
Asian spikelet: knitting by photo and pattern
Content
- A simple way to make an Asian spikelet
- Asian pattern way №1
- Asian pattern way №2
- Spikelet from the front
- Spikelet from the wrong side
- Video: Knitting an Asian spikelet without holes
- Photo MK
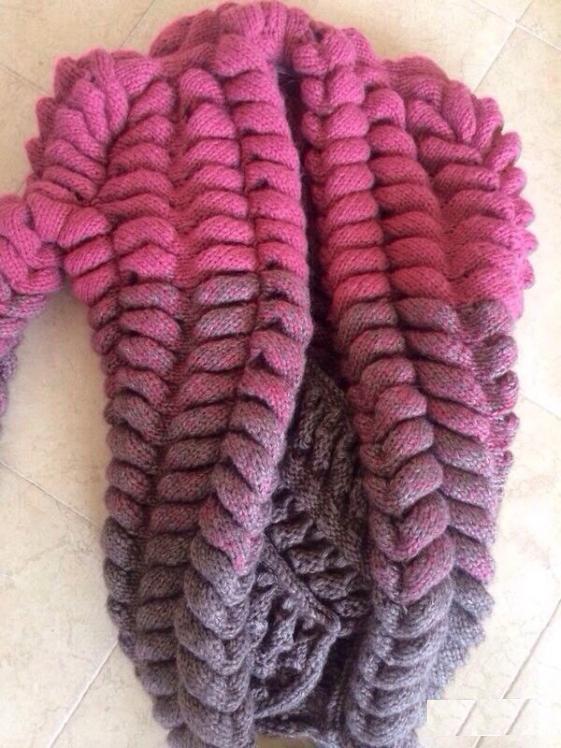
Surprisingly interesting drawing of Asian spikelets can be connected by means of the most simple kinds of loops. The thing turns out to be voluminous and draws attention to itself from the first sight.


A simple way to make an Asian spikelet
The pattern can be performed in two ways. According to the first of them, we will tie the rows in parts, that is, close some of the loops, and then re-type. According to the second - in one row it is necessary to perform dialing and closing of the loops, and the pattern is executed separately.
The number of tied rows and the originalThe number of loops on the spokes can be completely different. It is worth remembering that in the finished form the size of the product will be 1.5 times less, so it must be taken into account when calculating the length and width of the fabric.

Asian pattern way №1
Let's start with 40p. 1-6P. We knit 6p with the front surface. If you want to get a more delicate pattern, you can make the spikelets less thin by tying 3-5p of faces. Smooth.
Recall that when this simple pattern is executed, it is necessary to tie odd rows of LPs, and even - PE.
7P.: We find the central knitting patterns and close them. That is, we perform 10LP. The 11th point is resampled to the right spoke, we place the working thread after it, then we move the 12th point and close 12n through 11n. Under this scheme, we close all 20p. Further - 10LP.
8Р .: 10ИП, 20п - we type, 10ИП. After it, the total number of loops on the spokes is 40.
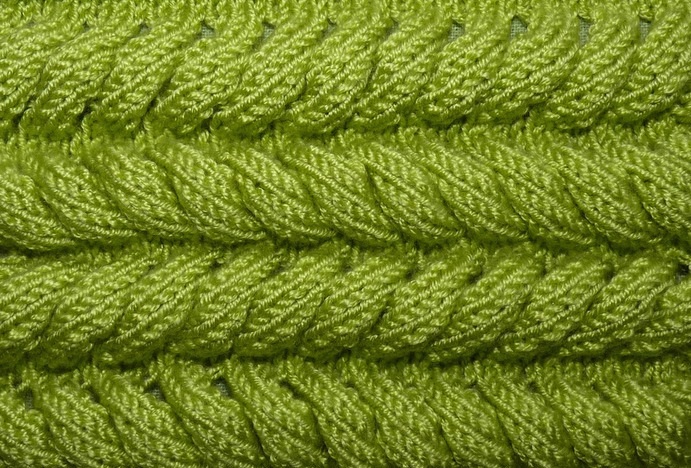
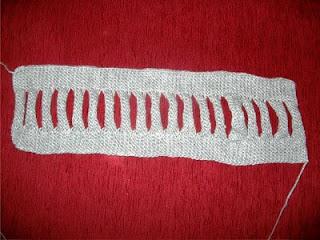
We repeat 1-8P. This scheme implies any number of repetitions of rapport. As a result, you should have a canvas, as shown in the picture. Perform it is not difficult, the master will connect it for 20-30 minutes.
How to type loops There are several ways how to dial the knitting needles. The Asian pattern will look neater if you use the following technique:
- The two last loops on the left spoke are pushed apart;
- Between them we stretch the thread;
- We put it on the left knitting needle. We got the first loop;
- It remains to repeat this process 19 more times and all 20p will be recruited;
- To connect them to the basic knitting, you need to make 21n and return it to the right knitting needle.
This technique allows you to get a more dense canvas, which will be an excellent basis for forming spikelets.
The process of assembling the spikes 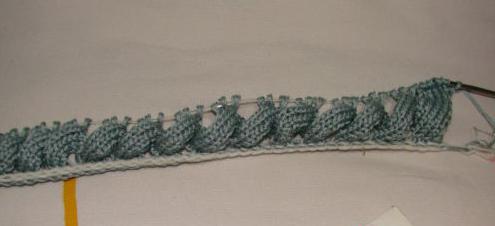
Now the spikelets need to be assembled into a single whole. To do this, turn the product on the wrong side.
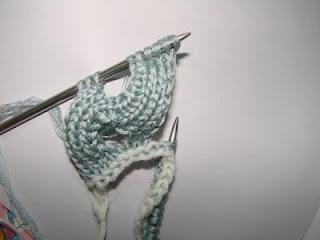
The first spikelet is obtained by twisting the first and second strips. Further, the third strip is pulled through the loop of the second strip and so on to the end of the web.
To make the spikelet more beautiful and delicate,You need to extend as far as possible every strip and hole. Turn the knitting on the face and straighten each spikelet, form it. Videos of this process can be seen on our website.

Asian pattern way №2
For the beginning in the second mode of knitting we defineWith the width of the spikelet. We will type exactly such a number of loops. If the spikelet is 6n, then we start with this quantity. Although it may be 10n, 8n, 4n, depending on what patterns you want to get. Simply class, as large blades on scarves and stoles look, for blouses it is better to type 4-6p. An important role is played by the thickness of the yarn.
We remember, typing with a knitting needles, that in this figure the edges are not taken into account.
Video: Knitting lessons for beginners
Spikelet from the front
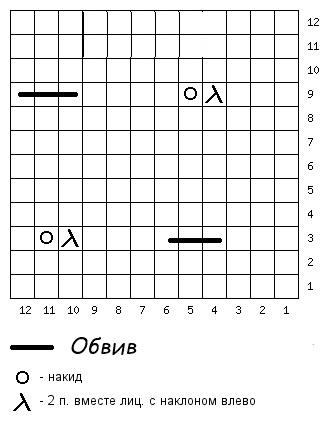
Spinning dial 18p., And then on this scheme:
- IP: only LP;
- 2P .: only IP. This is the basis of the future.

The scheme is as follows:
- 3R .: we begin to knit the first blade. Its dimensions: width - 6p, height - 10p .;
- 5LP, turn the product, 6IIP. Under this scheme, we knit 8 more rows. The first blade is ready.
To move to the next item,It is necessary (it will be 13r under the account) to connect 6ЛП from the right knitting needle and 3п from the left. The product is inverted.14Р .: 6ИП, 3п - do not bind. Continue with the scheme 3-13P only 6n. The third element should begin with 23P.
We carry out this scheme until the necessary length of the product is reached. In the end, you should have 6p.
Now, before going to the other side of the spikelet, you need to perform intermediate rows. The first will be the IP series, then the LP. You can repeat them again. But it is necessary to finish it with a number of LP.
Spikelet from the wrong side
The product is turned over and we begin to knit the wrong side. Simply class, if you do it all the first time, as the pattern is quite complicated. Now we need to direct the spikelet in the other direction, so that the pattern is symmetrical and beautiful. The master will immediately understand that the scheme here will be similar to the previous side.
We start the first element:
- 1Р .: 1Кр, 5ИП, we turn the cloth, 6ЛП .;
- 2-7R .: continue on this technology. Have received the first element;
- SP: We knit 9n (6n + 3n from the main cloth), all IP;
- 9Р .: we turn the canvas. Again we perform the alternation of IP and LP.
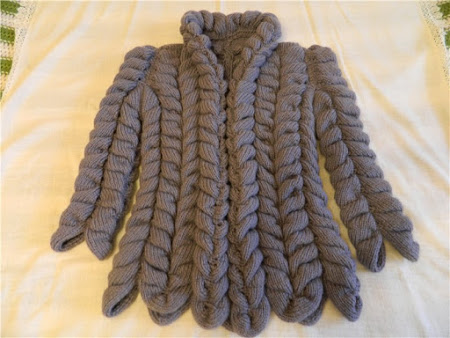
In the last row we connect all the loops andClose them. If properly bonded, spikelets will look in different directions from the center. If such a drawing you got, then the Asian pattern turned out.
Video: Knitting an Asian spikelet without holes
Photo MK

Comments
Related posts:
 Knitting pattern of a knob in accordance with the scheme with a detailed photo description
 Knitting of knitting needles according to the scheme with description
 Knitted sweater for women: knitting according to pattern
 Cardigan knitting - a knitting scheme with a detailed description
 Knitting bactus with knitting needles according to the scheme with the description (video lesson)