Christmas bow with own hands - beading technique with our own hands and a master class
Decoration of the house during the New Year holidays -very interesting idea, which is faced by almost all people following the traditions that have manifested itself during the New Year holidays. The solemn purchase of a Christmas tree, its ornamentation along with the whole family, are the very moments that we strive to preserve in our memory for a long time. Recently, the practice was also the creation of New Year's toys with their own hands.
Christmas bow with own hands - beading technique with our own hands and a master class
 You can make them using handicraft techniques,own experience and special master classes. This lesson will tell you about the creation of a simple bow-ornament, with the help of which it is easy to decorate both the Christmas tree and just the house. New Year mood is very easy to get, creating its small particles. The idea of this bow is the part of the holiday to which you will be related. To make a similar bow is also very simple. First, you need to choose a technique. In the situation with the bow - beadwork will be the best solution, which can and should be tested in practice. Bow - Christmas tree toy for the new year! In addition, such a decoration in the form of a bow can also be presented to your friends, or you can make a gift collection of souvenirs from jewelry. From year to year, this kind of art will decorate the Christmas tree and remind the owner of your talent and care. In order to make such decoration, the master will need a certain set of materials, in particular - beads and a special scheme, according to which he can unite them. Materials and a step-by-step instruction will be presented below:
- It will take a small line measuring 0.25 millimeters
- You will also need a satin ribbon
- Take the beads with which we will work. In our case they are pink.
- Also need scissors
- Tool for work - needle for beads
Getting Started 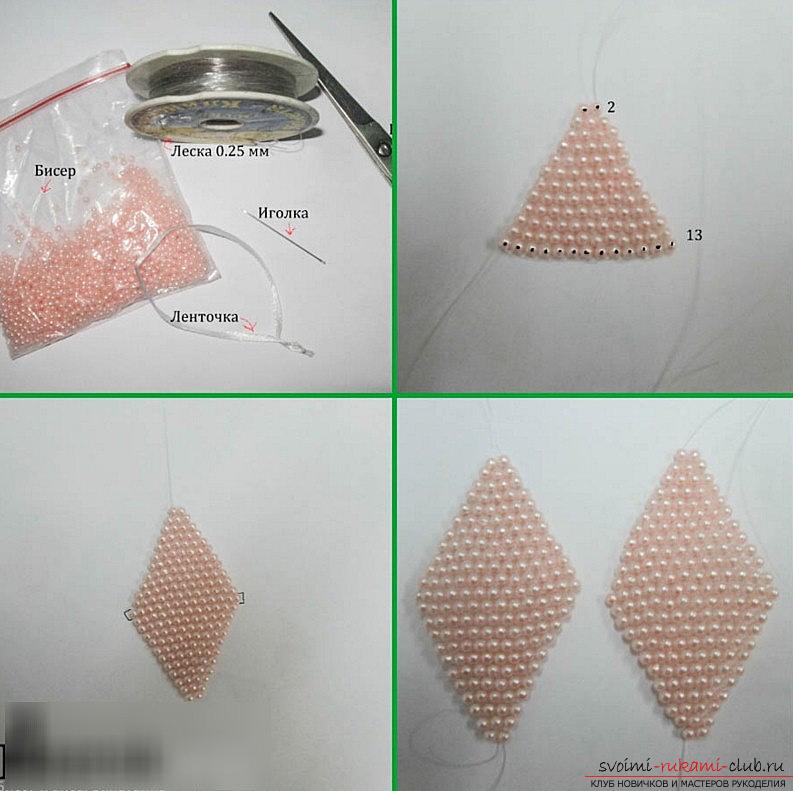 Using these tools, we can doown preparation of a unique and interesting material. So, we need a quilling material, from which we will prepare diamonds in the number of two pieces. They can be decorated in brick form, or using a mosaic design. With a wide part of the diamond we will make a line in a row of 13 beads. In the narrow part of the diamond for the design of the future bow must use only two beads.
 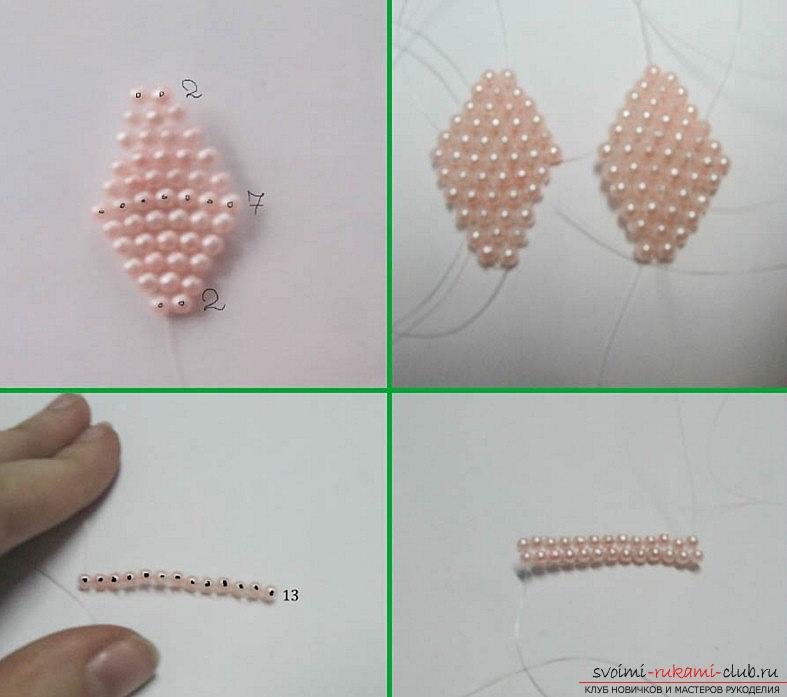 Making beads for future work is an importanta task. You must first determine which color scheme you will work with. Regardless of the choice, you can also change the tone qualities of your beads. Thus, it is possible to form a "gradient transition", which will make the toy a more vivid and interesting hand-crafted article to your New Year's tree. Designing the modules In this way, we need to create two identical layouts for future diamonds, but with smaller sizes for the workpiece. In the wide part of the small diamond, we take the threshold size for the line of 7 beads, and in the narrow part we also leave two beads. After, we form the ribbon element, using the basis for the middle line of the Christmas tree toy. In this case, it is necessary to take a strip, which we must weave using parallel weaving. The billet will have a size of 13 beads. For the bottom of the strip is required to form a row, in which there will be a bead one more than in the other row. For the upper part of the base series, we also add 2 rows of beads, using the concept idea from the photo.
 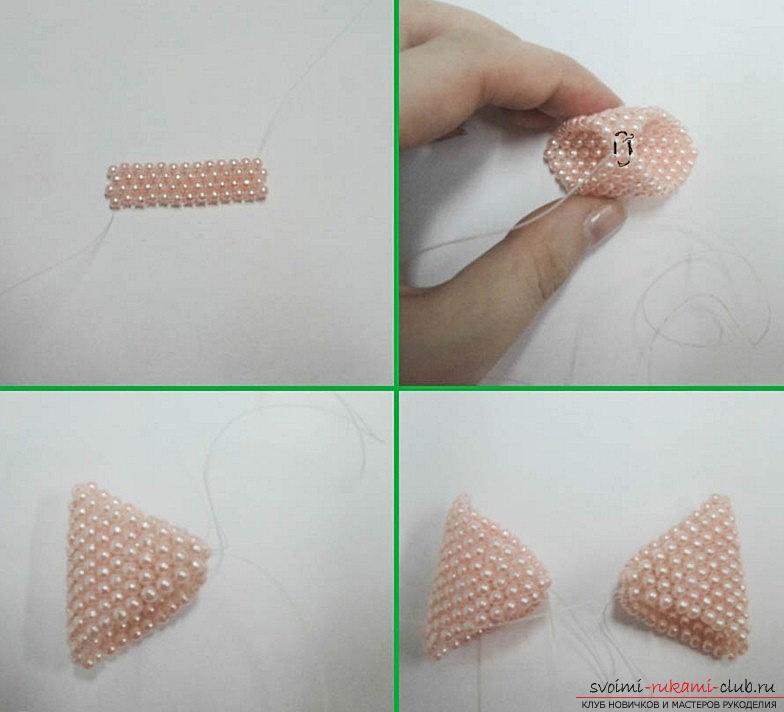 The wreath of all the details is the basis of the work. Previously, we only prepared the necessary "modules" - the elements with which we will create a complete picture of the bow. In the next step, we have to connect each of these elements specifically to make the bow became a real New Year's toy!
 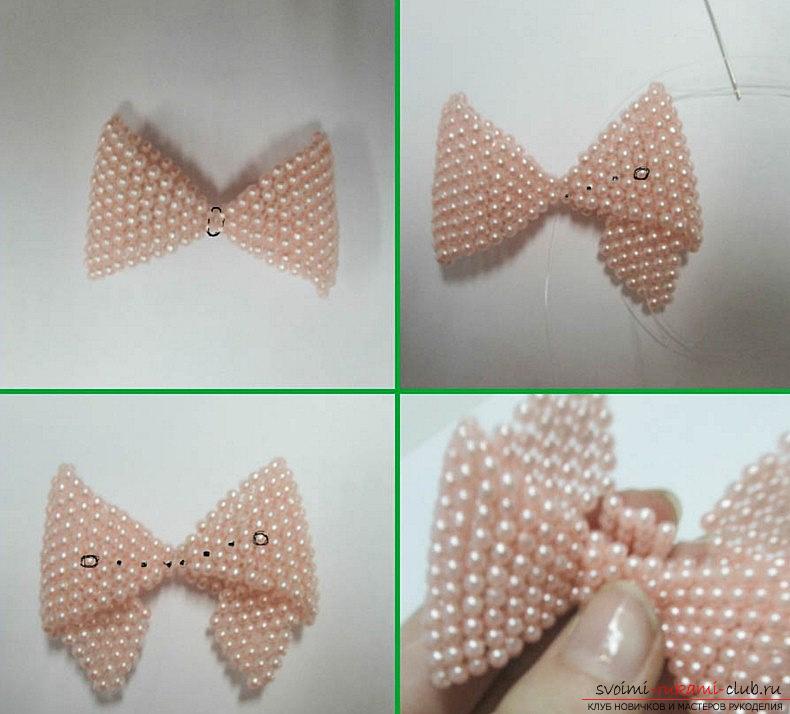 Assembling the bow The final assembly stage is the mostresponsible and exciting. To begin with, you need to make a join of large diamonds, using the base blank. They are fixed between each other. After, it is necessary to fix two diamonds. To do this, we count 3 beads, as in the photo, and then fix with the base small details for the fourth bead, which is on the wrong side of the future toy. We also need to do the second rhombus, which we have. After, it is necessary to fasten the middle. After, we take the tape and wind it on the narrowest part of our bow.
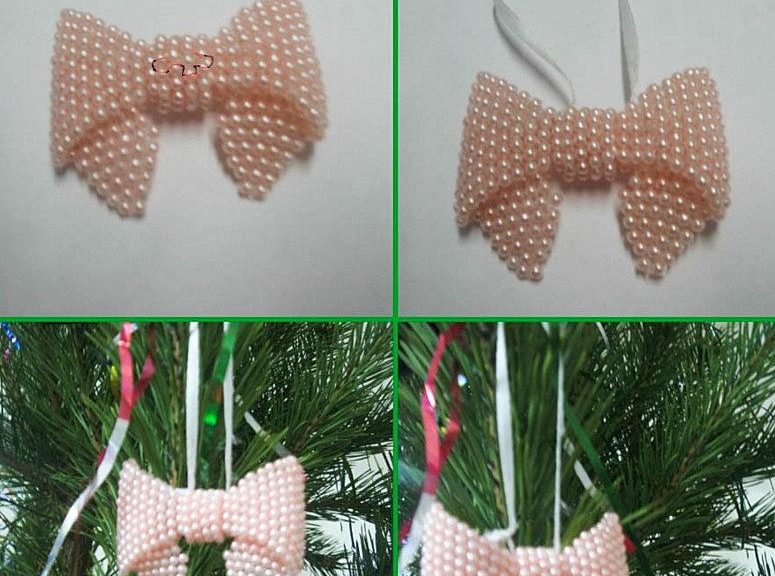
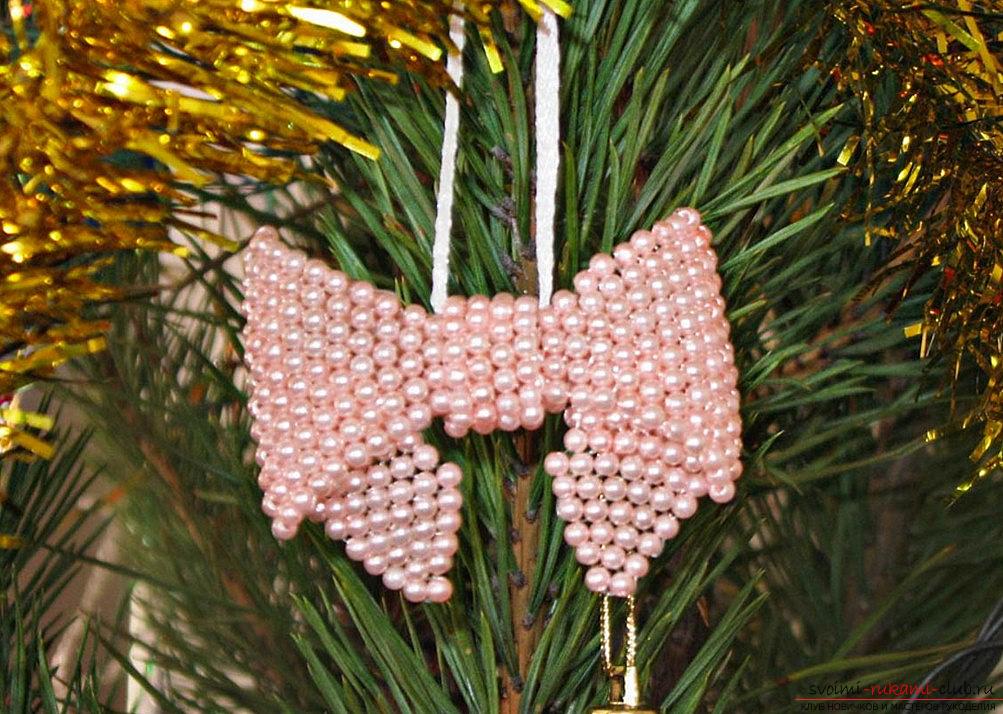
  At the end, we make the stitching of the two endswith each other, as in the photos of work. After, you need to take the tape and also pass through the bow, so the Christmas tree toy will be formed and ready to go for a New Year's decoration of the apartment!
Comments
Related posts:
 Bantik from beads master class of different techniques of weaving (video)
 Beadwork embroidery technique execution by own hands (photo)
 An odd job at the kindergarten by May 9 with your own hands. Tank master class
 Weaving baskets for beginners step by step. Baskets own hands the master class
 Beadwork technique in the master class (photo)