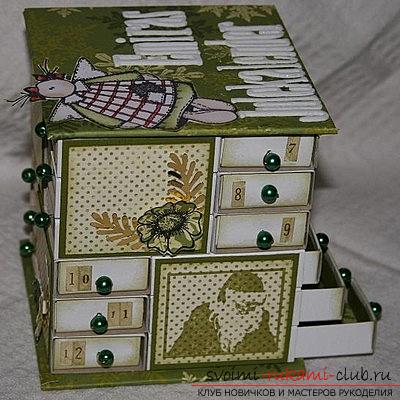
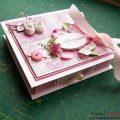
Christmas box for storing things - hand-crafted in scrapbooking technique
New Year's gifts can perform in very differentRole. On the one hand, they can become useful and interesting finds for a person, on the other hand - be a pleasant gift that will keep a memory of the past holiday, as well as an expensive person. This lesson will tell us about the method of creating a special gift with your own hands, based on scrapbooking. Many mistakenly think that scrapbooking is a way to decorate ONLY postcards. But, in fact, this technique extends to a number of other and unique objects with which you can make beautiful, New Year's gifts.
Christmas box for storing things - hand-crafted in scrapbooking technique
 Snow has already fallen, a period has come when allthe country freezes in anticipation of New Year's mood, and we will start the real business. What can be both interesting, spectacular and beautiful gift for a loved one at the same time? Of course, the idea of creating an interesting box for your loved ones is a very good decision. On the one hand, with the help of scrapbooking methods it can be colored and made beautiful in completely different ways. On the other hand - using special techniques of needlework, we will make a useful container for materials, as well as a successful set for storing their belongings. Gift box and scrapbooking materials The atmosphere of mystery and holiday, with which we join each day, is filled up with little effort of man. For this, it is enough to form small gifts for this memorabilia. Such a memorable thing can be expressed in the form of a similar box. And for its creation, special materials may be required, with the help of which we will work on the future idea of our box:
- Prepare empty matchboxes in a quantity of 24 pieces.
- You will need beads, also in a quantity of 24 pieces, green color
- Take the wire - a small piece of it
- Pieces of cardboard in two pieces
- Needed cutting pliers, as well as scissors for processing, you also need a needle
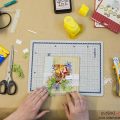
Cooking the box  When all these materials are ready, we canproceed to the most important part - the design of our unique gift. Make a gift based on a beautiful box will not be difficult, just follow the full instruction with photos that will explain all the actions for the postcard:
 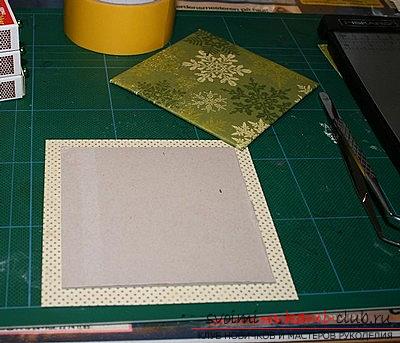 First, we select a large drawing. He will be at the top of the future craft. It must be cut to be used for crafts. Then, let's start preparing matchboxes. For this, they need to be divided into two parts. As everyone knows, a box of matches consists of a fixer with walls for kindling and the box itself. Separate them. Using needles, it is necessary to pierce a small hole in the front wall of each box. Then, using beads, they need to be threaded with a wire. After bending the wire, we bite off unnecessary ends from the future product.
  Components of the box and decoration After,It is necessary to insert beads and wire in the correct holes. But do it in such a way that the beads come out only from the outside of the product. After that, we fix the wall of our box with the help of an internal cardboard. For this, ordinary glue can come up, also you can use the services of Scotch tape from two sides. The surface inside the box should be treated with tissue, preferably using a tissue base on a darker tone. Further. prepare the main background for the future casket. To do this, let's take a special element of cardboard, and in turn, it needs to be pasted with a cloth. Do not use the New Year theme, but since we are making a gift for the new year, we should choose exactly this kind of background. In the same scheme, we work with the second square from the cardboard in order to decorate the outer upper part of the future product.
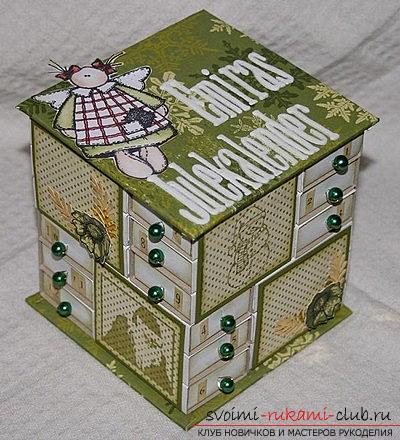
 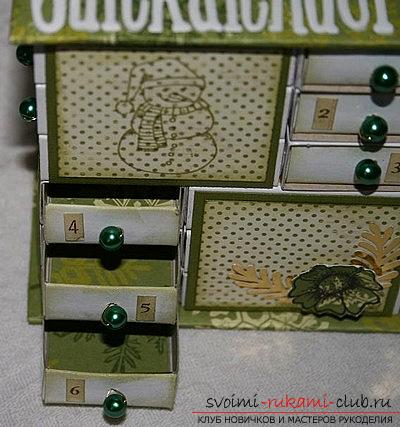 Next, you need to collect boxes for the sameprinciple, as shown in our figure. They need to be glued together. For this action, a sticky substance such as "super-glue" is best. The gel base of the glue may also come up. Thus, it is very simple to provide a strong and serious design. Next, you need to take and close the sides of the sides in boxes. For this, you need to take the picked up fabric, cut out the necessary shapes of squares in the right size, then - fix it for the product. There is an option when you can use other types of materials, everything depends on how you want to decorate your craft, we leave this moment for your imagination. Finishing part The upper part of the productis fixed by means of a drawing and a special inscription. The application will be added to the extra zest of the product. This is necessary to ensure that the products are combined for color reasons, and also correspond to the shape of the product. To avoid any confusion, secure each compartment of the number box with the appliqué.
Comments
Related posts:
 Gift box with your own hands. We decorate our gift.
 Scrapbooking of a cash box - a master class of scrapbooking for a gift
 This master class will teach you how to create your own hand notebook in the scrapbooking technique
 Making a swallow from paper in origami technique, which is easy to do according to the description, is not difficult to manufacture
 The idea of a scrapbooking card for the new year is home scrapbooking with your own hands