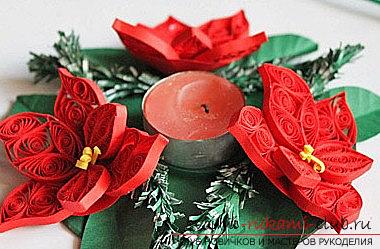
New Year candlestick with the help of quilling technique - master class with own hands
New Year's holidays are already very close, and because,we are preparing for them with special trepidation. I want to think through various kinds of crafts, attract children and learn something new. Fortunately, a variety of techniques allows you to look at all the crafts from a new angle and perhaps create something new and unique, modern, which will help improve the comfort of the house, add a little magic and raise the mood to all those around you.
New Year candlestick with the help of quilling technique - master class with own hands
 The quilling technique has become especially popular inin recent years and mainly due to its diversity in the use of techniques, as well as due to the opportunities that open during the use of new and unique elements of the modules. Let's try to recreate the version of the New Year's candlestick made of paper, which can be presented to your relatives, and simply designed specifically to diversify the New Year's interior of the house.
- Take specialized paper for quilling, stripes with a width of 10 and 4 millimeters.
- Also, you need to take a regular sheet of thick paper in a dark green color
- We use the services of a tool for quilling, scissors and of course, PVA glue, you will also need tweezers.
- You must prepare a normal CD or DVD. Also, ordinary cardboard can come up.
- For work, we also take wire and acrylic paint in white (gouache can come up)
- Also, take the options for felling in the form of snowflakes, beads and half-beads for decoration.
So, we are ready to start the main work. First, we need to make out the base element that will be used to form the candlestick with paper. First, take a disk or a cardboard, and glue a circle around it using paper of dense type with green color. 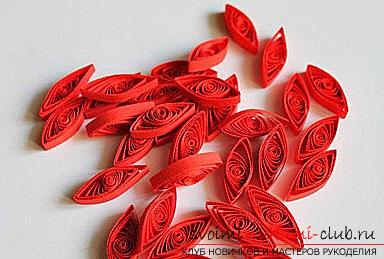 Candle stand After, it is necessaryform a special stand for a candle. In this case, we need a small candle with the processing of the aluminum sleeve. The candle stand will be formed from a special green paper for quilling. A width of 4 millimeters is appropriate to form a small roll of tight type in diameter by 4 centimeters. The roll must be punctured into the center of the disc.
 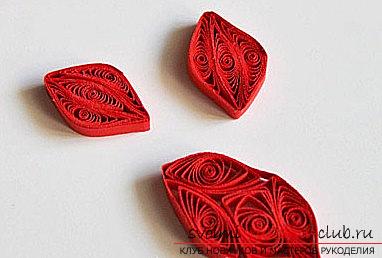 Elements of training are completed, proceed todecoration of our craft in quilling technique. The decoration of the crafts will occur thanks to the flowers in the form of poinsettia using the design of fir branches. Also, you will need cones of paper, as well as traditional snowflakes. The choice of a flower is not usual. It is this branch that blossoms at a time when all people around the world are celebrating a new year. This element is considered the main traditional element of Christmas. Thus, we will form flowers for the quilling technique. To make the necessary set of petals, or leaflets, we need to decorate the elements in the form of quilling eyes, using paper with red color. It, as always, it is necessary to wind, and after, bloom in diameter by 1.5 centimeters. Then, with the help of your fingers, squeeze the two edges of our craft and get the element of the eye. Then, you need to take a strip of red color for 10 centimeters and close in the element of the ring, then, get a shape in the form of a petal.
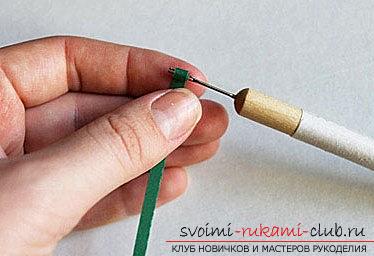
 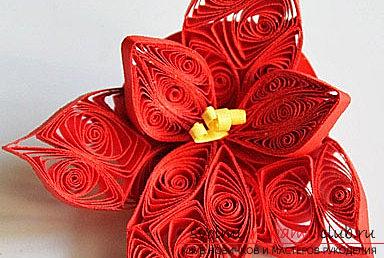 Then, you need to fill out the shape of thehelp elements of "eyes". On one petal of our type should place up to three eyes, there will also remain a small space in the likeness of the shape of the rectangle. Then, we take one more element of the eye and form the desired rectangle by manipulating the fingers. For this - it is necessary to compress our element with the help of two sides of the opposite kind. Then, we form the petal. We form flowers and molds. Thus, we need to form 4 such products to get the shape of a flower. To make the flower bulk, we will form a special version of the cone in the form of a red color. Three ready-made versions of the petals are glued along the cone. Then, we make two more variants of petals, but in smaller sizes. Next, we will form three elements of the glazes and also glue them together. In doing so, we press them along the edges. The leaf must be wrapped with a strip in red. Remains in the form of one large petal, and also two variants of small we glue inside the flower. Also, we form stamens in the form of small stripes in yellow form, which need to be cut in half and after, the shapes of the two strips are twisted. Then, the petals need to be stuck and get variants of two stamens for the flower. Thus, we have formed the one flower we need. You can also make two more of these optionsflower to evenly arrange them on a candlestick. Also, we will form green flowers in the number of six pieces. These are the leaves for the flower. We form a bend in the corners, so that there are veins on our leaves. After that, we disclose and then, spread out our sheet. Next, we prepare sprigs of spruce with paper. To do this, we use a wire frame, which we process beforehand with a conventional paper strip. The workpiece must be allowed to dry. Next, we prepare a variant of the needles. Using a paper strip of green color and a width of 10 millimeters, we need to cut our version of fringe. Then, using a brush, we must paint all the ends of the fringe with white acrylic paint. Next, we wait until the element dries. After using fringe, you need to glue the elements in a spiral (wire frame). Next, the tip, with the end uncovered, you need to cut off and fluff the needles. Thus, our handy is completely ready!
Comments
Related posts:
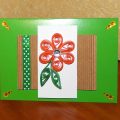 This master class will teach you how to make your own beautiful quilling cards.
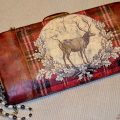 The master class will teach you how to decorate the clutch with your own hands using the technique of decoupage
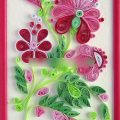 Technique of a quilling flower "Fantasy" with their own hands - a master class
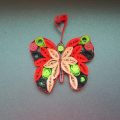 Quilling butterflies - loop quilling and master class with their own hands
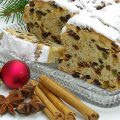 The recipe of the German Stollen with their own hands - New Year's master class