New Year's card "Window" for Christmas presentation - master class scrapbooking
The most diverse creative ideas allow usduring holidays, prepare quality and beautiful gifts made with your own hands. Using scrapbooking technology, we have a full-fledged opportunity to please our beloved people with new and interesting ideas that can be done with the help of a master class. He will tell us about the possibilities, methods and, of course, the schemes for creating such a gift.
New Year's card "Window" for Christmas presentation - master class scrapbooking
New Year's card gives us the opportunityspace in order to fantasize. An elegant postcard made by one's own hands should embody a certain symbolism and open up the possibility of a hidden meaning for the person to whom you are going to present it. A step-by-step instruction will help in the work, and pictures of the work process will simplify the process of cognition.
Formation of a New Year's card
 Everyone knows that the new year is a window into the newday. Therefore. to present a gift of a decorated postcard in the form of a window will be extremely symbolic and interesting. And if you also equip the postcard with a beautiful installation of twigs, it will be much more interesting and diverse. To make a similar is not difficult, but you need special material. A special lesson will be presented below, which will help you to master the basic principles of creating such a postcard, as well as the necessary materials in order to prepare a beautiful postcard.
- It will take paper in color for scrap
- Lace fabric
- Paper in white for scrap
- Snow artificial processing
- Cubes from paper
- Adhesive PVA
- Knife for the office
- Scissors
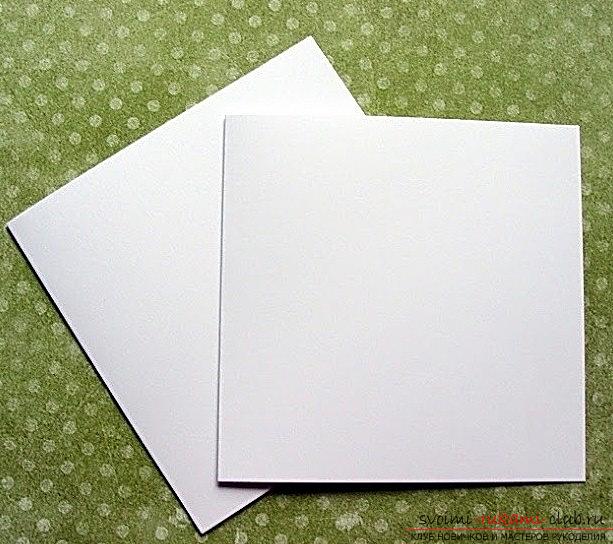
Decoration cards - the basis 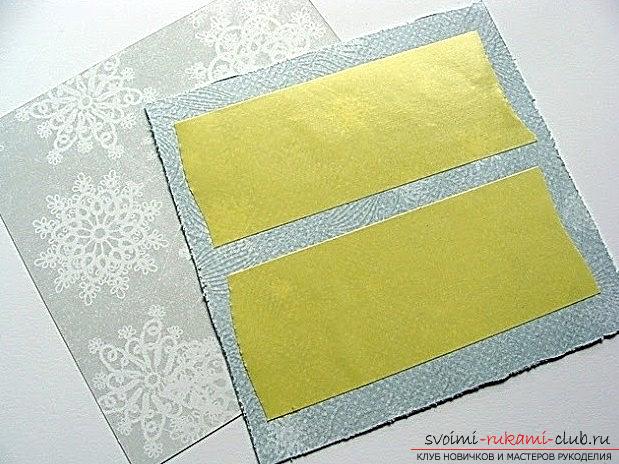 To start, you need to take a white paper,It is necessary to cut out two square shapes by the side length of about 145 millimeters. Then, you should take the colored paper in order to cut two more shapes square by 14 centimeters and 13.5 centimeters. For the meeting, the edges are uneven, for careless squares. As a tool, a stationery knife option is suitable. After, it is necessary to use an adhesive tape on two sides, in order to use a smaller colored square in the reverse side and paste it to a larger one. Afterwards, with the help of a machine stitch, lay our fixer and glue it on a white square. you will get a beautiful version of the basics.
 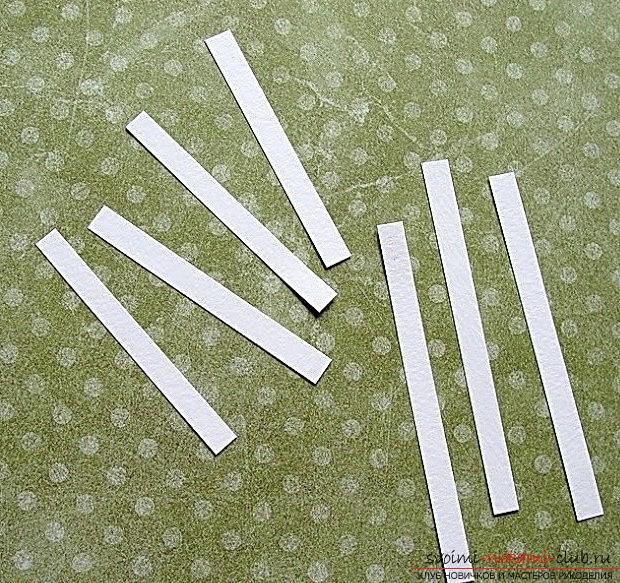 Preparing the window To make a window, you needtake white paper and prepare strips for 75 millimeters in the number of four pieces. Also, make three strips per 10 centimeters. With the help of these strips, we have to form a window that glues together. Next, we glue the cubes of paper to the window, so that there is a form of voluminous craft. Also, you need to use glue especially to glue our window to the shape of the rectangle of the base.
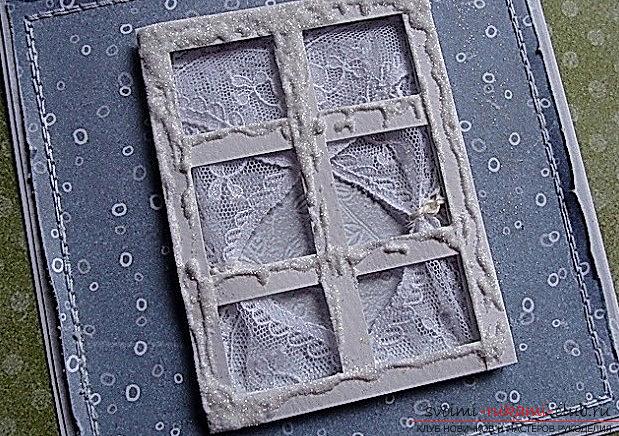
 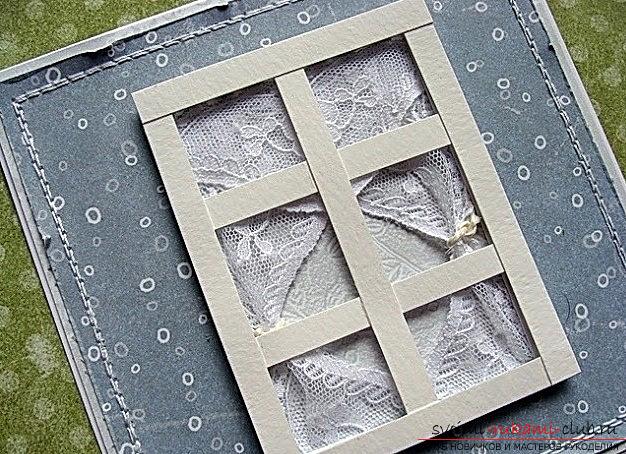 To do this, we use volumetric squares,which we fix on paper. Also, it is necessary to form a lace on top, which will serve as a future curtain for the window. Strips of paper are glued to the edges. Then, we attach our window to the main part, which was prepared earlier. After that, the window is covered with glue, it is covered with snow. After all, this is a Christmas card? Therefore, we have to pass a frosty version of freshness and atmosphere of the holiday! Decoration and decoration Window decor is the most importantcomponent. To recreate the New Year's spirit for the postcard, we have to make paper blanks. To do this, we prepare leaflets, twigs of paper, which can also be replaced with their own versions, which are quite capable of coming up on their own. We use our decorations of leaves to fully equip each element and add the necessary colors. Next, a rough rope is added to the craft to give the entourage. That's all, our beautiful craft for the New Year holidays is over! You can hand it to the addressee!
Comments
Related posts:
 New Year greeting card with a deer - workshop and step-by-step instruction
 A unique master class of scrapbooking: how to choose a background for a beautiful finish.
 Scrapbooking of a cash box - a master class of scrapbooking for a gift
 Double Christmas tree card for the new year - postcard and master class with photo
 How to decorate a New Year's champagne for a presentation? Scrapbooking