
New Year greeting card with a deer - workshop and step-by-step instruction
Miracles that happen in the New Year periodholidays - will never be forgotten. Special workshops and lessons allow us to learn how to create our own, small magic, using a variety of materials and instructions for work. The most important gift for the New Year in the field of souvenirs is the New Year's card. It is very easy to build it. To do this, you need a bale of the most diverse paper (Ordinary, decorative, design, volume, etc.), as well as a special scheme that will allow us to build work.
New Year greeting card with a deer - workshop and step-by-step instruction
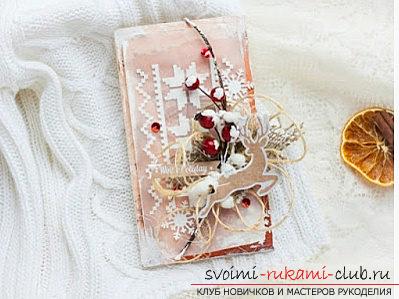 Also, most of New Year's crafts in stylepostcards use handicrafts, associated with special equipment - Scrapbooking. This kind of needlework implies the use of a variety of additions, allowing you to make a bright, colorful and voluminous postcard. Try to consider popular ideas Postcard with a deer on the New Year One of the bright and memorable characters of the New Year are the Deer, who are harnessed to the sledge of the famous Santa Claus. They help the old grandfather to bring gifts around the world, and the trace of their hooves remains in the sky in the form of beautiful, white stripes. Let's try and we'll build our own small postcard made with the help of scrapbooking elements
- A stencil for material processing is required
- Take a little scrapbooking paper, or crafting carton
- Kalka
- Baking of a deer and inscriptions
- Twine
- Decorative branch with berries for decoration
- Tape, supplemented with pompons
- Sackcloth
- Acrylic paint in white shades, decorating gel, red paretochki
- Sand of decorative type in white shade will be required
- Adhesive for paper
- You will also need a gun with hot glue
- Brushes, cardboard of design type as a basis
- Snowflakes
Initially, you should determine the sizeproducts. Usually, form a postcard of a vertical type with a standard size of 10 by 18 centimeters. For yourself, you can determine the location and size of the postcard yourself. But, in this case, the style and layout of the decor can change slightly.  Preparing the basis for workcut out scrapbooking paper in the right size, as well as a tracing paper that will be 5 millimeters smaller than each side of the postcard. We choose paper in brown shade, or kraft-cardboard. We pay attention to the density of the material itself, because it should not be too thin.
 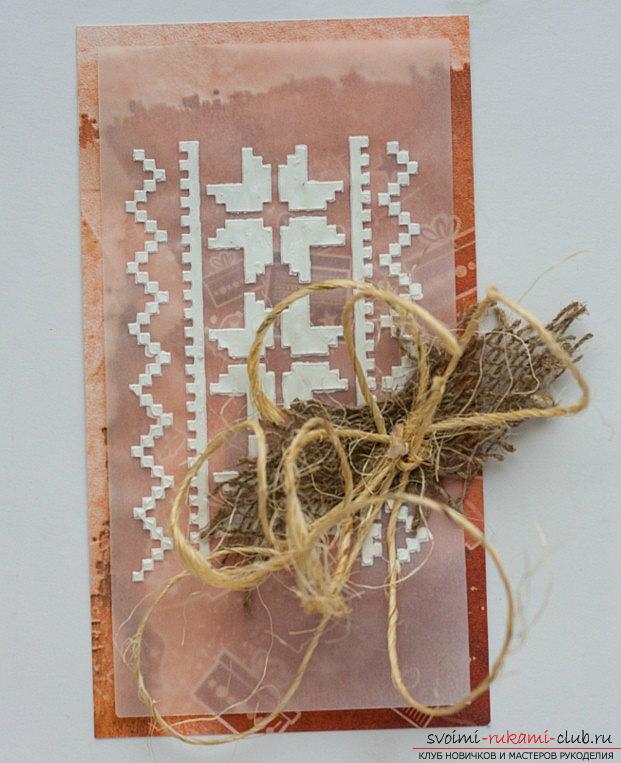 It still has to be painted. Mix white paint from acrylic with a decorative gel from Gloss using a stencil (On a tracing paper). In case you do not have tracing paper, you can do without her participation. Scrapbooking paper also produces an excellent pattern.
 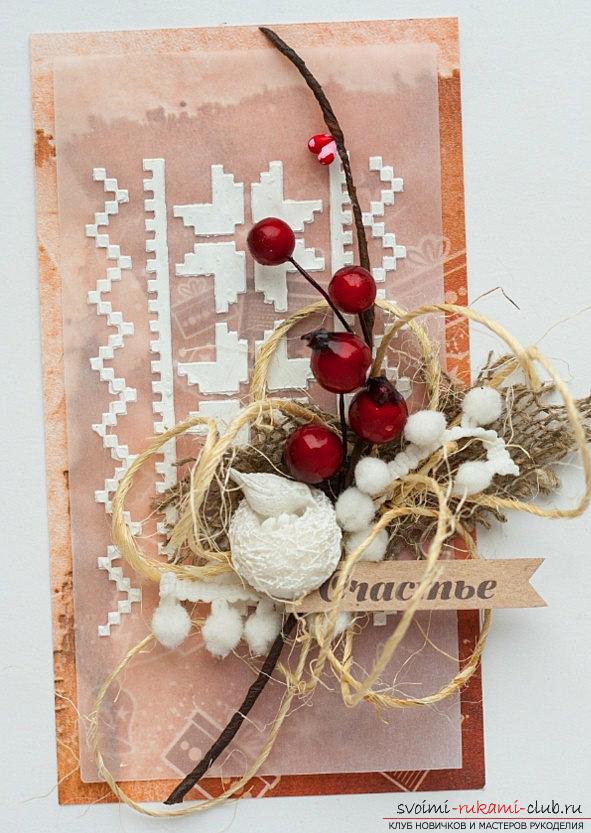 And yet, it is better to use the calque, becauseit allows you to achieve the effect of ice on the postcard as the main cover. The writing must be dense, and also have a matte surface. Glossy, by the way, seriously reduces the price of your craft, leaving unnecessary close on the surface of the product pictures. It should also be remembered that the tracing paper is transparent and, therefore, it should be gently applied to the product. Also, you can simply sew it using a stitch.
 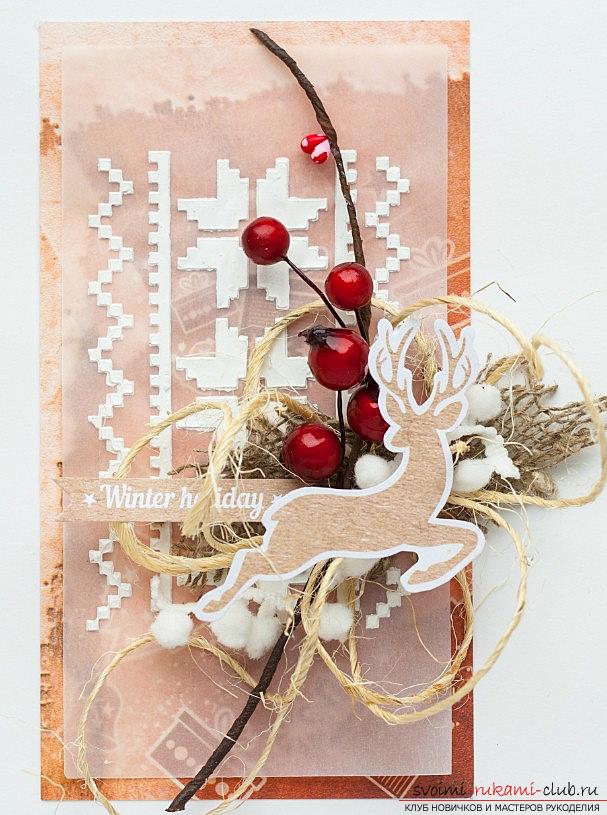 But, if the machine is not, a drop of glue will fitBack side in the places where the external pattern will be. Glue in large quantities do not need to be applied, otherwise the work will become extremely unpretentious and not interesting in terms of decor. Decoration After, we form a bow with the help of twine and connect it with a piece of burlap, it can be done right away to fix on our postcard. The bow is sewn to the base in order to secure the strength of the product. At the same time, the gun does not have to be heated again. Then, lay out the branch with berries. We picked up red berries, as well as braid, filled with pompons. They should also be secured with a needle and thread, forming several stitches. Next, a little distracted. It is necessary to pay attention to the fact that in the palette looks stucco, for examples we lay out a nest with birds. But, since the focus is on deer, so let's return to it. On the volumetric bow, you need to fix the element, applying to the picture. Of course, I want to leave it so that I do not restrain myself. But, how do you glue it so that it does not jump off the product in a couple of days? To do this, it is necessary to cut out the shape of the square in the desired size, using interlaced cardboard. We glue it with a pyramid, on the back of a deer. Then, it is necessary to fix our result with a thermo-pistol. We add sequins and snowflakes. Corner paper tracing paper must be fixed on the basis of paper. Also, one corner is left free. Its a little twist will not hurt! This is to ensure that the product snugly and hides a snowflake beneath it. Our postcards are almost complete. The last lines of work remain. It is necessary to glue the product on the basis, take in hand a brush and a paint of white acrylic. Create the effect of snow, sprinkling on the paint, which has not dried out yet. We use white sand of a decorative type for this purpose. A glitter of white color may also come up, then the snow will flicker and will pour. But, it must be white, without any shades of blue or pink. So we finish our card and get an incredible fairy tale. A version of a wonderful gift can be presented to friends and relatives. Kalka makes it possible to create a pattern of coating the ice, but nevertheless - the card and its beauty warms not less than the care of relatives! After all, we made it with love! That's all, we have a beautiful fairy tale - a wonderful gift for your friends, relatives and relatives. Although the tracing paper gives the effect of frosty ice cover, the pattern on it still gives a feeling of warmth and comfort. Thank you for your attention to my master class, I hope it will help you create a fabulous mood for your loved ones. All the best. All kinds of ways to implement and create unique and interesting handicrafts lead to the fact that you can diversify and improve the color of any holiday! For example, many people like to make jewelry and gifts for the New Year. The most striking example of a good craft for such a holiday is an ordinary postcard. But, there are a lot of ways to implement such a simple material in the composition. For example, you can use the well-known techniques of scrapbooking and quilling to supplement and improve your work. Some also use origami techniques. We will consider the brightest examples of cozy and interesting postcards, suitable for the New Year holidays! It is very important to teach the child such skills so that he can always thank relatives and relatives for the care and congratulate them on the holidays. New Year is a good way to practice! In addition, the skills of needlework, as well as diligence and mindfulness are developed. The second card The history of paper handicraft is one of the oldest, since the very appearance of paper. As early as the 15th century, servants of the monasteries for women, using sheets of paper on the gilded edges, formed beautiful and elegant versions of products with the help of gold strips. Later, the form of art received the name of the element of quilling, which in translation became known as the bird's feather. Quilling is suitable for any person and it can be practiced by almost everyone. Let's try to master one of these simple postcards for the New Year:
- Take the cardboard base
- You will need paper in color
- Also prepare the foil material
- You will need a sticky substance
- I need a pencil
- Let's take also a ruler for space processing
- Toothpicks and scissors
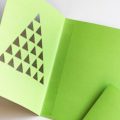
Initially, we will prepare a procurement option forcreating a postcard. We use a sheet of A4 cardboard in blue shades to bend it into two parts. Also, take the A4 sheet of white hue and draw, then cut out the rectangle on the sides by 11x17 centimeters. We glue it on a piece of cardboard blue shades. We use sheets of green, red, yellow, pink shades of paper in order to prepare strips of 5 millimeters of width. Scissors fix our strips. We twist from the stripes of roll form. The strip of paper should be in the form of a dense spiral. To do this, use a toothpick. The spiral dissolves to the required size. Then, from the received spiral we form a figure-drop. From the obtained variants of the figure, we compose a variant of spruce twigs, which must be transferred to a rectangle of white color. Using the material of red, pink and yellow shades of stripes, it is necessary to make figures of balls in the form of Christmas ornaments to transfer them to our base of a white rectangle. We use foil for cutting snowflakes, forms of stars, we make an ornament of a postcard, which we will get. With the help of stripes of white color, a drop is formed, and a bell version is also laid out. Thus, we get an excellent form of an interesting postcard, which you can give to a loved one!
Comments
Related posts:
 Master class on the scrapbooking of a New Year's card with your own hands - step by step instruction
 Double Christmas tree card for the new year - postcard and master class with photo
 Gift card for Christmas exchange with own hands - master class
 New Year greeting card "Furry Tree" by own hands
 A master class of New Year's crafts made by themselves - a Christmas tree crocheted.