
New Year gingerbread and gifts from polymer clay - a master class of needlework
Soon the New Year will come, and thismeans that we have to devote time to think through various gifts for the main holiday of the country! The main attribute of the New Year, as everyone knows - Christmas tree. A beauty with green coniferous branches is the main business card of the holiday and the main object of decorating the house. To date, people have come up with many ways that will make it easier to decorate the New Year's beauty.
New Year gingerbread and gifts from polymer clay - a master class of needlework
The process of decoration in many of us is causingunforgettable feelings and emotions. A beautiful set of toys, a pleasant smell from a coniferous tree and of course, a multi-colored flashing of garlands. Together with the family we are engaged in decorating every nook of the tree, trying to find a harmonious place for the toy. 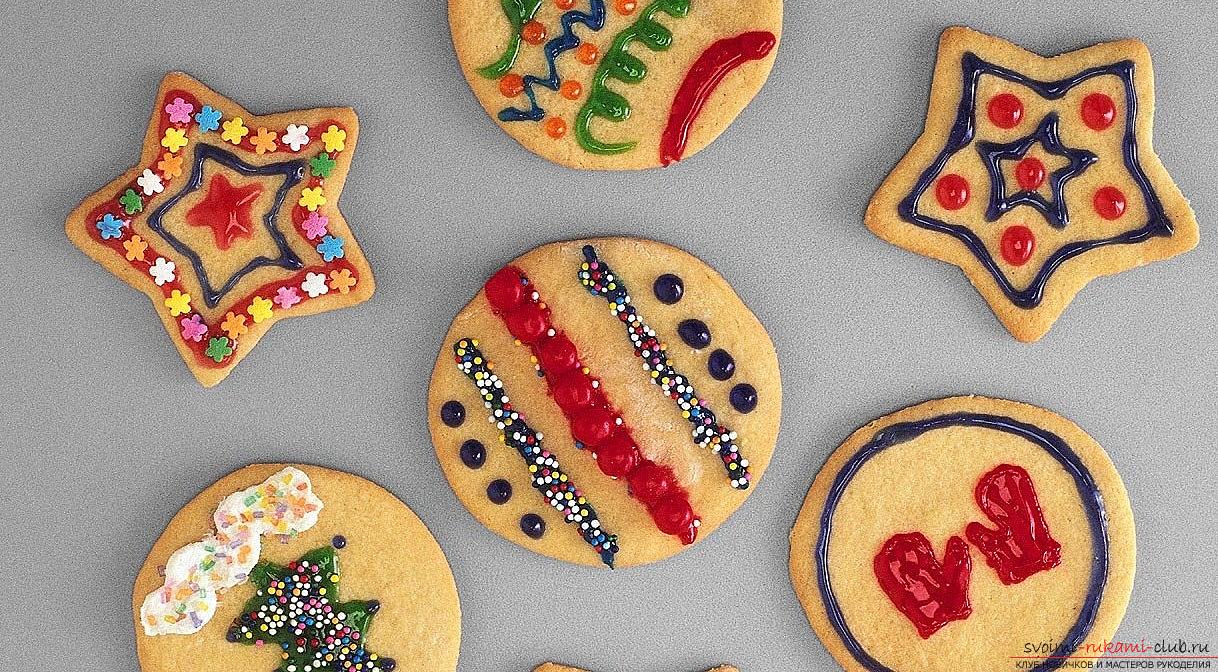 Children most like to decorateChristmas tree. It is especially wonderful when children themselves want to make gifts. New Year's toys - this is a great gift, which anyone can do! You can involve in the process of creating a child and teach him everything necessary to enable him to give warmth and joy to other people. The technique of working with polymer clay is an excellent example of needlework, where the child will have the opportunity to fantasize and invent toys on his own. A special variant of plastics that can be deformed in many different ways offers us a lot of ideas with which you can implement any ideas. In this article we will try to make out examples of popular and interesting New Year's toys made with the help of polymer clay. New Year's Gingerbread All people love gingerbread cookies! The main sweetness of the New Year period is decorated with glaze with various forms and looks very appetizing. Let's try to create our own toy for the Christmas tree in the form of a Christmas tree carrot. But, for the material of the work we will choose a special kind of polymer clay - fluorescent, where it will be possible to make the pattern luminous due to the qualities of the material. If you do not have one, the usual, white clay will do.
- Prepare a polymer clay of brown, pink and fluorescent type
- You will need a varnish for processing
- Take the brush
- Prepare also a knife for processing
- You will need a roller
- You will need a toothpick to fasten it
- Plank for modeling - to work with material
- Oven for baking
- Twine
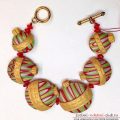
To begin with, it is necessary to knead the material wellbrown plastic to make it as soft as plasticine. Then, using a roller roll our product into the shape of the formation. Then, using the template, or the services of your own eye, we cut out a beautiful version of the New Year tree. You should be careful when handling clay with a knife. We should immediately prepare a small hole on the top of the craft to ensure that in the future we attach our workpiece to a rope. We work with fluorescent clay Then, we need to take "luminous clay" in order to roll out of it the shape of thin sausages. It is desirable to make them as thin as possible, and most importantly - even. Then, pieces of sausages must be laid out using the contour of the tree. In this case, we will be helped by a toothpick. It is very important to take a close look at this work process. After the contour is prepared, use your own imagination to recreate any additional pattern! As our proposals, it can be different balls, or volume lines, any shapes. Then, with the help of pink clay it is necessary to dilute the whiteness of the product. The process continues and the shape of the pattern is laid out until it is finished. Master class New Year's gingerbread on a Christmas tree made of polymer clay.Master-class New Year's gingerbread on a Christmas tree made of polymer clay.Master-class New Year's gingerbread on a Christmas tree made of polymer clay. When the pattern is ready, the Christmas tree can be baked. Check the temperature and baking time on the packaging of your polymer clay. Do not forget about precautions. After baking, the color of the glaze may change (if you did not take white plastic) - this is normal. This is a feature of fluorescent polymer clay. Master class New Year's gingerbread on a Christmas tree made of polymer clay. When the Christmas tree is baked, allow it to cool and after that you can cover it with varnish for plastic. When the varnish dries, you can pass the rope into the hole. Master class New Year's gingerbread on a Christmas tree made of polymer clay. Ready! And if you hold the Christmas tree under the light longer, then it will glow in the dark. In the same way you can make other toys-figurines on herringbone. Christmas wreath A simple lesson for modeling can also be a miniature copy of a popular Christmas wreath made by own hands. We use toothpicks, as well as polymer clay in combination of three different color solutions. Initially, it is necessary to take a polymer clay of green color. Then, it needs to be kneaded and rolled out a small sausage shape so that it has the desired thickness. In our case this is 0.7 centimeters. Then, the sausage should be enclosed in a special ring, so that it is more convenient, it is possible to wind any material. Seams should be smoothed using the underside of the product, so that the shape of the wreath is more aesthetic. With a toothpick, we need to design the structure of the product, which will help to decorate the appearance of our crafts. Decorating such a wreath is also simple. We prepare the shape of the bow of the polymer clay of red color and simultaneously we add the elements of the bryozo to make our decorating material more interesting. The bow is going in several stages. Then, you need to cut the shapes of the small rectangles. In our case, the dimensions are 1.5x0.5 centimeters. Then, you need to carefully trim the corners and get a diamond shape to glue the corners and then glue the corners of the product to get the shape of a half-bent. Snail from polymeric clay New-fashioned jewelry is gaining popularity again. Therefore, during the celebration of Christmas or New Year, you should choose only trend ideas that can catch people's attention and cause them admiration. Souvenirs are a special kind of needlework, which leaves a great memory behind it and, therefore, is highly appreciated by people. Vintage jewelry is especially popular with many of us. That's why, even if you have an old ball crashed or one of the Christmas toys cracked - it's not sad, but on the contrary - a new opportunity to realize your talents. The toy can just get bored. Therefore, vintage decorating art will make your masterpiece without much difficulty!
- Prepare a ceramic clay of white and blue hue
- It will take a set of pearlescent gouache
- Take the seashell - the purchased version of the grape snail
- Glitters for decoration
- Tape in narrow form
- Wire for floristics
- Tape from satin, narrow
- Adhesive substance moment in a transparent form, water resistant
- Brush
Initially, we are working to softenclay to a state suitable for processing the product. To do this, add a little water to the clay material, stirring the composition. During working processes, clay should also not dry up, and therefore, it must be wetted with water. The shell is filled with clay. After the inside of the shell is filled with clay, it is necessary to form the body of the cochlea, using the element of the boat. Clay will fit tightly to the product. After the boat is formed, it is necessary to extend the shape of its tail part. Then, it is necessary to stick the neck of the product, and also prepare the head for the cochlea. The muzzle should be slightly inclined in the lower part. After you fill the inside of the product with clay, we begin to form the body of the cochlea. The basic shape of our future snail will look like a boat. Clay should have dense properties of adherence to the base - shell. After we form the boat, it will be necessary to pull out part of the tail. Then, it is necessary to make a cast of the neck, and then the head of the product. The muzzle is also inclined along the lower trajectory. We use elements of clay in order to form a skirt for a snail. It will be allocated using a fringe shape. Thus, the figure forms the necessary dynamics of the product, it will seem that the snail moves a little. Horns for a snail Now it is necessary to start creating horns for a snail, so that eyes form at the ends of its product. To do this, you need to mold a variant of a thin sausage. The thickness of such a sausage will be equal to one match. When the product is ready, it must be divided into two particles. Thus, the horns will be the same size and will become uniform in the thickness of the product. After the blanks of the horns are ready, we rotate them on one side. Now, the horns need to be stretched a bit along the length. We roll them with the help of two fingers. For thickening at the ends, we form smoothing. So we get the shapes of balls. They can be fixed on the head of a snail to give the desired shape. We roll two forms of the ball, using the position approximately the size of the head of the match. It will be the shape of an eyelet for a snail. We attach them to the appropriate places. Antennae of the cochlea They are formed according to the same schemes as the horns, only they are made more tiny. Then, the mustache must be secured in its place. We iron the cochlea according to the brush moistened in the aqueous solution. This is necessary to smooth the irregularities. The material will be as smooth as possible.
Comments
Related posts:
 Clover of polymer clay, a flower of luck for beginners - a master class
 Pearl bead from polymer clay own hands - master class
 Christmas tree beads made of polymer clay for New Year's holidays - master class sculpting
 New Year's toys from polymer clay - toys for the Christmas tree and a master class
 This detailed master class contains techniques for working with polymer clay and will teach how to create beads from polymer clay.