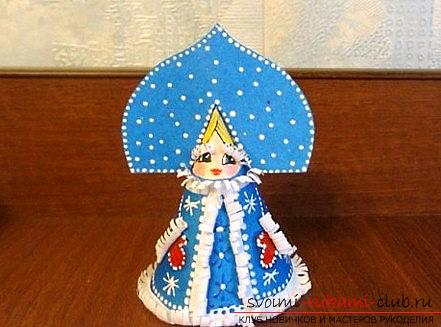
Christmas decoration of the Christmas tree: a decorative Snow Maiden with her own hands - a master class
In the period of Christmas fun, as well asPreparing for the holidays, we are in search of employment, thanks to which you can be a little entertained our child. This hand-crafted article and the whole master class is designed to master the elements of the work on the applique that are so necessary in the needlework on the examples of famous characters.
Christmas decoration of the Christmas tree: a decorative Snow Maiden with her own hands - a master class
 You can not hide the fact that the New Year isan excellent reason to learn something, and also nourish your knowledge with your own imagination. But, the hero of our paper jewelry will be not just someone, but the most popular figure of the New Year's holiday - the Snow Maiden. It is worth saying that any girl dreams of a Snow Maiden doll, dreams of dressing up this holiday as well as her protege and, of course, ready to go to any work, just to get close to a beloved, fairy-tale character.
  Arrangement of the Snow Maiden - cone
- Prepare the paper
- We need scissors
- Adhesive PVA
- Tools for kvillinga
- Fur
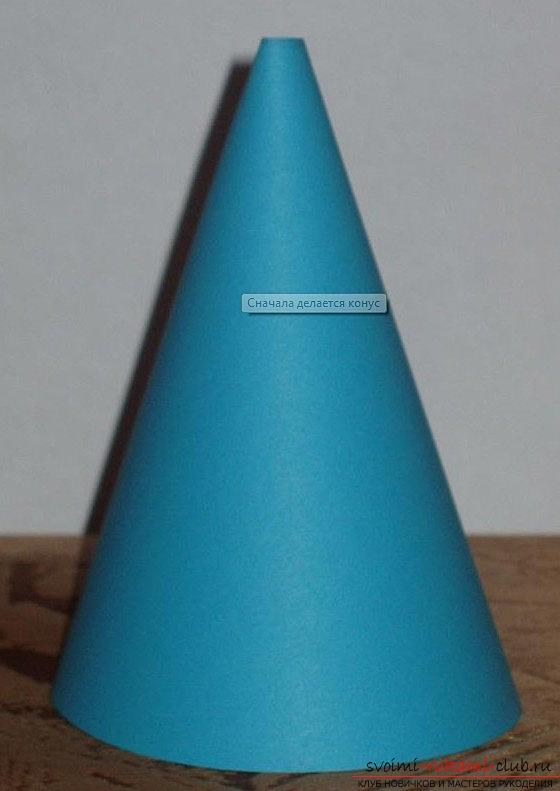
 Therefore, we will try to consider an uncomplicated andfunny lesson craft, using only the application. The first option will consist entirely of a basic shape - a cone. Using special manipulation with paper, you can achieve the desired effect and decorate the craft in such a way that it is even more interesting. The simplest tricks in the quilling technique allow you to achieve the desired effect.
 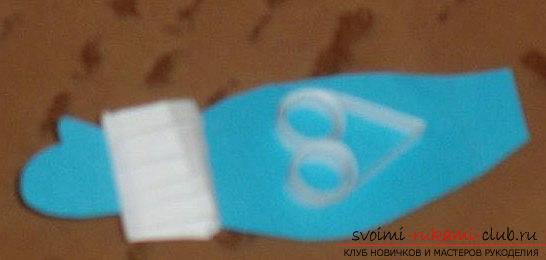 Initially, we form our cone. The shape of the cone can be quite large in diameter and size, so that each decorative element can fit on a future craft. At the heart of the cone we lay one third of the circle by a radius of 14 centimeters (to fit on a sheet in A4 format.) Using the same paper, we try to cut out the elements of the hands evenly.
 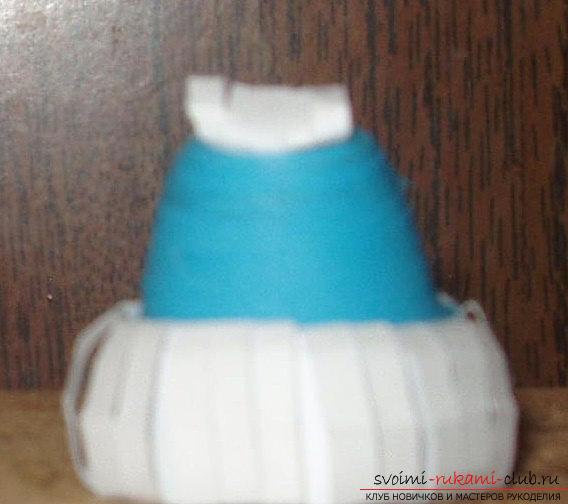 In order to make the face popularcharacter, you need to take a white paper. Therefore, the head must be made a separate part. The shape of the cylinder for creating such a piece is more suitable than the shape of the cone. The upper part is closed with a beautiful cap. The height of the cylinder should be determined in advance: we got about three centimeters. The face is drawn by means of usual felt-tip pens, as the pencil drawing together with the saturated color capabilities of the colored paper make these particles paler. To create blush, you should use red watercolor. Snow Fur The first form of the decorative element is the notorious fur that adorns the gloves, cap, sleeves and hem of our famous girl. In order to make the necessary decor, you need to take a strip of paper in white color in the size of 29.5 centimeters by 3.5 centimeters. Then, the product is folded into two parts, using the long side and forming a bend along the side to form incisions in the size of the interval by 5 millimeters. In the edges do not touch only the first centimeter. After that, the strip needs to be straightened, and we cut the parts of the not cut edges together in a lap type to get the shape of the tube. Hem for a dress - snowflakes The hem should be decorated with snowflakes, which are formed with the help of the quilling technique itself. To do this, we need to form a spiral using a narrow strip of paper. Paper can also be wound using, for example, a stick for sushi, or a spoke. Then, the product is carefully removed from the workpiece. After this, it is necessary to weaken the pressure on the edges of the spiral. It will thus be a little unwound, which will give us the shape of a free spiral. The edge must be fixed with adhesive. After the glue dries, with the fingers it is necessary to give the figure a special form in the style of "rhombus". After that, the diamonds must be glued together to form a snowflake. Sleeve embellishments Now we'll work on the edges of the sleeves. To do this, take the fur and decorate with each side. Thus, it will look more solid. It is also very important to complement our decoration with the quilling technique. It is necessary to twist a strip of paper using two sides. Get free spirals in the same form. They can be fixed with glue, and the rest of the unused paper must be bent across to make equal removal from the elements. Then, where the spiral touches the other, it is necessary to fix it with the same adhesive material. The finished structure must be connected to the sleeve. Then, we need to make a hat
 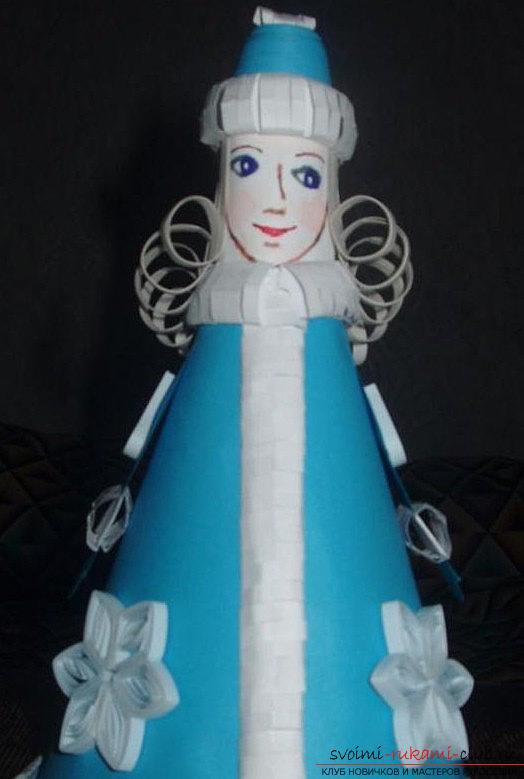 Its basis will be a spiral of a stiff form. To save time, as well as lower paper costs, we will screw the product with a felt-tip pen. The hole that remains can be decorated with a pompon type of fur. Further, in order for the spiral to form a cap, it is necessary to shift the axes with a slight pressure. When we achieve the desired result, we can fix the position of each turn, gluing it inside with the help of strips of paper. The bottom of the cap will have a border in the form of fur. Assembly After we have everything ready, the work can be processed with the help of such instructions: the head glue, glue hands, and glue adornments. The lower part of the hem, which is decorated from fur, is formed like a collar, as well as a vertical edge. We use the latter to hide the elements of the gluing of the cone shape. Snowflakes should be placed in a symmetrical form, using only the bottom part of the hem. Also we form hair. Take the spirals and form them on one or two turns, so that there are long ends. Loose ends must be glued to the head at the top. Thus, Snegurka's hair will look more beautiful and interesting than other works. Another variation of the voluminous toy In order to work on this project volumetric Snow Maiden and Santa Claus, we need some material:
- Prepare a little color
- Take the cardboard
- It will take white paper
- Adhesive
- Pencil
- Felt-tip pens
- Compass
We use compasses in order to formcircle on the cardboard and cut it. The diameter of the circle is chosen personally by you, depending on the size of the figure. Next, based on the circle, you need to form a cone of paper. Pick up the height for your figure in advance. Our conditional value is 7 centimeters. Then, the circle must be cut into two parts and bent into the shape of a cone. Then, using a sticky substance, fix the object. Then, the paper is cut into white in the form of fringe stripes. Paper needs to be cut no more than one second wide. In order to make the fringe curly, it is necessary to wind it with a pencil or pen. We form several different strips of paper. The size of the crafts in this case will not make any difference Face and ornaments 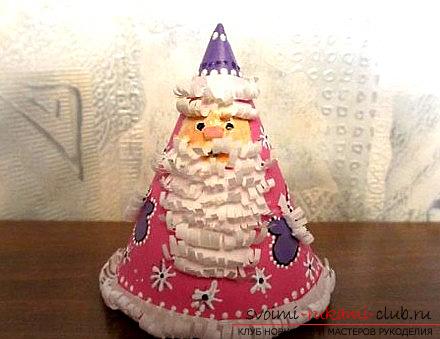 Next, we form from the paper the oval of a smallsize in order to prepare the face of a fairy-tale character. In our case - Grandfather Frost. It is necessary to glue this face to the top of the figure. We use the figure and colors to form the face of the future hero! We take strips for decoration and make an ornament of the future Grandfather Frost. The cut particles from the strips past the bottom of the cone to make the skirt for the fur coat. For the upper part of the cone, it is necessary to form a rim for the cap. We take small strips in order to make eyebrows. Beard is also formed from several variations of strips, which are superimposed one to the other. Strips in the glued form are twisted, using a toothpick. Next, dorisovyvaem for Grandfather Frost special gloves, and the hood can be painted with a purple color. We decorate the fur coat with the help of stars, snowflakes, as well as everything that you want. Form the Snow Maiden
 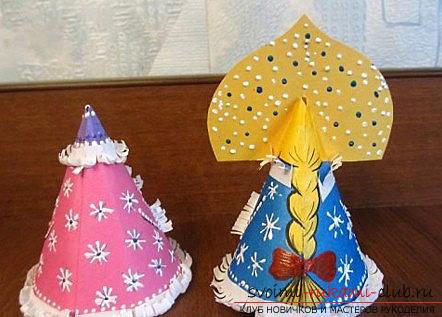 The Snow Maiden is made in the likeness of the image of GrandfatherFrost. To do this, you need to prepare a semicircle in blue, and also make a cone figure, form a crown for the Snow Maiden. For the crown we cut out the shape of a small semicircle, and in the middle of the article we form a special cut to bend the ends. The upper half of the semicircle is formed in the form of a cramp, which narrows closer to the upper part. The crown is attached to the cone. Then, the Snow Maiden needs to finish the face. Then, the product is cut in the form of a circle and fastened under the upper part of the cone. Then, we cut a large number of strips,using fringe. Of these, a collar is formed. Also, use the fringe to make the hem skirt. Of course, it is worth decorating and fur part on the sleeves with the help of this element, preferably on the front of the fur coat line. Then, the fringe is scrolled with a conventional toothpick. It only remains to complete the gloves and decorate the Snow Maiden the way you want.
Comments
Related posts:
 Decoration of bottles and decoupage with tights with their own hands - master class
 Making a Christmas tree snowman from paper - master-class crafting quilling techniques
 How to make a tree of beads with your own hands? Schemes and a master class for work
 Christmas bow with own hands - beading technique with our own hands and a master class
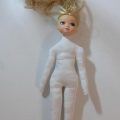 Snow Maiden from an old doll - a way to create a new toy from the old and a master class