
New Year snowflakes and Christmas toys with their own hands - master class origami
Surely every living person on earththere is that holiday that he loves most. But, it's no secret that for the majority of the population of our green planet, the most touching, favorite and important holiday is the New Year and Christmas. The period of Christmas holidays, which is filled with bright events and a variety of pleasant moments, is not forgotten for a long time. We also remember the golden moments in which, together with my parents, I worked small miracles and felt the taste of happiness, which, alas, is so difficult to translate into a more mature age.
New Year snowflakes and Christmas toys with their own hands - master class origami
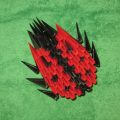
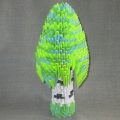
One of the oldest and kindest family traditionsmany generations - decoration of the New Year tree and preparation of the house for the New Year holiday. Undoubtedly, everyone wants to participate in this process. The smallest necessarily demand their right to hang that very cherished and beautiful Christmas tree toy. But, even this family tradition can be diluted even more pleasant, and most importantly - a useful tradition. Yes, we are talking about preparing New Year gifts on our own, or together with children, parents. At the moment, there are many ways to create beautiful garlands, Christmas toys and trinkets that grow on a coniferous tree only thanks to your efforts. Some people prefer to buy them in the store, but we are not looking for easy ways! Therefore, consider one of the most common and unique elements of decor - decorating Christmas tree toys made of paper. Origami technique is a bright representative and today we will get acquainted with its remarkable properties. Flower set: snowflake-origami as a New Year's decoration Special origami-modules allow us to connect different particles and create a composition from them. Today we will learn one of the techniques of modular origami and try to make simple flowers, which later on can be decorated and decorated on a Christmas tree in the New Year's day, or you can decorate your curtains with this skillful craft. 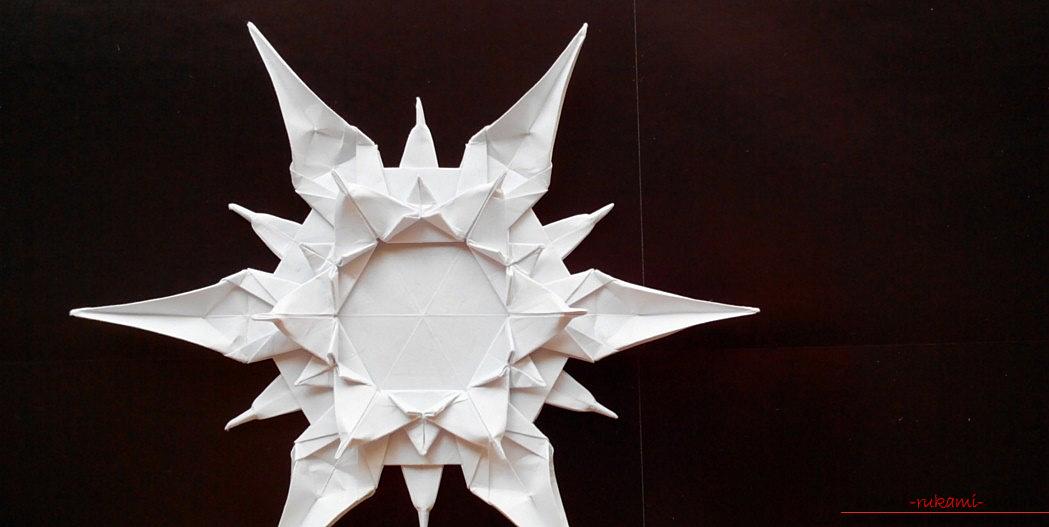 To create a flower snowflake we needprepare 444 modules in white. Next, you need to collect the series of modules. Prepare the modules of the triangles. There are two such modules and one more module is put on their corners. Then, you need to assemble for each row the same set of modules. For the first and second rows, six modules are required. Then, for the next series, there are six modules to add. It turns out that for each corner of the module it is also necessary to attach one more module. For the third row, in total, you get 12 modules. For the fourth row, we form the same number of modules as in the second row, using two corners and one module. The fifth row should be added significantly: add 12 more modules, using the scheme of the third row and get a form for 24 modules. Thus, we repeat also the 6th row for 24 modules. The seventh row is formed twice as much. In total, we will have 48 modules for the 7th series. Further - you will not need to add. The snowflake should become bigger and, therefore, we collect three rows of 48 modules to create a volume. The eighth row, the ninth and tenth row are connected by 48 modules. Work on the beams of a colored snowflake We have prepared the basis of a snowflake and now, proceed to its rays. In total, our rays will be eight. Each beam must start from six modules. We collect them according to the principle of big to small. Tobish, the first row - 6 modules, the second row - 5 modules and until the sixth row is completed with one module. Thus, we will form one ray and we will have to make seven absolutely identical rays. Forming a flower of a snowflake Let's decorate our craft with a flower! In order to form three flowers, you need to make the modules per square in sizes 9 by 9 centimeters. In our case, they will be in blue shades. Modules of squares are formed this way: you need to take a square and fold it using a diagonal. Then, the lower corner must be raised to the upper corner. Then, you need to take the triangle to the right and fold it into two parts (or as they say, flatten). After, the left triangle is taken and also folded into two parts. Each upper corner of the flattened triangle must be pushed back. Then, you need to fold the right triangle into two parts, also enter the left triangle. After, they need to be joined and glued together. After, four more modules are formed, which need to be connected together. We get the shape of the flower we need. Using this scheme, we form the remainder of the other two flowers and glue them on the version of the finished snowflake. It is desirable to decorate with paper strips, which can be previously wound on a pencil. Winter flowers are completely ready! Kusudams for Christmas trees Origami techniques also combine the creation of magnificent balls like Kusudama, which can be performed in a variety of sizes, using interesting curves and shapes. Prepare together with you one such piece of the ball. In addition, the material will be made using different shades of paper, so that you can make different balls on a Christmas tree and form a kind of garland of paper. To do this, you need to prepare 60 sheets of paper, which must first be done in the right size of the square. Suitable for the records of the type "Note", which have equal sides initially. They are also called stickers! We will form squares into modules, and assembling them will help us to make a beautiful ball of paper. After preparing all 60 crafts of modules, we need to start the assembling phase in order to make inflorescences of the future product, proceeding from the modules. We should get 15 different inflorescences, which will contain 5 modules per inflorescence. Then, when these forms are received, they will need to be glued together. Detailed instructions for gluing and joining elements will be provided in graphical step-by-step instructions. In addition, they should be decorated with glitter. Thus, the figures will get a more fabulous and interesting appearance. New Year's tree from the modules Decorate New Year's paper crafts with the help of glitter, this will make them more fabulous and interesting in terms of design. Next, we will consider the option of creating a tree, the sequence of work on which will be presented below. Let's take advantage of the modular origami technology. To begin with, we need to prepare new, separate parts, which will later become new artifacts of the Christmas tree. We are to prepare triangular modules in the number of 353 pieces, using the scheme. We collect our workpiece as shown in the diagram. New Year's ball-wave
  Now we are ready to consider the last ideaNew Year's craft of colored paper, which will allow us to form a ball. Let's take colored paper in A4 format. Education crafts will take about an hour, but the result will be worth it. With the help of origami technique, one piece of paper that has been folded many times - will become a real art. So, the leaf that lies before us needs to be decomposed into 32 pieces in one side, as many particles must be made on the other side. In this way, we will get a small harmony in two directions.
  Then, the sheet must be folded across,forming a fold that will be in the middle of the product. Then, to the fold, which we have, it is necessary to make the wrapping edges. Thus, we will divide the paper into 4 pieces. The abstract form of the origami ball will be obtained by wrapping the edges, with which we partition the paper into 4 equal zones. Now, take the fold that will be closest to the middle and bend it to the other side, then - combine it with the center line to organize the accordion. In the same way, you should act the other edge to connect it with the line of the middle.
 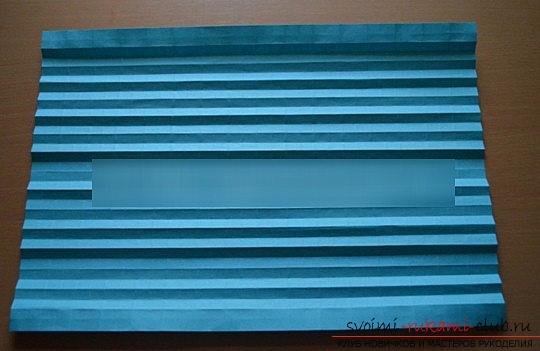 Preparation of the cylinder and the round form So,repeat these operations for the underside of the product. Now, the paper will be divided into 8 particles. Previously known to us, the paper should be divided into 16 parts, after that - make 32 pieces. Then, we repeat the same actions along the longitudinal direction. The extreme harmony particles at this time can not be bent, we get the version of the accordion, which will need to be straightened using the fold line. Next, collecting the product, we get the wave effect of our crafts. It turns out the option of abstraction, which we have to improve. It will need to be remade into a cylinder and then make a ball.
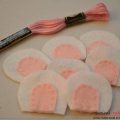
 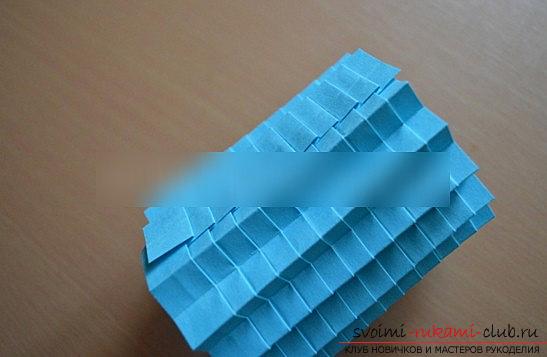 You need to combine the folds to put their friend into the friend, doing zamochki. Then, the faces are closely aligned, after, a cylinder with denticles is obtained. The edges of the top and bottom should be divided using a diagonal, and also folding the shapes of the triangles. Then, we form the ball, pulling the folds along the rows. After, we get the format of a spherical object without glue and any other tool. All with your own hands! But, in order to preserve the best and hardest form of the ball,It is necessary to form glued triangles, along the top and bottom. Then the craft will have a tough form. We decorate the ball. We will form a special suspension on the yellow thread. It can be done with a decorative brush, and with the help of a thread we will select each ball meridian. We will form the brush first. To do this, you need to make a bundle of threads and band them in the middle part. Then, gently bend the thread over the dressing, using shifting from one side to the other. We leave only one eyelet, on which the brush will be attached to the ball. The rest must be bandaged with a thread, using a margin of 1.5 centimeters from the edge. Then, cut off the unnecessary, forming a cut of an even view. The form of the brush will be obtained, which will be supplemented with a paper ball. Then, a suspension is formed, which is decorated as a Christmas tree pendant for our toy.
Comments
Related posts:
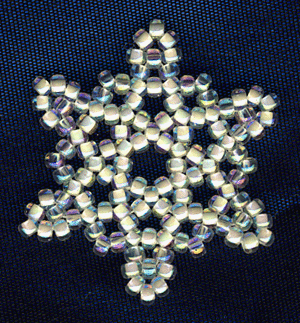 Beaded Snowflake: Christmas ornaments with their own hands (diagram)
 This master class will tell you how to make a modular origami from paper - a ladybug.
 New Year's articles from beads: toys and jewelry by own hands
 This detailed master-class modular origami with step-by-step photos contains a scheme for assembling birch from paper.
 How to make a magic toy out of felt with your own hands? Master-class of products