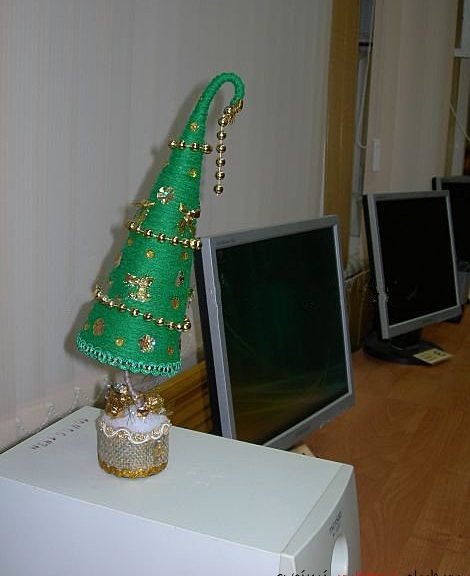
Christmas tree created by own hands, will serve as an original decoration for the office or educational audience.
The New Year is very close. He will come by night express. And having conducted it, you again may not have time to prepare for the new year as it should. And what should be for this holiday? Of course, different crafts. The main decoration of the room is a Christmas tree. It can be alive or artificial. Well, everything is clear with the living, but with an artificial Christmas tree there is where the fantasy will unfold. The material for the Christmas tree can be the most unusual - paper, plastic bottles, pasta, cones and even coffee grains and fragrant peppers. Such an unusual combination of not at all hand-made materials, like coffee grains and sweet pepper, gives an excellent result. Indeed, in the presence of fantasy and free time, you can create real masterpieces. Crafts are good at any time of the year, but winter is different from others by its krastotoy and originality. Such are the holidays for which they are intended. Everything changes, and crafts change. Here and on, and this time, New Year's crafts are slowly replacing crafts on the autumn theme, because almost a week left and Autumn will give the reins frosty beauty Zima. It is for the winter that the most cheerful and long holidays are held, loved by children and adults - New Year and Christmas festivities, for which it is customary to give and receive gifts. It was also very fashionable to decorate houses, offices, school classes and even student audiences for Winter. I like to decorate my study room for the New Year. But in a computer class every square centimeter is occupied, so a small Christmas tree-topiary will be very useful. This tree is not ashamed and give, you can even put it on the festive table. In this master class I will clearly demonstrate how to make New Year crafts, using my own hands using paper and other materials available to all. Together we will learn how to make Christmas trees from paper, which you can pleasantly surprise and please people in New Year's holidays, as well as decorate a class or office. In addition, if you do topiary with students or students, it brings not only aesthetic beauty. Students will be able to develop their creative abilities, and the process of creating beautiful things raises their imagination and imagination. 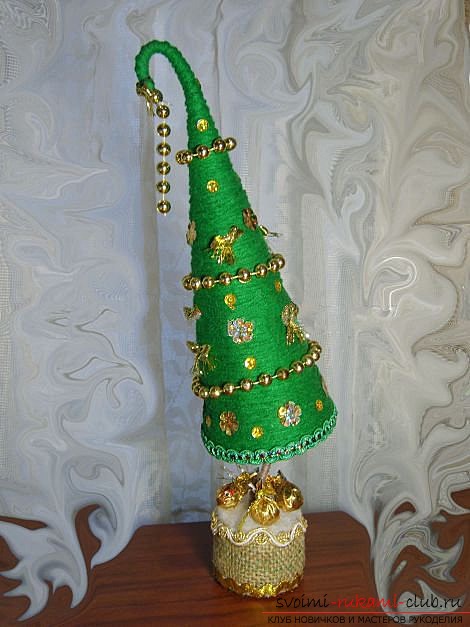 For work we will need: 1. Materials for the herringbone:
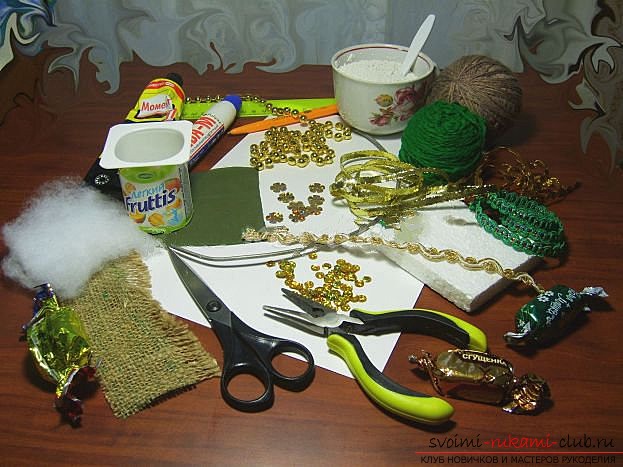
- A sheet of thick A4 paper (I have a paper for drawing)
- Aluminum wire length 40 cm
- Polyfoam 8x8 cm
- Lining fabric 10x10 cm
- Green thick threads for the herringbone and brown for the trunk
- PVA glue
- Clay "Moment"
- Sequins of two kinds
- Necklace of Christmas tree 50 cm
- Braid for the bottom 30 cm
- Ribbon for bows 30 cm
2. Materials for the pot:
- A plastic cup
- Building gypsum
- Sacking 20x8 cm
- Lining cloth 8x8 cm
- Synthepon 8x8 cm
- Braid for decoration 20 cm (2 pcs.)
- Candy wrappers (for "gifts")
3. Tools:
- Scissors
- Ruler
- Pen (or pencil)
- Combination pliers
 The process of making herringbone: 1. Collapse "kulechek" from a sheet of paper, adjust its width at the bottom. Spread the edges of the paper with glue PVA and press firmly. 2. Attach the ruler to the top of the cone and measure it in the shortest part (this is the maximum possible height of the tree). Then, holding one end of the ruler and gradually turning the cone, make marks of the same length throughout the lower part.
 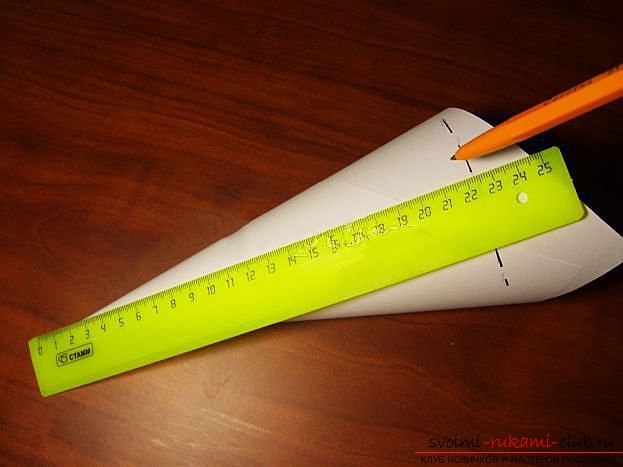 3. Cut the excess paper with scissors. The base of the tree is ready.
 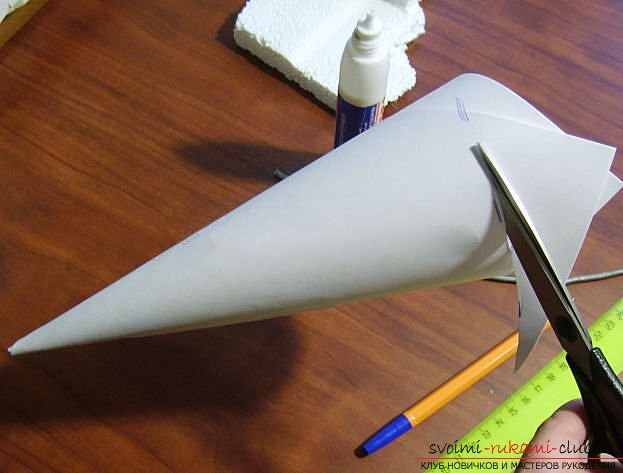 4. Place the cone on a piece of polystyrene, circle the circle and gently cut the bottom.
 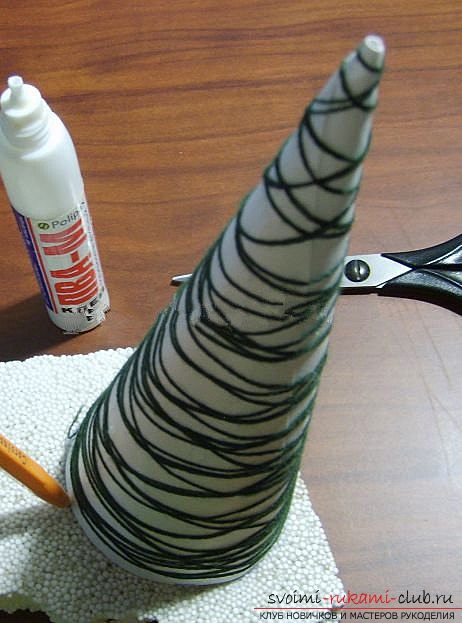 5. Prepare a "trunk": wrap a piece of wire on one side with a brown thread about 1/4 of its length. (I did not do it right away, so I felt uncomfortable). 6. The upper part of the "trunk" pierce the center of the circle from the foam and insert it into the cone so that it protrudes over the top at 7-10 cm and the pliers bend.
 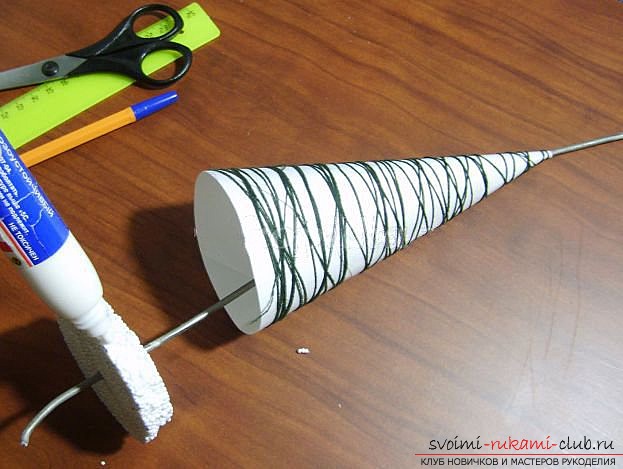 7. Flap the sides on the sides with glue PVA and insert into the bottom of the cone of paper. You can additionally fill the cone with crumpled paper (newspaper), so that the cone itself is not deformed during subsequent manipulations. 8. In a piece of lining 10x10 cm, make a hole, put it on the wire from below and gently glue the PVA glue to the bottom, covering all the foam. For insurance, you can wrap the edge of the fabric at the bottom of the cone with several turns of thread. I wrapped the entire cone with a thin thread, lubricated with PVA glue for better subsequent adhesion to the main thread.
 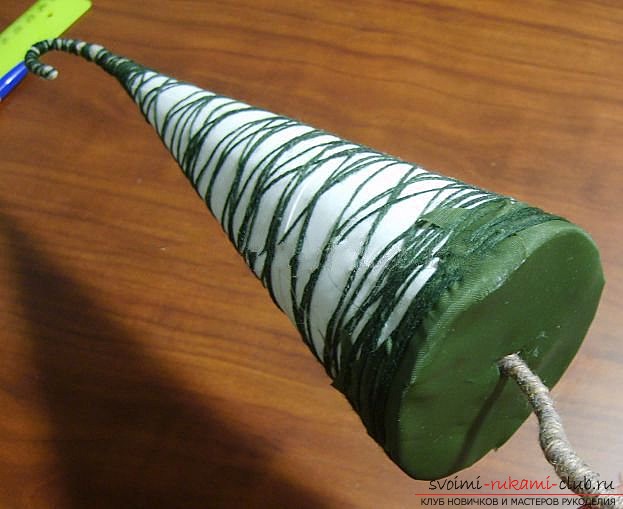 9. Thread the green color at the base of the cone, slip the cone approximately 2 cm with PVA glue and wrap tightly with thread so that there are no gaps. Then smear and wrap the next 2 cm, etc. I did it in such a way that it would be more convenient to keep the product and not spoil your hands.
  That's ready ...
 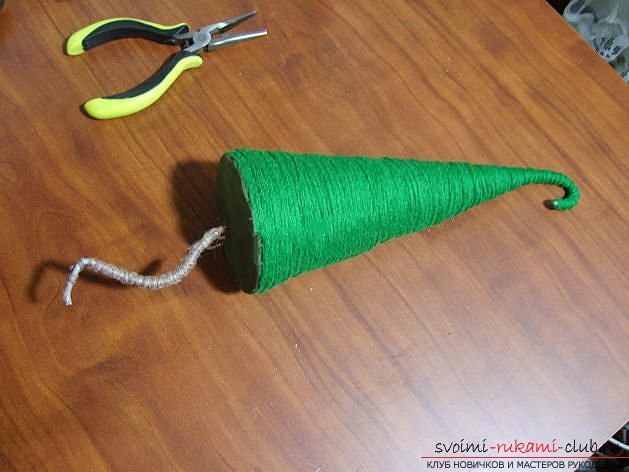 10. It was the turn to the pot. Prepare the necessary capacity: if the pot is small - the tree can collapse, but too large - it's ugly. I cut the glass from under the yogurt.
  The bottom was covered with a lining cloth 8x8 cm, glued to PVA. Boka pasted sackcloth. Surplus burlap bent into the pot.
  eleven. Then you need to prepare a solution of gypsum, diluting it with water until a doughy state. Here I was a little cunning: I added a handful of river sand to the finished solution - and the plaster saved, and the solution turned out to be heavier, which means that the stability of the future product is better.
 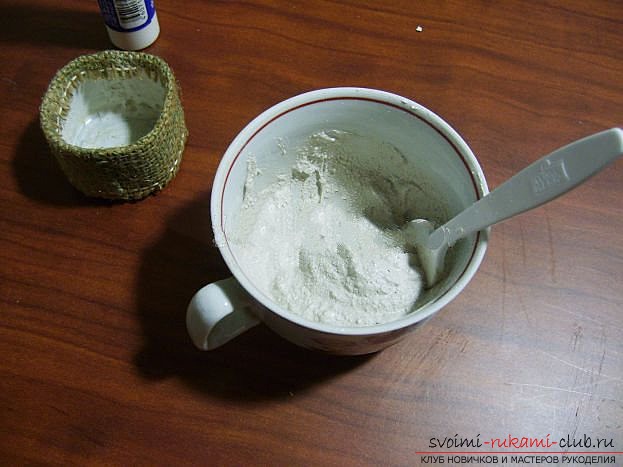 The pot must be filled with gypsum solutionalmost to the top. 12. It's time to insert the base of the tree trunk and the center of the pot and compact around it a solution. You can use the blunt end of the pencil, after wrapping it with cellophane. The solution will "settle" and there will be a place for "snow". Now we need to leave our product for a couple of hours or until the next day, to, as it should, solidified the solution. I had to put the Christmas tree in the corner for saving. Here I was so carried away that I forgot about the camera. 13. Decorate the pot. The place of the burlap joint can be taped. Around the trunk lay sintepon. Glue the "Moment" glue on the top of the pot and around the base with glue. If desired, paste bows and sequins. Under the tree - "gifts" from candy wrappers from candies (inside too wrappers).
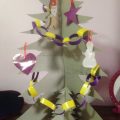
  14. The final stage: decoration of the herringbone itself. First, glue the braid on the bottom of the cone to additionally fix the threads and cover up possible flaws. Then, tree beads, individual beads, sequins, bows - and everything on the glue "Moment" (PVA dries a long time). Here is our beauty with her friends from the "grass" and "swan feathers".
  And two more babies are born.
 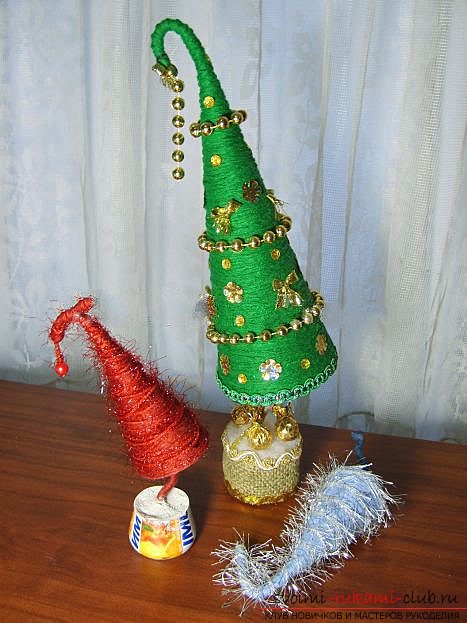 And she herself has already taken an honorable place in the computer class and reminds my students that soon the New Year and it's time to take the tests.
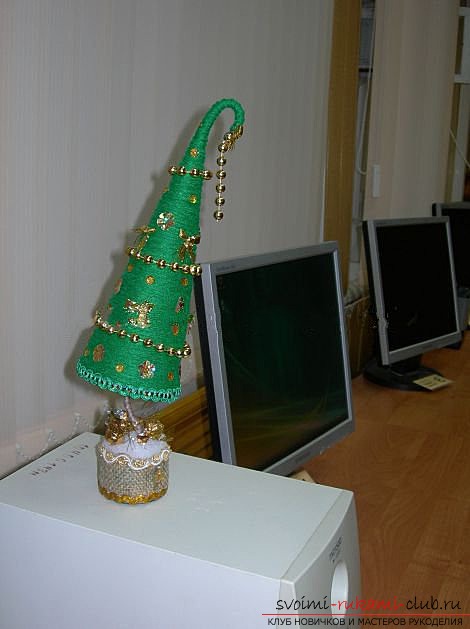
Comments
Related posts:
 New Year tree with their own hands, a Christmas tree made of fabric, how to make a New Year tree with their own hands, a Christmas tree made of candy, master classes for making Christmas trees.
 Your crafts. Christmas tree of branches by own hands
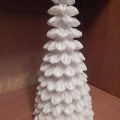 New Year's hand-craft: a Christmas tree made of cotton discs with your own hands for the 2015 contest, New Year's crafts by your own hands
 New Year tree from the pallet with your own hands
 New Year's tree from improvised materials with their own hands.