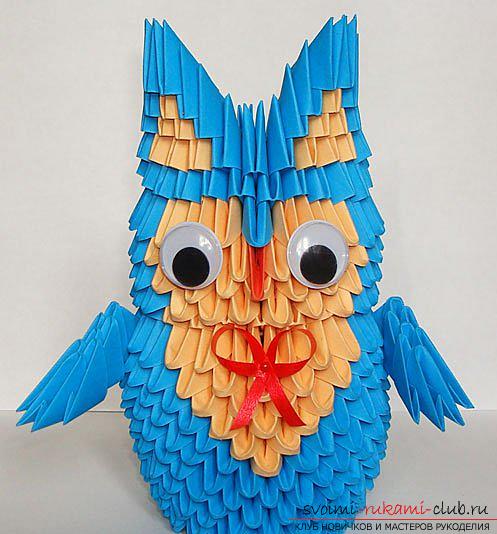
A simple figure of an owl, assembled from modules in origami technique according to the scheme - an interesting lesson
Figurine of an owl, assembled from modules in technologyorigami, is a vivid example of a world-famous art form. To produce it you need a little free time, elementary skills of making individual modules and desire. The article's material will help make the process not only fascinating, but also as easy as possible. Modular origami is one of the most entertaining types of this ancient art. To create figures, including birds, a large number of individual elements, the so-called modules, are used. There are many ways of making modules, the most commonly used are triangular modules. The figure of an owl, assembled from modules in origami technique, consists precisely of such elements. You can make them using the scheme that you see in the photo below. 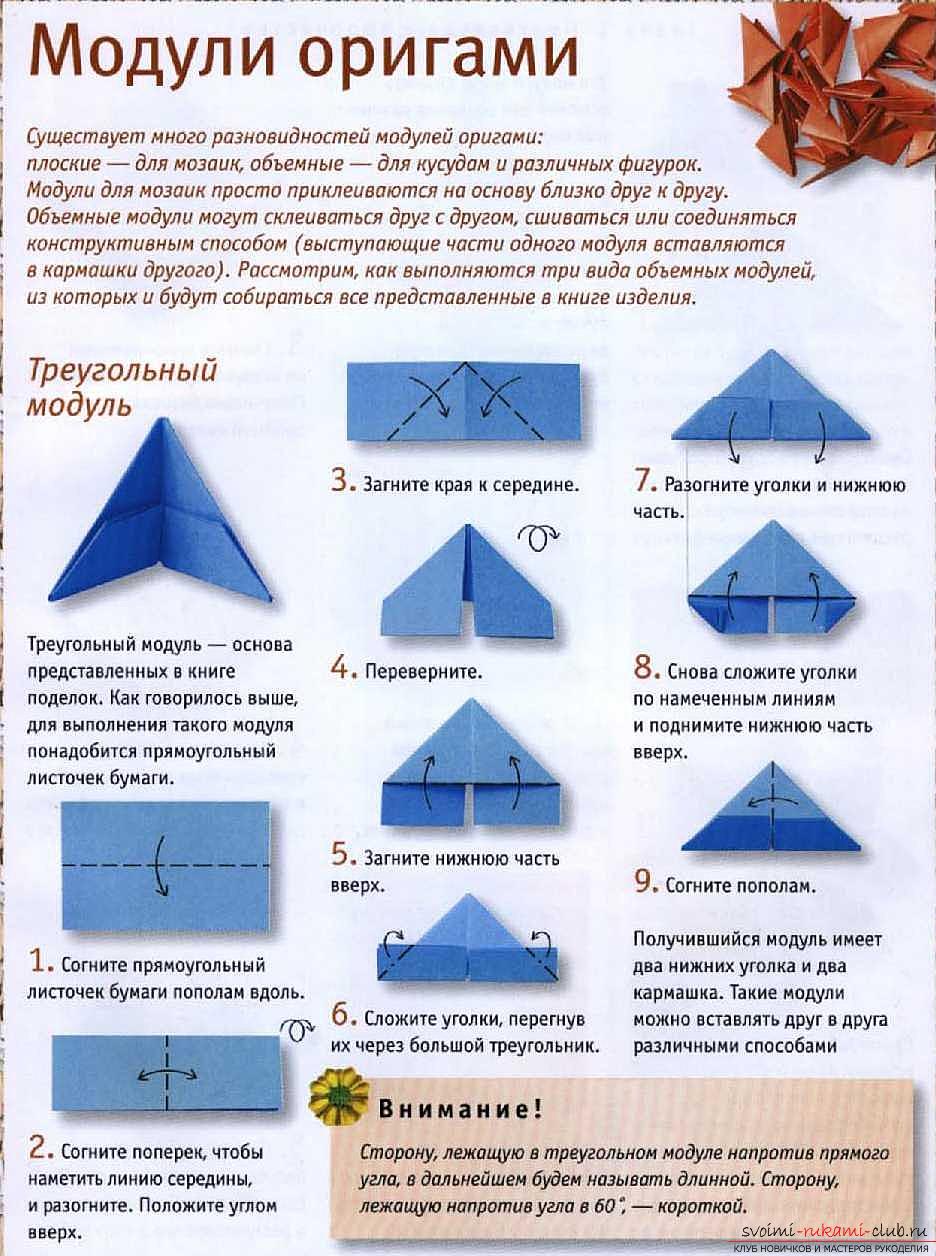 A total of four hundred and forty-eight modules are required for operation. Of them:
- one red element;
- sixty-seven beige modules;
- three hundred and ninety-six modules of blue color.
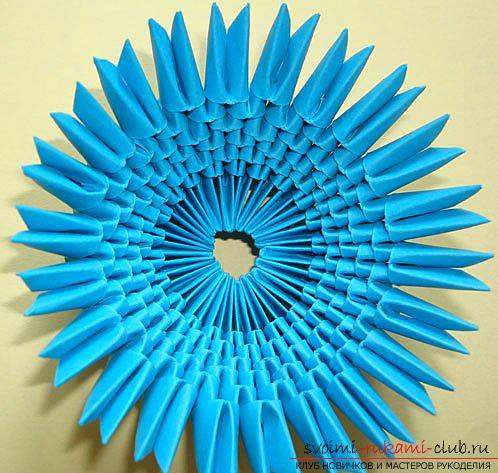
From one sheet of paper, A4 size, shouldThirty-two modules of triangular shape are obtained. The coloring for the bird can be changed at its discretion. We proceed to the very process of work. In order to collect the handicraft was convenient, we will collect the first three rows at once. The first row Twenty-two modules of blue color put on their short side. Second row Twenty-two blue modules must be placed on their long side. 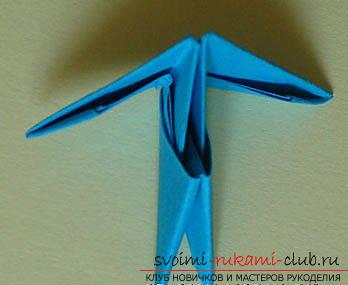 The third, fourth, fifth, sixth and seventh rows are performed similarly to the construction of the second series.
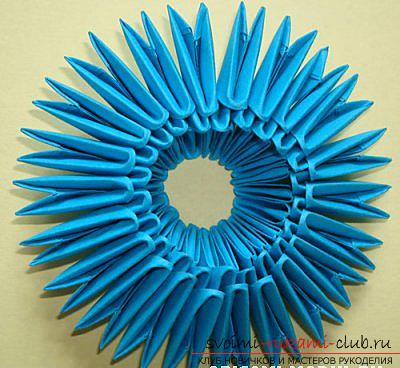
 Eighth row We attach one beige module and twenty one blue modules.
 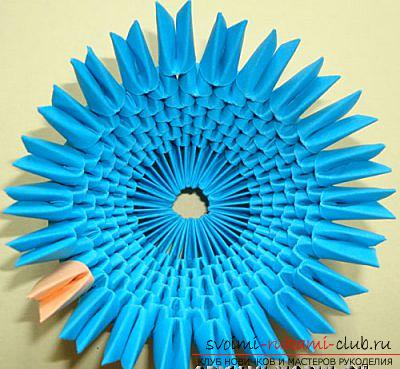 Ninth row We attach two beige modules and 20modules of blue color. Tenth row Three modules of beige color and nineteen blue modules. Eleventh row Four beige modules and eighteen blue modules. Twelfth row In this row, add five beige modules and seventeen blue ones. Thirteenth row In this row, we increase the number of beige modules to six pieces and reduce the number of blue modules to sixteen.
 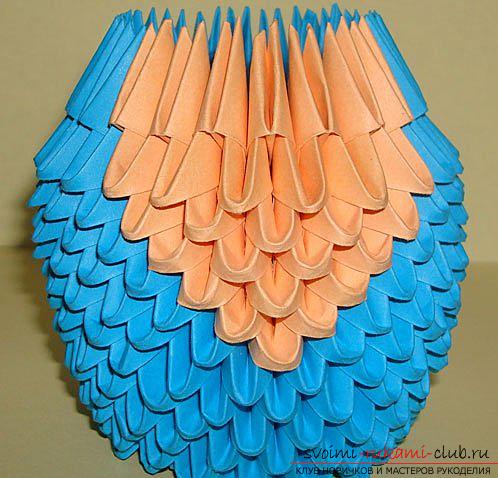 Fourteenth row In the fourteenth row we are a bitwe will change the way of fixing the modules. We will fasten them so that the short sides are directed to the front side of the product. Thus, we will attach seven beige modules and fifteen modules of blue color. Fifteenth row Again, we return to the previous method of fastening the elements - the long side is obvious. We attach six beige modules and sixteen modules of blue color. Sixteenth row The series consists of seven beige modules and fifteen blue modules. Seventeenth row This series consists of eight beige modules and fourteen blue elements. At the end of the series, attach one red module, which in this product serves as a beak.
 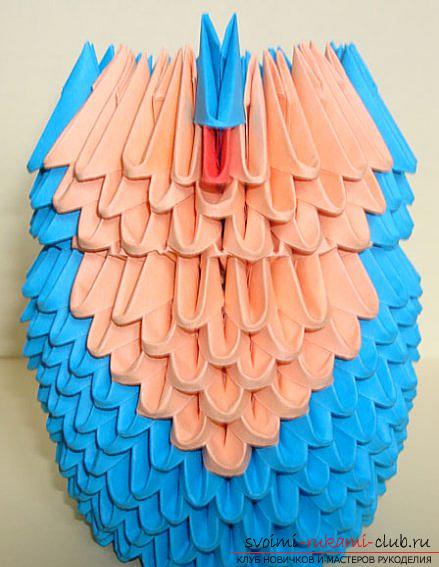 Eighteenth row In the eighteenth row we needattach to the figure six beige modules and sixteen blue modules. Nineteenth row In the nineteenth row, we will again mount the modules so that their short sides are pointed outward. We need twenty-two blue triangular modules.
 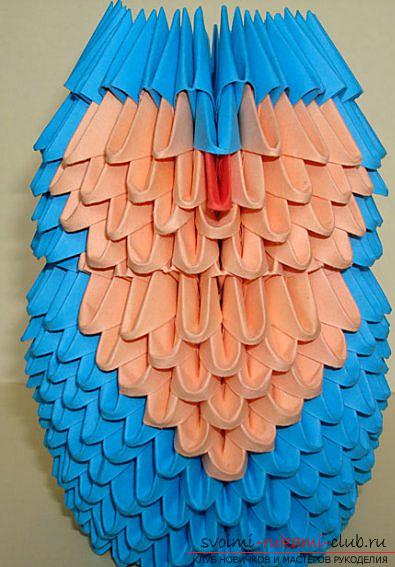 The next stage of work on the figure of the owl inThe modular origami technique will be the assembly of the ears. First row We fasten the modules in the following order: one blue, three beige, three blue, three beige and one blue module.
 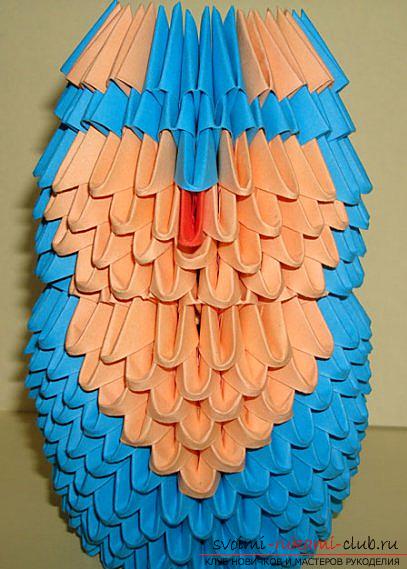 Starting with the second row of ears we will collectalternately. First, we will collect one, and then proceed to the next. Second row One blue module is attached, two modules are beige and one is blue. Third row One blue module, one beige and one blue again. Fourth row This series consists of only two blue modules. Now let's start assembling the wings. First row One blue module. Second row Consists of two blue modules. Third row. We only attach one more blue module. Fourth row Two blue modules. The fifth row is repeated the same way as the first and third rows. To connect the wings with the owl's trunk, you will need to take one more blue module for each wing. It remains to paste pre-prepared eyes and the most intelligent bird is ready.
Comments
Related posts:
 This master class will teach you how to make a violet in a vase in the technique of modular origami.
 How to make a cube of paper in the origami technique according to the finished scheme.
 How to make a beautiful craft in the technique of modular origami, step-by-step photos and a description of the work on creating a charming snowman and a bright swan from modules of different colors
 We make an origami parrot, step by step instruction. Origami modular, requires a certain skill.
 Origami box, made by hand according to the scheme, will be an excellent packaging for the gift.