The English rose with your own hands - flowers from polymer clay and a master class
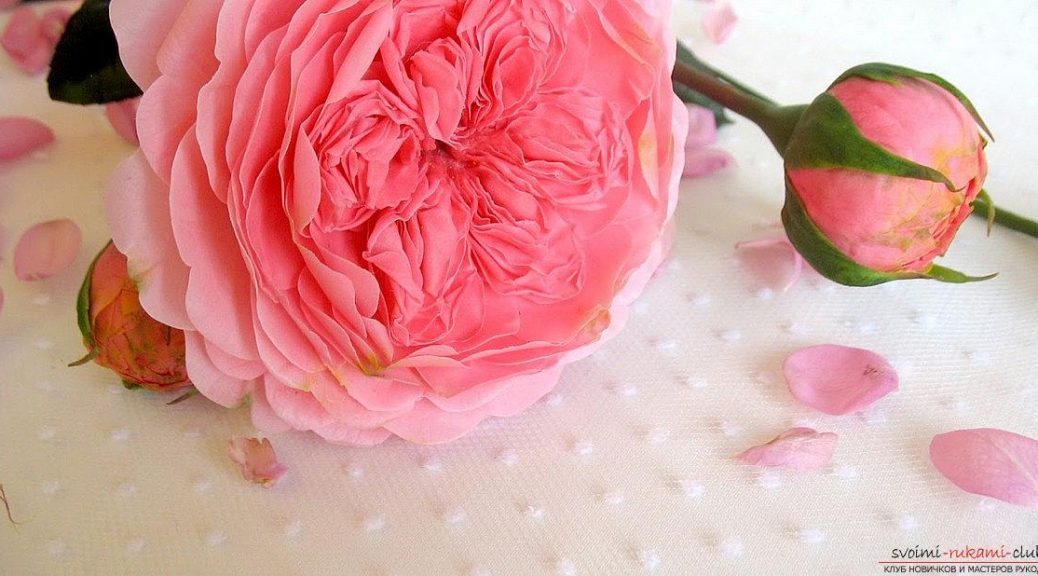
Rose Pion-shaped or English rose - one of thethose garden queens that many women dream of. If you are a master of needlework and want to make it pleasant for your relatives, or simply decorate the house with such a chic thing - this lesson will definitely be a good start to study.
The English rose with your own hands - flowers from polymer clay and a master class
 For work we need the material of coldporcelain in the number of two color solutions. In our case, we took the purchased clay from "Modena", in which the colors of red, white and yellow colors were intervened in various proportions. Have received a color "Apricot" and "Light apricot". Building a flower
 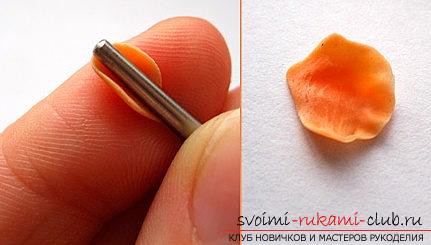 Dark cold porcelain will become our middle. Also, we will need various tools for processing ceramics. First of all, it should be a stack. A knitting needles can also come up. Also need a lubel, or bead, which is planted on a toothpick in the right size. Also, you should take the glue. The glue "moment" is suitable for these tasks.
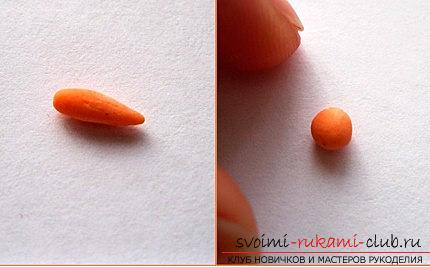
 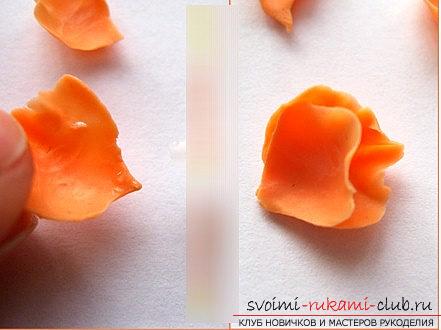 First of all, we need to split off a smallA piece of clay and form a pattern of "droplet". Then, using the stack, you need to roll out a small droplet on the finger in a thin and wavy petal, as in the picture.
  Then, it is necessary to prepare about five to sixlike flowers. For roses of a large type, such flowers should be larger. Now, for each petal it is necessary to give the appropriate bulge. It will be great to use a special latex rug, if you have one.
 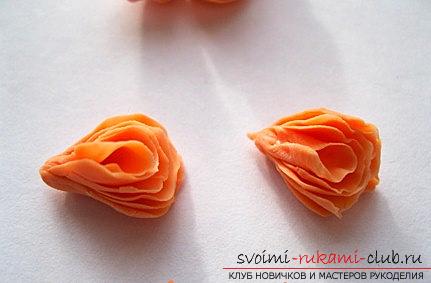 Petals for a flower Next, we need to takethe largest petal from the existing ones and to do the lubrication at the bases with glue (use one drop, with your fingers behave carefully). You need to fix the second leaf to it. It must be superimposed on top of the other, but inward. In a similar way, we glue all the other petals to form a dense, deformed tube of our flower.
 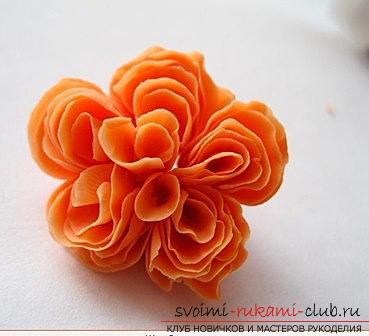 So, we made a fifth of our flower formiddle. Then we need to make five such formations. We repeat all actions. When all parts are made, they need to be glued between each other.
 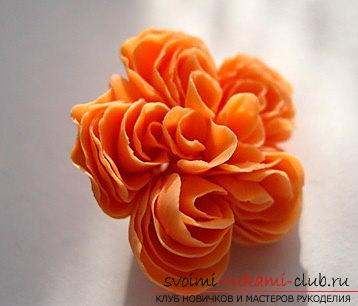 If you can not make a single shape and see the gaps, it is enough to make the leaves in a single form and paste them into the clearances.
 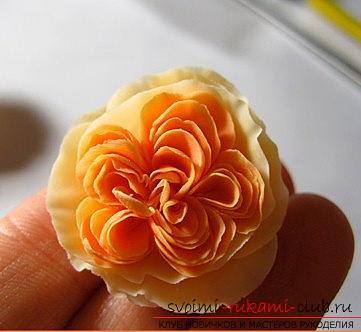 Next, you need to make side lobes forour roses. take a lighter clay, form our petals on the same principles. Next, you need to feel out a piece of our clay and decorate it with a droplet. then, make wavy edges for the product. After, it is necessary to lubricate the edge of the petal with glue and attach to our flower.
 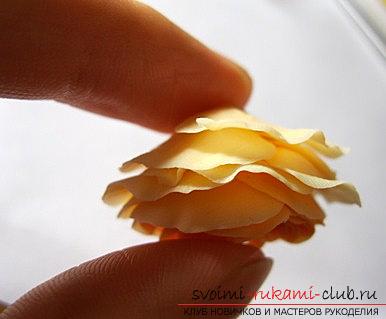 Lateral lobes are attached in a circle, we make from them the basis for our common flower of dark color. So our rosette of the English kind is ready!
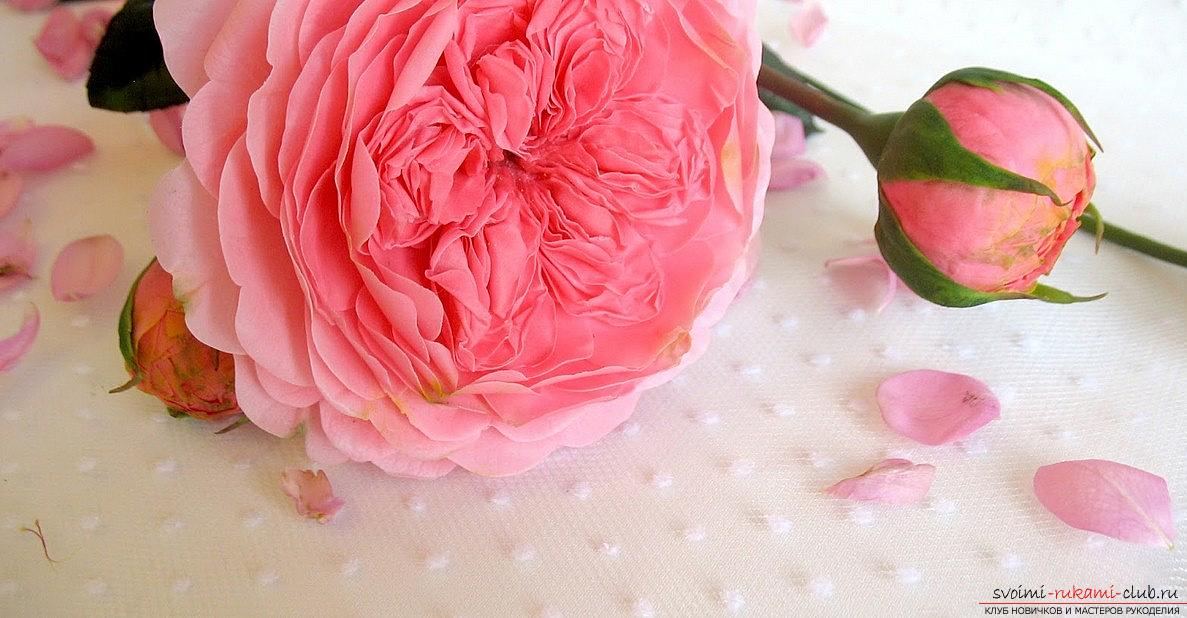
Comments
Related posts:
 This detailed master class with photos will teach you how to make your own necklace of polymer clay.
 This detailed master class with photo and description will teach you how to make your own flowers from polymer clay for hair clips.
 Pearl bead from polymer clay own hands - master class
 Master class on modeling dolls from polymer clay with their own hands
 We make a figure of a snowman from polymer clay - a master class with our own hands