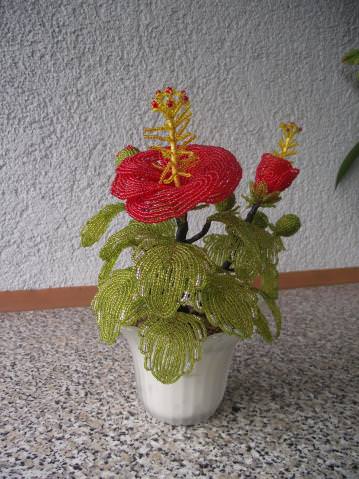
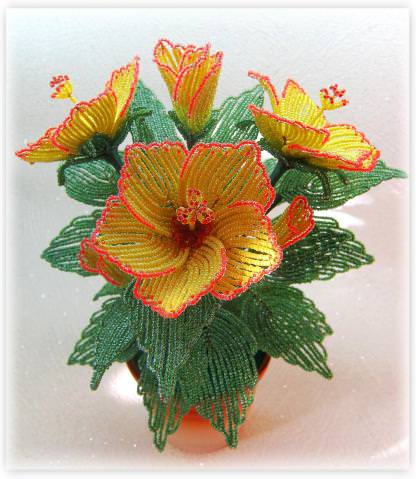
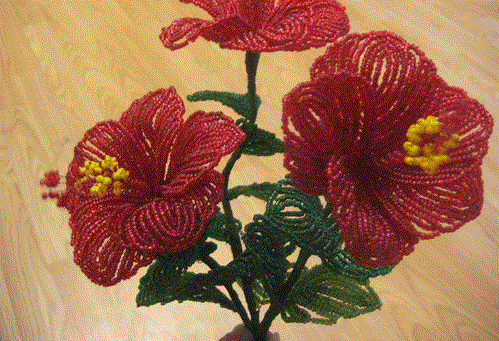
Hibiscus Beaded: beautiful flower with his own hands (video)
Content
Today, flower shops andspecialized departments of supermarkets can be found small bushes with large buds of flowers, pleasing to the eye with its aesthetic appearance and all sorts of colors. This hibiscus - beautiful by nature, plant, leaves no one indifferent, who has ever seen it. So we could not pass up and decided to dedicate our next master class on how to make hibiscus beaded by hand.


Master class on weaving Hibiscus Beaded
Beading is very hard work, nottolerate neglect and haste. Therefore, the first step in our hibiscus, you should take care in advance of the availability of all necessary materials and tools, because we want to get high quality results, and not just "something of such things."
So, our workshop we will hold with such materials:
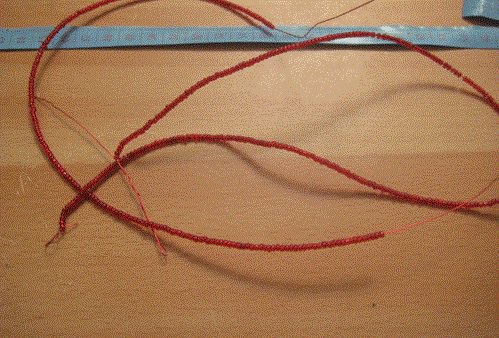
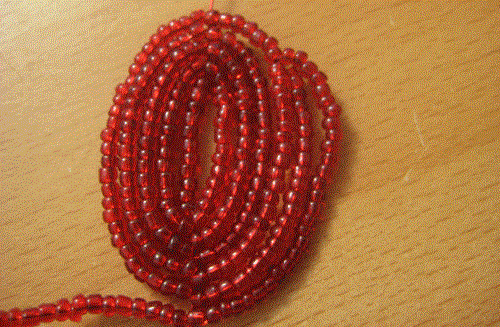
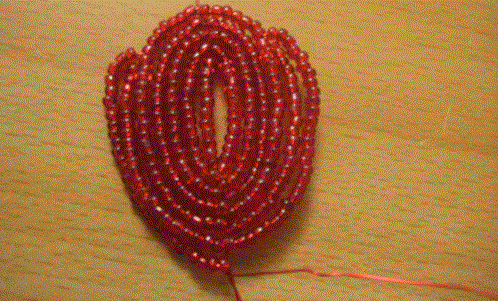
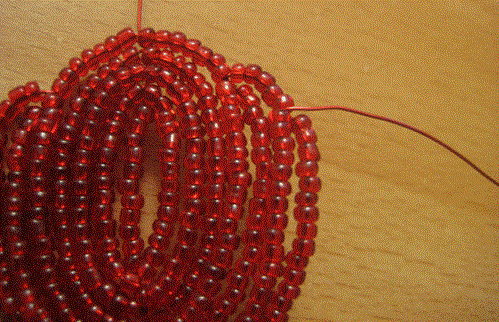
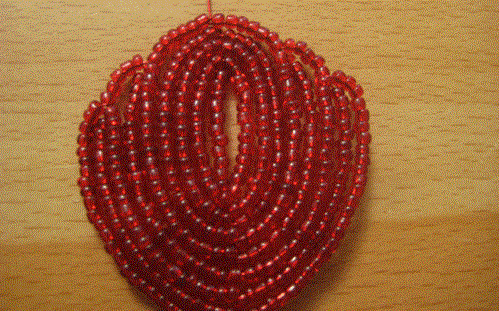
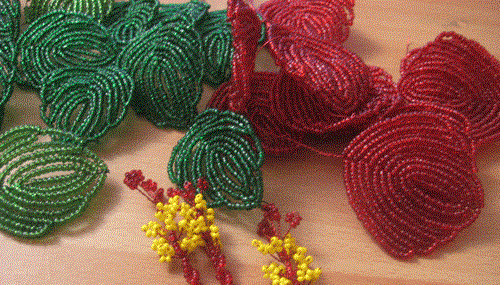
- beads: Red - 100 g; Green - 80 g; Yellow - some stuff for the stamens;
- wire netting leaves and hibiscus flowers, the size of 0.3 mm and 0.4 mm;
- thick wire of 0.8 mm to 2.5 mm for the stem;
- thread of green color, tone beads or florlenta for stem winding;
- shape for landing or, quite simply, a pot, a vase can be;
- plaster for fixing, (alternative - Alabaster);
- stones for decoration.
Hibiscus Beaded fairly simple to perform, andbecause of its weaving should not cause any difficulties. In addition, step by step photos that accompany our workshop will complement the theoretical exposition of a good example, and thus make the work easier and more successful.
When we're done, we can start.
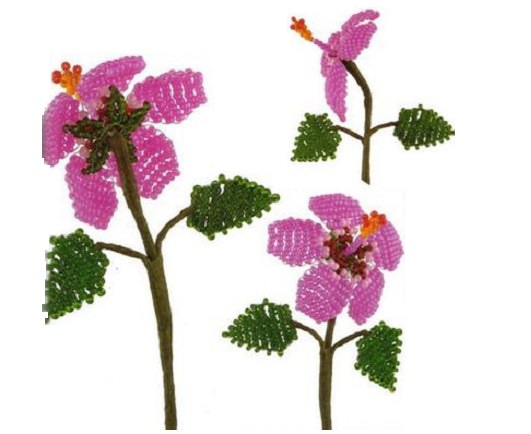
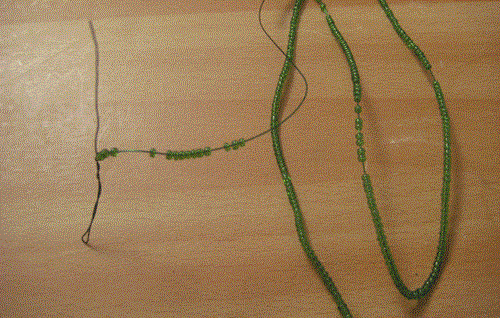
We are making the petals Our work we start with flowers weaving.
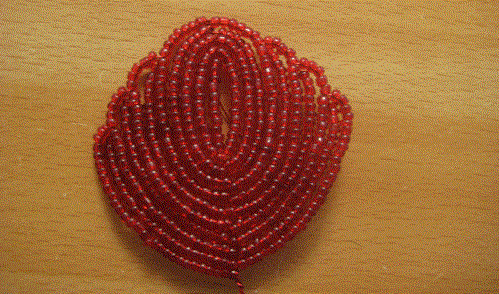
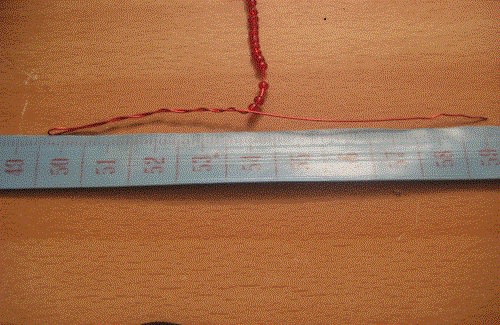
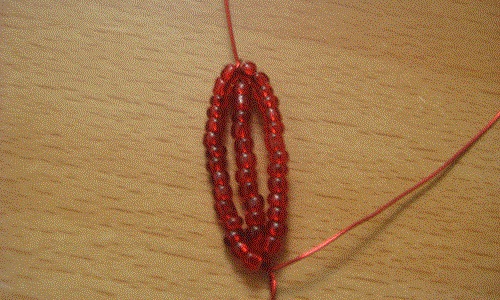
To begin with we take a wire about 50 cm long(We need this length, it seems best to perform the work, to avoid entanglement, and if necessary can be easily trate new piece). On it, using the French technique of weaving, stringing beads 11 bases. Next, the 4 arc on both sides, not forgetting each arc to increase for a few beads.
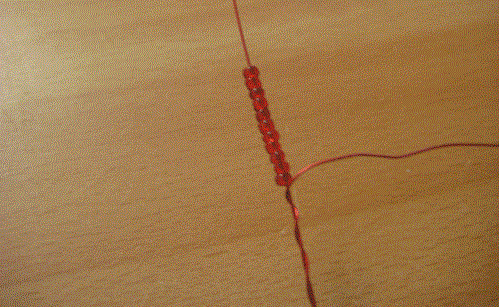
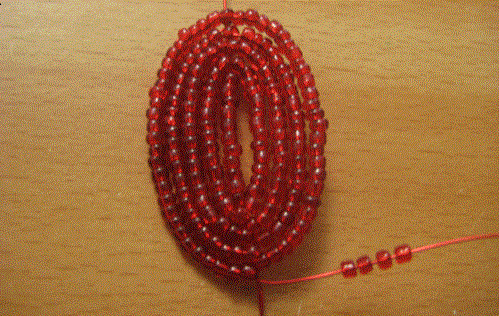
By performing a series of 4, we stop just above the middle and, passing under the wire 3 side by side, we come back.
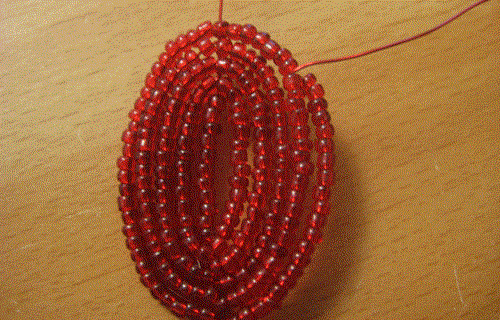
The other side of the petals of hibiscus perform in the same way, trying to achieve the maximum symmetry.
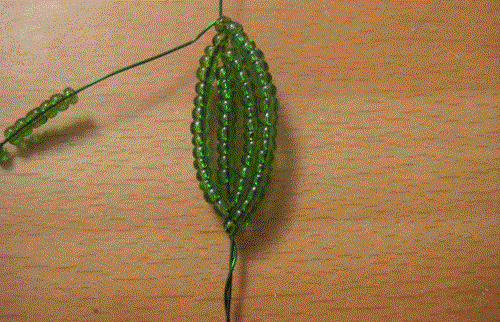
Then, the next row, and before reaching the end of the 5 beads, come back. Then, we do not reach at 3 beads, do not forget to pass the wire is still under 3 arc.
Now, a working wire leaving the top of thePetal, recruit her 3 beads and fasten them to the wire axis. On the reverse side also perform all: fasten wire at 3 arc, departing from the axis 3 beads. Finish line, continuing to weave the arc to the base of the petal. At the base is mounted on the axle and weave the arc, again without reaching the end of the 18 beads.
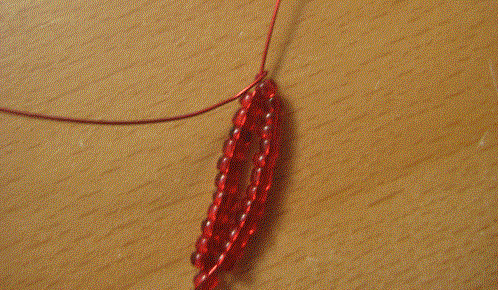


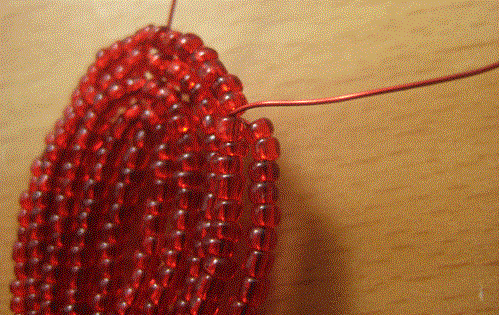


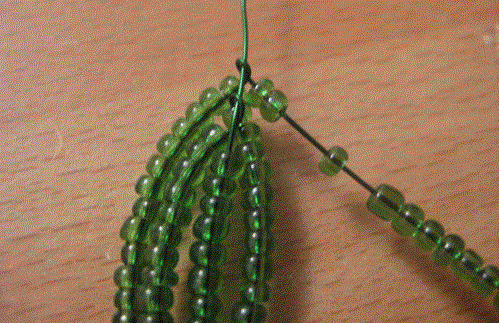
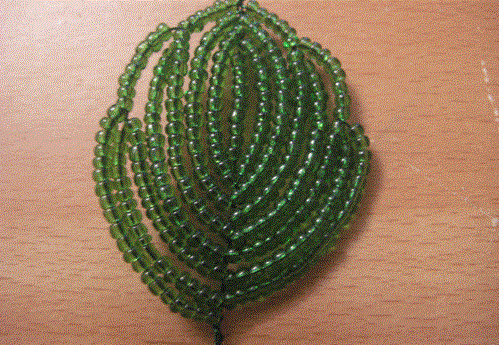
We have already formed a hibiscus petal. Further, if desired, you can decorate it with patterned edges or enter into another color weaving beads. registration methods vary and can be performed in several different ways:
As you can see, beading allows using only one schema, create different petals of the same flower.
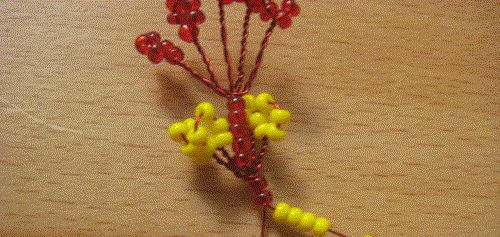
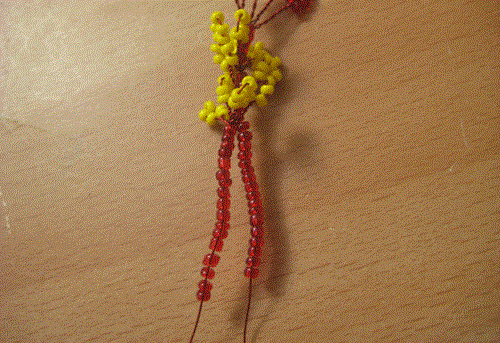
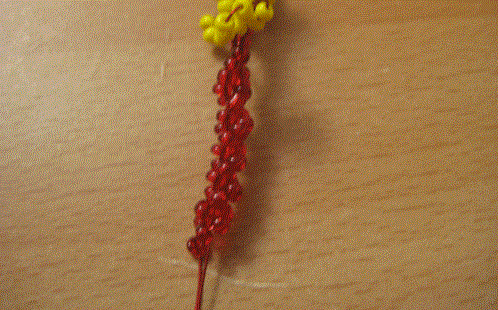
The core of the mid of a flower hibiscus can be framed too few options, but traditionally it is made up of stamens, several loops.
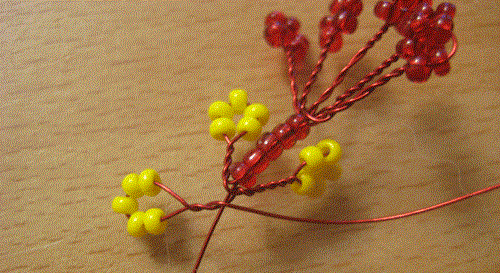
Stamen
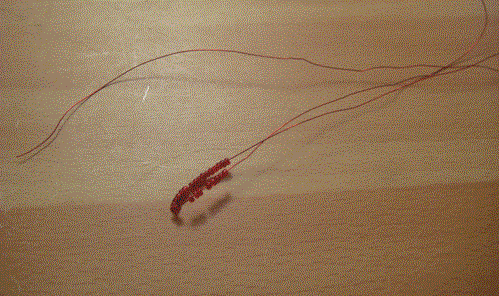
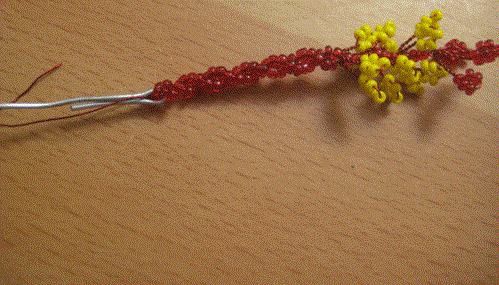
At 25 cm long wire recruit 25 redbeads and, leaving the tail forming a loop of beads 5, further tedious wire twist (turns the leg of one centimeter). Repeat the same steps with the other beads. Next on the tails strung beads 5 and move to the legs.
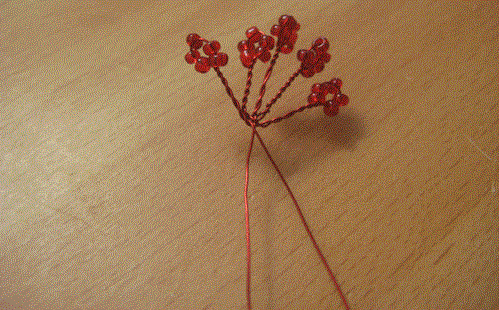
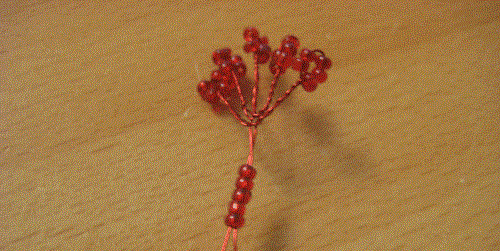
eyelet
To make this element should dial theone of the ends of the wire, where we formed red stamens yellow beads in an amount of 20 tricks. Now we make 4 loops, consisting of 5 beads. Then again strung red beads on the 2 pieces and continue to generate the same yellow tabs. Thus forming a series of three loops of the yellow and then on the tip of each strung red beads and twist the wires together.


Buds Alternatively, your floral arrangementcan complement buds. For hibiscus buds, do the French weaving a few small leaves of different sizes. Then the leaves to twist the two to form a bud. For the leaves bud must be 5 tabs of green beads.
Sheet leaf hibiscus Technology repeats weaving petals. The only difference that weave their green beads.

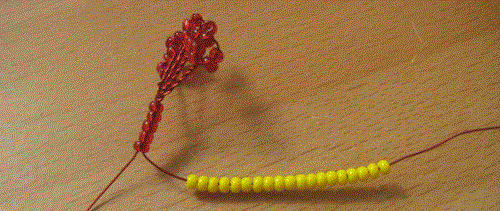
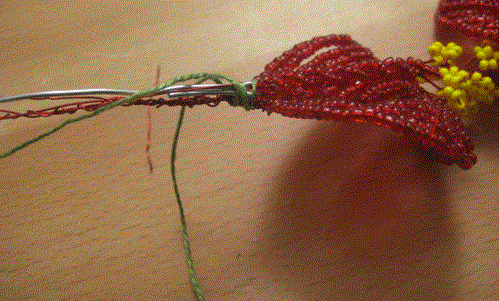
When the process of assembling all the elements are readyWe proceed to the assembly. Fold first all elements of the flower, and then collect the bud, not forgetting to securely attach it to the stem. Wrapped with tape or thread stem bud, and then add up the flowers, buds and leaves in a bouquet.


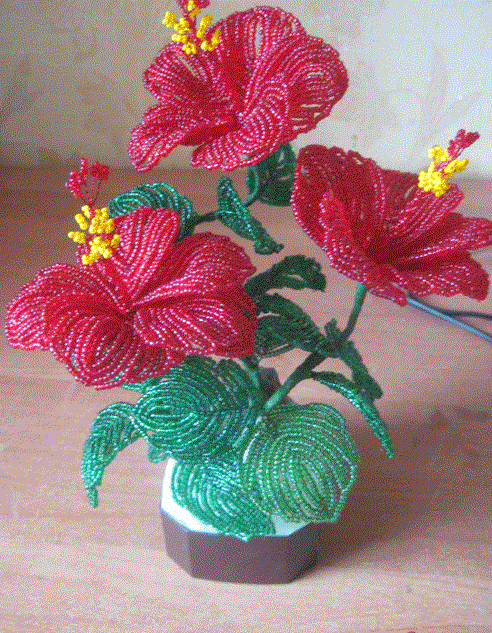
In a pot pre-breed plaster if you want you can paint, but you can leave and thus, making inlay stones. More details on how to arrange the finished product you can learn from a special video.
Driving parallel weave hibiscus
We have considered you a more complex versionperform hibiscus. If you think that not enough are ready to implement it, you can start with a simplified version, namely the parallel weaving and make a flower using such schemes here:


Uncompromising love for creativity will help youcreate a truly beautiful hibiscus beaded, and our workshop with step by step photos and videos that will be a great addition and inspiring element. Good luck and enjoy your creativity.