Izon for beginners scheme with numbers butterfly (pictures)
Content
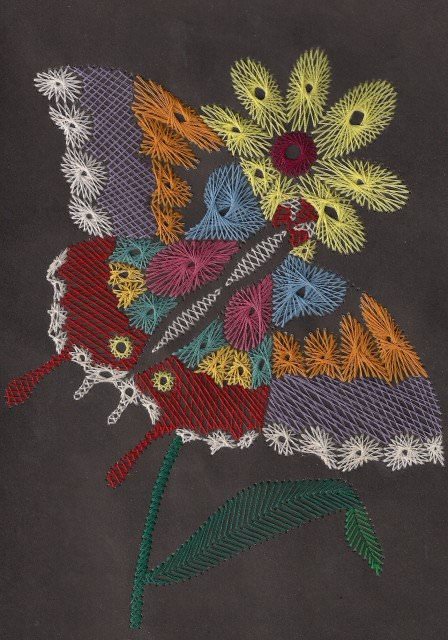
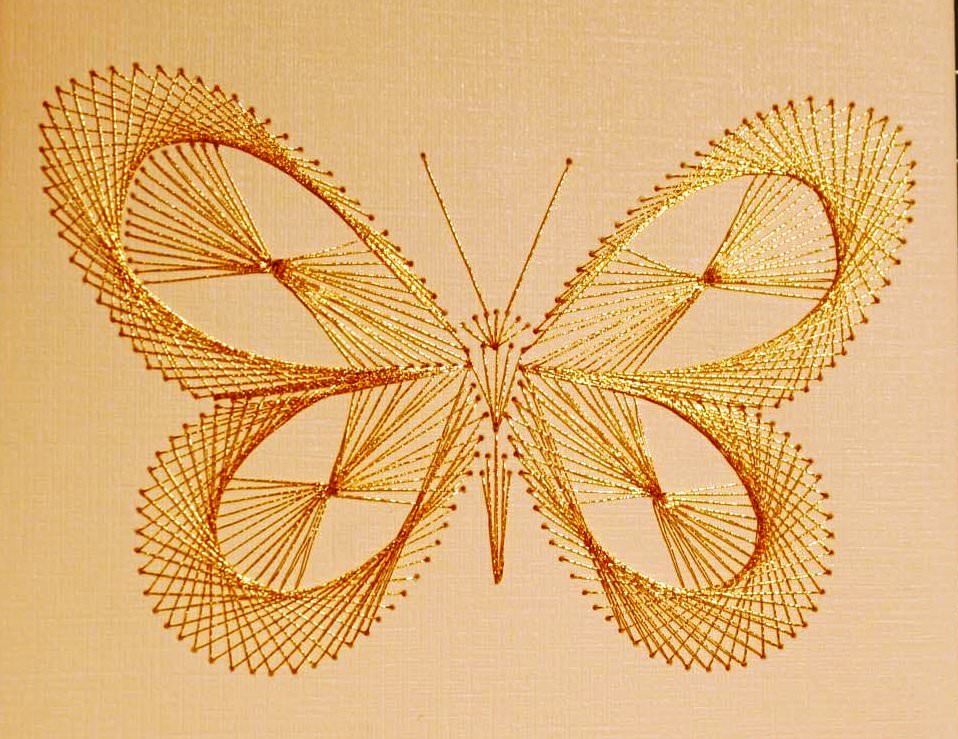
Beautiful, original and amazing at the same timeSimple needlework for beginner embroiderers is to quit. The butterfly made in this technique will be both an excellent gift and a magnificent addition to the interior.


Inventory
"Born" on the shores of the Foggy Albion,The technique of "isolate" today enjoys great popularity in the domestic space. Taking into account the fact that today both the master class advice and the diagrams with figures come to the assistance of the needlewoman, the product does not seem complicated at all. In order to get started, you need to prepare:
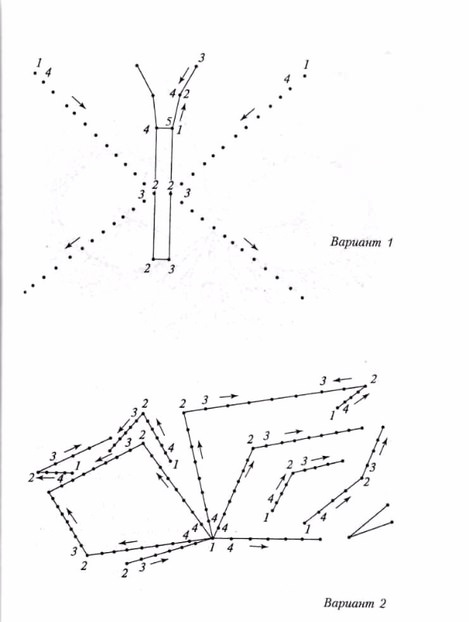
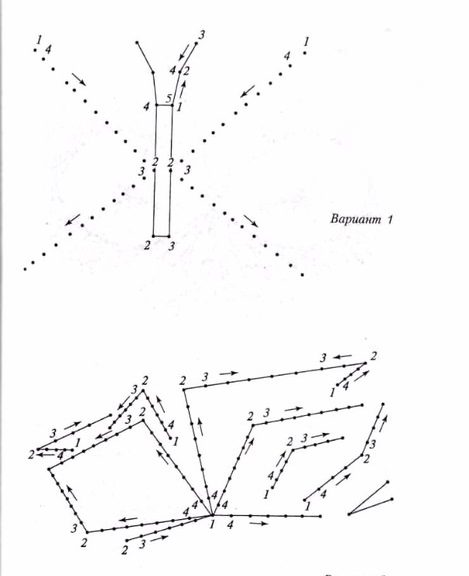
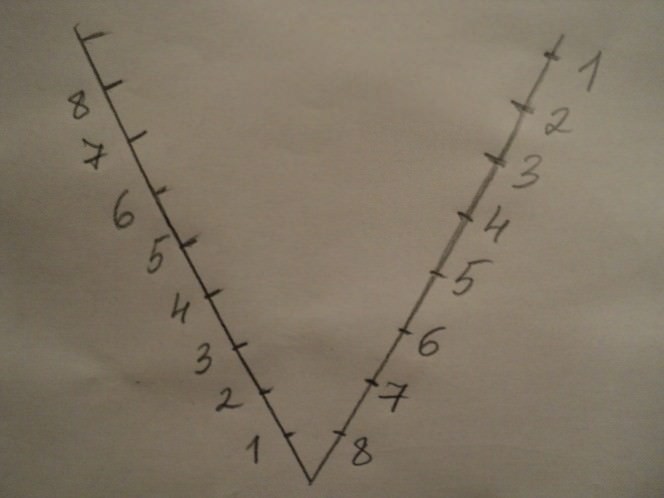
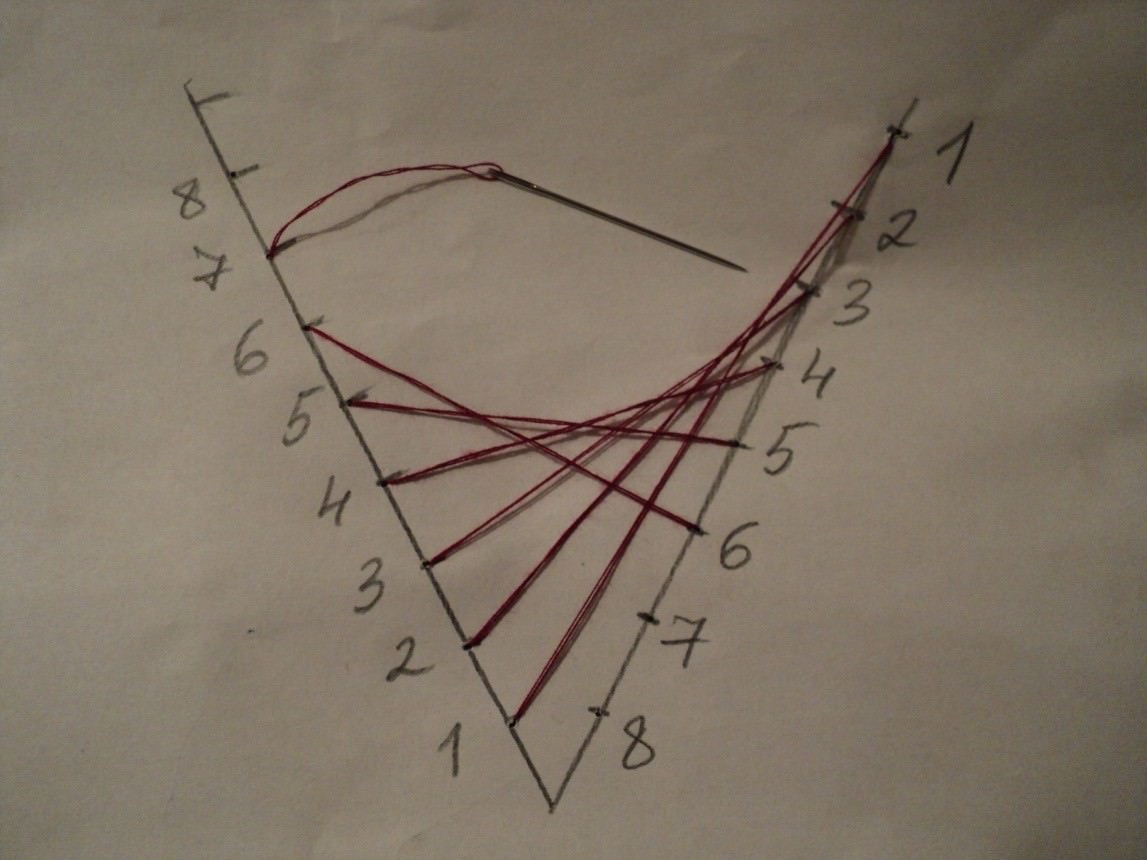
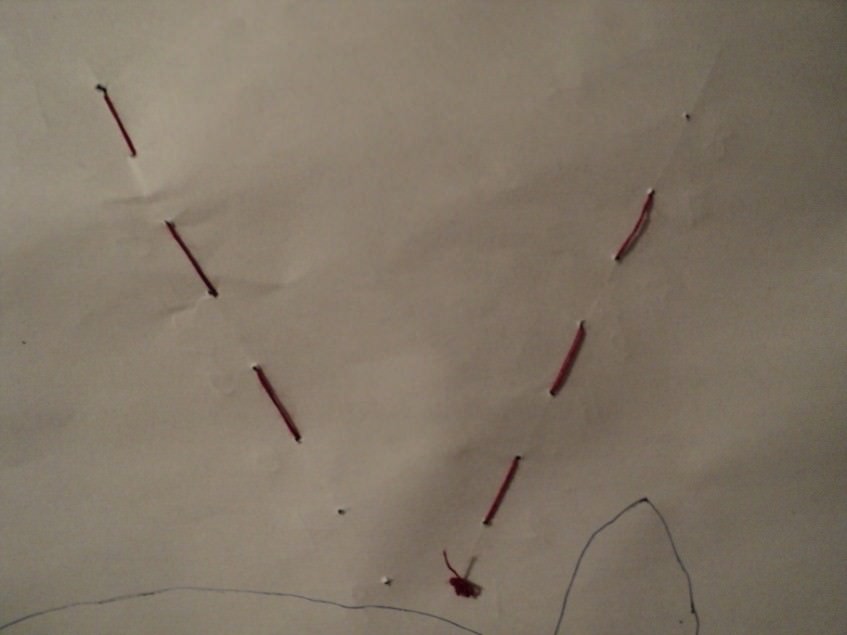
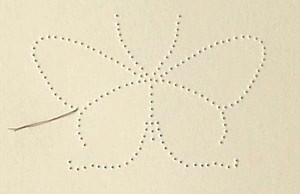
Working on an angle
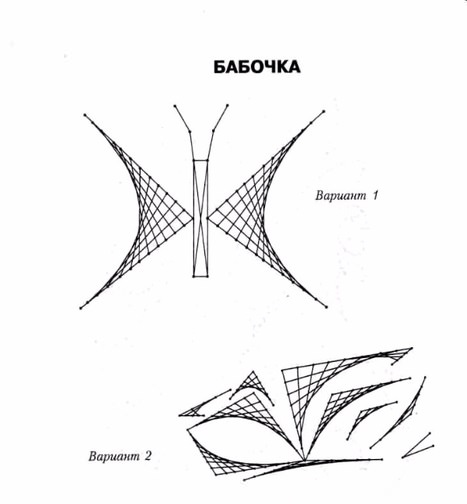
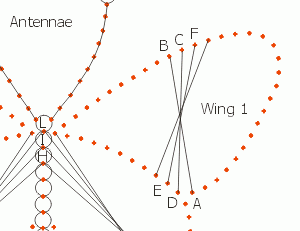
For many novice craftsmen, the technique of "isolating"Seems complicated. But this is not so, and having mastered the basics, you can create real masterpieces. The "butterfly" pattern assumes the presence of not only round, but also sharp elements. In this regard, you need to learn the regularity of the execution of stitches when filling the corner. To do this you will help a master class for beginners.
Do the following manipulations:
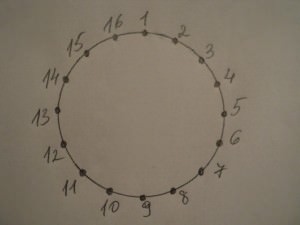
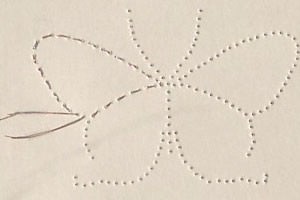
Work on the circle
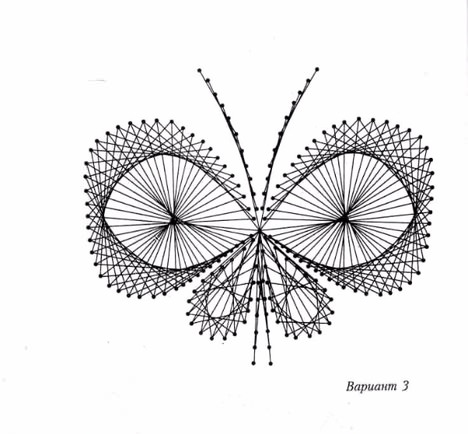
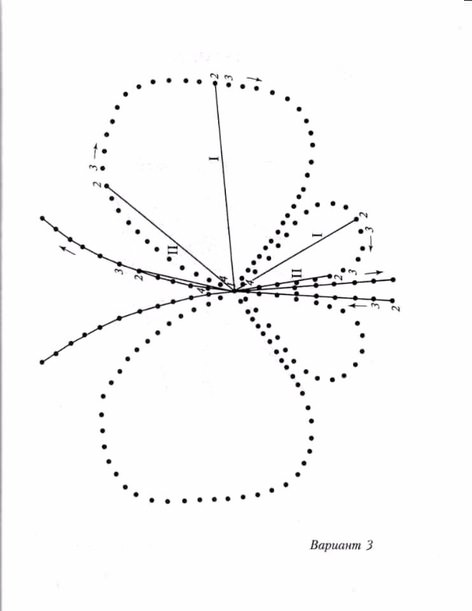
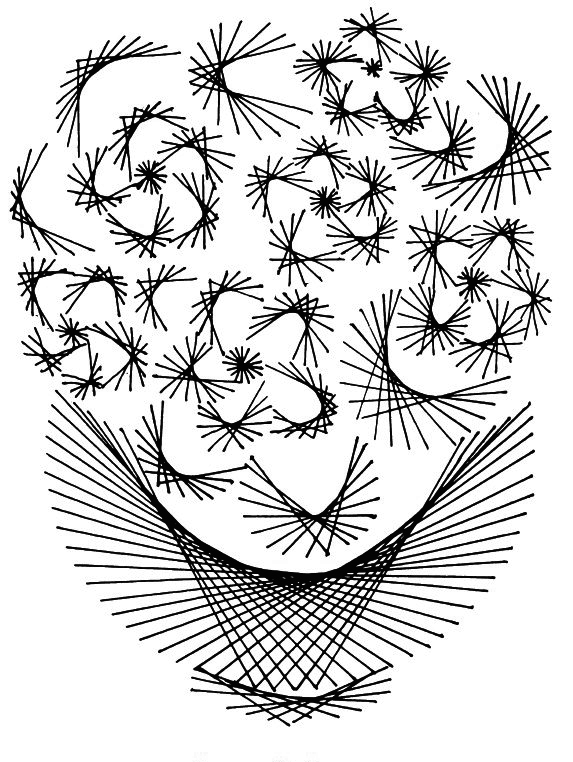
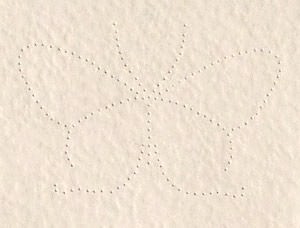
The butterfly consists of four circles. Also, depending on the scheme with figures, the drawing can be supplemented with other nice elements.
In order to fill this figure in the technique of "isolate", you will have to perform simple manipulations, which the child can handle.
We are working on a circle "Arming" with a template or a compass and proceed to the actions recommended by the master class for beginners.
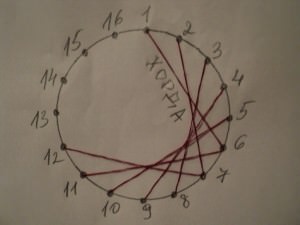
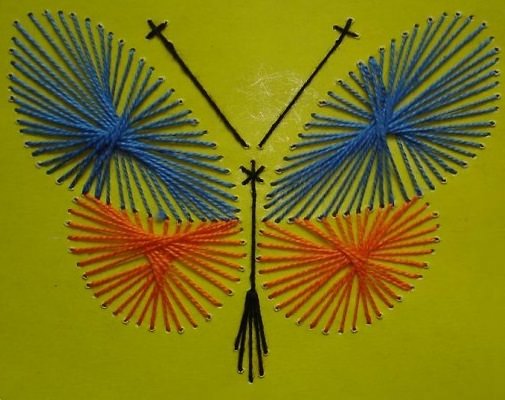
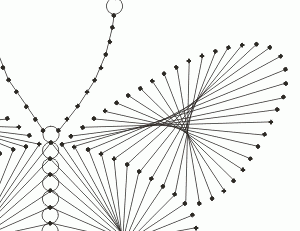
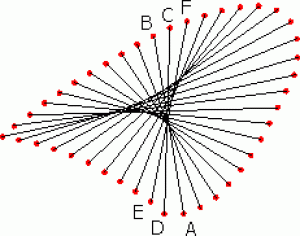
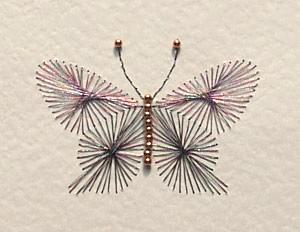
We work with the wings of the butterfly After you have "stuffed your hand", you, guided by the hints of the scheme with numbers, you can create a whole composition of butterflies. You should act as follows:
The wing is ready!

Remember that the patterns in the technique of "isolate"Will differ depending on the large or small distances between points, called chords. Depending on what the scheme advises you, you can fill the figure by the diameters. If you divide your circle-wing into eight equal parts, then you will get a surreal butterfly a la Salvador Dali. The pattern on its wings will be stellate or spiny.


A few tips
If you are just learning this simpleTechnique, the embroidery of circles and corners must be fixed with a different number of points. Embroider figures in this way: fill a large circle in one direction, and small - in the opposite direction.
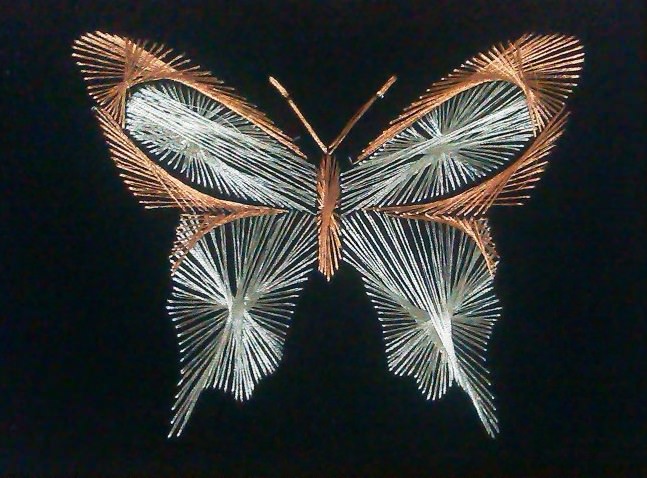
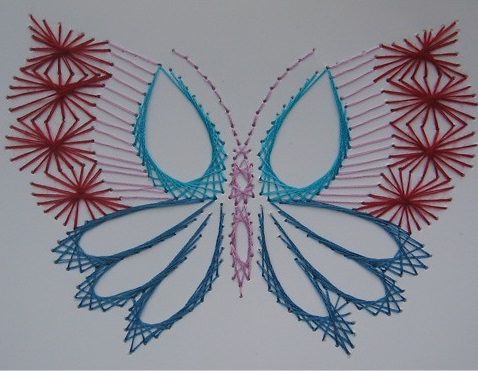
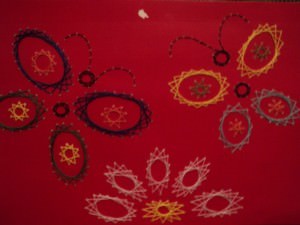
A little later you can create interesting, unusual and rather complex pictures and successfully experiment with threads of different colors.
The threads you use can be eitherOrdinary coil, and woolen thin. The denser the structure of the thread, the more extensive the product will look. If you choose a fine thread, then the butterfly you made will be more lacy and delicate. Experienced craftswomen recommend using silk threads. So, regardless of the wishes of the chosen scheme, the drawing will look exquisitely and richly.
Also, beginners should follow certain rules:
- Nodules do not need (they easily slip through the holes), it is best to use adhesive tape or glue;
- Markup should be done on the wrong side of the job;
- From the front side of the product holes should be performed with a thick needle, with the back - using a thin;
- If the drawing is shallow, the pattern will look much more refined and interesting;
- The segments must be exactly the same.
Finally
After you master this simple technique,You can perform more "serious", intricate patterns. The works done by isoniazes are perfectly combined with both strict office and cozy home interiors.
Butterfly patterns with numbers