Guide to the manufacture of fluffy white rim in Kansas technique
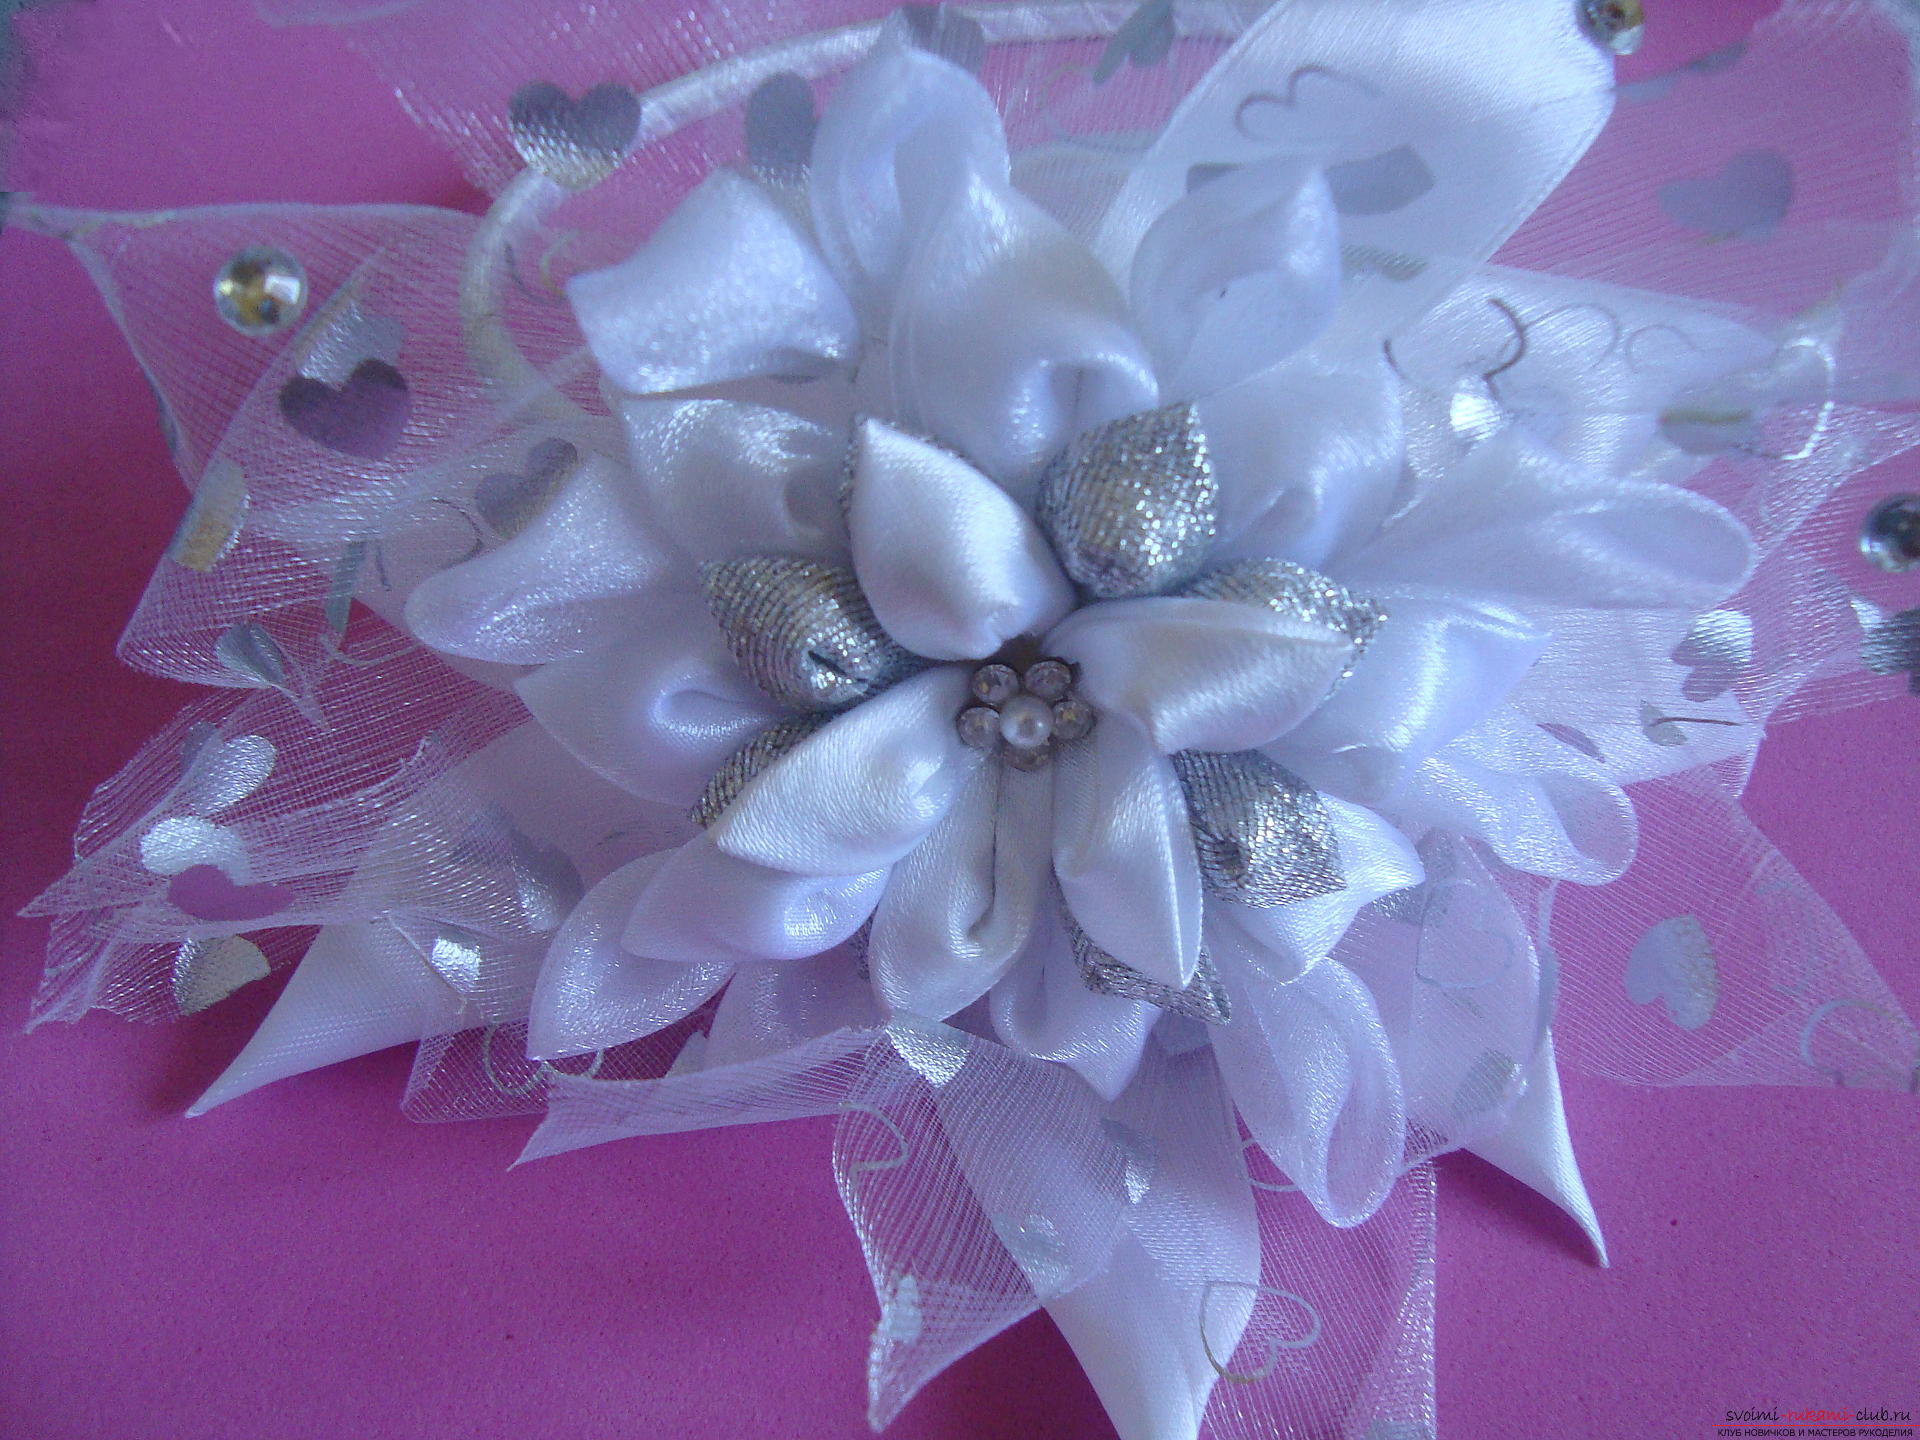
This festive bezel in white color will suitfor a little princess or for a schoolgirl. It is created from satin ribbons and organza. Incredible volume of the product is due to multi-layered petals, the flower looks unusual, original and very beautiful.
To create a rim with a flower kanzashi, prepare:
Video guide
Stages of work
The first step is to prepare the bezel. It is better to wrap it with a thin braid, then the bezel will get a snow-white appearance, and will not stand out from under the huge decoration of white ribbons of different texture. Tours of the winding must be tightly fixed to each other, so carefully tighten the tape. To tape from the rim did not bloom, it needs to be fixed with glue every 3-4 cm. To do this, apply a drop of glue on the back side and immediately press it to the rim, wait a little - until the sticky mass freezes. Be careful when working with hot melt, it is quite hot and can leave burns on your fingers. Decoration on the rim is created in two stages. First you need to make a base of long thin petals, which will determine the volume and originality of the work. Then, the curved petals are created for the central neat flower. For a flower, square blanks are required, their size is the same as the width of the braid, that is 4 by 4 cm. The number of white elements is 13, and 5 pieces are prepared for the silver squares. 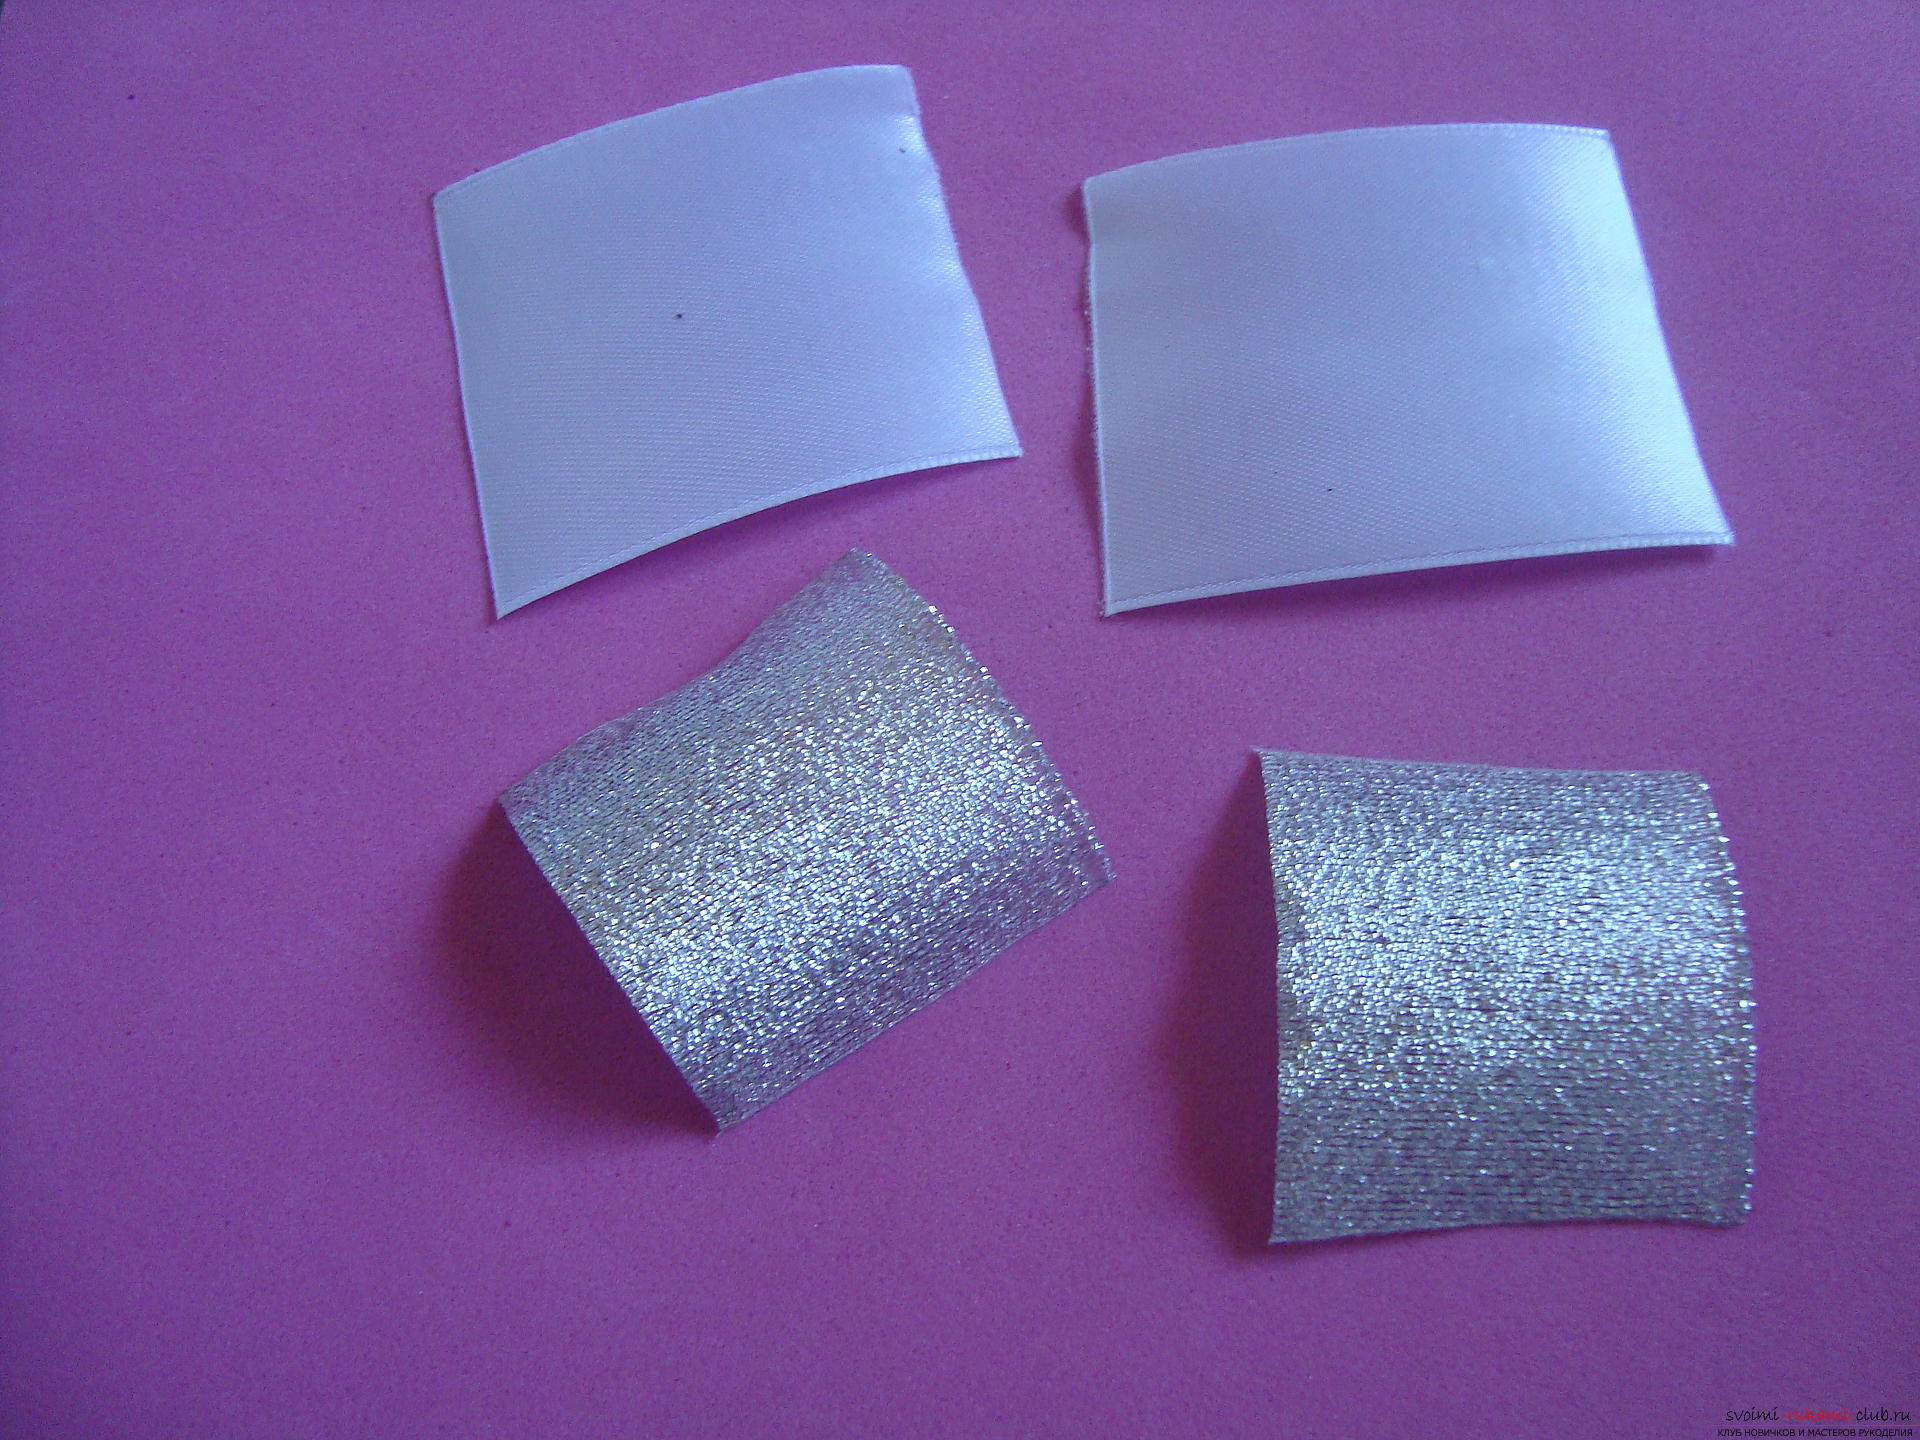 Each prepared element is bent along an oblique line to form a rectangular triangle.
 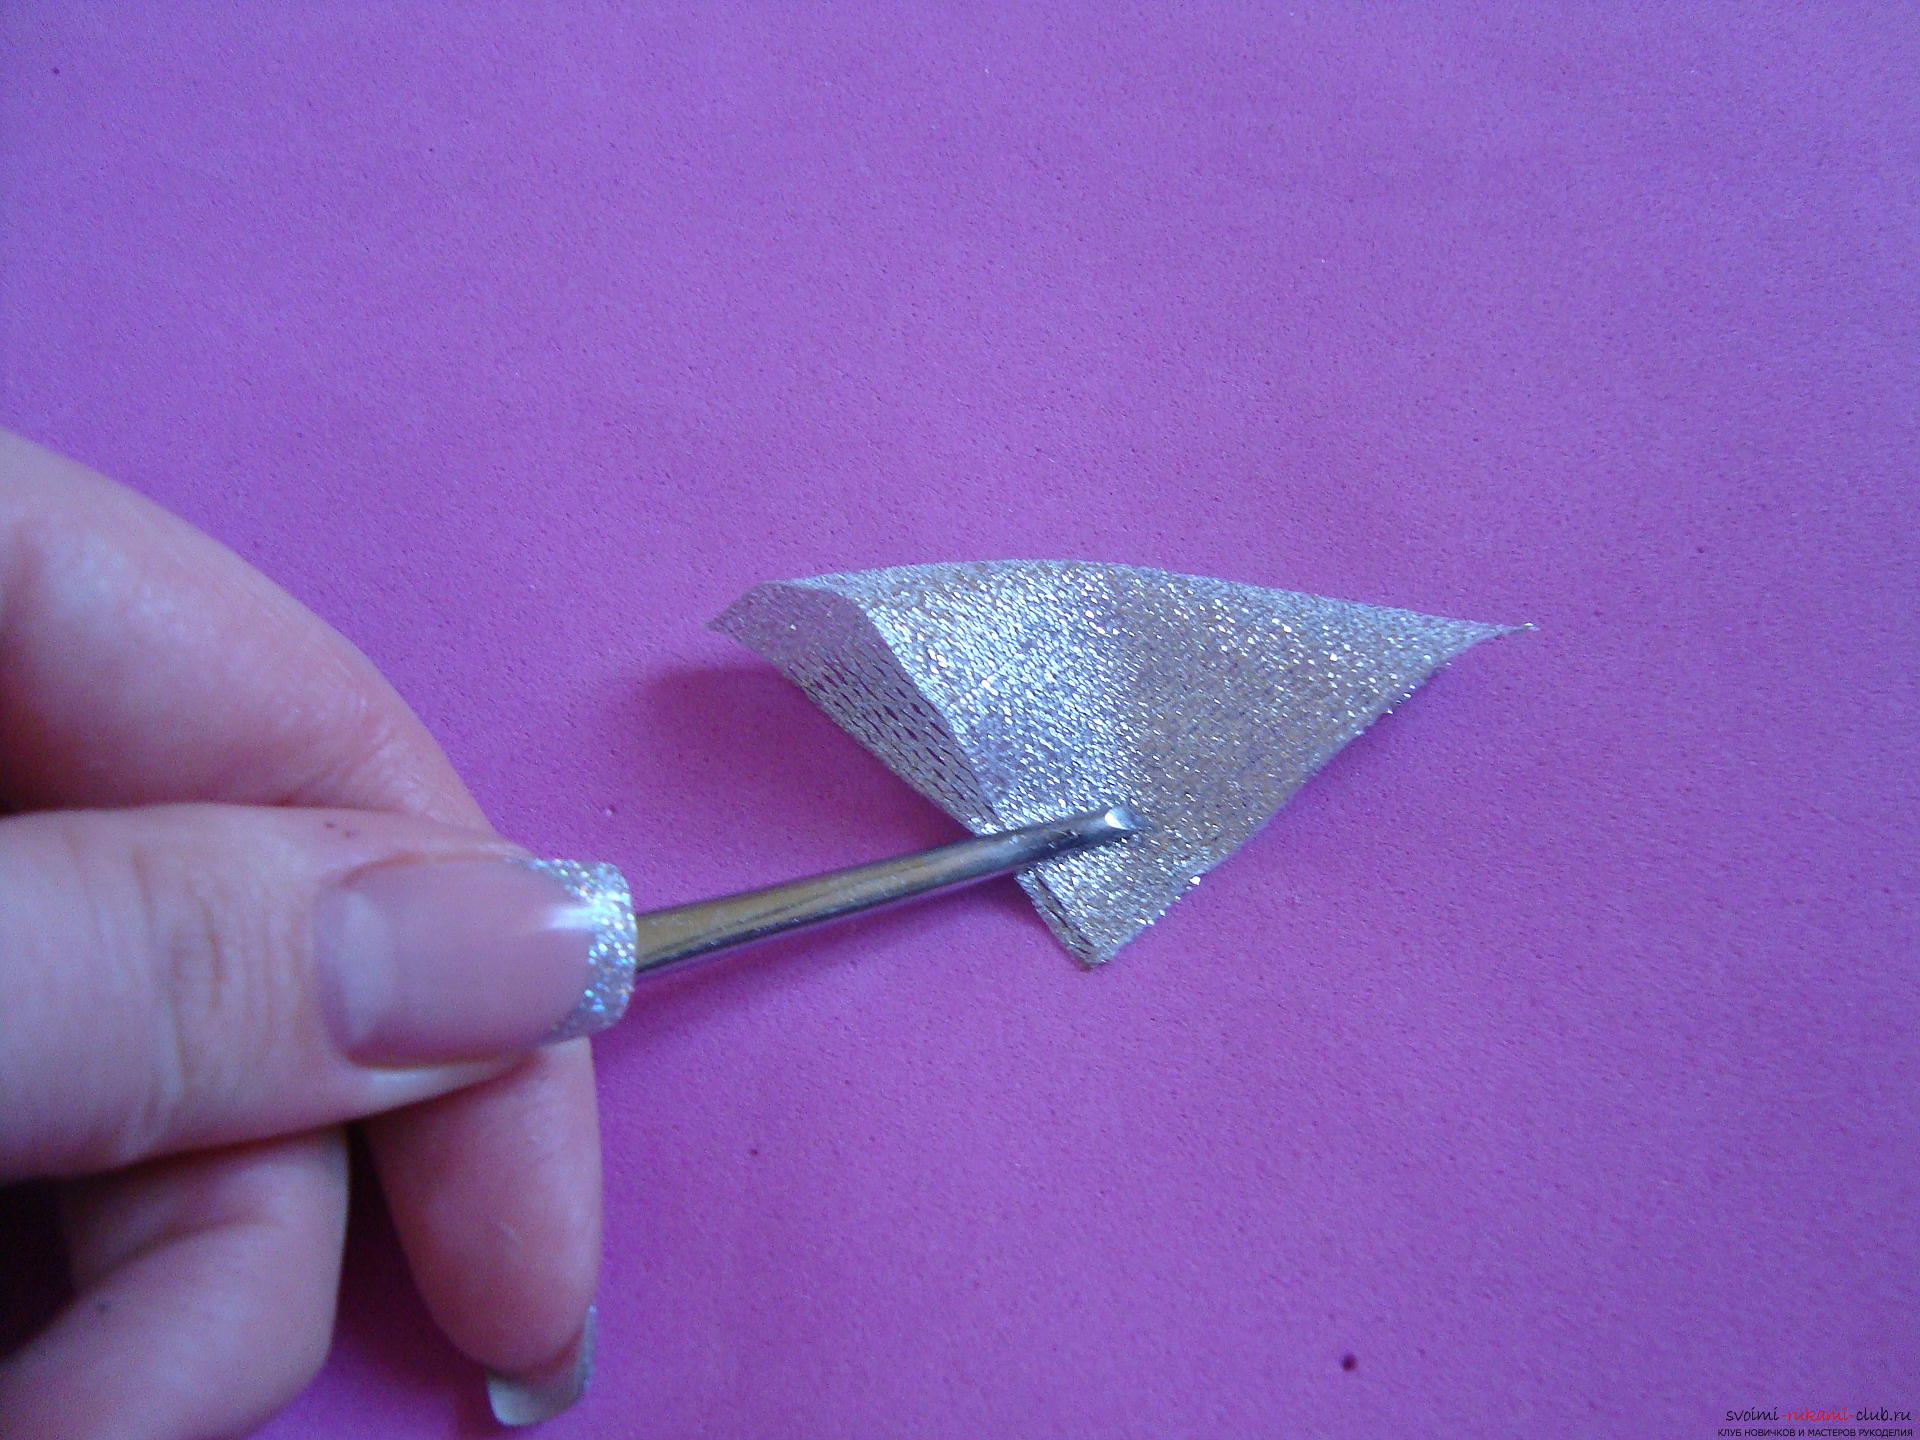 Then the workpiece from satin or silver brocade is required to bend in the middle, or more precisely along the median line of this triangle, to form a new triangular shape, but already in four layers.
 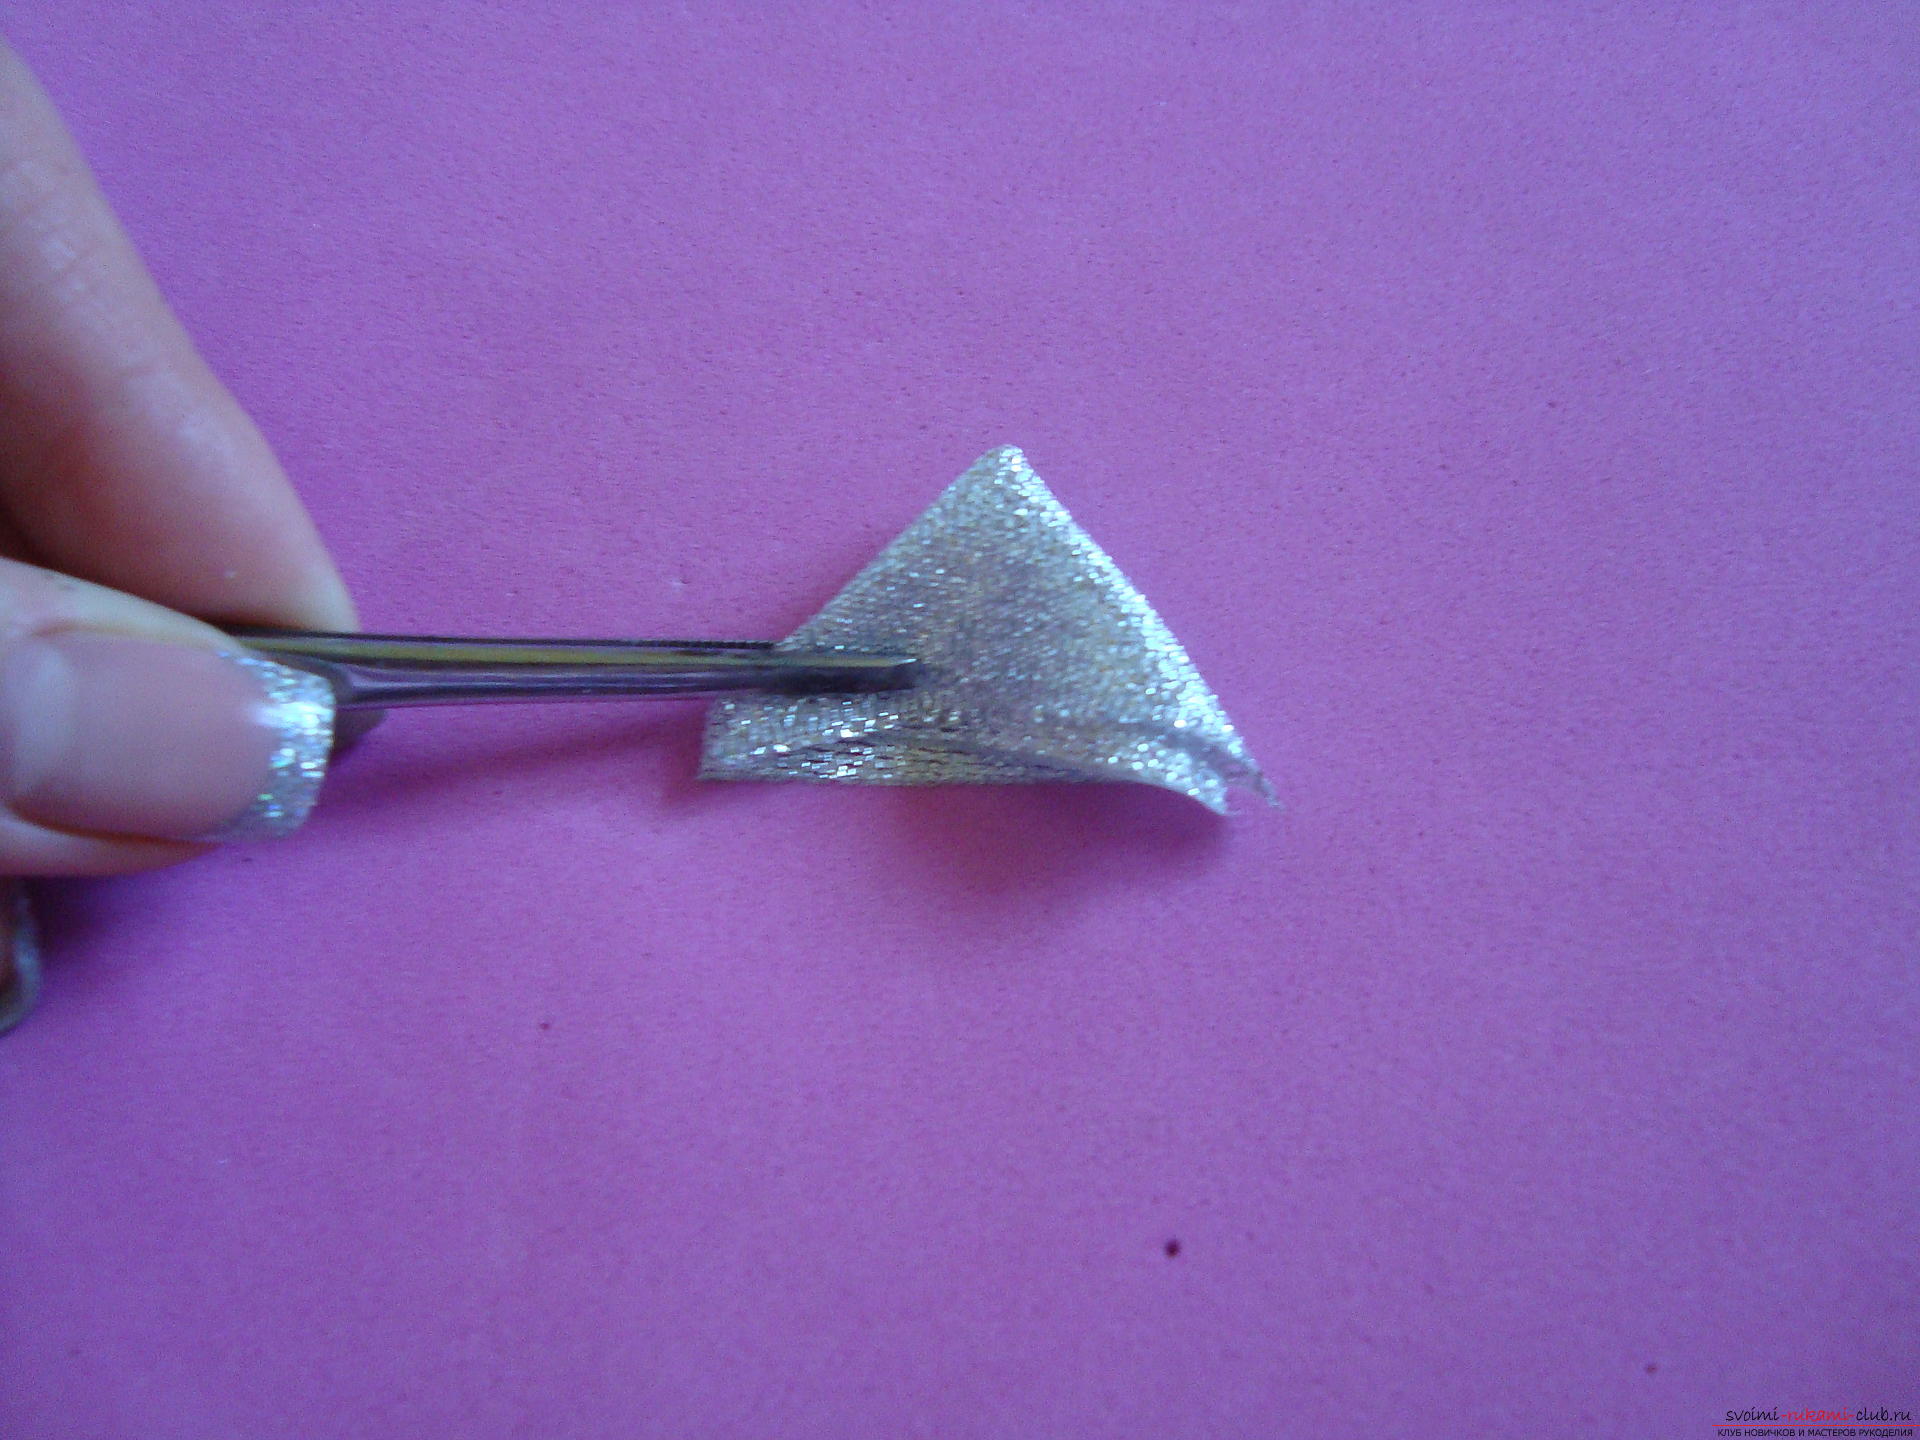 We visually mark the central line of the workpiece, which will divide the right angle in half, press the nail into this place to help in the bending of the details of the sharp corner to form at the top.
 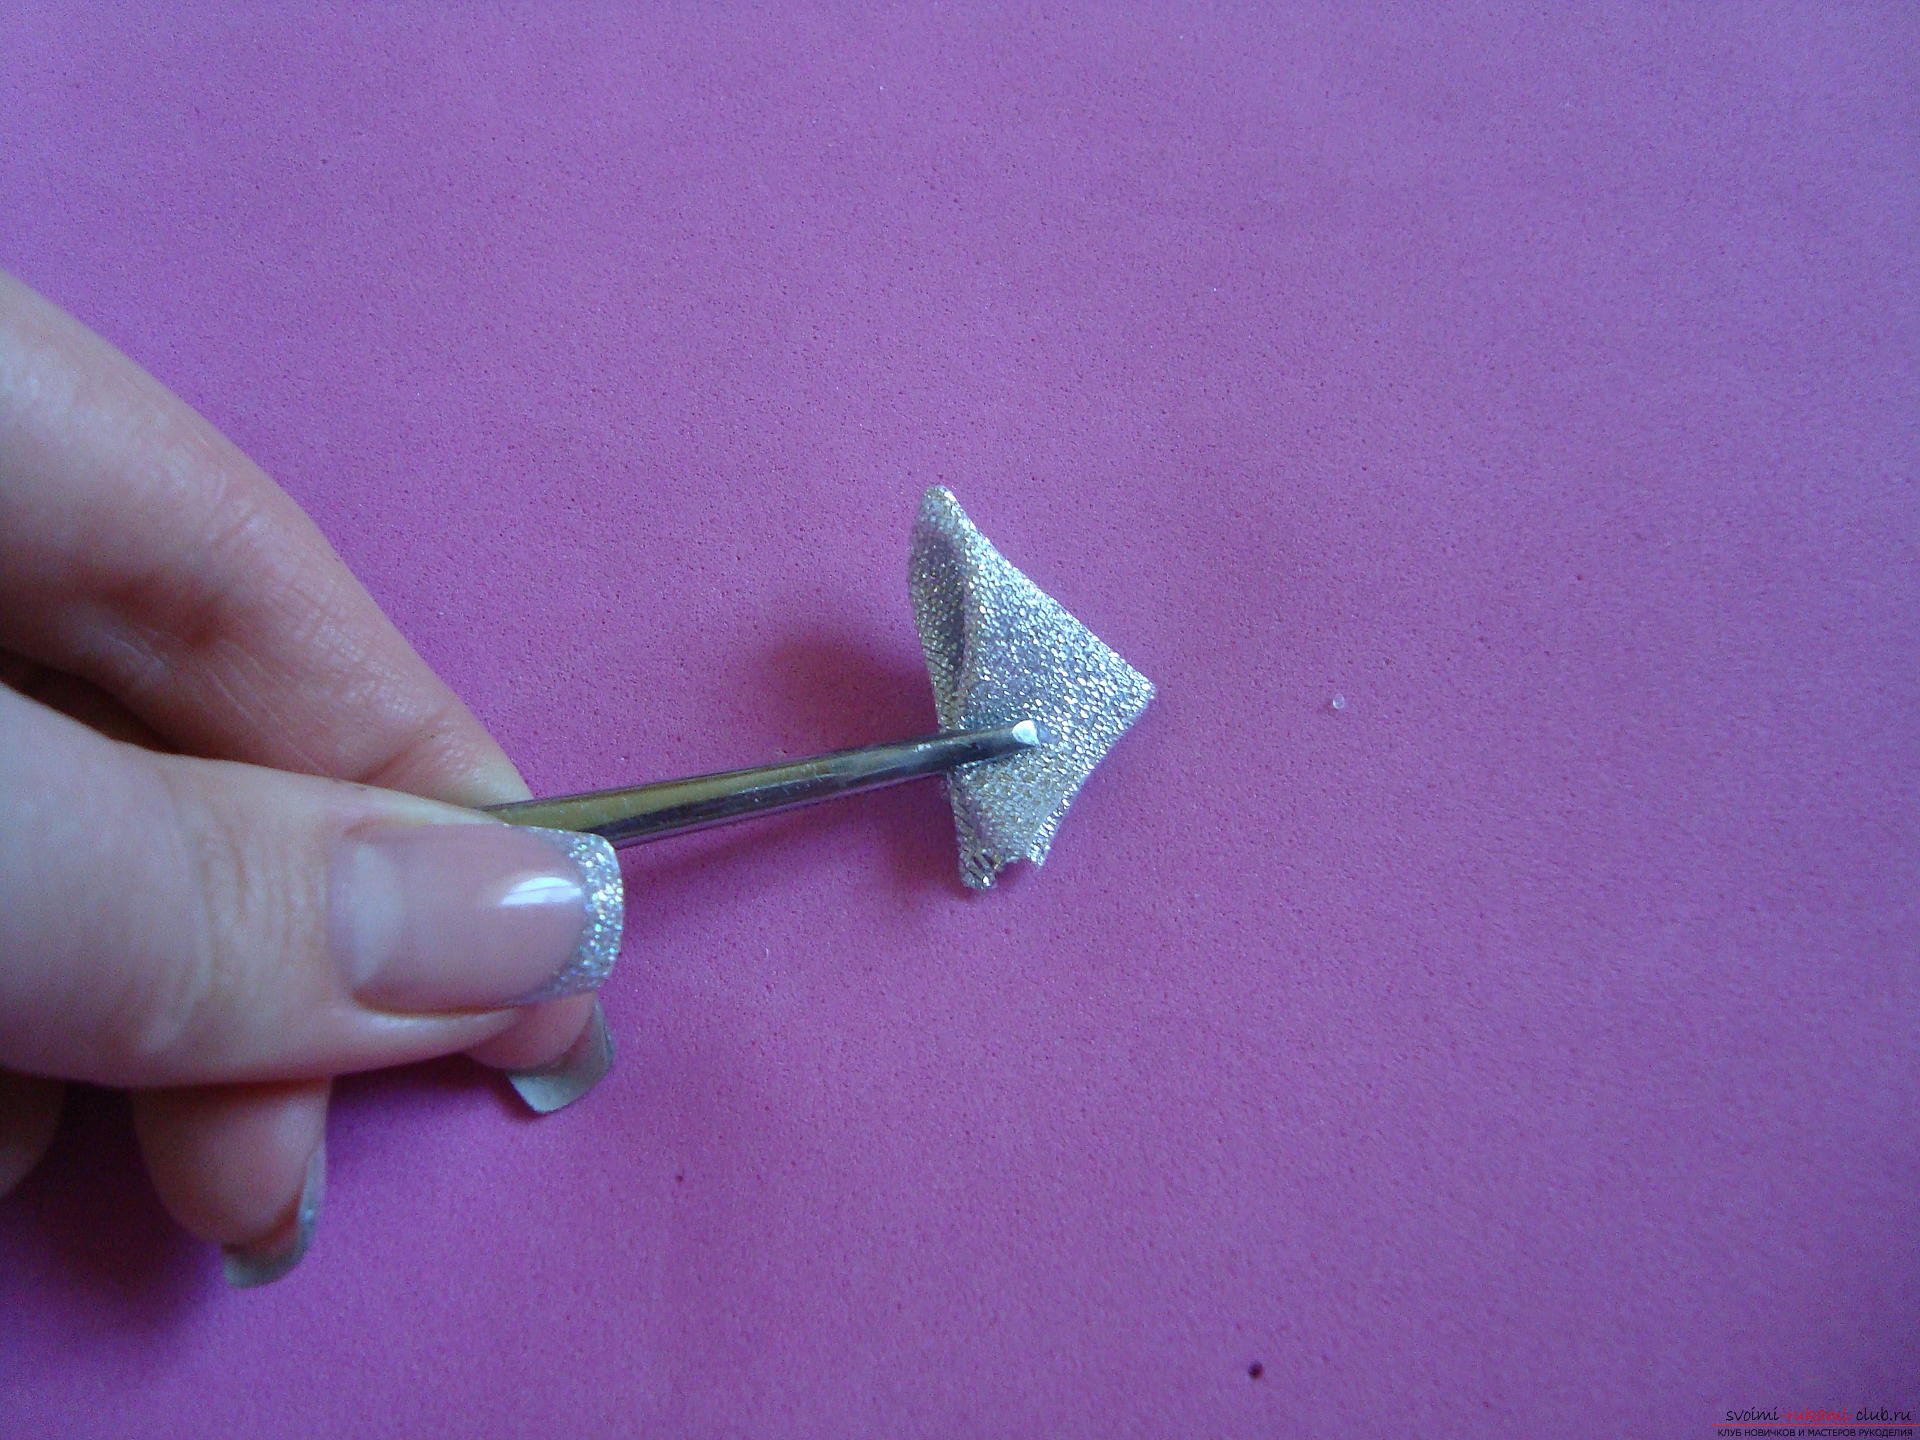 Thus, a sharp petal is born, but itsyou need to fix it. To make the petal take its final form, it is necessary to solder its lower part with a very hot burner. To do this, press the bottom of the part with a ruler (the petal is on its side), and with one confident movement draw a line along the ruler, while the burner is pressed into the fabric. The element should get a straight line at the bottom.
 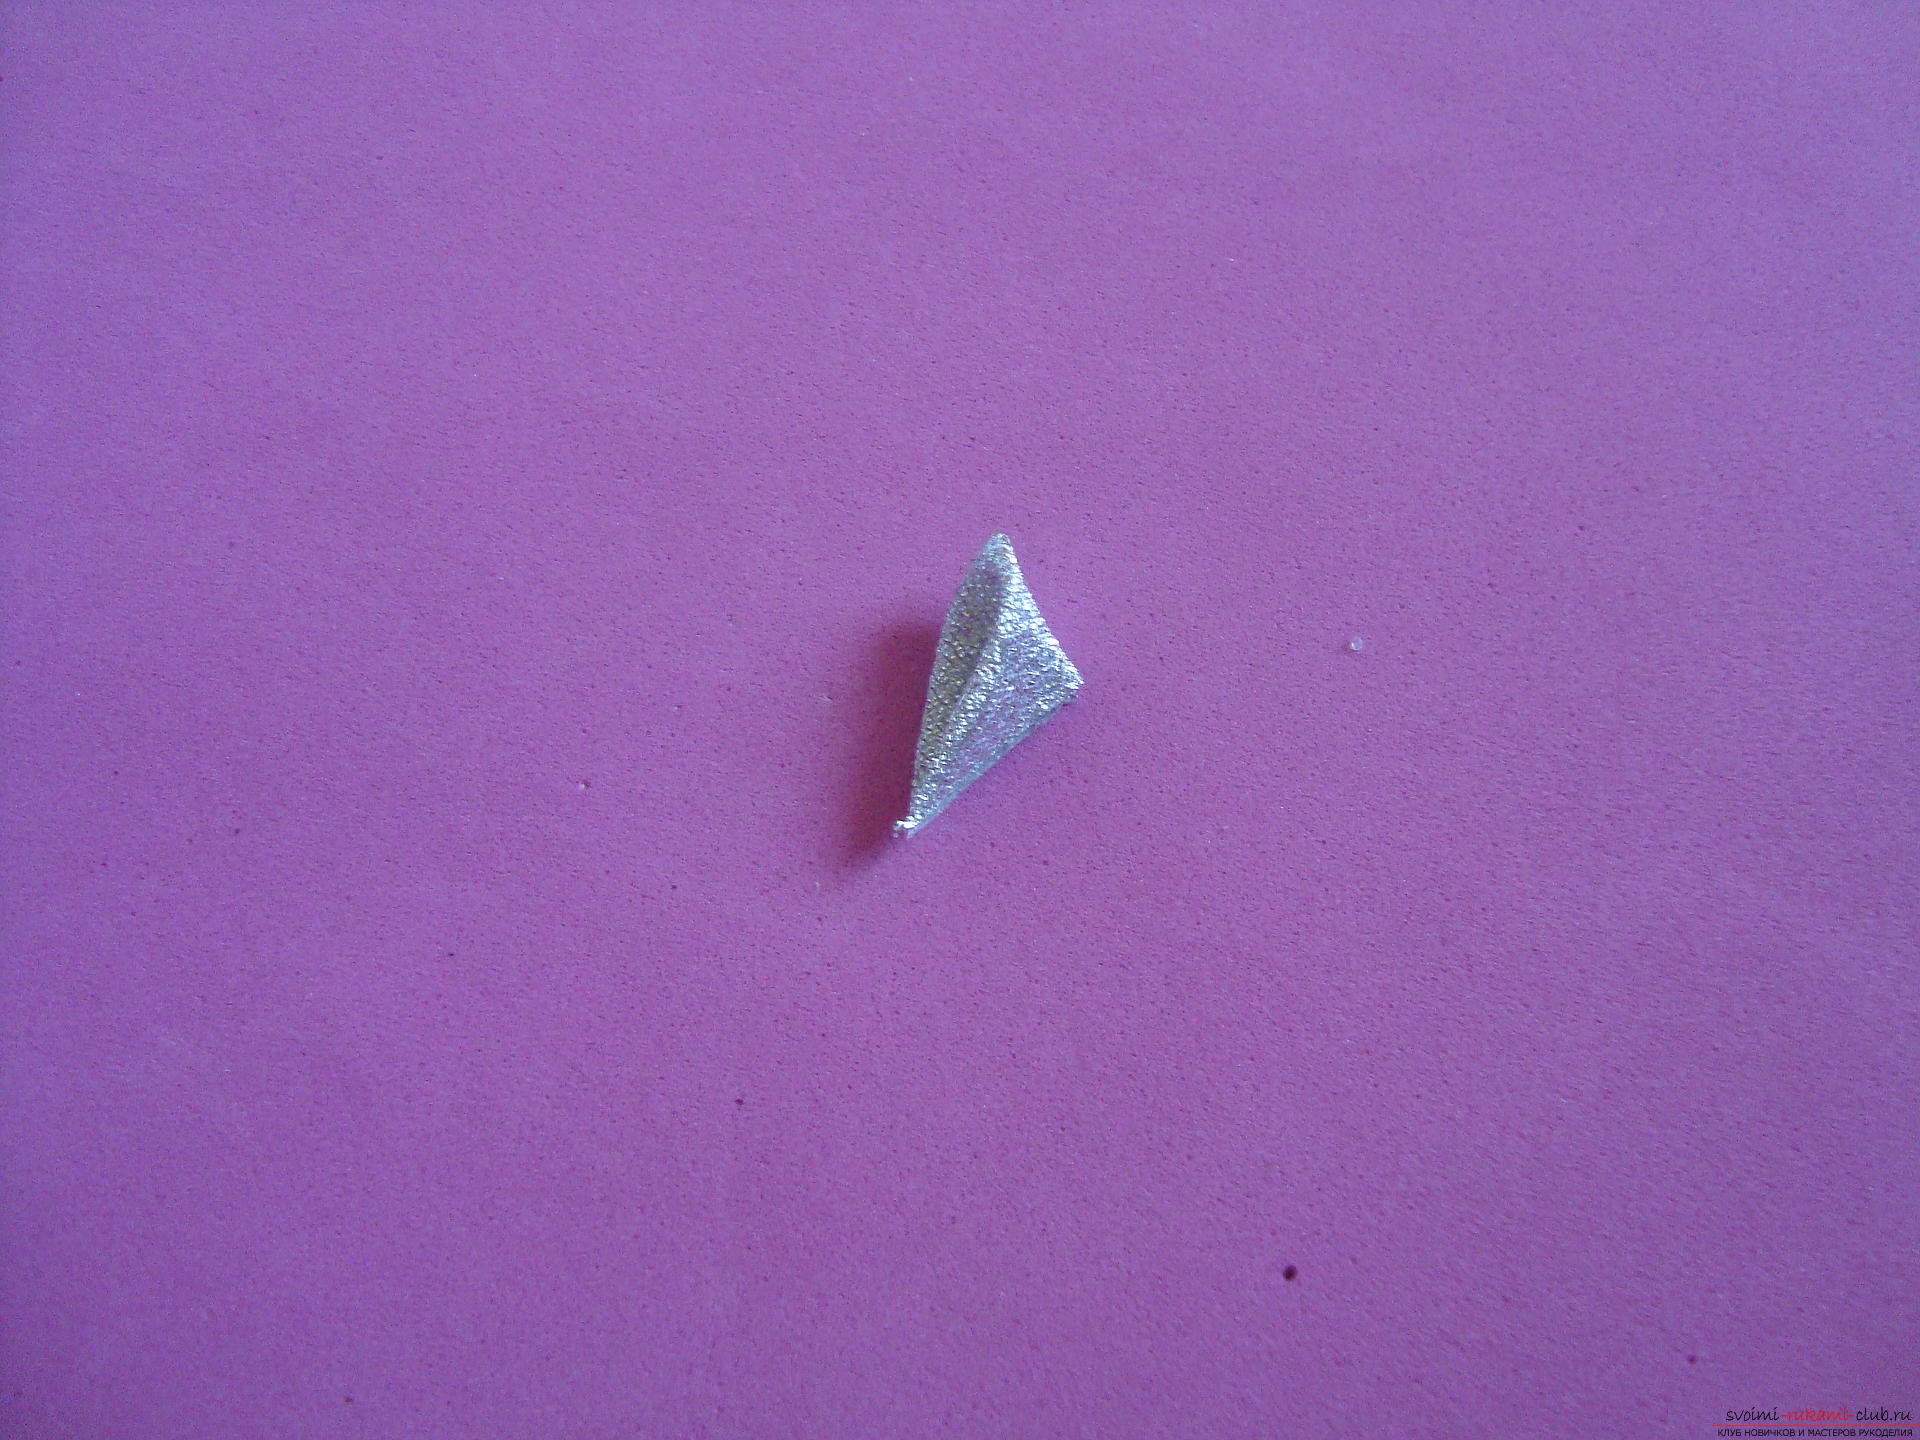 Then the petal should be bent to make it look like a boat. This form of the element will provide an unusual kind of flower.
  It is from this form of petals that thecentral flower ware. For the edges, you need other long petals from a narrow ribbon, which is divided into 8 cm pieces. Fold the ribbon piece smooth side outward and clamp one edge at an angle of 45 degrees with a ruler.
 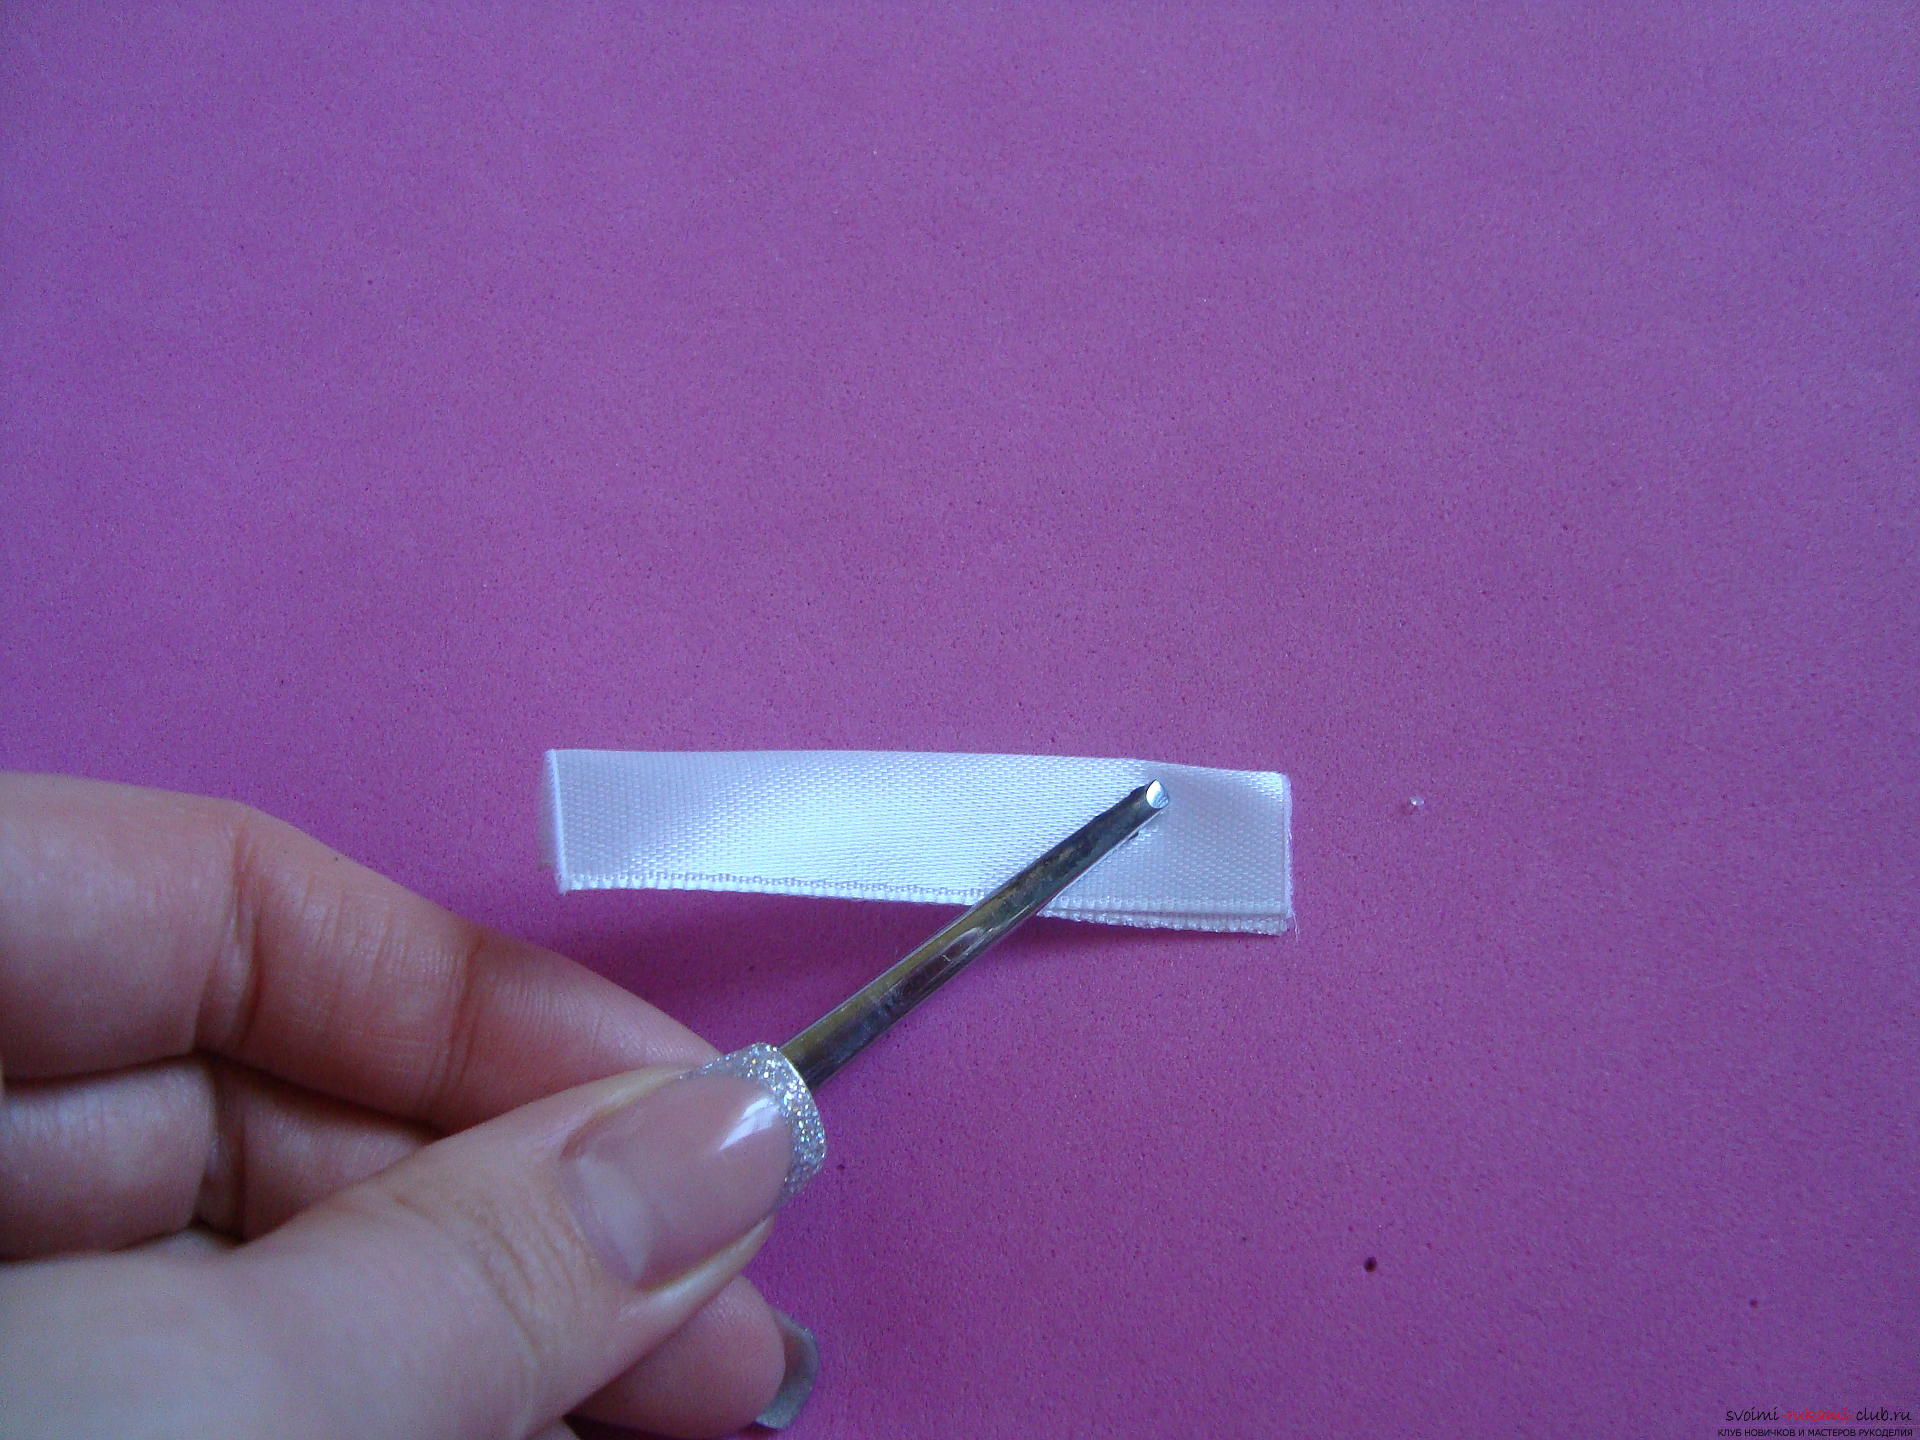 With the burner, cut off the edge of the part to create an acute angle. When burning, it is necessary to solder the edges, so hold the part well against the glass with a ruler.
 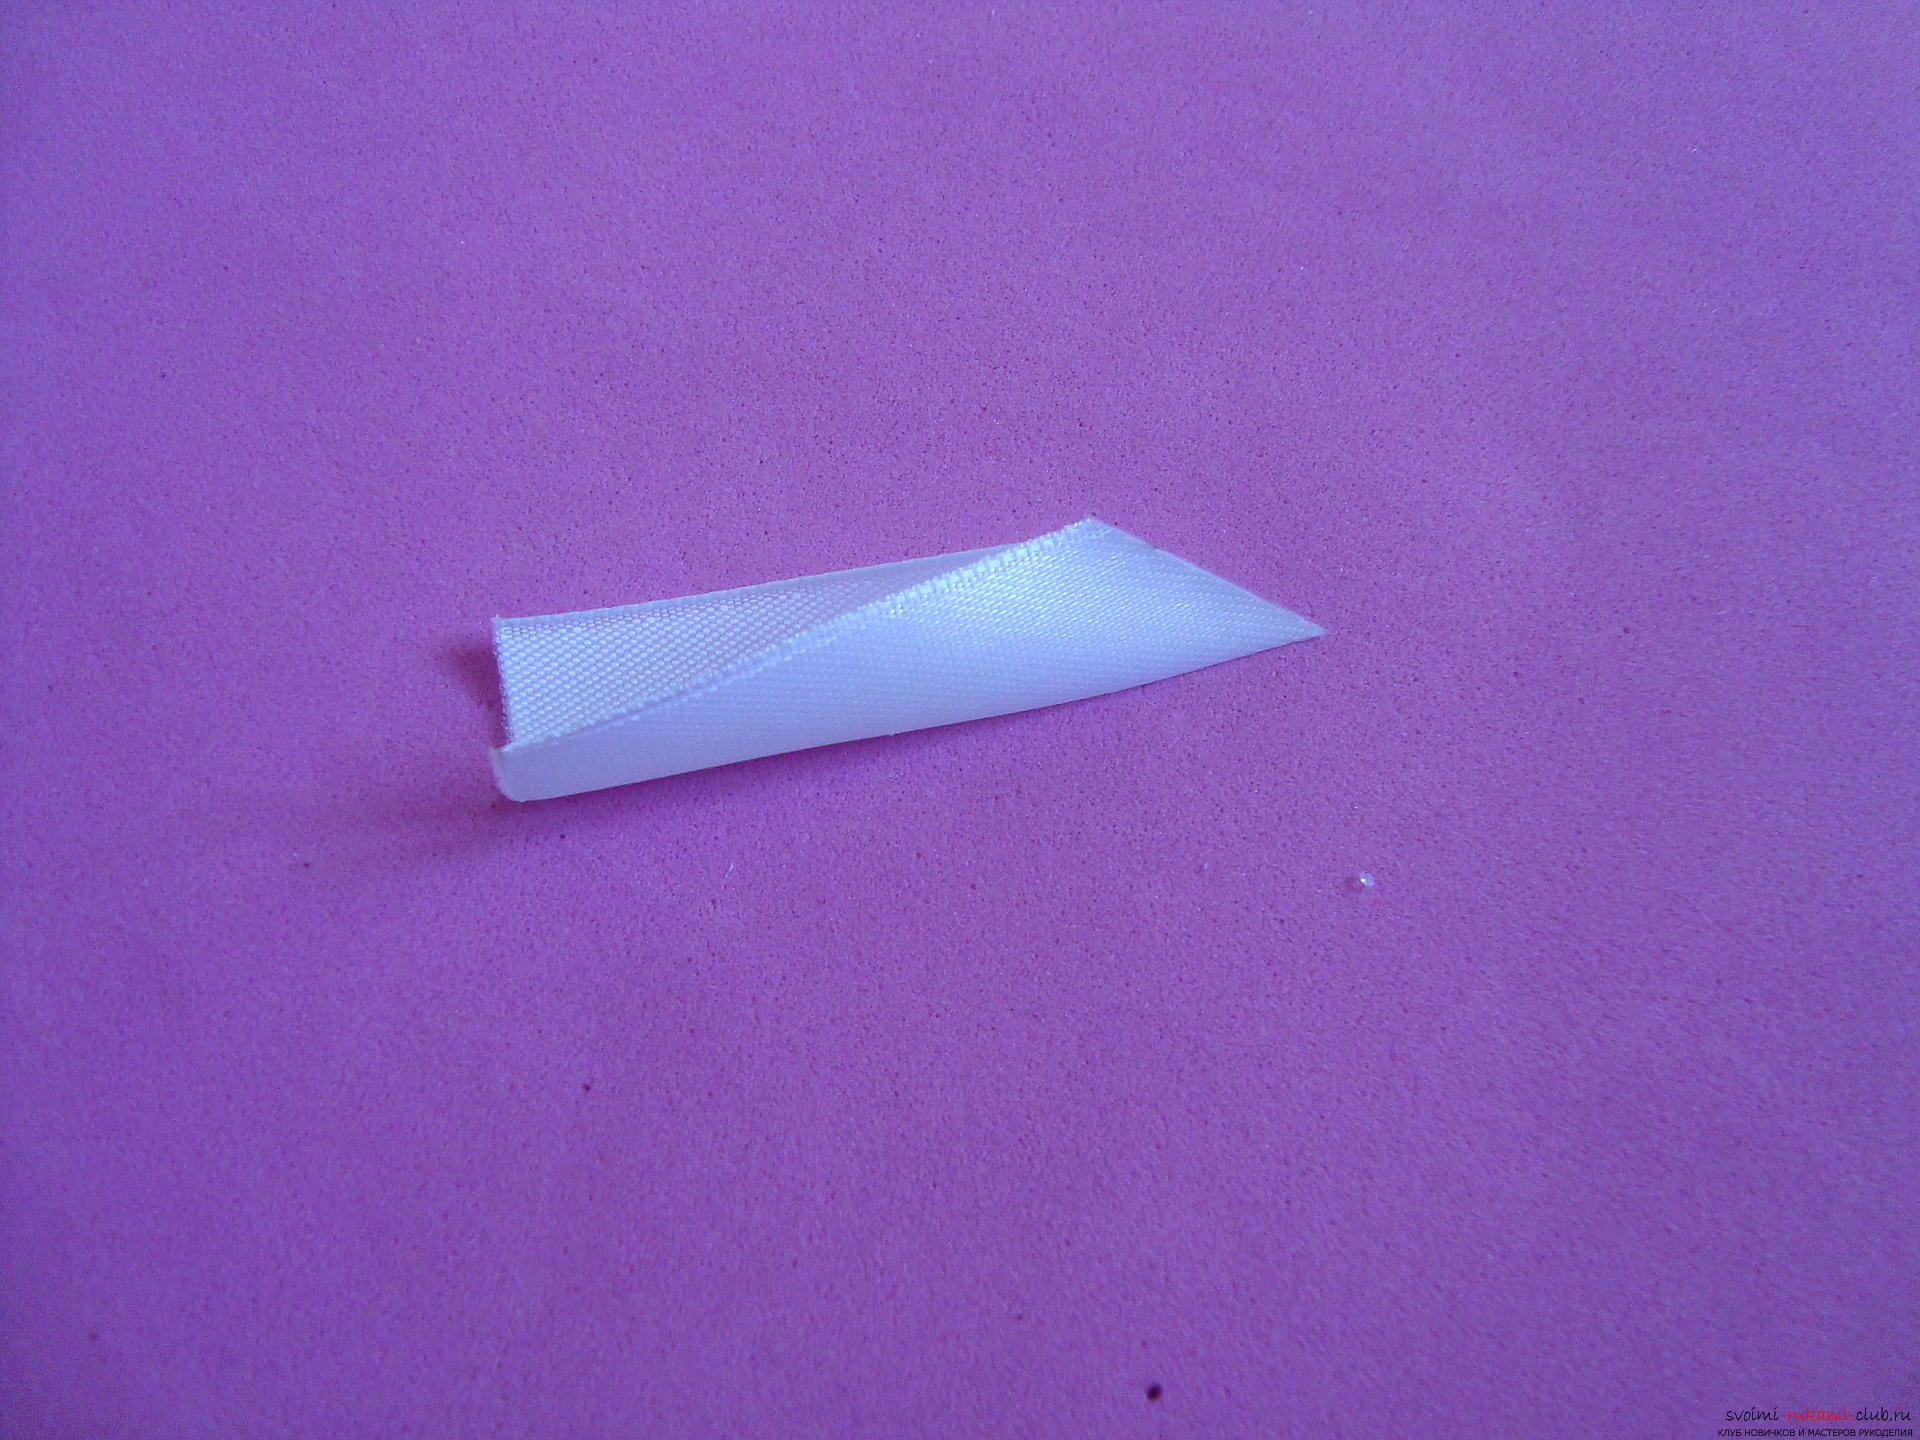 Straighten the part so that the underside of the atlasremained on the reverse side of the petal. In the lower part of the workpiece, two symmetrical folds must be created, each rather small - about 1 mm. Then clamp the base of the part and cut the line on it, about 1 mm from the edge.
 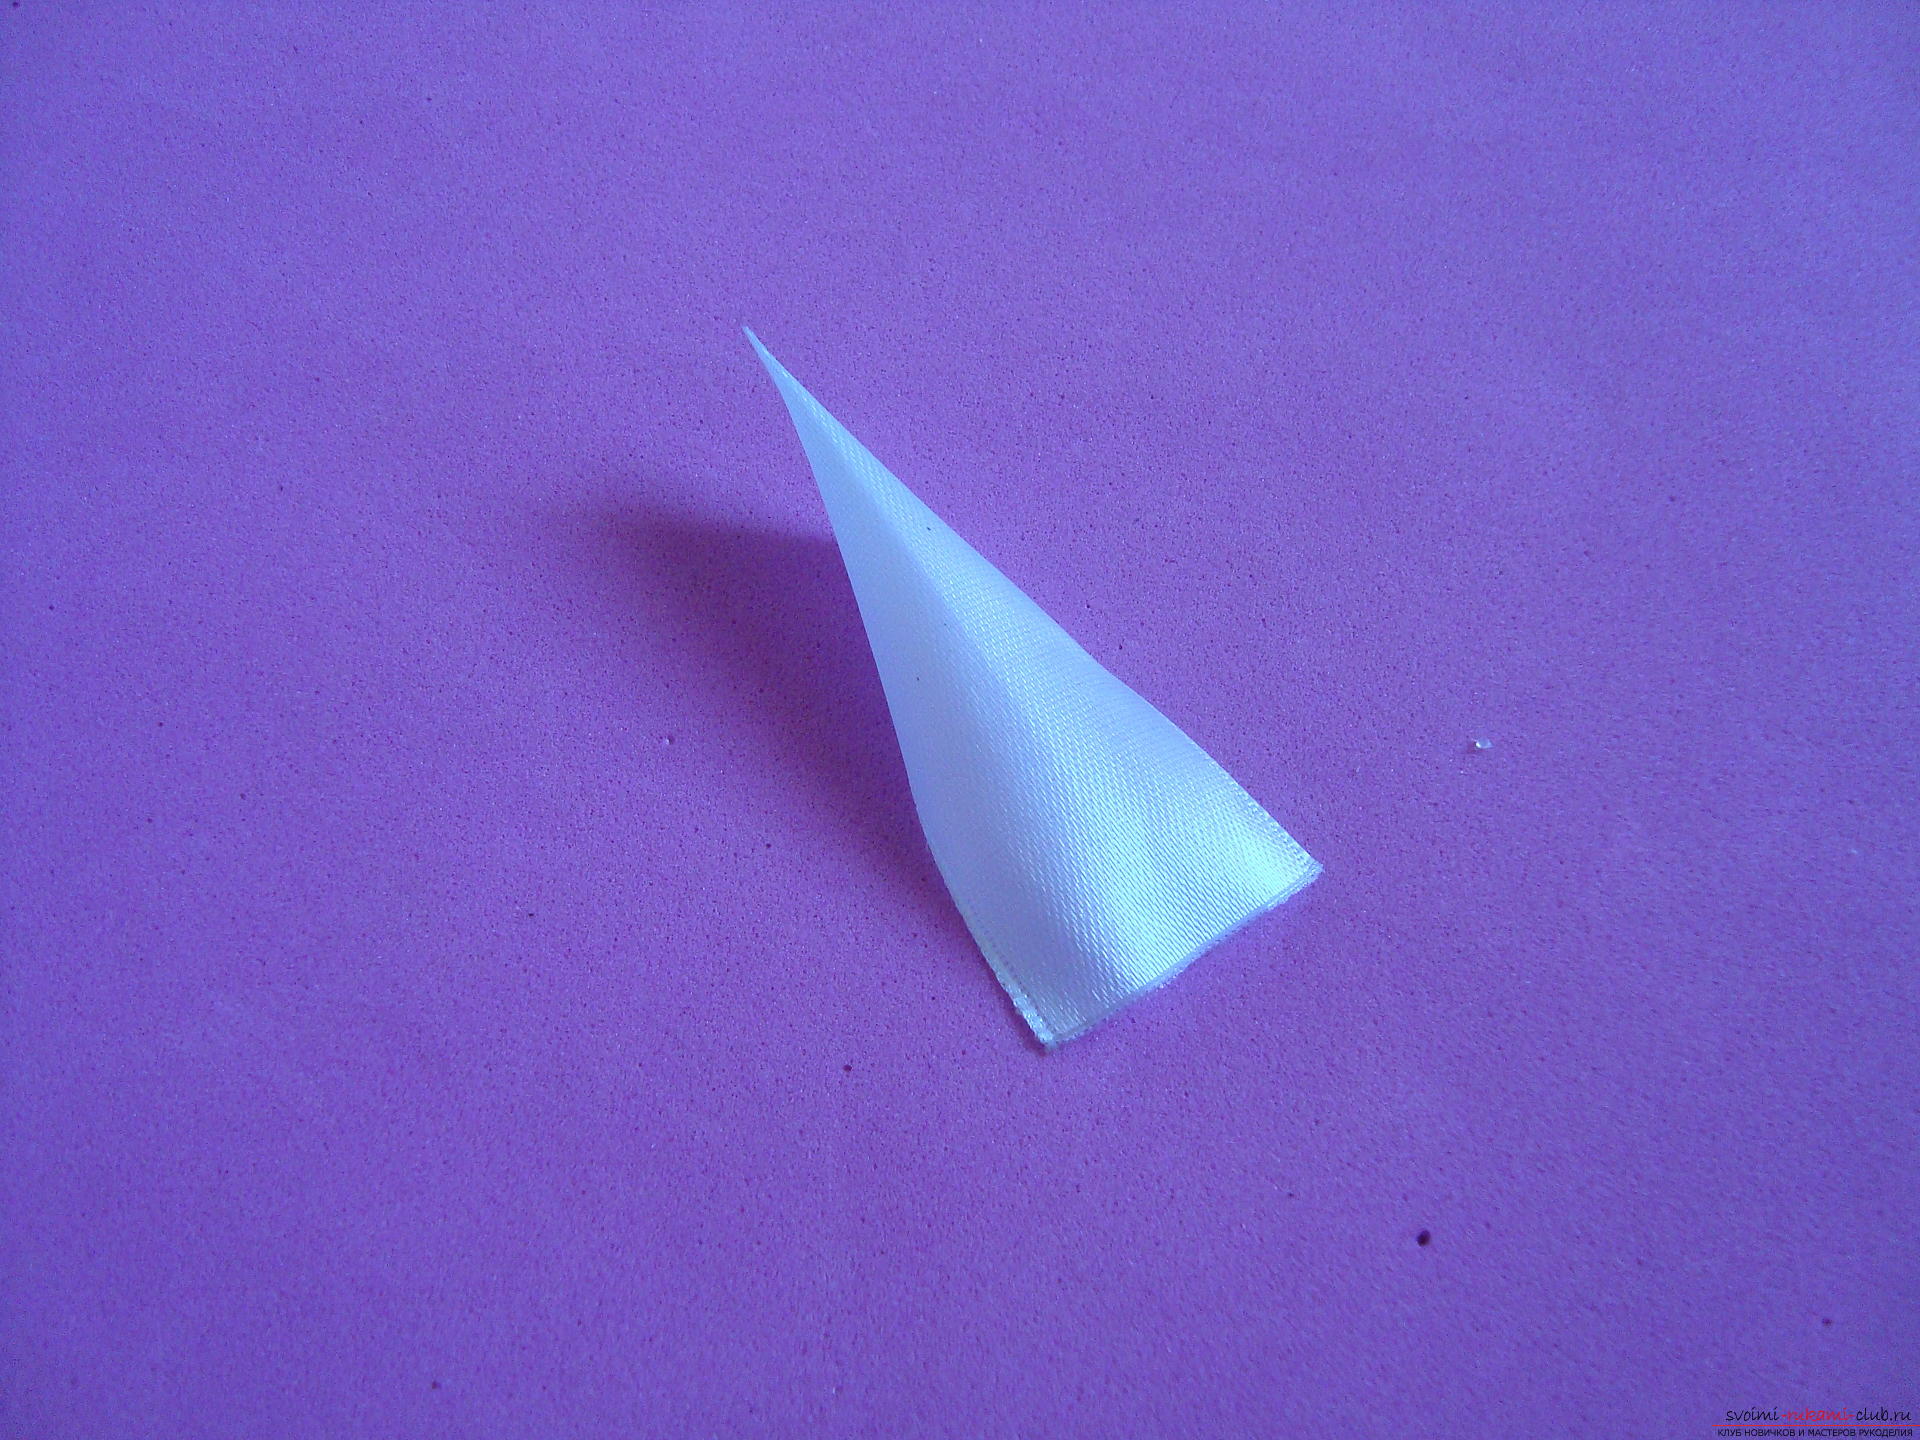 Of the organza tape 5 cm wide, several large petals will be required, they are made in the manner of the first sharp elements, but they do not bend in the other direction.
 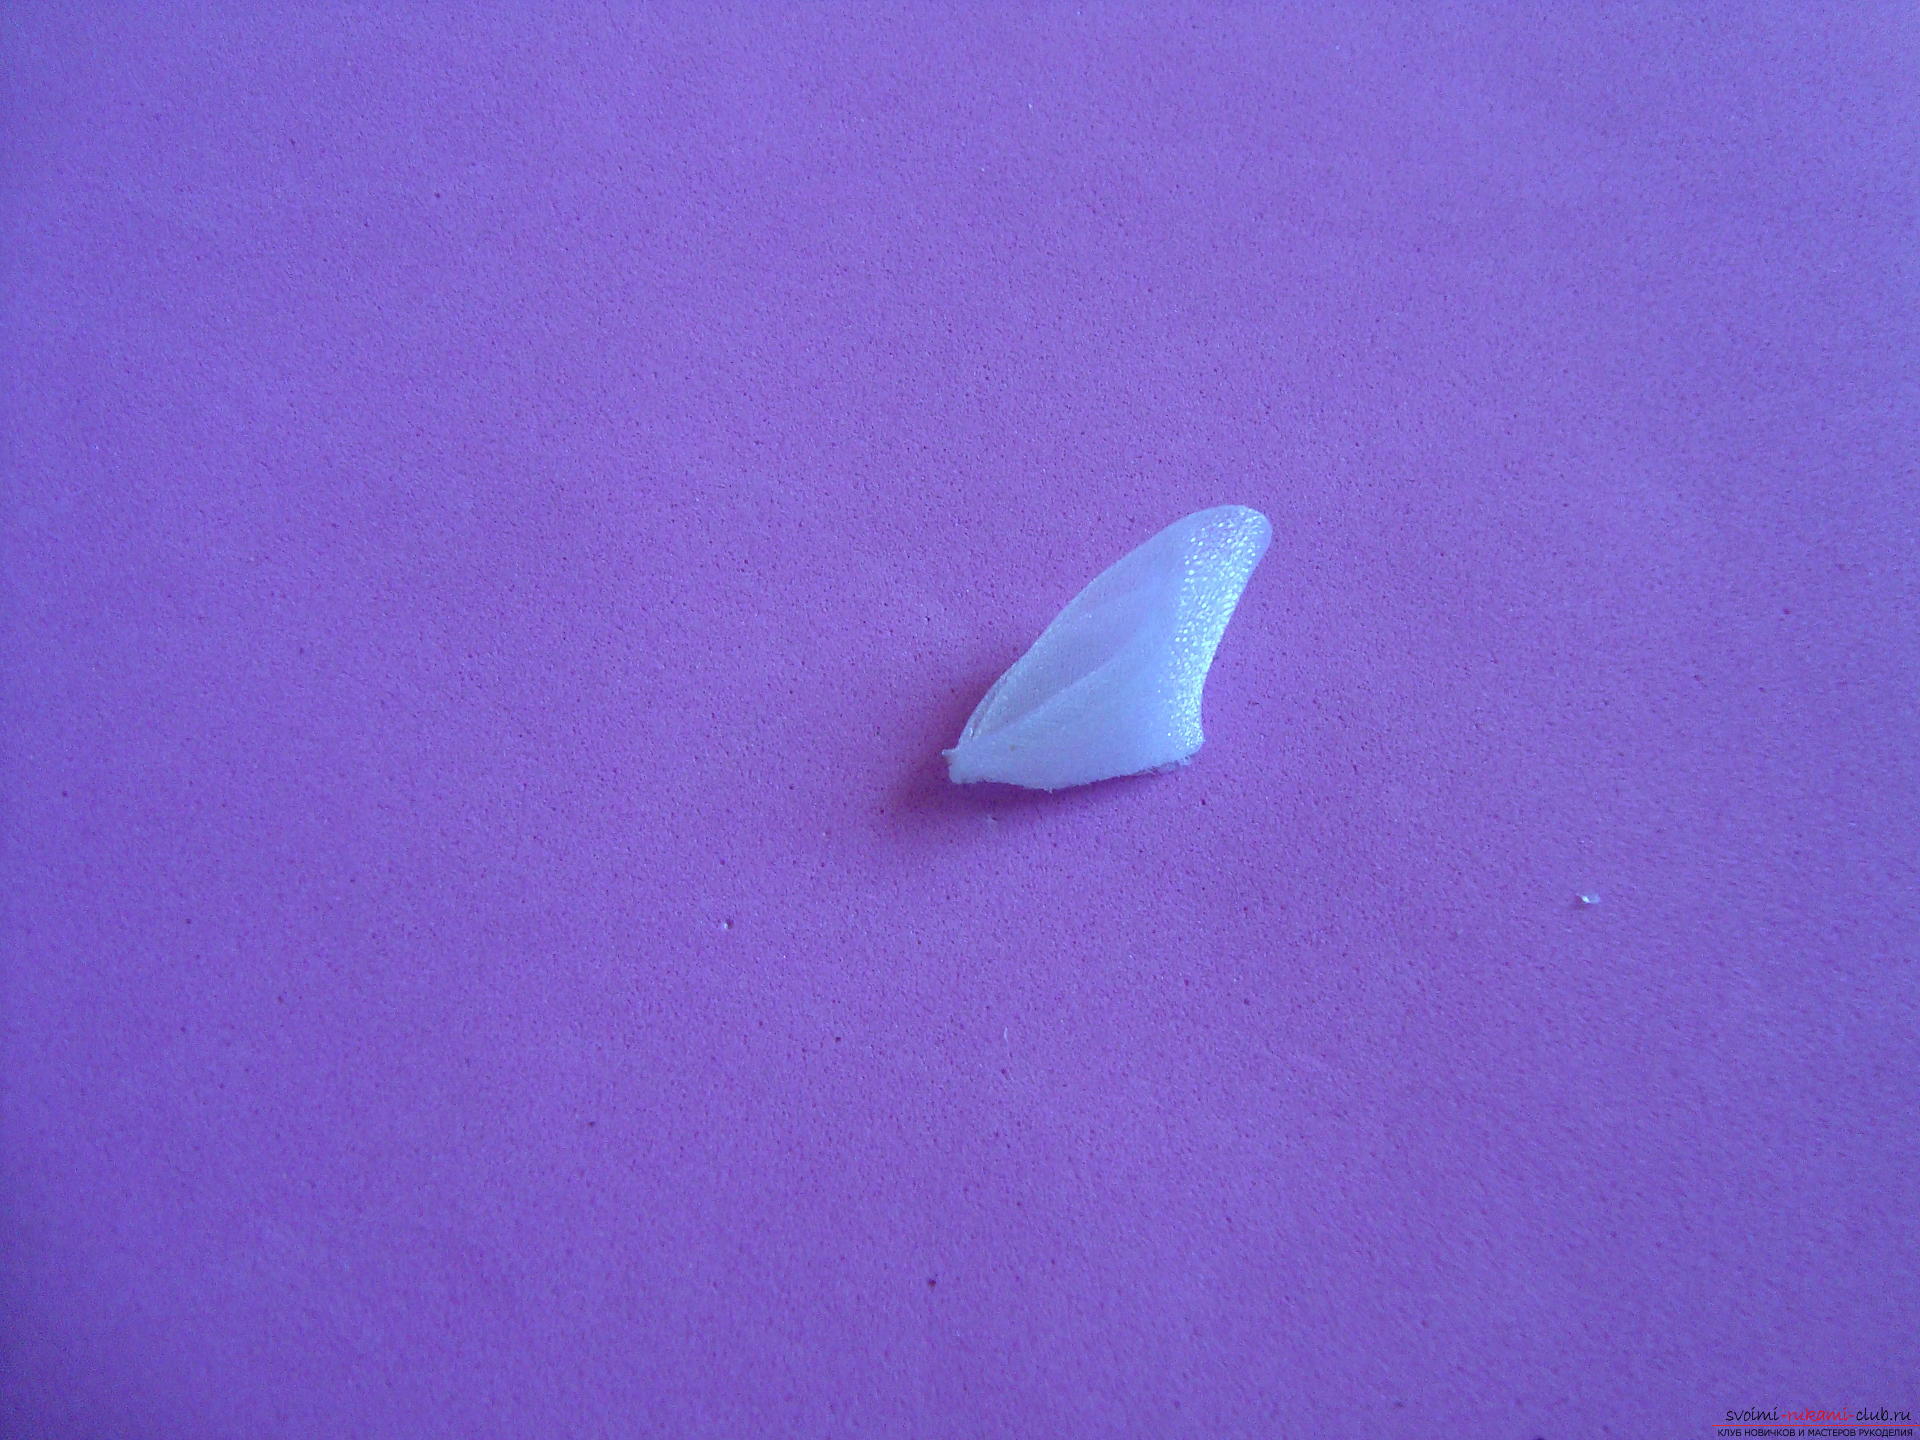 Take a small circle of satin ribbon(about 3 cm), glue on it the first row of curved white petals, then lay a row of silver pieces, the middle forms five snow-white elements. To hide the joints between the petals in the center, it is necessary to paste a small rhinestone or shiny flower.
  On another satin circle with a diameter of 5 cm,paste long petals, they will form the basis of the composition. These details can be created not only from the atlas, but also pieces of organza. The flower from the curved petals is glued to the center of the lush base.
 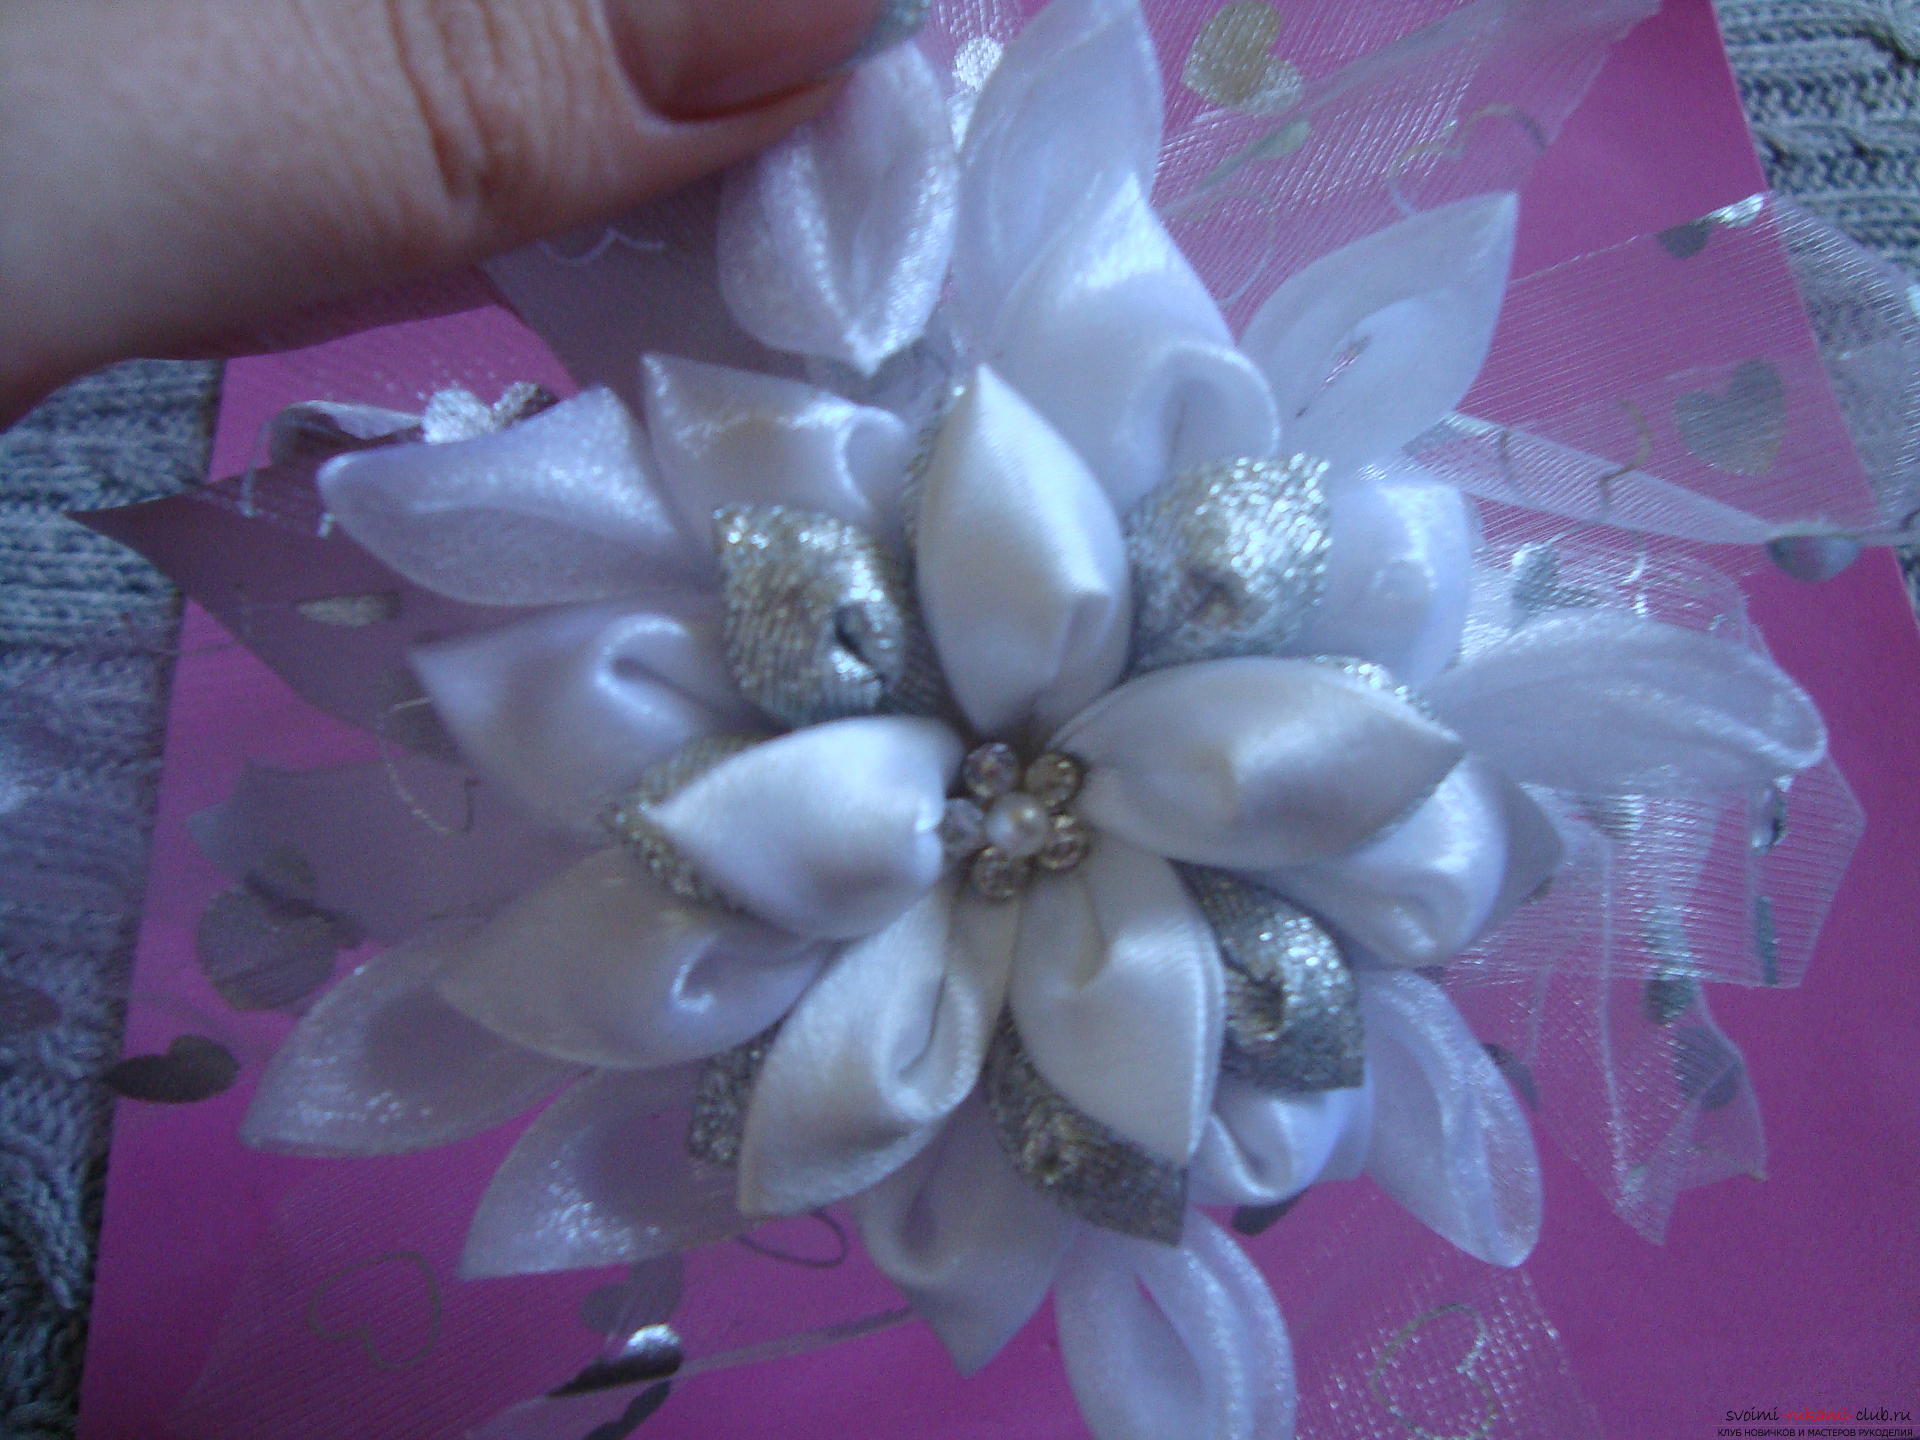 Fix the decoration on the sideparts of the rim. In order for the flower to be positioned correctly, it must be primed without glue and choose a harmonious arrangement in accordance with your face shape. Designate a convenient place, and only then glue a flower to it.
  A charming lush flower can be worn for festive events or on weekdays under a great mood!