March decoupage: Ornaments and items with their own hands - Master class processing
Together with the spring our house also comesmagic holidays, thanks to which there is an opportunity to express their love and gratitude to close people. On the eighth of March it is customary to please and thank women. It can be like a beloved woman, so Mom. Regardless of who you are on this holiday, there is always someone who can make a beautiful gift with his own hands.
March decoupage: Ornaments and items with their own hands - Master class processing
 The technique of decoupage is in some cases suitable forTo prepare your own gift, made by yourself. The day of all women is no exception and, therefore, you can consider a number of interesting but unique handicrafts, to which not many will guess! Therefore, we promise you that your gift will become a real exclusivity and will be able to please a loved one. Decoupage bottles for the New Year - how to do? Decoupage of champagne is the first topic that we have to face. Decoration technique on a glass surface. We will try to study this master class in order to independently paint on the bottle flowers and beautiful design in the style of the upcoming holiday. We will need:
- Bottle of champagne for decoration
- Napkin and flower motif
- Acetone
- Acrylic ivory, white, light lilac shade and red hue
- Napkins with motifs (floral or any other - under the holiday)
- Adhesive PVA
- Acrylic lacquer
- Concentrate green pigmentator
- Glitters
- Nazhdachka
- Brush in soft form
- Sponzhik
- Brush
- Tape from satin
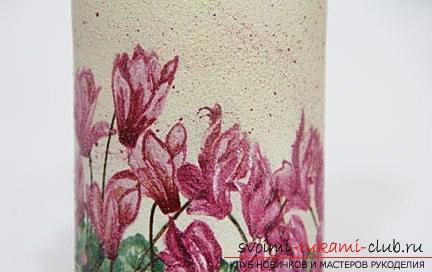
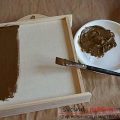
Getting Started 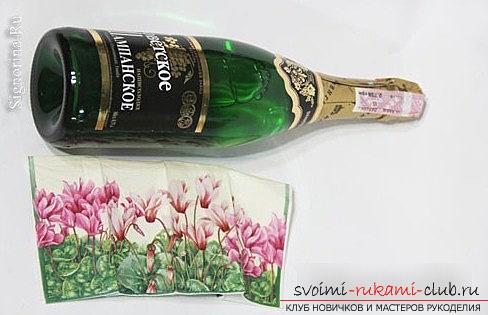 To begin with, you should start preparing a smallnapkins in the form of a handkerchief to work with decoupage. The napkin must be broken into two parts, so that the edge of the craft is not cut off evenly, not cut off. Also, it is necessary to cut off the side pieces of the napkin. The second half will separate a small piece so that you can make the edges of an uneven appearance. From the second half, you need to separate a small piece, then make the edges more uneven, then to combine them in decoupage. This should be done because the napkins and its length are enough to cover the desired area.
  Next, we are preparing the bottle fordecoupage. For this, we prepare the surface for work. It is necessary to remove each label, but leave the foil and then, wipe the entire glass surface with acetone, in order to degrease the outer part. Then, it is necessary to ground the surface with a white paint. The paint should be applied with a conventional sponge so that there are no traces on the product. In order to roll decoupage, it is necessary to take a bottle and attach a large piece of napkin to it and then, to smear on it with the help of any means for decoupage, or glue PVA.
 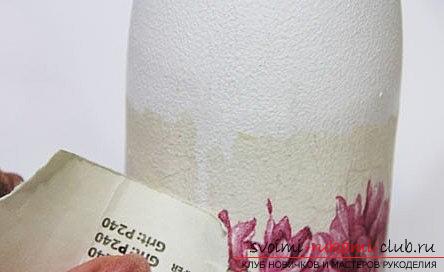 Suitable as a normal varnish from acrylic. Then, it is necessary to smear the product with a soft brush, starting from the central part of the product to its edges. After a piece of decoupage dry, you need to try again that fragment, which is missing on the product. We tear off an extra piece (taking into account the fact that when we get wet - the article is stretched a little) and paste the desired element into the required area.
 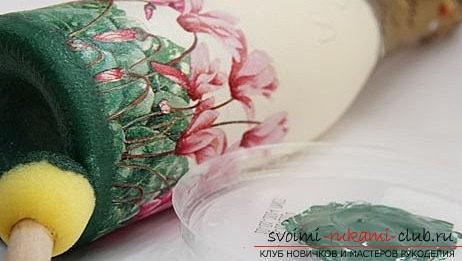 If the napkin was wiped usingvarnish, then after the element has dried, it can also be immediately sanded, removing small creases from the paper. After your funds dry up, in case you use additional means of material processing - it will be necessary to cover the product with an additional layer of acrylic lacquer, then to sand the irregularities. Forming the inscription Thus, we have prepared the basis by which our postcard will look more interesting and diverse, with a unique background. Elements of decoupage allow you to change the bottle beyond recognition, but it is also important to use in the work and decor elements. They help to "refresh" the appearance of the picture and add a little contrast to the product.
  To form a beautiful background inscription onMarch 8, it is necessary to take an acrylic contour with a spout of a thick type. Next, the text of the congratulation is written on the primer. After the contour dries, select the appropriate acrylic paint in a tone for the base element of your napkin and paint over the artwork: first the outline, then the entire bottle. In our case, we take acrylic from ivory. Next, we take different shades of green and interfere with the desired version of the paint in order to tint the don products. It is desirable that the color that is obtained directly coincides with the part of the lower element of the figure. The bottom can be treated with a conventional labial bast, then wait until the bottom dries. Decoupage and sketching Then, when all the basic elements of decoupage are finished, you need to make the appropriate decors. To do this, you need to take sparkles and highlight the right moments, in particular - small particles of images on a napkin. For example, you can apply a glitter varicoloured type on the stem of colored ornaments. Using pink glitter, you can decorate your flowers, adding a little bit of volume to the product. Also, you can add underscores to the entry, highlighting the product with acrylic glitter. For example, you can use glitter in silver or shiny color. Also, the effect of "spraying" can become an important element in filling such empty space. How to make nabryzg? This element is formed extremely easily. It is necessary to take a paint from acrylic in the right color values (you can contrast) and an unnecessary toothbrush for processing. Mix the colors: we took a white, red and lilac acrylic of light colors in order to get a version of the ebb of our flowers (cyclamen). Then, a small amount of paint is put on the end of the toothbrush and then, with your fingers, you run along the edge of the villi to shake the liquid on the bottle. Drops will fall by spray, in different diameters and locations. Thus, your bright background will be filled with lively and contrasting design elements. In the end, the handicraft needs to be modified, using the services of ordinary acrylic lacquer. The product is finished, you can also tie a small ribbon near the throat of the bottle and safely hand it to your woman, mother, sister or grandmother!
Comments
Related posts:
 Decoupage of housekeeper with their own hands - master class and photos for decoupage
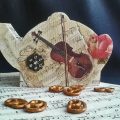 This master class will teach you how to make your own tea house and how to decorate it in the style of decoupage.
 Master class with a description and photo will teach how to make decoupage of a bottle of champagne with your own hands
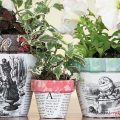 Decoupage pot for flowers with their own hands, decoupage of flower pots, master class
 New Year's flower for ornaments from origami - workshop