New Year gifts, New Year's crafts, souvenirs with their own hands, how to make a gift for the New Year, ideas for New Year gifts with their own hands.
New Year is a long-awaited holidaypractically for all the inhabitants of our planet. Each of us on the eve of the holiday there is a lot of trouble: where to spend New Year's Eve, what tasty to cook, what to give, etc. However, the most pleasant and, at the same time, the most difficult is to choose the right gift for a loved one. And in order not to spend too much time in choosing a suitable presentation for relatives and colleagues, think about gifts in advance. It's just the time. Nowadays, when you can buy absolutely everything, special gifts are those that were made by yourself. And in Europe, the tradition of modest gifts has become relevant for a long time. This is due to the fact that the incomes of all are completely different, and an inexpensive gift will help avoid embarrassing situations when a close person is not able to answer you the same for a smart gesture. Set for mulled wine On the eve of Christmas holidays, all showcases burst from all sorts of gifts and souvenirs: therefore you can easily pick up everything that your soul desires. But how to be in the case when you want to give something you really want something original from the heart, or when there is absolutely no time to stand in line, or maybe you were invited by friends to visit, and you do not have enough time to go to the store? Do not worry, an original idea that is original enough will always be able to help you. Give a loved one an unusual souvenir in the form of a set for mulled wine. This drink has a rich history and has won its popularity around the world. It has enough nice features: warm in cold weather and give a pleasant mood. In addition, mulled wine is a preventive remedy for colds. 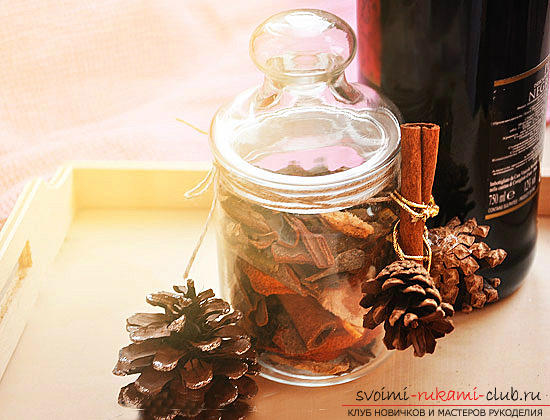 Everything is quite simple and, at the same time, veryunusual. Such a gift is suitable for any occasion. Gather yourself a mixture for mulled wine, put it in a beautiful package and safely go on a visit, taking a bottle of wine. Such a set can be easily assembled at home, for this you just need to buy spicy spices in the form of cinnamon, cloves, cardamom, and orange peel. This option is suitable for very urgent cases. But if you have free time, and you think about New Year's gift in advance, then we offer you a second, more prolonged, variation in the production of a mixture for mulled wine. It can become quite budgetary or vice versa - very solid. Everything will depend on the wine you choose to add. To make such an original gift you will need cinnamon sticks, tangerines or oranges, a mixture of spicy spices, a decorative jar, additional jewelry, and wine. The process of making a mixture for mulled wine First you need to pick a beautiful jar. It can be a packing from tea or an original tin can, quite often in such boxes sell cookies, sweets, etc. In addition, dry a couple of mandarins or orange. Slice them with slices or rings and place for a couple of hours in an oven heated to 100 ° C. After all the ingredients have been collected, put them in a jar, do not forget to add a few cinnamon sticks.
 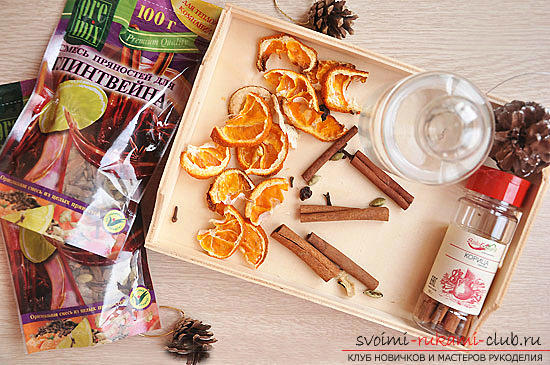 Now proceed to the decor of the jar. Use a string or other unusual rope and tie it under the neck. Additionally, you can tie cones and cinnamon sticks. To make the jar look more original, decorate the cones with sequins, setting them on transparent glue. An alternative to this decoration can be biorochki from colored paper (it will be perfectly combined with such a gift paper for decoupage), write on it your New Year wishes for a loved one or the composition of the mixture. In general, use any jewelry that will be at your fingertips, fasten them to the jar, using a glue gun.
 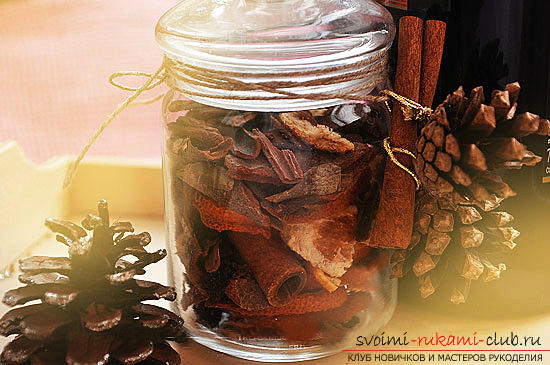 Now your unusual gift for a loved oneman is ready. It remains to put it in a gift bag and go to visit. Picture with the Christmas tree Another very original gift that will be a worthy decoration of the New Year holidays is the New Year tree, placed in a photo frame. You will spend more time and effort on it, however, you will be satisfied with the results of the work done.
 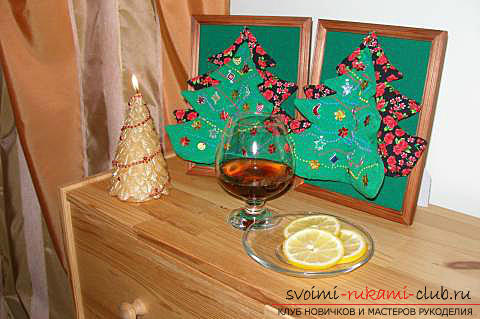 For this product, prepare two types of fabric forat its discretion, a photo frame of the desired size, stuffing material, various ornaments for the Christmas tree. In addition, you need tools such as double-sided scotch, a stapler for furniture, cardboard for the base, scissors, English pins, a pencil, and you can also prepare a thin stick that will facilitate the padding process. First you need to make a pattern, which you can see below in the photo. Consider these points: the length of your Christmas tree should be a few centimeters shorter than the length of the Christmas tree, and the width on the contrary - more than 2-3 cm of the photo frame. Make a cardboard pattern, transfer it to two types of fabric and do not forget about the allowances for seams.
 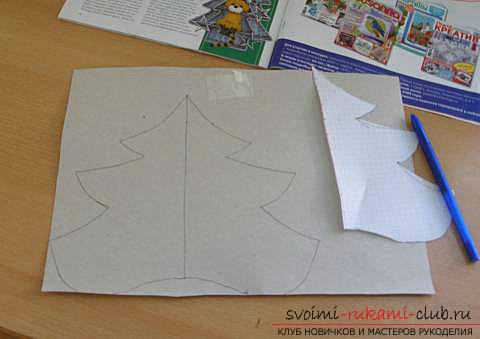 Next, cut out your Christmas trees, grind them with pins and sew, leaving small holes to turn out the product and fill it with foam rubber.
 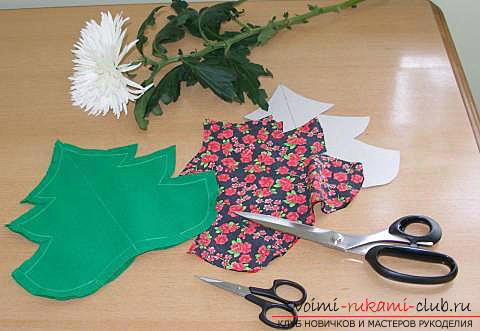 Be sure to make incisions in all internalangles, be careful, do not damage the seams. Cut the ends of the outer corners as close as possible to the seams, but do not touch them. Turn out your products using a thin stick, and lightly iron the seams.
 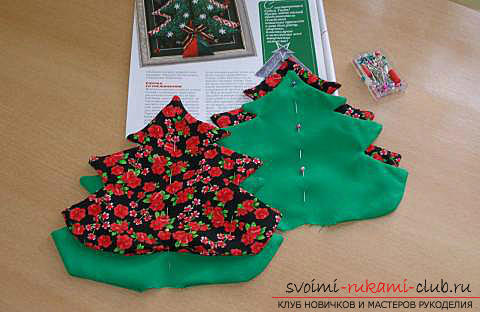 When both parts are ready, put them one onone, raising the upper herringbone by 1-2 cm. Roll them together and stitch in the center, tucking the allowances of the lower opening of the trees into the interior. Now, using a stick, fill all openings with foam rubber or other stuffing material. Fill the details as tightly as possible, the voids should not remain. In the end, sew up holes with a hidden seam. As you know, you should do it as carefully as possible.
 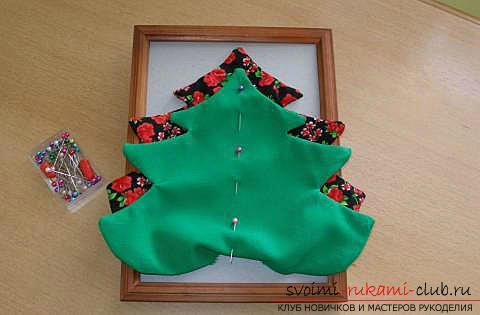 Put on the fir-trees the finishing touch in the form of all sorts of ornaments and start to make the framework frame.
 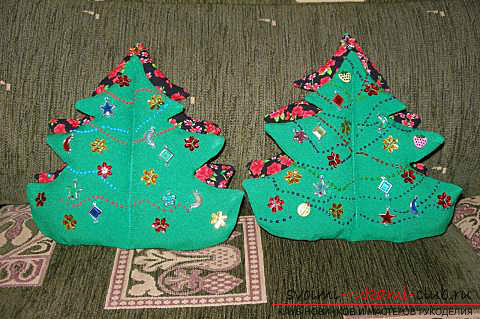 The cardboard, corresponding to the size of the photo frame, needs to be covered with a cloth. Cut out a piece of rectangular fabric along the braid, this will not allow your tissue to crumble.
 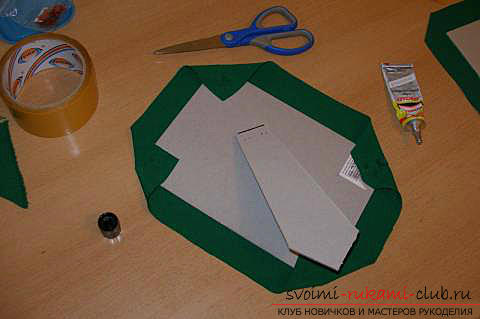 Cover the front of the cardboard with a two-sidedtape, put a cloth on it and decorate on the back of all the allowances, fixing them with glue and sewing the corners. Make sure that the fabric is laid flat on the front.
 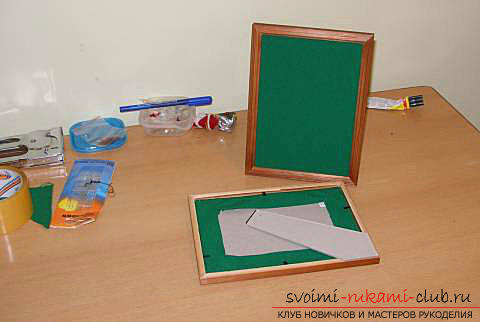 Now it remains to put the cardboard in the photo frame and fix the bottom of the Christmas tree with a stapler as close as possible to the center seam. Now your gift is completely ready.
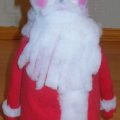
 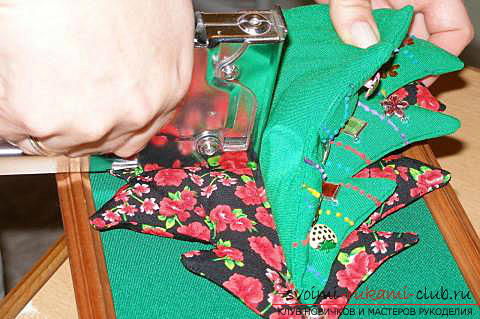 Symbol of 2016, made of a sock Symbol2016 is a fiery monkey. It can become the most suitable souvenir, which will be borne by luck and prosperity to its owners all next year.
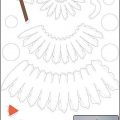
 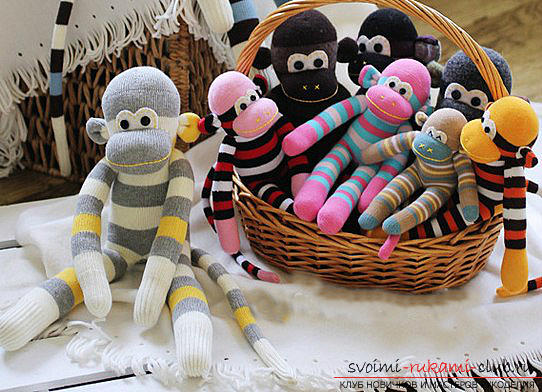 Using the most trivial thing, you easilymake such a gift. Choose a bright and cheerful pair of socks, which we use to sew a New Year's symbol. In order to perform a New Year monkey from socks, study in detail the sequential scheme depicted below, act in accordance with all its points, and you can easily make an unusual monkey from socks with your own hands.
 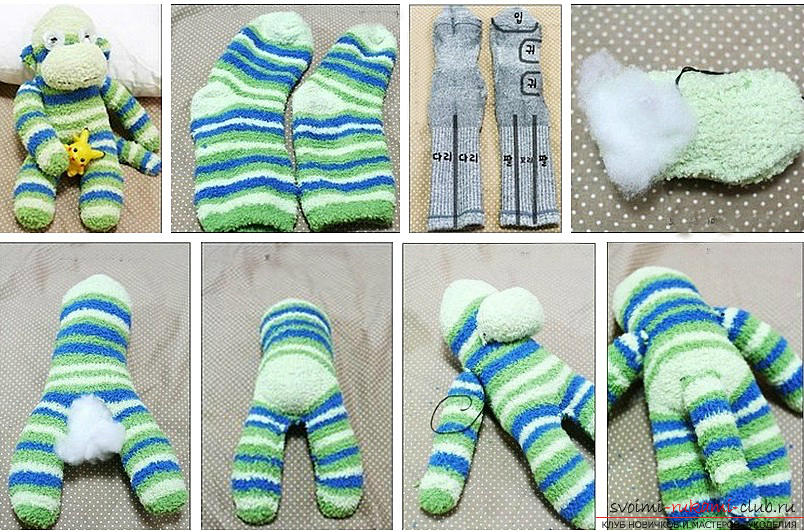 The result will be much more interesting if youwill use in your work terry socks. And give a monkey New Year mood will help a scarf and a box with a gift in hand. Unusual mug as a gift You may think that the mug has long become a rather banal souvenir. But this does not apply to the circle that we are offering to do. Perform a souvenir, in the form of a "school board", on which you can write with chalk, leaving morning wishes and notes. Similar souvenirs are sold on the Internet, but are quite expensive. Therefore, why not try to make such an interesting gift with your own hands.
 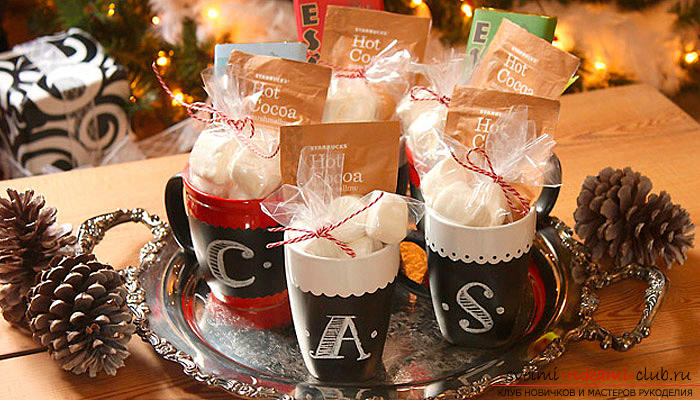 To make such a presentation, you will needceramic mug and special dye for glass and ceramic products, which must then be baked in the oven. One pack should be enough for at least 5 mugs, so you will please not only close people, but you can also make a nice mug for yourself. Step-by-step photo instructions you can watch below. Do the work in this way and become the owner of such bright kitchen objects.
 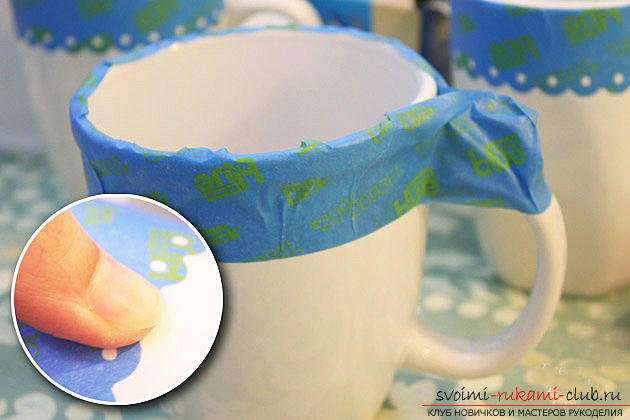 Cover the surface with a paint tape that you do not plan to paint.
 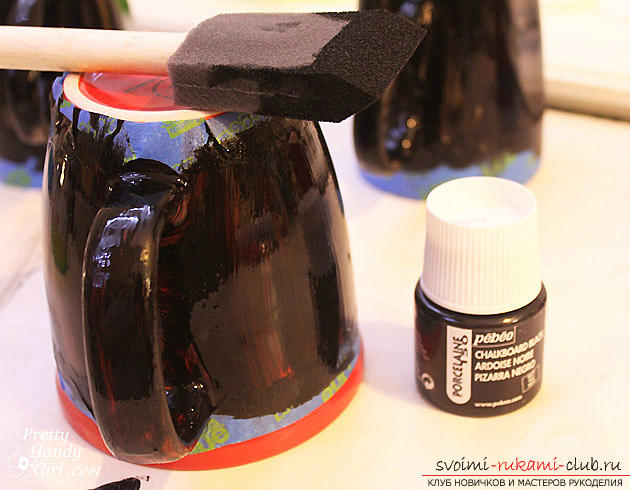 With the help of sponge paint on the surface of the mug.
 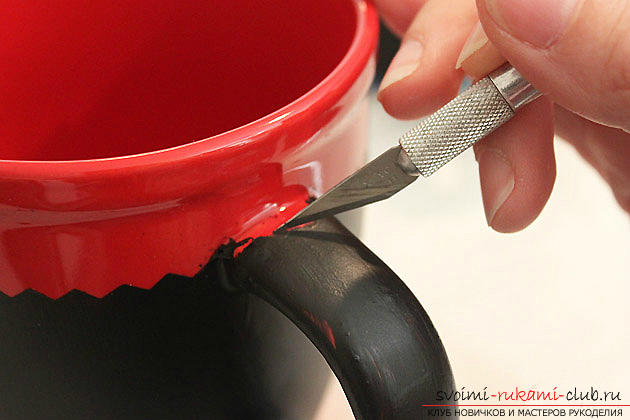 Remove the paint tape and further adjust the pattern on the handle.
 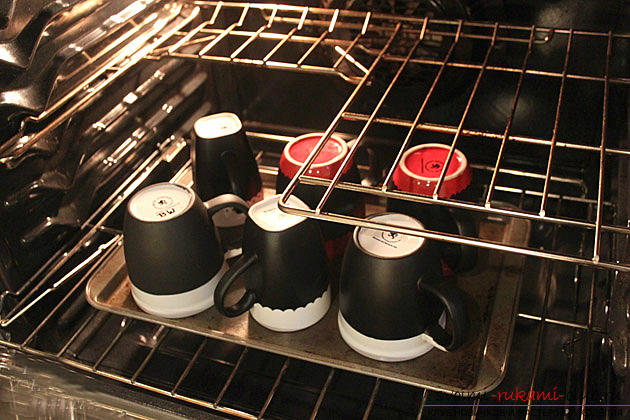 Place the mugs in the oven for baking. Before presenting your gift, write on it a beautiful New Year's wish and place inside a bag with all sorts of sweets. Now your friends will not think about what to drink coffee on long winter evenings. New Year's message for the fan of electronic gadgets
 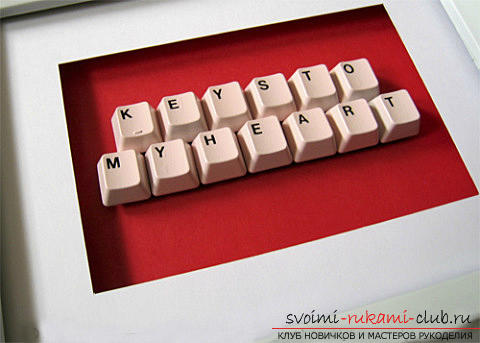 If your friend is an expert in the field ofinformation technology, then he will appreciate such a souvenir. The idea of such a picture is quite simple and, at the same time, very original. To coincide with such a present can be absolutely to any celebration. Many homes have an old, non-working keyboard, the buttons of which will become the main material in the manufacture of such a panel.
 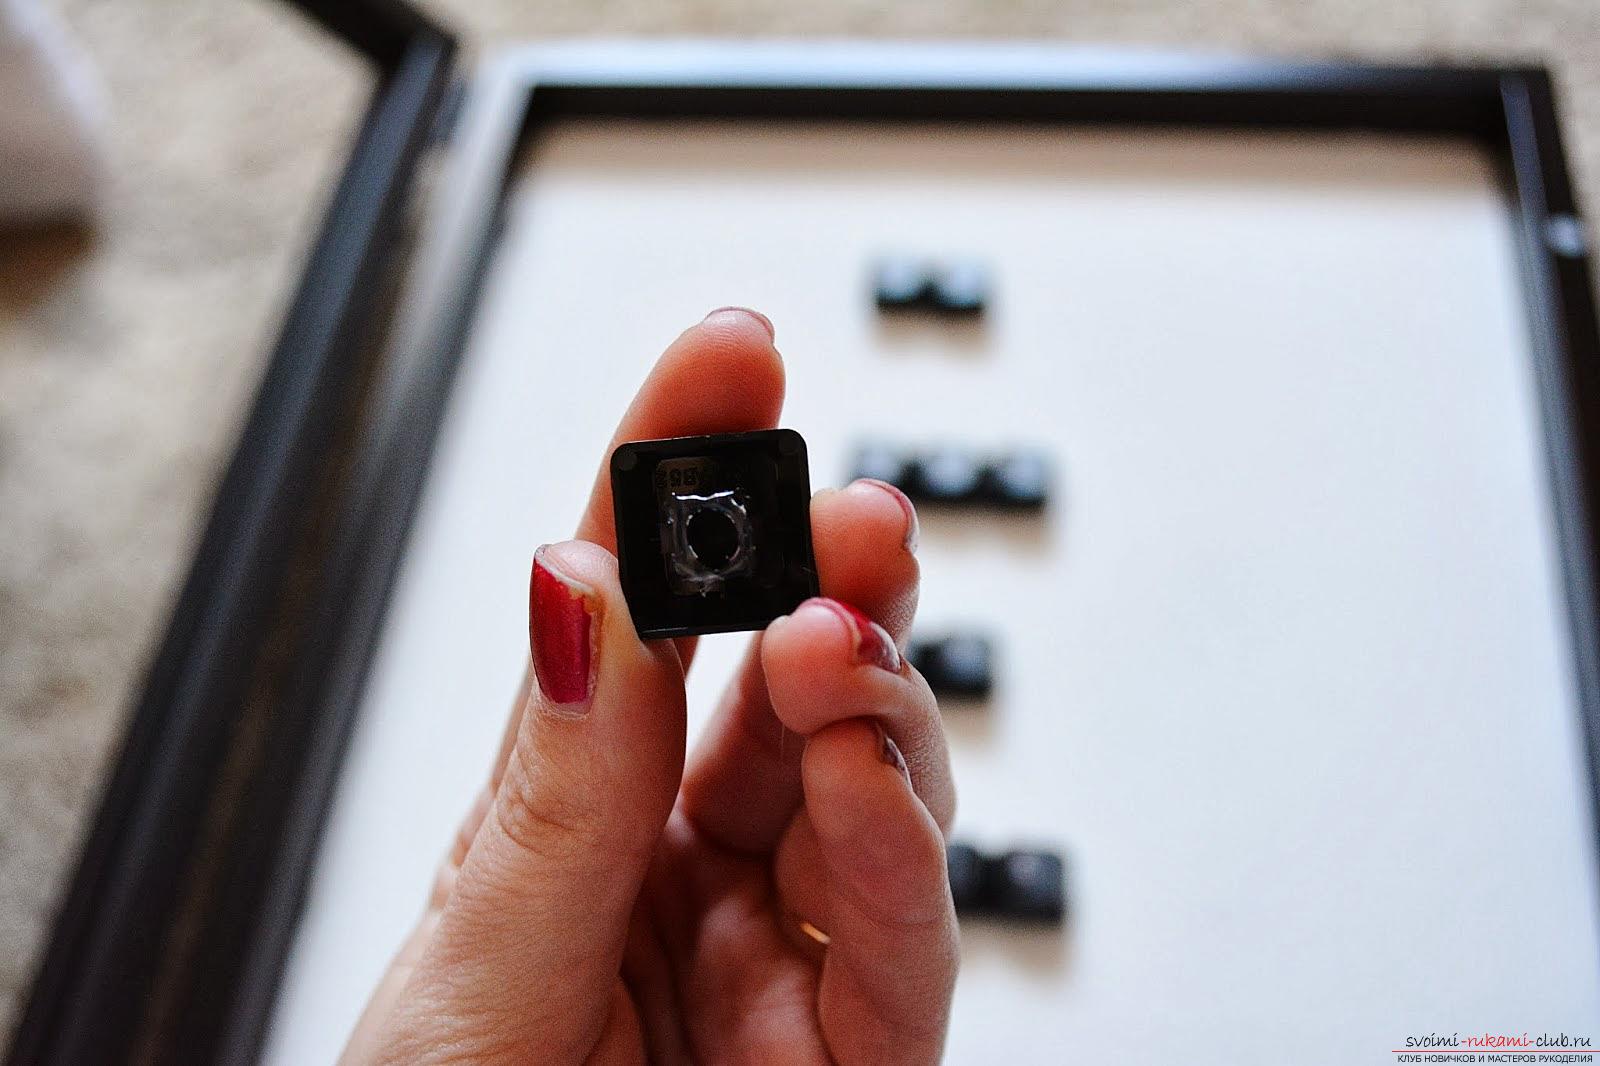 Just choose the right combination of keys, which will make a cute New Year's wish. Separately, prepare a frame with a tissue base and paste on it the desired phrase.
  Do not be discouraged if the keys fade with time. Update them with paint, and you will succeed.
 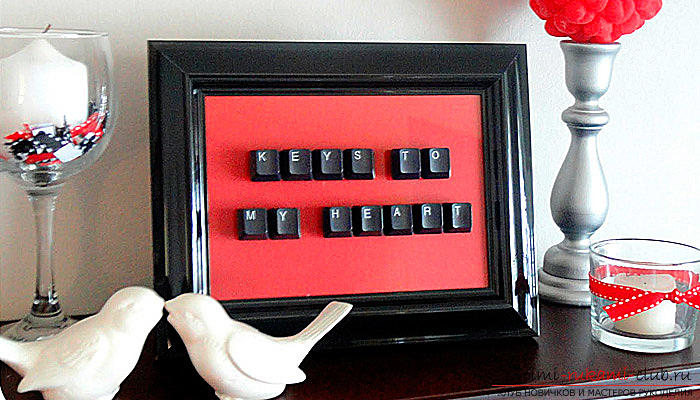 Textile monkey Charming monkeycan be made from the most ordinary flaps that can be found in every house. It can be a great New Year's gift for little children, you can also plant it on a Christmas tree, and it will give you a festive mood. From the materials we will need several flaps of different colors, thread floss, stuffing material, embroidery frame, needle with thread, stick we will use for packing, a piece of paper, and other related tools required for sewing.
 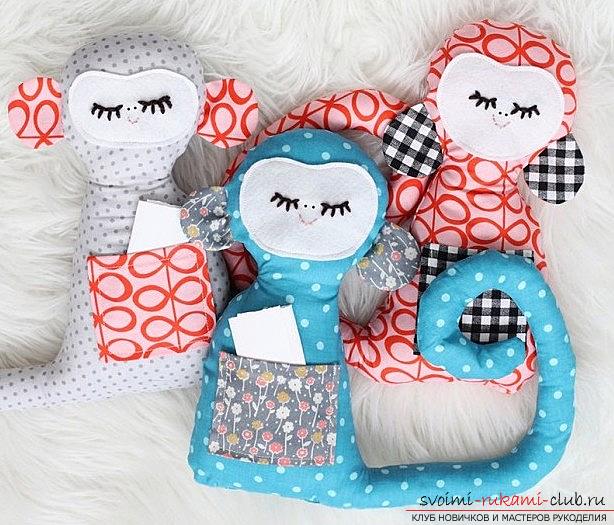 Description of work The first thing to draw by handsketch of a toy. You should get one solid detail. In addition, draw details of the pocket and ears. We will sew them separately. As accurately as possible, cut out all the details according to their outline and transfer them to the fabric.
 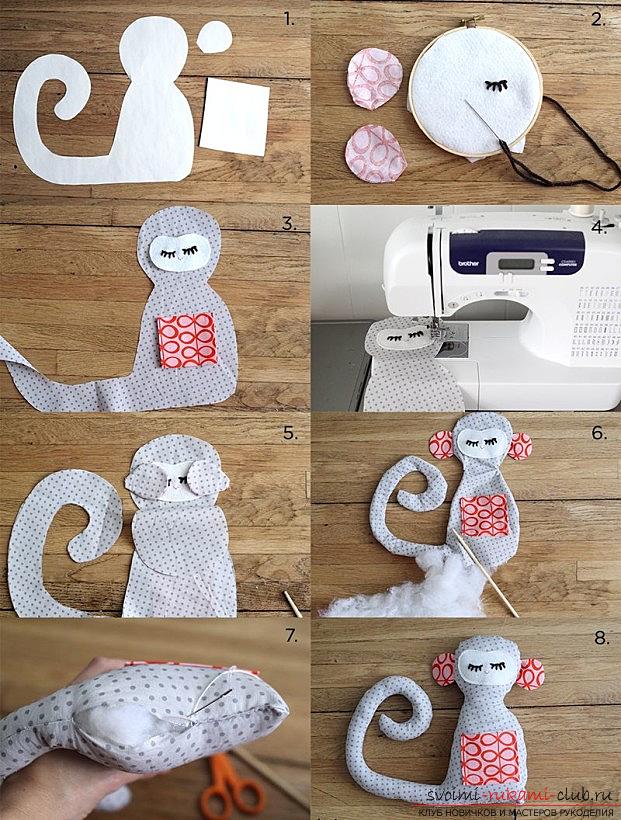 We need to make two parts of the trunk andears, the detail of the pocket will be in a single copy. For the trunk, choose a lighter color material, the ears and pocket will be made of a different, brighter and patterned fabric. Do not forget about the allowances. As a result, you should get two details of the trunk, four details of the ears and one detail of the pocket. Now it's time to decorate your face. Pull the cotton fabric on the embroidery frame and embroider the closed eyes, nose and mouth of our future monkey. That the general picture was more beautiful, preliminary you can draw eyes, a nose and a mouth the pencil. When the muzzle is ready, cut it in this way, as shown in the illustrations. Attach the muzzle to the main part and sew it. It is better to use a sewing machine, however, in the case of its absence, a hand-sewn seam is also suitable. To make the monkey as neat as possible, make small stitches. Sew a detail of the pocket to the trunk, having turned its edges a few millimeters. That this detail was not a snag, you do not need to stitch the top. You can always put a candy or a leaf with a New Year's wish inside. Now sew on the contour of the ears, leaving one side free for packing. Fill the details of the ears with stuffing material and sew their torso. It is important to take into account one point. The details of the trunk should be placed in the face, and the ears should be placed inside. So that the fabric does not go, fix all the details with needles. Sew together two parts, it's best to start with the tail, because it is he who is the most labor-consuming site. At the bottom leave a non-sewn patch for packing.
 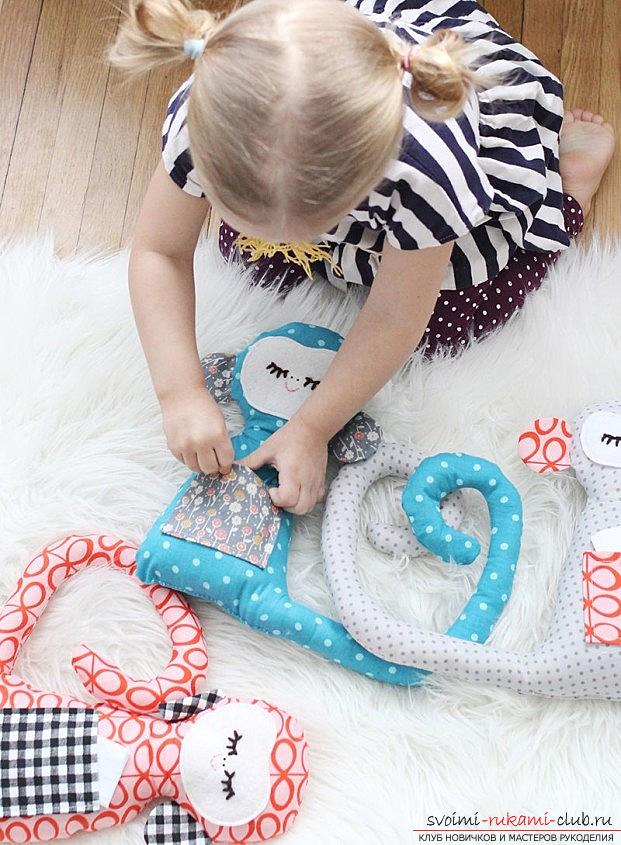 Turn the part out, it's much easier to do thiswork, using a small stick (a pencil or something like that). Fill the toy with a sintepon and sew the bottom of the product with a hidden seam. And now the symbol of 2016 is completely ready. New Year's card pop up This card can be made without much effort in just a few minutes. Congratulatory cards of this kind can be performed to any celebration, slightly modifying the elements. In addition to this, making this postcard is well suited for developing classes with young children.
 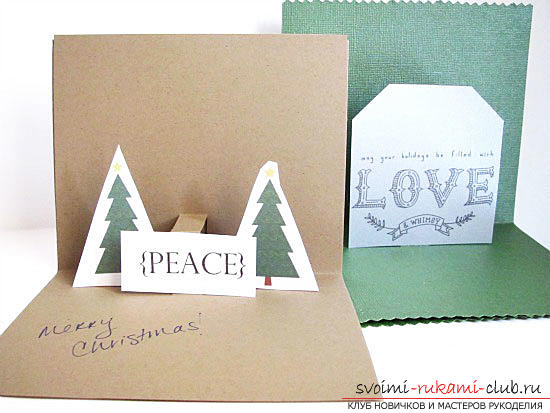 The set of materials is quite simple. You will need a thick cardboard for the base, patterned paper for decorative elements, as well as scissors and glue (you can replace with double-sided tape). Fold in pieces a solid sheet of paper that you prepared to make the base, and cut it into two parts. Now, from the two sheets that have turned out, you need to make two basics, folding them once more in half. These two workpieces will be used to make one postcard. The first part will serve as a platform for individual elements, and the other will become the cover that closes the flaps of the pop up effect.
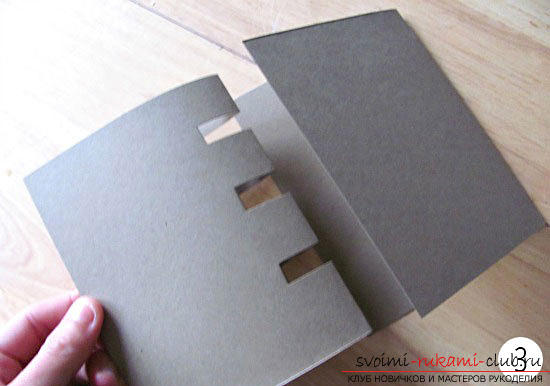
 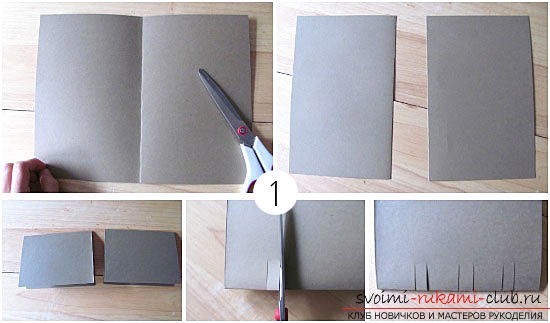 After familiarizing yourself with picture number 1, perform the same incisions on one of the details.
 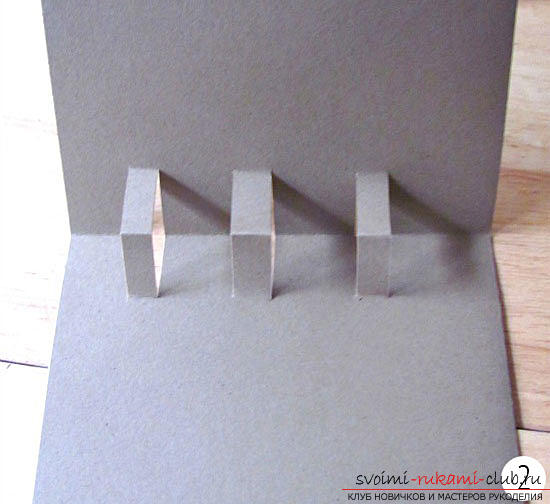 Next, in accordance with Figure 2, open this workpiece and straighten all the resulting shelves. Now glue the second workpiece to the topinner postcard. Be careful, the shelves should be glued on. If desired, you can use double-sided adhesive tape or glue. The final stage remains - we must glue the decorative elements to the shelves. Decoration can be chosen at your discretion. It can be photographs, inscriptions, congratulations, images of Christmas trees, Santa Claus, Snow Maiden, etc. So, with the help of simple manipulations, we got an unusual holiday card. Choosing a gift for a loved one, remember that the true significance of the presentation is not in its value, but in the attention and care that we put into a gift made by ourselves. Congratulate your loved ones on the upcoming holidays, and all the best will come back to you next year.
Comments
Related posts:
 New Year 2016, New Year's crafts with their own hands, presents for the new year with their own hands, New Year's toys with their own hands.
 New Year's crafts, crafts for the New Year with their own hands, hand-made articles from their own hands, a New Year's gift with their own hands.
 New Year's crafts, children's New Year crafts with their own hands, how to make a snowman from paper with their own hands, examples and instructions for implementation.
 New Year's hand-made articles, Santa Claus with his own hands, how to make Santa Claus, crafts with children, ideas and detailed lessons.
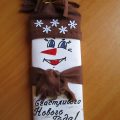 How to make a snowman. Gift wrapping for the chocolate on the New Year for the 2015 Competition, New Year's handmade crafts