New Year's snowflakes with their own hands - techniques and creative ideas for home
When New Year holidays come to our house,I want to somehow diversify the atmosphere and add more references to the fact that the holiday of snow and magical events is also involved in your home. There are a lot of ways to add the necessary contrast, but not everyone will approach us. 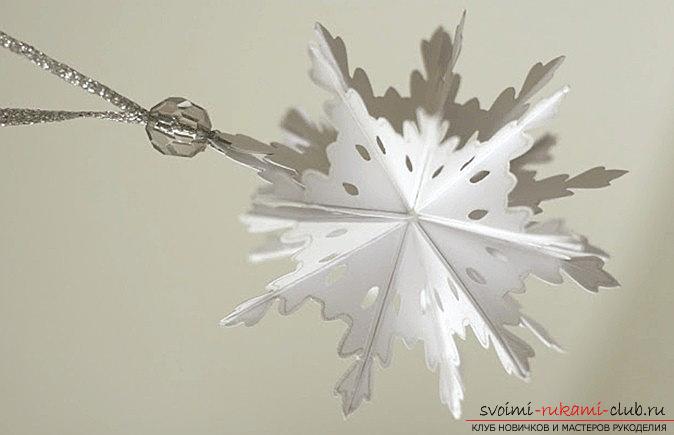 Before you - a simple and full-fledged lesson, inwhich in simple language will be told about two simple techniques of needlework of snowflakes. They explain in detail the entire process of creating a snowflake from the beginning to the very end. You will be able to get acquainted with interesting variants and interpretations of the same variant of a snowflake. Like, two different looks at the same thing! Such a snowflake is not a shame to decorate a tree, and its appearance is great for a home.
New Year's snowflakes with their own hands - techniques and creative ideas for home
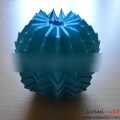
Someone from the experience of needlework may not be enoughskills and knowledge specifically to develop or improve an idea. Then, the wizards turn to various sources to get additional information. It is worthwhile to think, what attribute of the holiday without any problems can build any schoolboy or a novice master? Of course, a snowflake! It is this element, even in the kindergarten, that is given to us in order to develop our own motor skills and to try to recreate something unique, interesting. 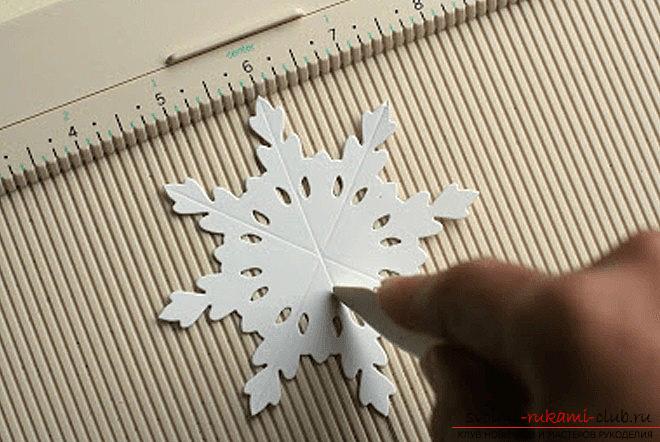 But, in our case, this idea of a snowflake will be slightly different. Before you will appear a full-fledged version of a formatted and interesting three-dimensional snowflake, with which you will work: The first option
- Take a bright paper for work
- Next, we need scissors for different manipulation with paper
- Also, you will need a regular glue to fix and fix the design elements.
Take the paper and cut out six squares in onesize, then, they need to be folded, using an alignment on the diagonal. Then, we use the shape of a trehguil. In it it is necessary to form three notches, in a diagonal arrangement, but, squares should not be cut to the end. Then, you need to unfold the square and using two edges that are closest to the center, lift, and then - glue with each other. Then, the square must be turned over and after, also glue two corners on the following incisions. After that, the square must be turned over again, and also the subsequent sections are glued together. Repeat this action until the end, until the front of the work is completed. Thus, we prepare six bulk components.  Then, they need to be glued together in the center, but at the same time -wait until the glue dries. The second option If the first decision snowflake is ready, you should use one more solution for a change. The second option will be a bit more complicated and will require more materials from you. But, you will get a more diverse version of the snowflake, which can also be used to decorate and create a unique appearance for your home.
- Take paper and scissors for the cuts
- Prepare the glue
- Then, take the tape (narrow version)
- Also, prepare a bead
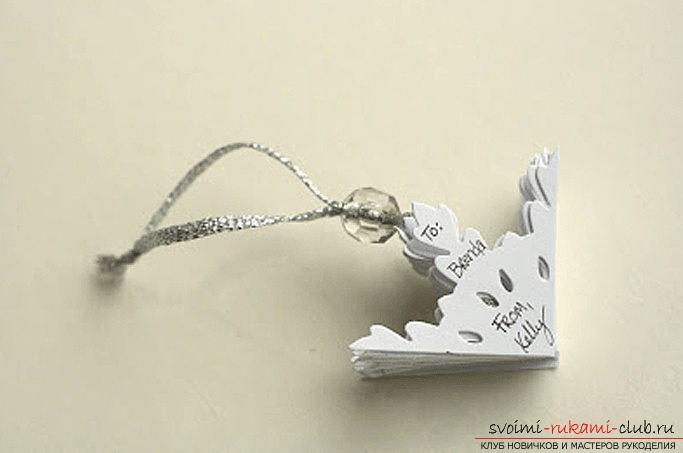
So, we prepare snowflakes from the form of paper, then,fold it into two parts and after, press along the fold line for the product. Upon the advent of all actions, it is necessary to make the snowflake unfold and then, turn by 90 degrees, then we must again turn the snowflake in half. After that, a new perpendicular line appears in the new fold line, compared to the previous one. The paper needs to be leveled so that afterwards, rotate it 45 degrees again and bend it again. By such actions we will form a variant of the snowflake, which could be divided into eight parts with the same dimensions. Next, we bend the paper from the photo,we compress the variant of the triangle that we get. We form four variants of the workpiece. Next, we glue the vertices using the blanks together. After, take the tape and glue it to the top and bottom of the stack of snowflakes. Then, you should cut two quarters of those snowflakes that have not yet been tested. Then, you need to glue the quarters again in order to close the endings of the ribbons. After, stretch the end through the bead. We knot the knot with tape and after, shift the bead to the center of the middle of the snowflake. It turns out that the snowflake has taken shape. So it is easy to collect and hide it until next New Year's holidays. In addition, it can be given to close people. Our work is finished. With this simple method, we have a full-fledged opportunity to form and make our own version of a variety of snowflakes, which you can use at any time of the holiday. In addition, you can lure children in order to create completely new and unique forms of snowflakes. The motorics of the fingers, as well as the variety of ideas will open up new ways of interacting with paper. In addition, the baby can give the handmade article to his friend as a gift. Thus, he simultaneously does two useful things - he studies new techniques of needlework that have a positive effect on motor skills and mindfulness, and also gets new lessons and the opportunity to make pleasant to other people.
Comments
Related posts:
 Top 50. Creative ideas for home.
 Beaded Snowflake: Christmas ornaments with their own hands (diagram)
 We make a beautiful Christmas decoration of the snowflake with our own hands with the help of the "Quilling"
 New Year snowflakes and Christmas toys with their own hands - master class origami
 Creative gifts - a ship in a bottle Black pearl at the 2015 contest, creative gifts with your own hands