New Year Scrapbooking Ideas - Methods of Decorating a Christmas Tree with Your Own Hands
All children and adults from year to year are waitingapproaching the New Year celebration! And that's why they prepare in advance with various gifts, come up with new ideas, try to implement the most interesting and fabulous decisions. Sometimes gifts can be noticeable, one that can be handed. And sometimes, a gift can be made mysterious and at the same time, become an ornament of your home.
New Year Scrapbooking Ideas - Methods of Decorating a Christmas Tree with Your Own Hands
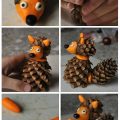
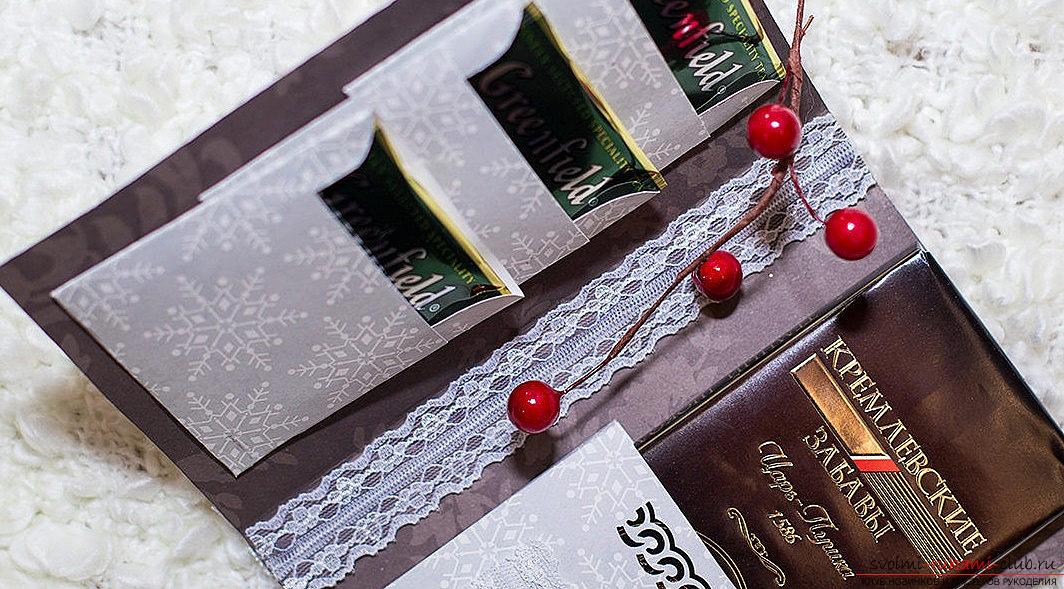 Many craftsmen use their ownskills in order to create interesting and unique forms of handicrafts. In particular, it deals with the simplest and most interesting forms that can be available to everyone. For example, it is quite realistic to use the scrapbooking technique in order to decorate a new gift and at the same time - an elegant decoration on a Christmas tree. There are different ways and different ideas that can be realized through the use of applications on paper, as well as other decorative ornaments. We offer to consider the brightest list of beautiful New Year and shiny toys that were made by themselves! Scrapbooking is a special technique of needlework, which opens new opportunities for its master. Schemes and structures of work on this type of paper processing opens the possibility of creating universal and unique handicrafts on any subject. A special place in scrapbooking is occupied by the technique of handicraft, which connects us with the New Year holiday. Children around the world prepare postcards, craftsmen create chocolate bars, and some people simply decorate their home. Yes, with the help of this technique, needlework can also really learn how to decorate and make your home even more interesting. Today we will consider a popular and interesting decoration technique, thanks to which the appearance of your house is transformed, in addition, it will bring some advantages. Chocolate girl is a thing that is usually given for holidays from hand to hand. But, today everything will be completely different. After all, a chocolate bar can also be used to hang as a small toy on a Christmas tree. Well, if you want, you can certainly give it to one of your guests! Chocolate girl for gift and fir-tree Chocolate girl is a universal object that allows you to both congratulate and decorate your object at the same time. Today we try to make from an ordinary chocolate bar an interesting object for the design of herringbone. It is worth noting that the chocolate bar is a gift set of postcards and places for chocolate inside. Make it an ornament is not so difficult, and native people will be very pleased!
- Prepare a piece of watercolor paper for A3 format
- Also, take a design-type paper to make scrapbooking (New Year's theme)
- Theme version of the picture on the theme of Christmas
- A bit of burlap
- Gears and installers for them
- Adhesive Moment in Gel, or glue stick
- Measurement ruler
- Tape, lace, cord (waxed) and tape from satin
- Variants for decor (beads, half-beads, napkin, openwork, rhinestones, brads)
Procurement for chocolates on a Christmas tree 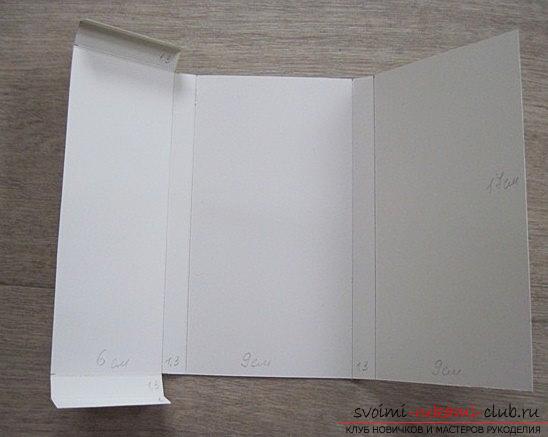 To start, you need to form a workpiece. To do this, you need to prepare two options for the sides of the postcard, and also make a pocket for the future chocolate. We use a sheet of watercolor paper in order to mark out the template. We proceed from the size of the future chocolate. We take a standard solution of 8 by 16 centimeters (width and length).
  Make a contour by 1 centimeter to getthe size of the lid, and the back of the future chocolate. The size will be in the parameter 9 by 17 centimeters. The pocket, on the contrary, will be a little narrower - 6 by 17 centimeters. Further, we make a laying on the folds of 1.3 centimeters, as well as a bend of 1 centimeter, for the karmashik.
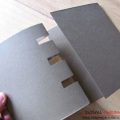
 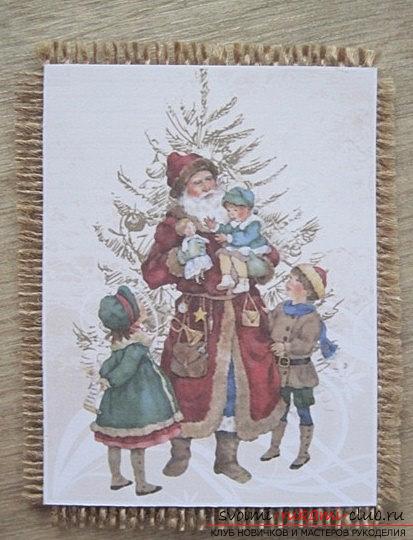 Then, it is necessary to cut out a template, with which weto work. In order for the postcard to be formed without different creases, it is necessary to penetrate the surface. To do this, take the scissors and their blunt side form the fold lines, using light pressure. We try not to damage the paper. Then, the card must be folded, starting from the corresponding lines. Then, the workpiece must be postponed and the decor produced.
 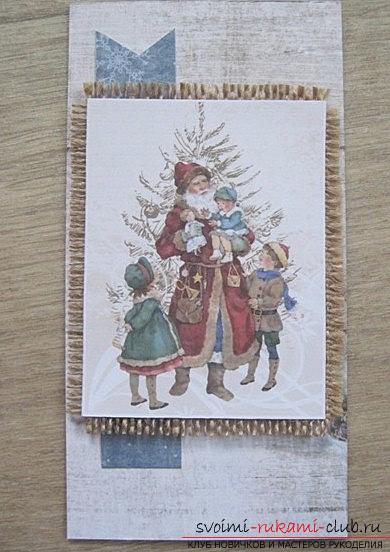 Decorate a chocolate card We take one sheet of paperpaper for scrap and make cutouts of two rectangles in size 8.5 by 16.5 centimeters. Also we form a rectangle in size 1 by 16.5 centimeters. We make decoration of the front part of the product. To do this, you need to try on the picture using our rectangle, which will be glued to the front side. The size should be smaller by one and a half centimeters in width than this version of the rectangle. Then, on the burlap, the picture is placed in such a way that the edge of the picture has a ledge on a pair of threads of tissue. They need to pull out and get a fringe version of the product. Then, using another scrap sheet, it is necessary to cut out the contrasting version of the strip, for a width of 3 centimeters.
 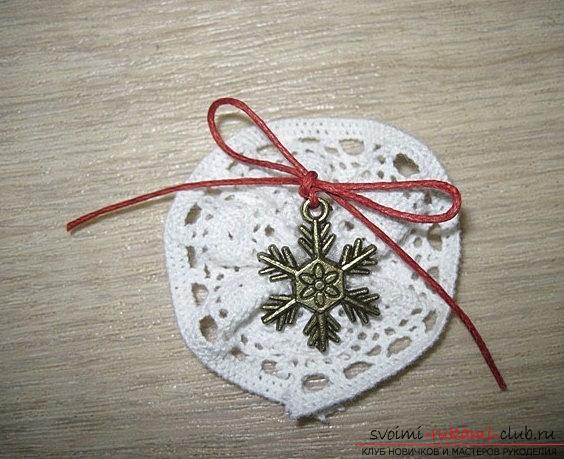 The length is left at an arbitrary value. The length will determine the format of the element's projection from under the future picture, on one or two sides. On the one hand, we will make a variant of the triangle, in order to form a small flag. Then, the element is tried. But, it does not stick. After using the element of the openwork napkin, it is necessary to cut the product into two parts and lay it under the image and the flag. It is very important that the napkin does not go beyond the edges and does not stick out.
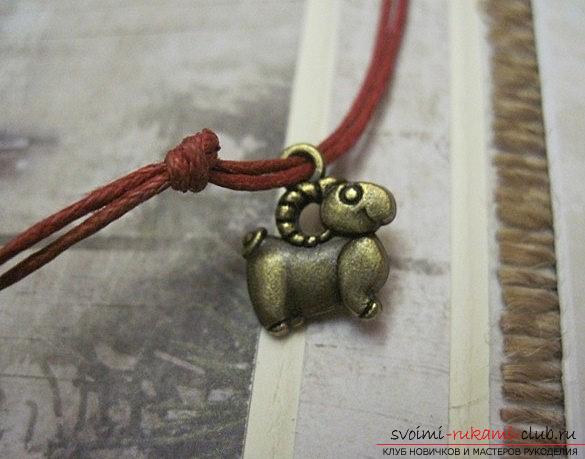
 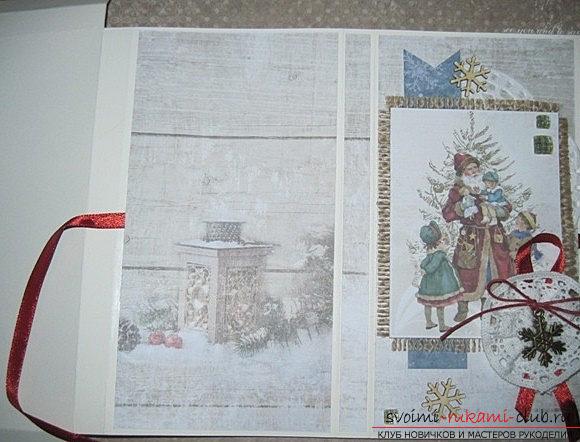 Next, you need to process a piece of braid. To do this, you need to collect the edges of the thread, then, pull them together and get the shape of a flower. then, using a metal pendant, it is necessary to pass the lace, and then - to tie a new bow. After, we sew and then glue the suspension on the center of the flower, using braids. This is necessary in order for the hole to be closed. We take the satin ribbon in order to fold the loop and then fix the middle of the tape with a stapler. Assembly In order to collect our composition, you need to take the lower corner of the image and place the loop there from the tape, then - from above to plant a flower and a suspension. After admiring what happens in the end. If you like the idea, we begin to work on sizing the details of the future composition using layers in the lower parts. Then, it is necessary to glue the ties on the roof and back in the main part - this is a tape in length by 20 centimeters. It is necessary to connect the base, as well as the rectangles of our paper images for design. We form a narrow strip for gluing on the bend, after - on the back and then, on the front. The figure is aligned with rectangles, according to the bend pattern. Then, small decor elements are added in the form of snowflakes and rhinestones. After, we are working on a karmashik.
 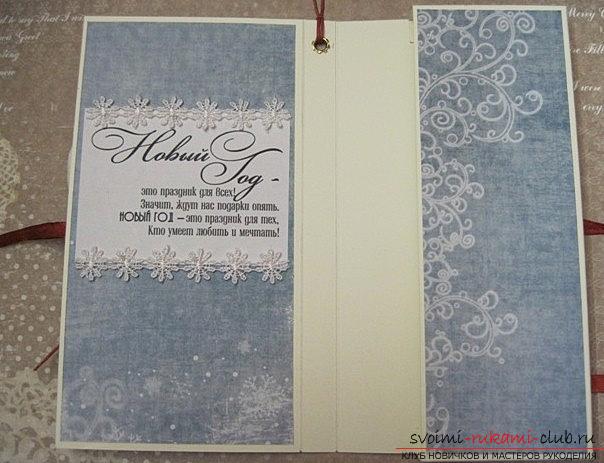 Pocket of a Chocolate Girl It is necessary to take the second sheetpaper for design and cut out of it the shape of a rectangle, the size of which will be 5.5 centimeters by 16.5 centimeters. we do gluing on the pocket lap. Then, you need to smear the hem in the pocket and then, gently stick it to combine the edges. The inner surface is formed from a rectangle in the size of 8.5 centimeters by 16.5 centimeters on the same sheet of paper that is used for the lapel in the pocket. From the top is a congratulation from the printout. Then, we make decorations with glitters or other elements. After, we form a hole in the fold in the postcard. You will need the thorns, which install eyelets and a punch. Then, in the place for the hole, we place our eyelet and accordingly, we fix there a loop that consists of a cord (waxed). The end of the cord should be put in the ear of the suspension from the metal, in the shape of a barrack or other shape. The ends of the loops should be tied in a knot. That's all! Our wonderful piece of chocolate is completely finished.
Comments
Related posts:
 Christmas tree bells with their own hands: new ways of decorating a Christmas tree and a house
 New Year gifts, New Year's crafts, souvenirs with their own hands, how to make a gift for the New Year, ideas for New Year gifts with their own hands.
 Popular methods of design of a New Year's composition from masters - with their own hands
 Postcard by yourself: Scrapbooking. One of the techniques for decorating a birthday card.
 New Year scrapbooking Christmas tree - New Year cards and Christmas tree with a snowman