Pattern of the original shirt for your dog. Sew an interesting outfit for your pet for free with simple tips
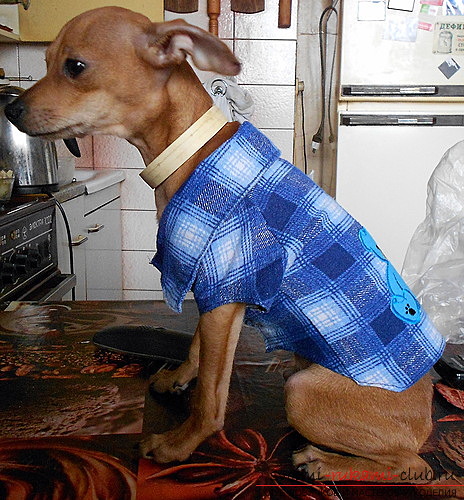
So the first cold autumn days come. We are all hurrying to wrap ourselves up in new warm clothes. But do not forget about our beloved four-legged friends. After all, they also require a fashionable outfit for the season, which will protect them from drizzling rain and winds during long autumn walks. But it is not necessary to immediately go to the store and look for clothes for the pet there, especially since there are very few specialized stores that are really good, and there are even fewer quality things there. Everything can be done much easier! A beautiful and simple pattern of the original shirt for your dog will help you sew a unique and actual in the autumn of 2014 outfit for your pet. In addition, you can do this completely free of charge with your own hands. In such a wonderful autumn shirt your dog will not only be reliably protected from all the vicissitudes of autumn, but will also look great and cheer up everyone around you.  In order to make a shirt for a dog, it will first be necessary to take measurements to make it very simple. It is most convenient to measure the dog with a measuring tape.
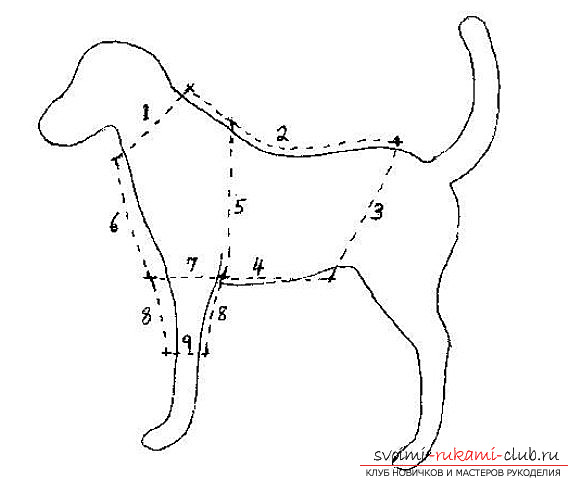
How to make measurements you can see in detail in the photo above.
When you finish all the necessary measurements and determine the parameters of the proposed shirts, you can go directly to the pattern.  To create a pattern, you will need two sheets of paper. The best parchment is a large format. On one sheet is the top of the pattern, on the second is the bottom half.
 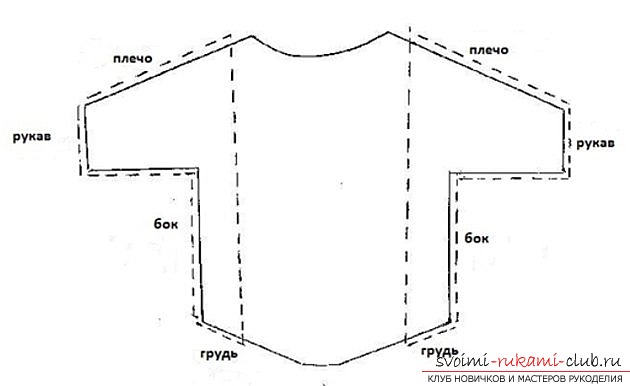 In the photo above, the back (the upper part of the pattern) is drawn with a solid line. The lower abdomen is indicated by the dotted line. Let's start creating the top part of the pattern.
- First, fold the sheet in half.
- Next, in the first half, draw one halfpattern. In the sizes you need to follow the measurements taken from the dog earlier. When you draw a pattern, make sure that the sides and sleeves of the product are on the edges of the paper, and the back is in place of the fold of the sheet.
- When finished, cut out the resulting pattern and cut it out.
- After that, we transfer the pattern to the fabric. Be sure not to forget to add a few centimeters of allowances for seams.
Go to the bottom of the pattern of the original shirt for your dog.
- It will consist of two parts. This will be necessary in order to later be sewn to the product lock or fasten buttons.
- By the line of the belly and along the line along the sleeves, the pattern of the lower part will coincide with the pattern of the upper.
- The shoulder line will be 2-2.5 cm higher than the top.
- Next, we measure the distance from the middle of the chestBetween the front paws to the base of the front foot. For bald and smooth-haired rocks, it is better to choose a variant with fastening of the shirt on velcro or zipper. In this case, leave another 2.5 - 3 cm to the right and left parts of the pattern. If the product is planned for a long-haired dog, then the buttons are best suited. In this case, you will need to add 2.5 cm to the right side (there will be buttons on this side) and 5 cm to the left (this is necessary to make the cuts for the buttons).
- When all the previous steps have been completed, we transfer the pattern to the fabric. Be sure to leave a few centimeters of allowances for seams.
The last step is to stitch the upper part of the shirt from the bottom and insert the chosen clasps. That's all the original shirt for your dogon a simple pattern is ready. Thus, you can see that it is very easy to make a wonderful thing for your pet. All you need is a simple pattern, the tools available in the arsenal of any hostess, a little patience and, of course, your boundless imagination. Having made such a wonderful product, you will not only please your pet and all those around you in a beautiful new way, but also save it from the cold Russian autumn. So do not hesitate to sew the original shirt for your dog right now and make your pet a real mod. The results of the work and useful observations are not forgotten to be shared in comments with other users.
Comments
Related posts:
 Overalls with a hood for a dachshund pattern with your own hands. We create beautiful and unique clothes for walking and at home to our beloved pets. Easily and completely free of charge we protect the pet
 We create an original decoration for a housekeeper for your house completely free of charge and without special efforts
 We sew simple but beautiful Roman curtains for the kitchen. Completely free of charge we make an excellent decoration by our own hands
 Knitted handmade overalls for small dogs will warm your pet in bad weather.
 Pattern of a waterproof overall for a dog. Photo and detailed description of the work