Temari how to make your own hands wonderful balls (photo and video)
Content
- Necessary materials
- We make the basis of Temari
- Video: forming the basis for the future ball
- Make markup
- Video: different types of markings for temari
- We embroider a pattern
- Video: a variety of embroideries
- A bit of history
- Video: master-class on making temari
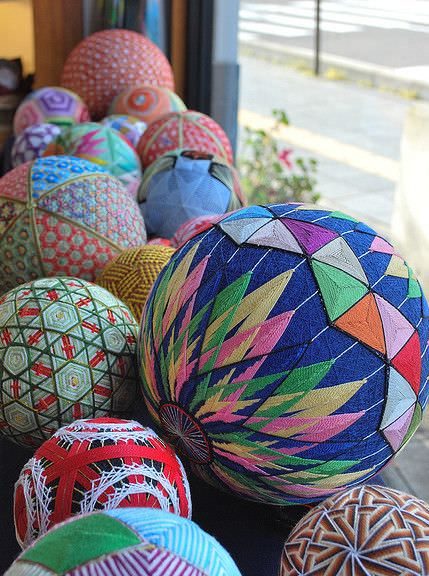
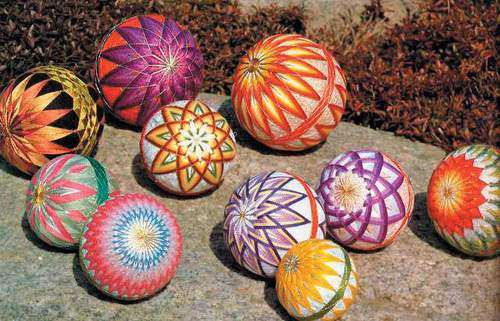
Traveling to the countries of the far east,Watching videos and photos about Japanese culture, you can repeatedly meet in the decor of buildings and apartments interesting balls with bizarre patterns. Coming a little closer, touching these wonderful ornaments, you realize that they are made of the most common thread. And then a simple philistine is amazed: how can such wonderful things turn out such wonderful things ?! In the article we will talk about how to make embroidered balls of Temari with their own hands.
Despite the fact that the art of creating embroideredBalls seems pretty complicated, you can learn by watching a few videos, analyzing the charts, reading a couple of three descriptions, supplemented by detailed, step-by-step photos. This master class will also help you learn basic techniques.


Necessary materials
In order to make your own handsAn amazing ball in the technology of temari, you do not need any intricate devices. All the necessary materials, for sure, will be found in your home. And so, you will need:
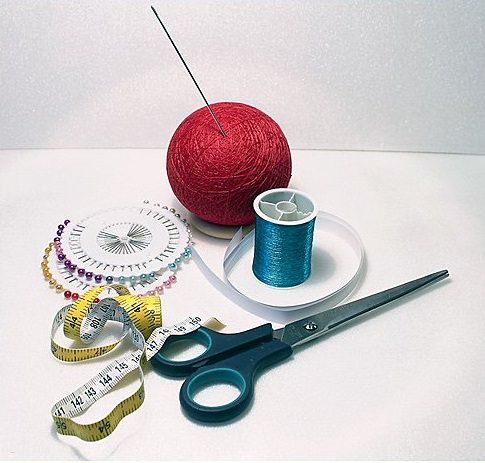
The basis - this can be a special blank inA foam ball (they are sold in large quantities in handicraft shops and art shops, they cost a penny). You can also use a tennis ball, a small rubber ball or, at worst, you can make a base for the ball with your own hands from kapron tights.
After all the necessary materials have been prepared, you can start working.
We make the basis of Temari
In order to make the basis for the futureDecorate we take a prepared ball and begin to wind it with a reel thread. At once we will say that the process is long and monotonous. But for the sake of future beauty can be tolerated. Wind the thread tight. So that the thread does not sag anywhere, otherwise the ideal shape will not work. Put coils in different directions. Thus, you will get such a mess. It will become the soil for embroidery of the pattern.
Video: forming the basis for the future ball
Make markup

From the accuracy and correctness of this stageDepends on the implementation of the embroidery of the ball. The marking of the embroidered globular ball is done according to the globe principle. That is, any ball should have a north and a south pole, as well as an equator. Have enough patience, and do not despair if you have to redo the markup several times. In the future, you, so to speak, put your hand, and it will be easier to perform this process. Perhaps, for you it would be advisable to view the video and photo lessons on the topic. For our trial balloon we will do a simple markup on 4 with the equator. This is the most primitive option, but it lies at the basis of any other, even the most complex markup. And so, proceed to marking our ball:
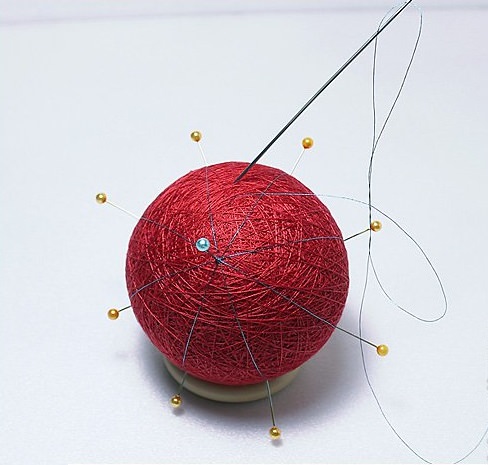
Next, we need to determine whereTo be the south pole and the equator. In order to determine the location of the south pole, take a piece of paper with which we wrapped the ball and bend it in half. Accordingly, to determine the equator, the resulting segment is bent two more times in half;
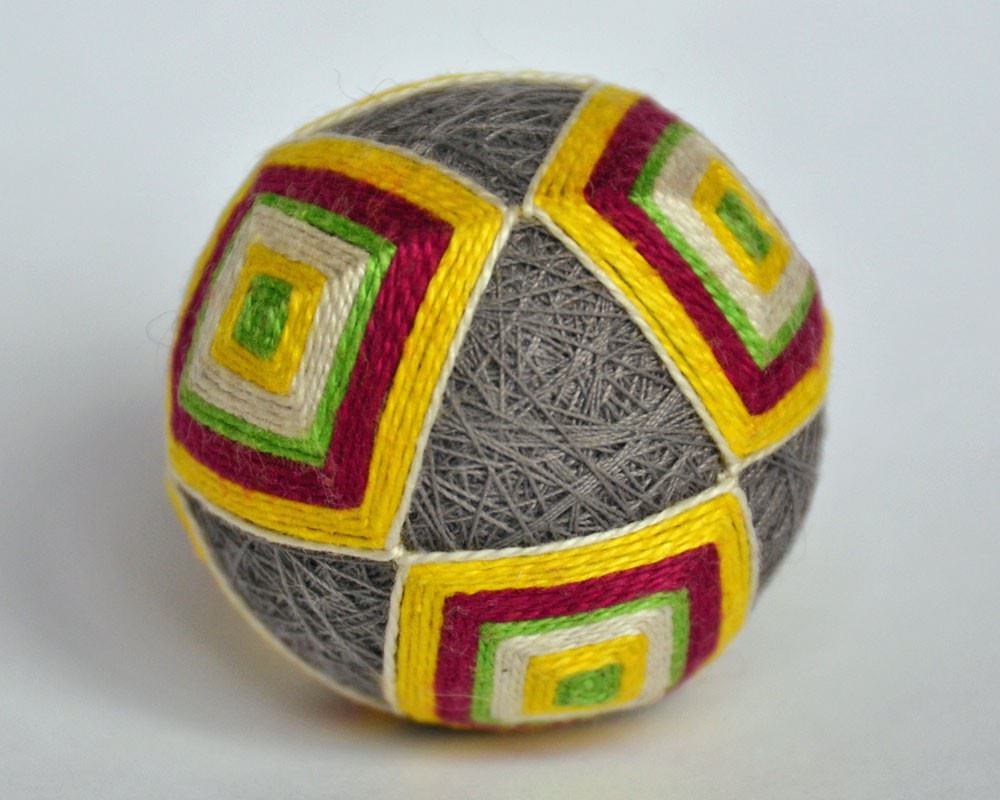
This completes the process of marking the ball, and you canProceed directly to the embroidery process. For the first time, it's better to choose some simple pattern. You can start with the pattern "Square". This is a simple technique that results in a very beautiful product. For other, more complex patterns, the markup will be slightly different. But the beginning is always the same. Variants for markup can be found in the detailed master classes that are presented on our website. Enjoy the wonderful video lessons about this.
Video: different types of markings for temari
We embroider a pattern
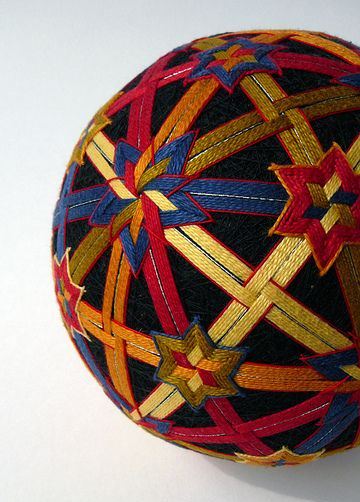
After the marking of our theme is over,You can start embroidering squares. As already mentioned, this master class is dedicated to the pattern "Squares" Our squares will be two-colored. Rows of different colors should alternate. To begin with, we note that during the operation the needle needs to be inserted under the winding of the substrate, and not just under the marking thread. First, make a large knot at the end of the thread, so that its tip does not jump out of tension.

We introduce the needle very close to the intersection of the linesMarkup and make a small stitch. We do the same at each corner of the markup. Embroider stitches need clockwise. All work can be represented in the form of a scheme. Red indicates the intersection of the markings, and blue indicates the progress of the stitches;
We make one row of stitches with a thread of the first color;
The technique of "Square" is the main one. It starts with more than one master class, video and photo lesson. In general, there are more than 100 ways to decorate Japanese temari balls. For them also there are descriptions and lessons on the Internet, and if you want you can understand this ancient
. In addition, with the acquisition of experience and understandingProcesses, you yourself can create patterns and make your own hands a real miracle, unique and unsurpassed. And adding to it love and tenderness, you will receive a real precious gift that will warm the soul of your loved ones.
Video: a variety of embroideries
A bit of history

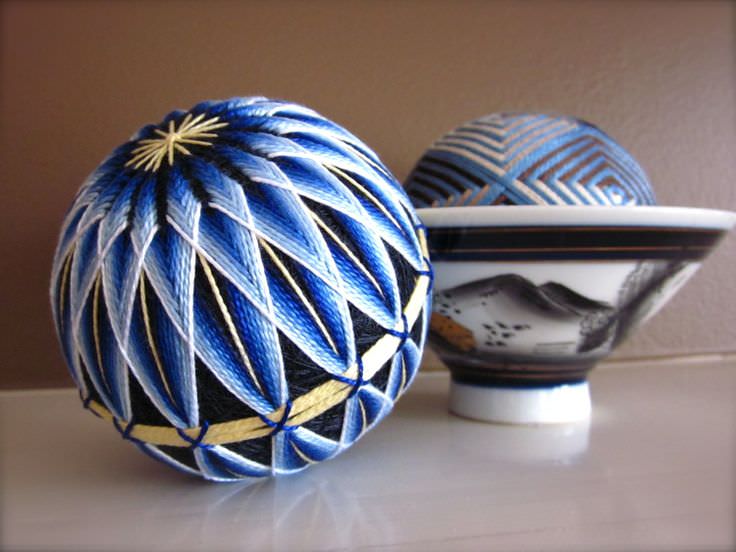
The ancient Japanese art of Temari was born stillIn the VIII century. Such balls were made, as a rule, for children. At the same time, mothers put all their love and care into the product. A little later, the art of Temari became the lot of the daughters of Japanese samurai, who spent their free time for embroidering balls. Even after several centuries, the art of embroidering balls in Japan has not lost its value. Today, in order to become a professional Temari master, you need to go through four stages of training, not one master class and produce about 150 training balls.
And although in our time,Decorative function, they are considered a precious gift. Giving such, without exaggeration, a work of art wishes his future owner happiness and success in business. They are suspended in the form of garlands, decorated with brushes and bells, put on sticks and put in vases instead of flowers, hang on a Christmas tree. But the most important feature of these lovely ornaments is uniqueness. Hardly anyone will be able to make two identical balls. Create for your health! There is nothing more surprising than watching miracles happen with your own hands.