A detailed master-class on the folding of two snowflakes using the modular origami technique.
What is snow made of? Snow - it's millions, even billions of sparkling, unique snowflakes. By the way, about the uniqueness. Snowflakes have more than 100 different signs. This means that there are at least 10 to 158 degrees (one with 158 zeros) of options for creating this masterpiece. This figure is about twice the number of all atoms in the universe, and it is incredible to find two identical snowflakes in nature. The snowflake is so fragile that it melts before it falls into the palm of your hand. But thanks to the origami, snowflakes you can admire a long, if you like, all year round.  This article presents a master classmodular origami to assemble two patterned snowflakes that you see in the photo. During the assembly, two simple snowflakes will also be shown. Thus, this article will help you to collect 4 variants of snowflakes. And having understood the principle of assembly - you can give free rein to your own imagination. We make the module The next photo shows the order of assembly of the triangular module (hence the name of the technique - modular origami). From one sheet of A4 size 32 billets are obtained. To assemble all 4 types of snowflakes presented in this article, you will need: 90 modules for the first snowflake, 42 modules for the 2nd and 3rd snowflakes, and 126 modules for the fourth. The photo at the beginning of the article shows the 1st and 4th.
  We collect the first snowflake. It will take 90 modules. Arrange the 12 modules in a circle, placing them on the short side, with pockets towards the center (see photo) - this is the first row.
  Use the 12 following modules for the second row, connecting them to the first one as shown in the photo.
  It turned out a circle - two rows of 12 modules.
  Attach another 12 modules, forming the third row.
  The next step is to collect a ray of snowflakes(the first of six). At any of the third-row modules, we put on two modules at once - on the left-hand corner is the right pocket, and on the right-hand corner is the left pocket. In the photo, the two modules added are shown in red.
  We put on one of these two modules (yellow on the photo).
  Even higher - again two, then one, two and one module.
  Here's what it looks like when assembling white modules:
  Similarly, we collect the remaining five rayssnowflakes. If we designate modules of the third row with numbers from 1 to 12, then the snowflake beams will go from the 1st, 3rd, 5th, 7th, 9th and 11th modules.
  Photo of the resulting snowflake from the other side.
  Collecting the remaining snowflakes The other snowflakes have a different scheme. More precisely - a different beginning. We take 6 modules (1 st row) and put them on the short side, with pockets towards the center.
  The second row has six modules, and all the elements are closed to each other in a circle. This is the basic detail for the 2nd, 3rd and 4th snowflakes.
  Assembling the 2-nd snowflake. Take for one ray of snowflakes 5 modules and connect them to a simple bar.
  Collect 6 such bars and put them on the base piece. Such a snowflake can be collected by any child (especially if it is helped with the assembly of modules). This snowflake took only 42 modules.
  Assembling the third snowflake. Take 5 modules for one ray of snowflakes and connect them into a column like this: on the left corner (1 module) - right pocket (2 module). Right corner (2nd module) - left pocket (3 module) and so on (see photo).
  Collect 6 such bars and put them on the base piece. This snowflake looks harder and nicer, but any child will collect it without much difficulty. This snowflake also took 42 modules.
  Assembling the 4th snowflake. Take the base part and on each of the modules of the 2nd row, put on 2 modules of the 3rd row. On the left corner - the right pocket, on the right corner - the left pocket (pictured in red).
  In the photo - all 12 modules of the 3rd row.
  Fourth row - 12 modules.
  The following modules could be called the fifthnext, but in fact - this is the beginning of the formation of the snowflake pattern. In any case, on the 4th row on 6 of the 12 modules (that is, through one), we put on 2 modules (the photo is shown in red).
  Above the newly added modules, add one at a time (in the photo - yellow color), above - two and even higher - one (see photo).
  Now - the most difficult operation. On the modules of the fifth row add an arch connecting the neighboring rays of the snowflake. The arch uses 9 modules (yellow and green in the photo). The right side of the arch for all 4 modules: the left corner - the right pocket. The left side of the arch - on the contrary: the right corner - the left pocket. The 9th module (top) closes the arch.
  Arch can be collected in place, that is, right on the snowflake, but more conveniently - separately.
  That's how one of the six assembled sides with an arch looks out.
  The last nuance. Free module of the 4th row, which appeared under the arch, fill in the uppermost pockets (in the photo - red).
 Collect 5 more arches and attach them to the snowflake. The product is ready!
  This is the reverse, to be exact - the face of the snowflake.
  P.S. (This advice has nothing to do with origami). If you want to hang a snowflake, then fasten the thread as close as possible to the center. Tie the center and guide the ends of the thread from both sides of the snowflake.
Comments
Related posts:
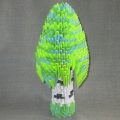 This detailed master-class modular origami with step-by-step photos contains a scheme for assembling birch from paper.
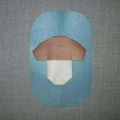 This detailed workshop of origami for children of 8 years will teach how to make an origami-mushroom from paper.
 Modular origami: the swan. Master-class for the 2015 Competition, master classes on modular origami
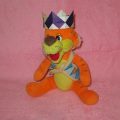 This detailed master class with a photo and description will teach you how to make origami for beginners - an origami-crown made of paper.
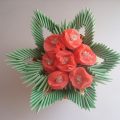 This master class will teach you how to make a violet in a vase in the technique of modular origami.