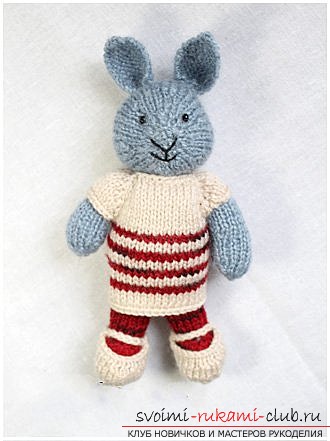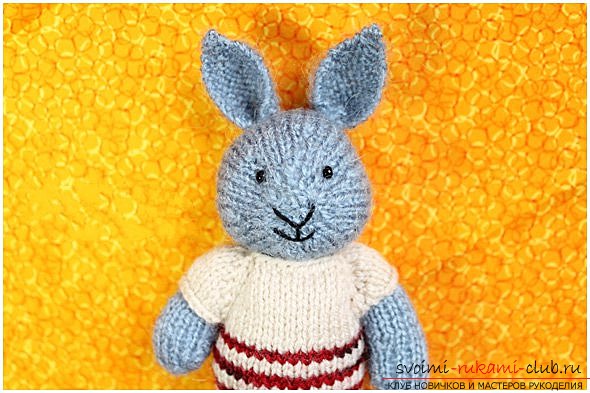
Such a toy as a bunny can easily be knit with your own hands and give it to your child.
Knitting knows no bounds! If you can read the diagrams, you can link the product, even though its author lives in another country and speaks a language incomprehensible to us. Of course, in different countries, in addition to general principles, there are national peculiarities of knitting. Take, for example, the well-known "grandmother's square". Do you know that in Spain we changed the pattern we used with small additions? And now the square motive looks quite different. And how nice it would be if we had the opportunity to see with our own eyes the work of foreign needlewomen. For example, we buy a plane ticket to Spain from Kazan and admire the traditional craftsmanship of the inhabitants of this country. Unfortunately, not everyone can afford it. So let's connect your imagination. Today I suggest you, go to the mysterious England, where the wonderful craftsman Julia Williams lives. It was she who came up with cute bunnies, knitted needles. Knit Julia began at 9 years old. After studying for a graphic designer, Julia, however, did not abandon knitting. Especially because it was needlework that helped her cope with the greatest stress due to her son's illness. Today Julia creates magnificent toys, knitted with needles. It's not just rabbits, but also mice, pigs, foxes and other little animals. 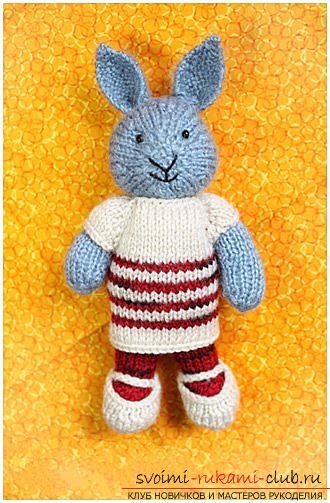 Let's try to tie a bunny on the motives of toys Julia Williams. This is not an original description, it is composed by us, looking at the photo of the finished works of Julia. Materials and tools for knitting:
- Yarn. It is better to take woolen yarn, for example, mohair.
- Needles that match the selected yarn. Typically, a suitable number of spokes is indicated on the yarn label.
- Needle for sewing knitted (knitted) products.
- Mulino black for the design of the face.
- Black beads for the peephole.
- Filler (sintepon, sintepuh, etc.)
Crochet head knitting: We begin to knit the muzzle and move to the back of the head. 1 row: We dial 8 loops. 2 row: we knit this series with the wrong loops (8). 3 row: edge loop (we do not tie it, but just put it on the right knitting needle), (1 persons, 1 increase in the broach) - repeat to the end of the row, 1 persons. (14) For those who do not know how to make an increase in the broach, I will explain: 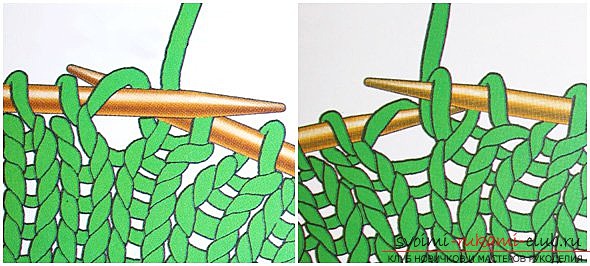 Using a working spike, grab the broach between the twoloops of the previous row in the area where you want to perform the addition, and throw it on the left spoke. Operate the spoke through the front wall of the hinge formed from the broach and tie it. 4 rows: purl (14). 5 row: 1 edge loop, (1 persons, 1 increase in the broach) - repeat, 1 persons. (26) 6 row: the purest (26). 7th row: facial (26). 8 row: purl (26). 9 row: 1 edge, (increment in the broach, 4 faces.) - repeat, until there is 1 loop left on the spoke, 1 face. (32) 10th row: the purest (32). Next, we knit another 10 rows, alternating face and purl. Those. The 11th row is knitted with facial loops, the twentieth is bypassed, and so on. 22 rows: 1 edge, 11 faces., 2 loops together face, 4 facial, 2 together facial, 12 faces. (30) 23 series: the purest (30). 24 rows: 1 edge, (2 loops side by side) - 6 times, 4 faces., (2 loops side by side) - 6 times, 1 face. (18) 25.26, 27 rows - garter stitch, i.e. All hinges, both in the front and in the back rows, knit with facial loops. 28 row: 1 edge, (2 loops together facing) - to the end of the row. Cut the working thread, the tail of the thread is dragged with a needle to sew knitwear through the remaining loops on the spoke. We fix the thread. We sew the head, stuff it through a small hole. We form from the synthepone three fairly dense balls and place them on the cheek and forehead. Knitting the torso of the bunny: 1 row: We type 15 loops. 2nd row: purl (15). 3 row: 1 edge, (1 increase in the broach, 1 faces.) - repeat 14 times (29). 4 rows: purl (29). Next, we knit 4 rows: in the front rows - facial loops, in the purl - the purl. 9 row: (7 faces, 1 increase in the broach) - repeat 2 times, 1 persons., (7 persons, 1 increase in the broach) - repeat 2 times (33). 10, 11, 12, 13, 14 - we knit, alternating the front and back rows (33). 15 series: 15 persons., 1 increase, 3 facial, 1 increase, 15 persons. (35) We send three more rows (35). 19 series: 15 persons., 2 together facial, 3 persons., 2 together facial, 15 persons. (33) We send three more rows (33). 23 series: 13 persons., 2 together facial, 3 persons., 2 together facial, 13 persons. (31) 24 row: the purest (31). 25 series: 1 persons., 2 together facial - repeat to the end of the series (21). 26th row: the wrong one (21). 27 row: 1 edge, (2 together facing) - to the end of the row (11). 28 series: purl (11). Close the hinges. Sew the hole and fill the body. Knitting the right foot: 1 row: We type 6 loops. 2nd row: purl (6). 3 rows: 1 edge, (1 increase in the broach, 1 faces.) - to the end of the row (11) 4 row: purl (11). 5 row: 1 edge, (1 increase, 4 faces, 1 increase, 1 persons.) - repeat 2 times (15). We send three more rows (15). 8 row: (1 person., 2 together facial) - repeat 3 times, 6 persons. (12) We send three more rows (12). 12th row: 1 edge, 1 increase, 9 persons., 1 increase, 2 persons. (14) We send 9 rows. 22 row: 1 edge, (2 together facial) - 6 times, 1 face. (8) 23 row: the purest (8). 24 rows: 1 edge, (2 together facial) - 3 times, 1 face. Close the hinges.
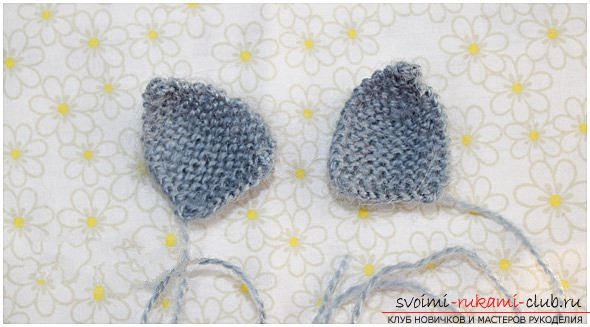
 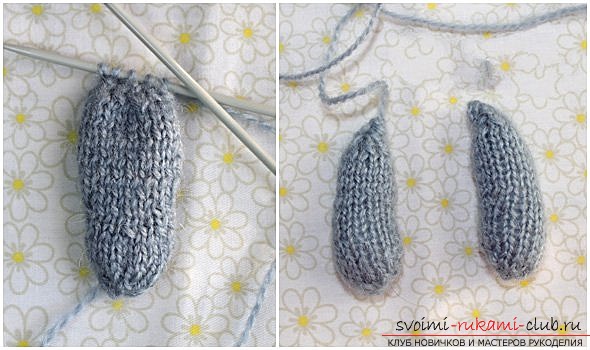 Knitting the left foot: 1 row: We type 6 loops. 2nd row: purl (6). 3 rows: 1 edge, (1 increase in the broach, 1 faces.) - to the end of the row (11) 4 row: purl (11). 5 row: 1 edge, (1 increase, 4 faces, 1 increase, 1 persons.) - repeat 2 times (15). We send three more rows (15). 8 row: 6 faces., (1 faces., 2 together facial) - repeat 3 times (12) Then we knit in the same way as the right foot. Knitting bunny legs: 1 row: We type 10 loops. 2nd row: purl (10). 3 rows: 1 edge, (1 increase, 1 faces.) - repeat to the end of the row (19). 4 rows: purl (19). 5 row: 1 border, 1 persons, 1 increase, 7 persons., 1 increase, 1 persons., 1 increase, 7 persons., 1 increase, 2 persons. (23) We send three rows (23). 8 row: 1 border, 6 persons., (2 together persons.) - 4 times, 8 persons. (19) 9 rows: 1 edge, 5 purl, (2 together are new) - 4 times, 5 purlins (15). 10th row: 1 border, 5 persons., 2 together persons., 7 persons. (14) We send three rows (14). 14th row: 1 margin, 1 increase, 12 persons., 1 increase, 1 person. (16) We send 5-7 rows. It all depends on how long you want to make a foot for the bunny. I knitted another 7 rows, i.e. 21 I had the last row. After that, close the hinges. Knitting the ears: We'll knit the ears for the bunny with garter stitch. 1 row: We type 10 loops. We send 16 rows (10). 17 row: 4 persons., 2 together persons., 4 persons. (9) 18 row: 4 persons., 2 together persons., 3 persons. (8) 19 row: 3 persons., 2 together persons., 3 persons. (7) 20 row: 3 persons., 2 together persons., 2 persons. (6) 21 rows: 2 persons., 2 together persons., 2 persons. (5) 22 row: 2 persons., 2 together persons., 1 persons. (4) 23 series: 1 persons., 2 together persons., 1 persons. (3) 24 rows: 1 persons., 2 together persons. (2) 25 row: 2 together persons. We finish knitting. The base of the ears is pulled together.
  Knitting Dresses: We type 26 loops. 1 row: 4 persons., an increase, 1 person, an increase, 3 persons., an increase, 1 persons, an increase, 8 persons, an increase, 1 persons., an increase, 3 persons, an increase, 1 persons, an increase, 4 persons. Next, all the even rows will be knitted with the wrong loops. 3 row: 5 persons., An increase, 1 person, an increase, 5 persons., An increase, 1 person, an increase, 10 persons, an increase, 1 person., An increase, 5 persons, an increase, 1 person, an increase, 5 persons. 5 series: 6 persons., An increase, 1 person, an increase, 7 persons., An increase, 1 persons, an increase, 12 persons, an increase, 1 persons., An increase, 7 persons, an increase, 1 persons, an increase, 6 persons. 7 series: 7 persons, increase, 1 persons, increase, 9 persons., Increase, 1 persons, increase, 14 persons, increase, 1 persons., Increase, 9 persons, increase, 1 person, increase, 7 persons. 9 row: Next we need one more spoke. We loop 9 loops with the front loops on the 1st spoke. On the next needle 11 loops facing (this will be the sleeve). Next, we knit the sleeve: the purl series + closing the loops. 19 front loops per 1st spoke (the one on which there are already 9). Then we knit the second sleeve.
 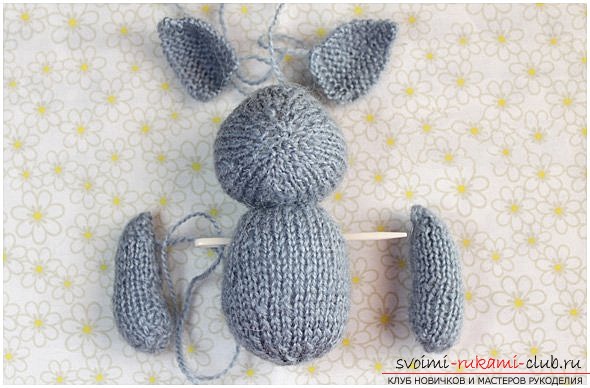 After we knit a dress of the necessary length. The shoes knit like the beginning of knitting the legs (up to 8 rows inclusive). If the yarn for shoes is thinner than the one from which the bunny is connected, then in the 5th row instead of the 7 face we sew 8. We make out the face: embroider a smile, a nose and sew eyes.