The addition of a simple swan figurine in origami technique will appeal to children and adults and will not take long
A simple figure of a swan in the technique of origamiis made for several minutes even by a person who has never encountered this kind of art before. It's easy for both an adult and a child to cope with. In this article you will find a detailed description and a scheme that facilitates easy learning. Making of various paper crafts in origami technique has long become popular among the adult and children of our planet. Technique origami, as is known, originally appeared in the eastern countries - China and Japan. It was in this part of the world that paper was invented. Here it was considered a bad form of inability to fold paper, turning it into real and fairy-tale characters. Only in the twentieth century, after the end of the Second World War origami became the property of the whole world. Amazing products made of paper are fascinating and attract attention. There are many ways to make this or that piece or piece of paper in the origami technique. In today's article, we will tell you how to add a simple figure of a swan in origami technique. There are many options to collect this majestic, noble bird. It can be volumetric or modular, or folded from one sheet of paper. 
 If you are a novice master, it's beststart working from simple schemes. They will suit both adults and children. Kids will be in indescribable ecstasy from such an interesting and entertaining process. For work we need only paper. We can take absolutely any color available, even a sheet with a pattern in several color shades. It will turn out even more beautiful, colorful.
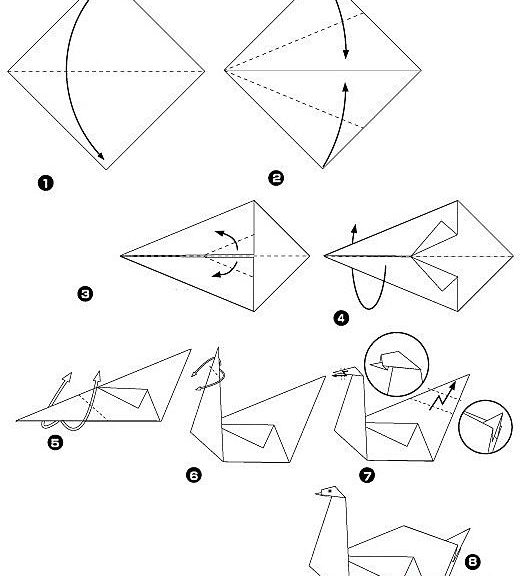
  The paper must be square in shape. Therefore, if we have a rectangular sheet, first we need to give it a square shape and only then start to make a figure of a swan. Fold the sheet in half from top to bottom. Well we squeeze the wrinkle, making pressure, and unbend, giving the leaf the starting position. Turn the sheet over and bend both edges to the inside. They should be located relative to the line of the previous fold. As a result of these actions, the angle should be sharp with the gap left. Carefully smooth the workpiece, which in the near future will become a swan. To form the neck of our wonderful bird, we need to bend one of the pieces in the opposite direction. In this case, we will bend the left side to the right side. Until we are convinced of the correctness of the arrangement of all angles and bends, it is not worthwhile to smooth over the places of the additions too much. Then we will have the opportunity to correct this or that addition. After you have done everything correctly, carefully, with the use of force, smooth out all lines of additions. Let us disentangle our last addition and raise the workpiece so that it is possible to divide the two edges from below. We need to turn our necks on the wrong side, placing it so that it is on top, above the swan's body. To achieve such an effect, we will be using the lines of additions we received as a result of previous actions. To make the poultry fit all the requirements and norms, we need to make a fold on the upper part of the neck (which we have done before). Again, bend the workpiece and turn the top corner to the opposite side, purl, on top of the other layers, which consists of the neck of a noble bird, made from paper in origami technique. In order that the image of the swan took a complete appearance, we need to finish the work on creating the neck and head. Therefore we will make two folds of small dimensions, raise the swan so that its top is placed in the right hand, with the second hand we will squeeze the beak of the bird and the front part of its head, making it flattened. The hand that formed our head is slightly lowered downwards. In doing so, we must ensure that as a result of this manipulation, the slope of the swan's head is changed. We must achieve the following effect: the upper part of the head must be broken at the point located in the middle itself, and all the layers, of which a detail such as the head is made, must necessarily come to the top of the layers forming the bird's neck. This action of the master is called a curl. The result will be a beautiful swan - a royal bird, causing admiration and respect. To make the work easy and exciting, we offer you a scheme for assembling a simple swan figurine in the origami technique. It is quite enough. But if you want to view in more detail each separate stage of the work, use video materials, which in the Internet resources can be found a huge amount.
 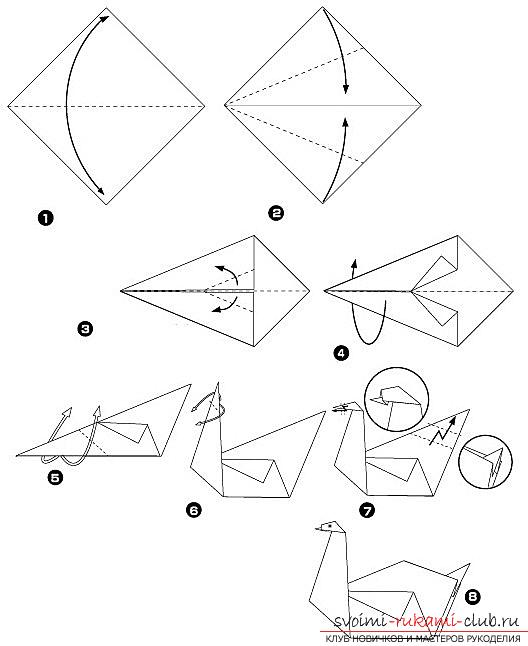 You can carry out this artwork and together withchild. Children will love the transformation of an ordinary paper sheet into a fairy-tale swan and they will gladly take up the creation of such an original product. The result will not take long. After only a few minutes you will be able to enjoy such a wonderful bird - a symbol of love, faithfulness and tenderness, grace and nobility, which is for the inhabitants of all countries of the world, without exception, a swan.
Comments
Related posts:
 You can create a beautiful tree with your own hands from sisal, and it does not waste much time and material. Such a Christmas gift will appeal to children and adults.
 A simple drawing of a 3d drawing, an image of a ladder, a pencil for beginners will not take long
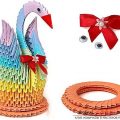 How to make a beautiful craft in the technique of modular origami, step-by-step photos and a description of the work on creating a charming snowman and a bright swan from modules of different colors
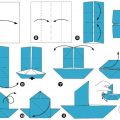
 The three-dimensional figure of a dog in origami technique is not difficult to create and is accessible to everyone
 How to make an origami swan from paper: a step-by-step instruction.