How to sew the original toy in the shape of a cat. Description of the process of sewing a cat on a pattern by own hands
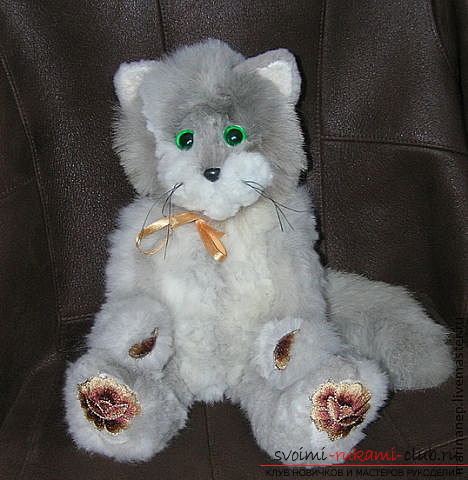
One of the most beloved petsare cats. In different epochs there were different attitudes to cats, at one time they were exalted as a deity, in another they were called demons. But if you look at today's cats, then they are favorites of many and quite similar to each other. Same size, similar morals, well, the main unifying feature - gluttony and cunning. 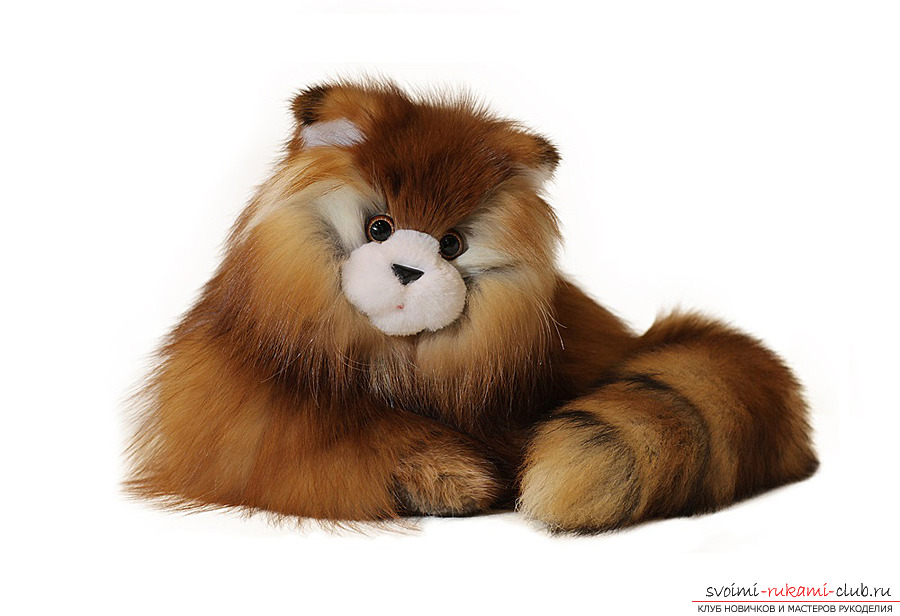 If you do not get it for some reasonget a cat in your house, then a wonderful way out of the situation will be a double-made pet made with your own hands. To do this, we picked up several options, how to make the cat itself the most similar to the present.
  In order to sew a nice fluffy kitten we will need:
- Fur fabric (color take on personal preference) 26x78cm.
- Fibrous rope 10-13 cm (mustache)
- Black felt for cat eyes and gray for the ears
- Needle for embroidery, black thread (mulina, for typewriter), pattern.
On the pattern you need to prepare all the details of our cat.  If you sew a cat out of cloth, it is worth considering thatit will be much thinner than the fur, consider this fact when using a pattern and when you will sew a face. If you choose very close to the real cat's eyes for a toy, it immediately acquires a more realistic look. Well glue the eyelids, as they often fly off in the first place. When approaching work, open the front of the body, the base, then the tail and lining. Carefully cut the fur fabric, watch the direction of the villi (they should be in one direction). You can use this pattern of a fur seal:
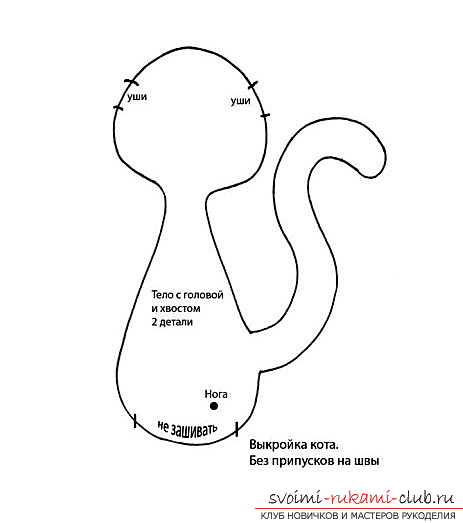
 Gently carving out all the details of the cat, start themsew. It is necessary to take into account that when sewing together, we fold the details with the front side, stitch it together, and then gently turn it out, straightening the seams (ears and tail especially). We sew our eyes to the head before we start sewing it to the body. After sewing all the parts, our cat needs to be turned out, properly straightening the seams and stuffing the toy. First paws, farther than the muzzle, and so on. We sew the nose with the help of a string of mulina, then make a couple of stitches, make our cat mouth. When making a mustache, we sew through the thread through the face, on the one hand, to the second, make a knot and pull the thread back so that the knot lingers on the fabric. The same manipulation is done on the other hand. Embroider the cat on the paws with the stitches of the fingers, spread the hair neatly. That's all your charming little animal is ready!
Comments
Related posts:
 How to sew a vest over a pattern with your own hands. Detailed description of the process of working with recommendations
 How to sew sliders for a child yourself. Pattern of children's sliders with a description of the process of tailoring their own hands
 How to sew a comfortable nightgown with your own hands. Master class with a detailed description of the process of sewing night shirts
 How to sew a cozy slippers with your own hands. Step-by-step description of the work
 How to make a toy for a cat yourself: tips and types of toys for free.