How to tie a cute little toy crochet? A step-by-step guide with photos and description of the binding technique
Soft toys like everything! Even adults sometimes freeze in front of the shelf with fluffy bunnies, seals, and mice. But the most important toys still remain bears to this day. And it is not necessary that they should be large and plush. So, for example, you can tie a cute bear with your own hands using a hook. And knitting such a toy will take quite a bit of time. 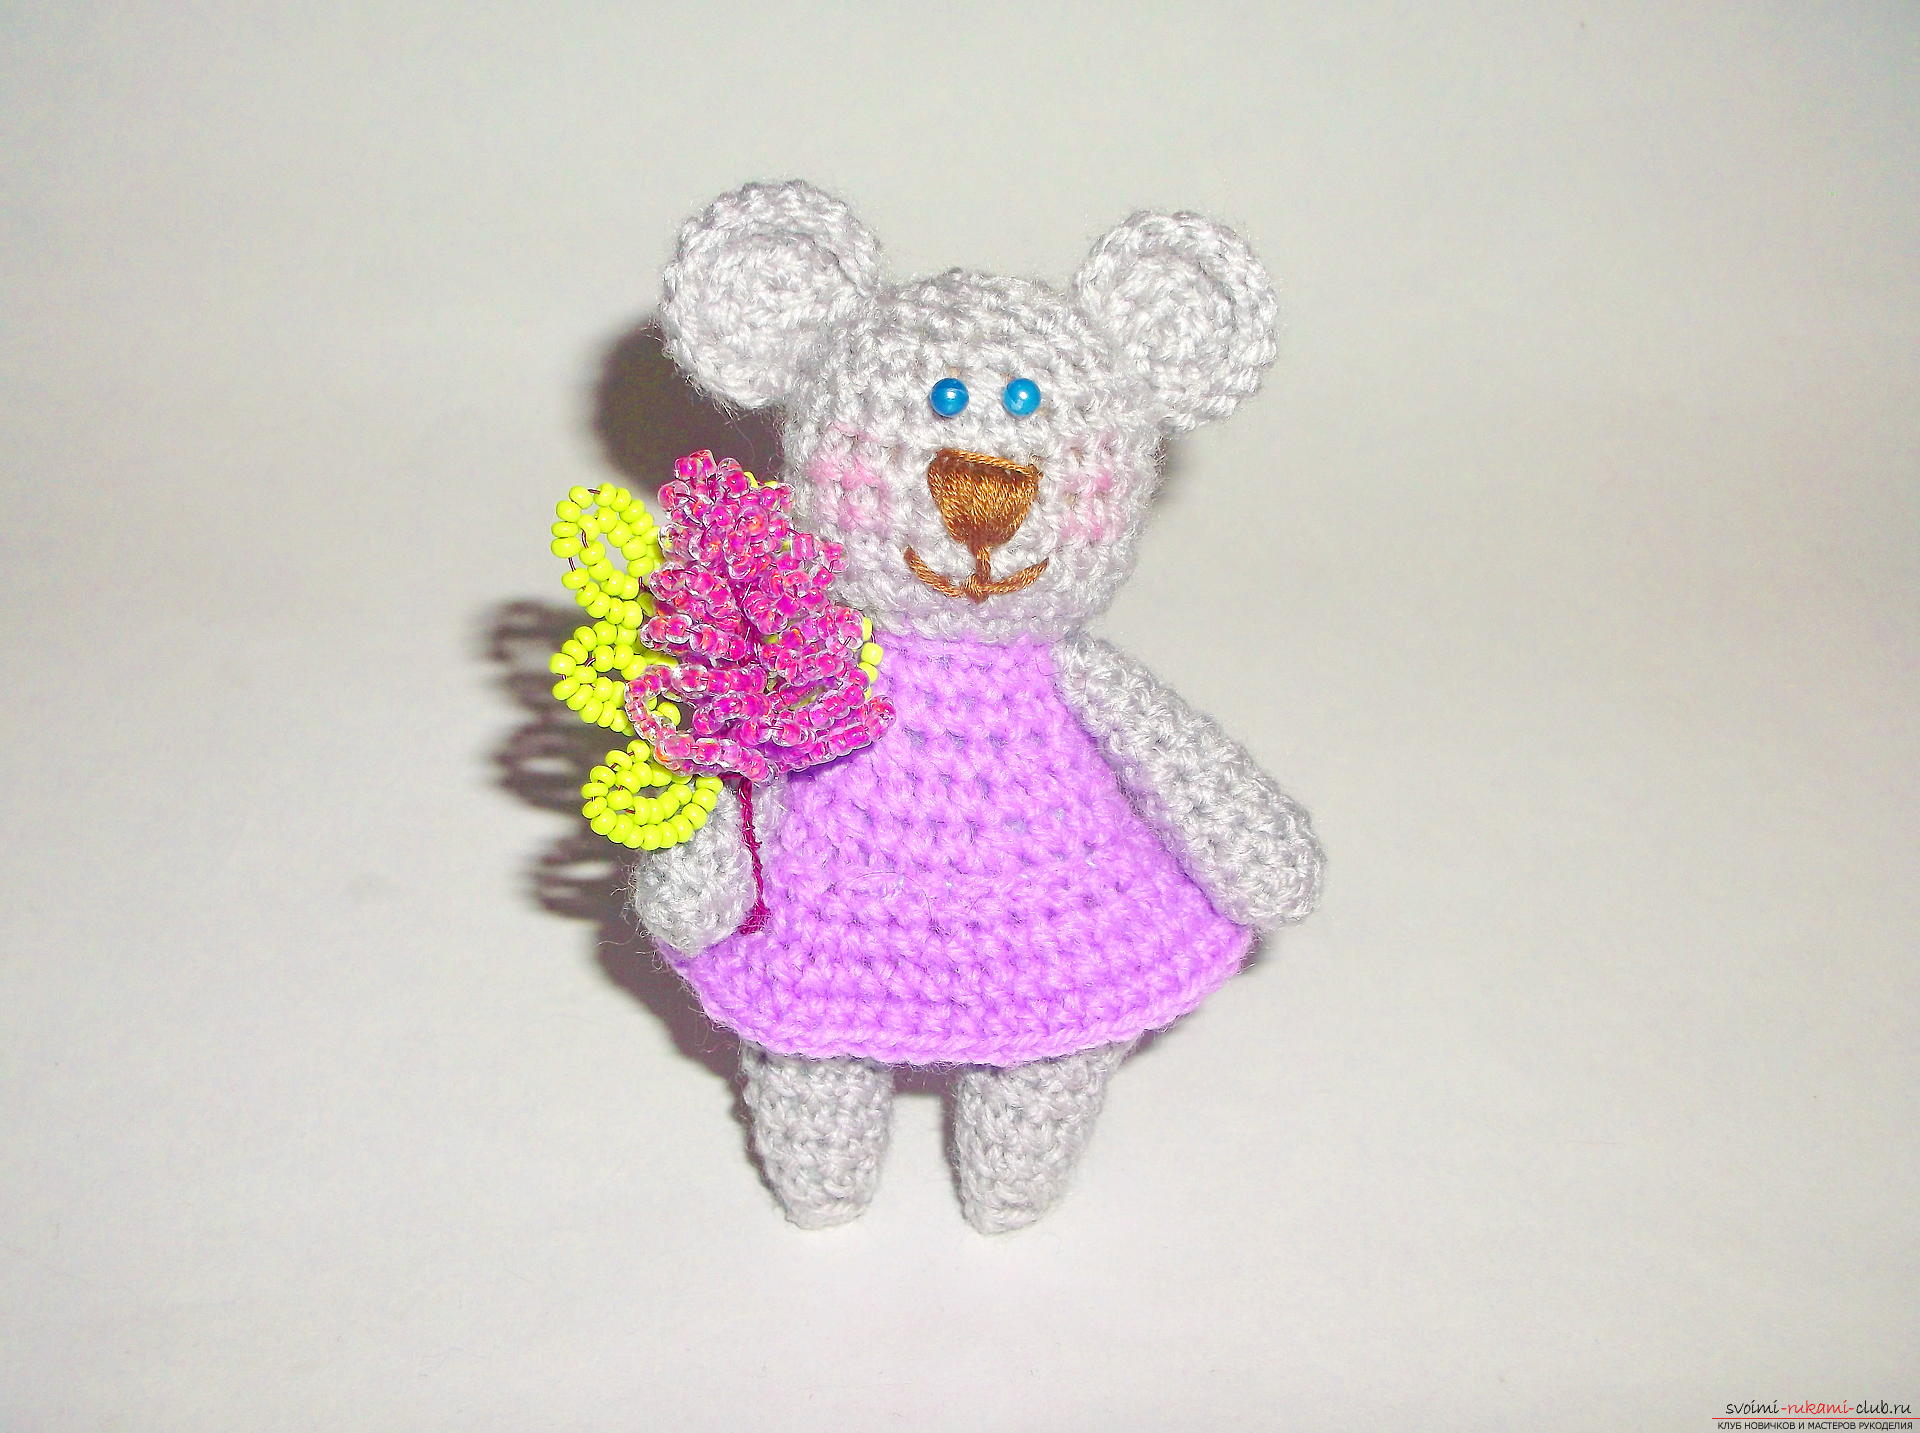
What should be prepared?
To knit bears we will need the following materials and tools:
- The yarn is gray and lilac;
- Hook;
- Filler;
- Threads of a moulin;
- Needle;
- Scissors;
- Two small beads;
- Blush.
Description of the stages of work
Begin to knit a bear we will not be with the head, likeusually they do it, but with their feet. And let's go higher to the body and, accordingly, to the head. That is, we will get a bear cub almost whole knitted. The exception here is only the front paws and ears. We take lilac yarn and make a sliding loop, in which we will bind six columns without a crochet. And in the second row we'll make three additional. So we have only nine posts. And we knit five circles around them. And now make three more. And we'll tie one row without them. The second leg, or rather the paw, we knit the same way. But we will not cut the thread here, but make two air loops and join the second leg. 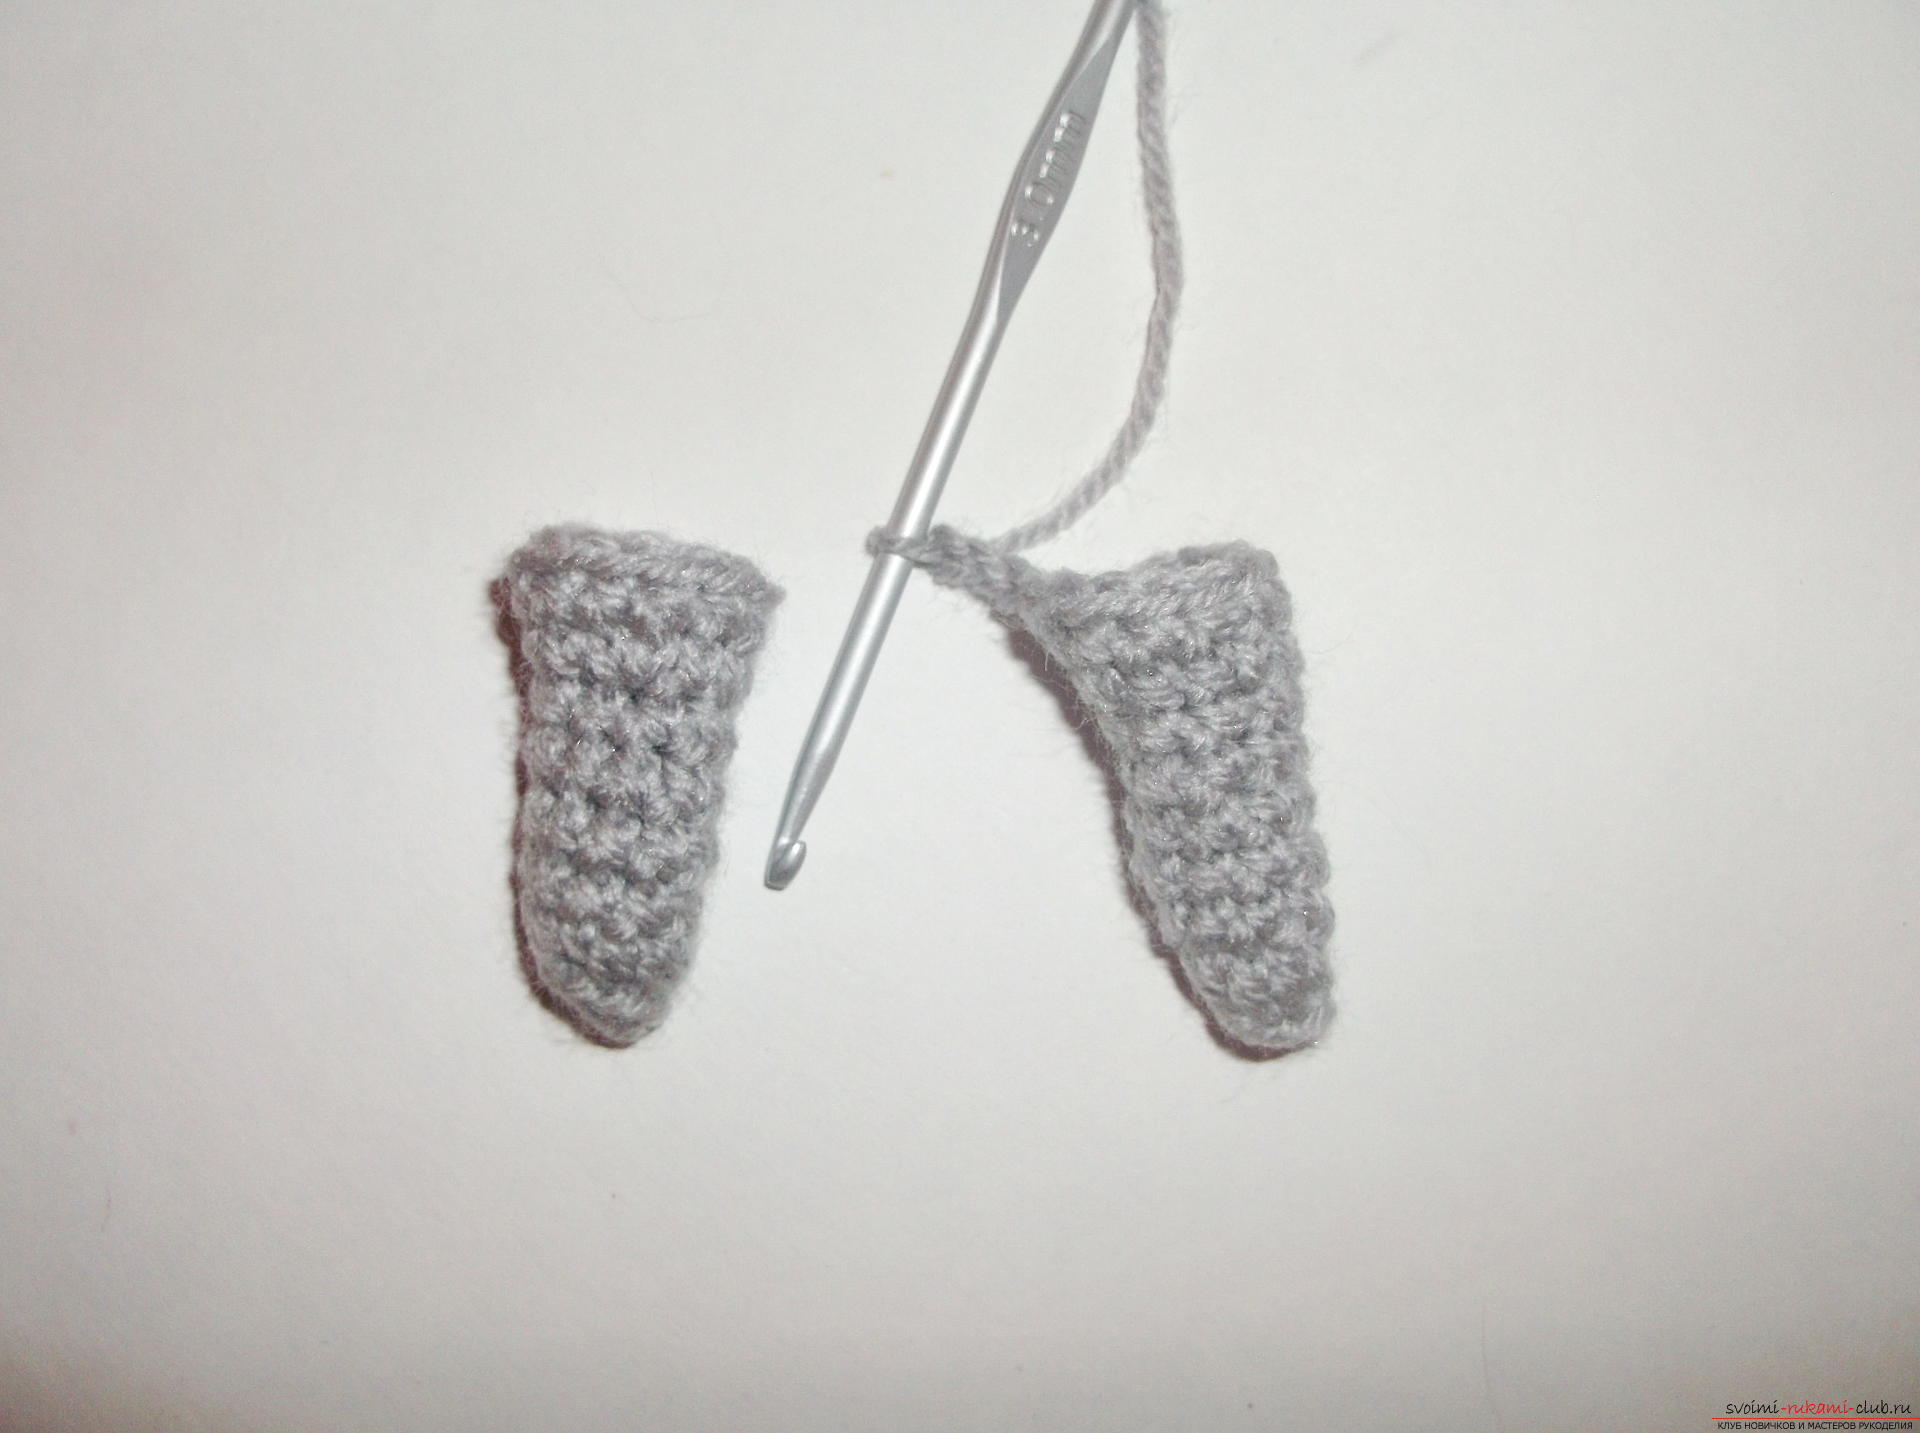
 Next, we will knit in a circle four ryadochka. And then we will replace the thread with the lilac. After all, we'll have a bear in a lilac dress. We tie one row. And after it we'll make six discounts. Next, we knit a series without any deductions. And in the next we will again make six decrements. Then again there is a series without deductions. And in the last lilac row we'll make four adjustments. Let's change the thread to gray. We make a series with additions in each loop.
 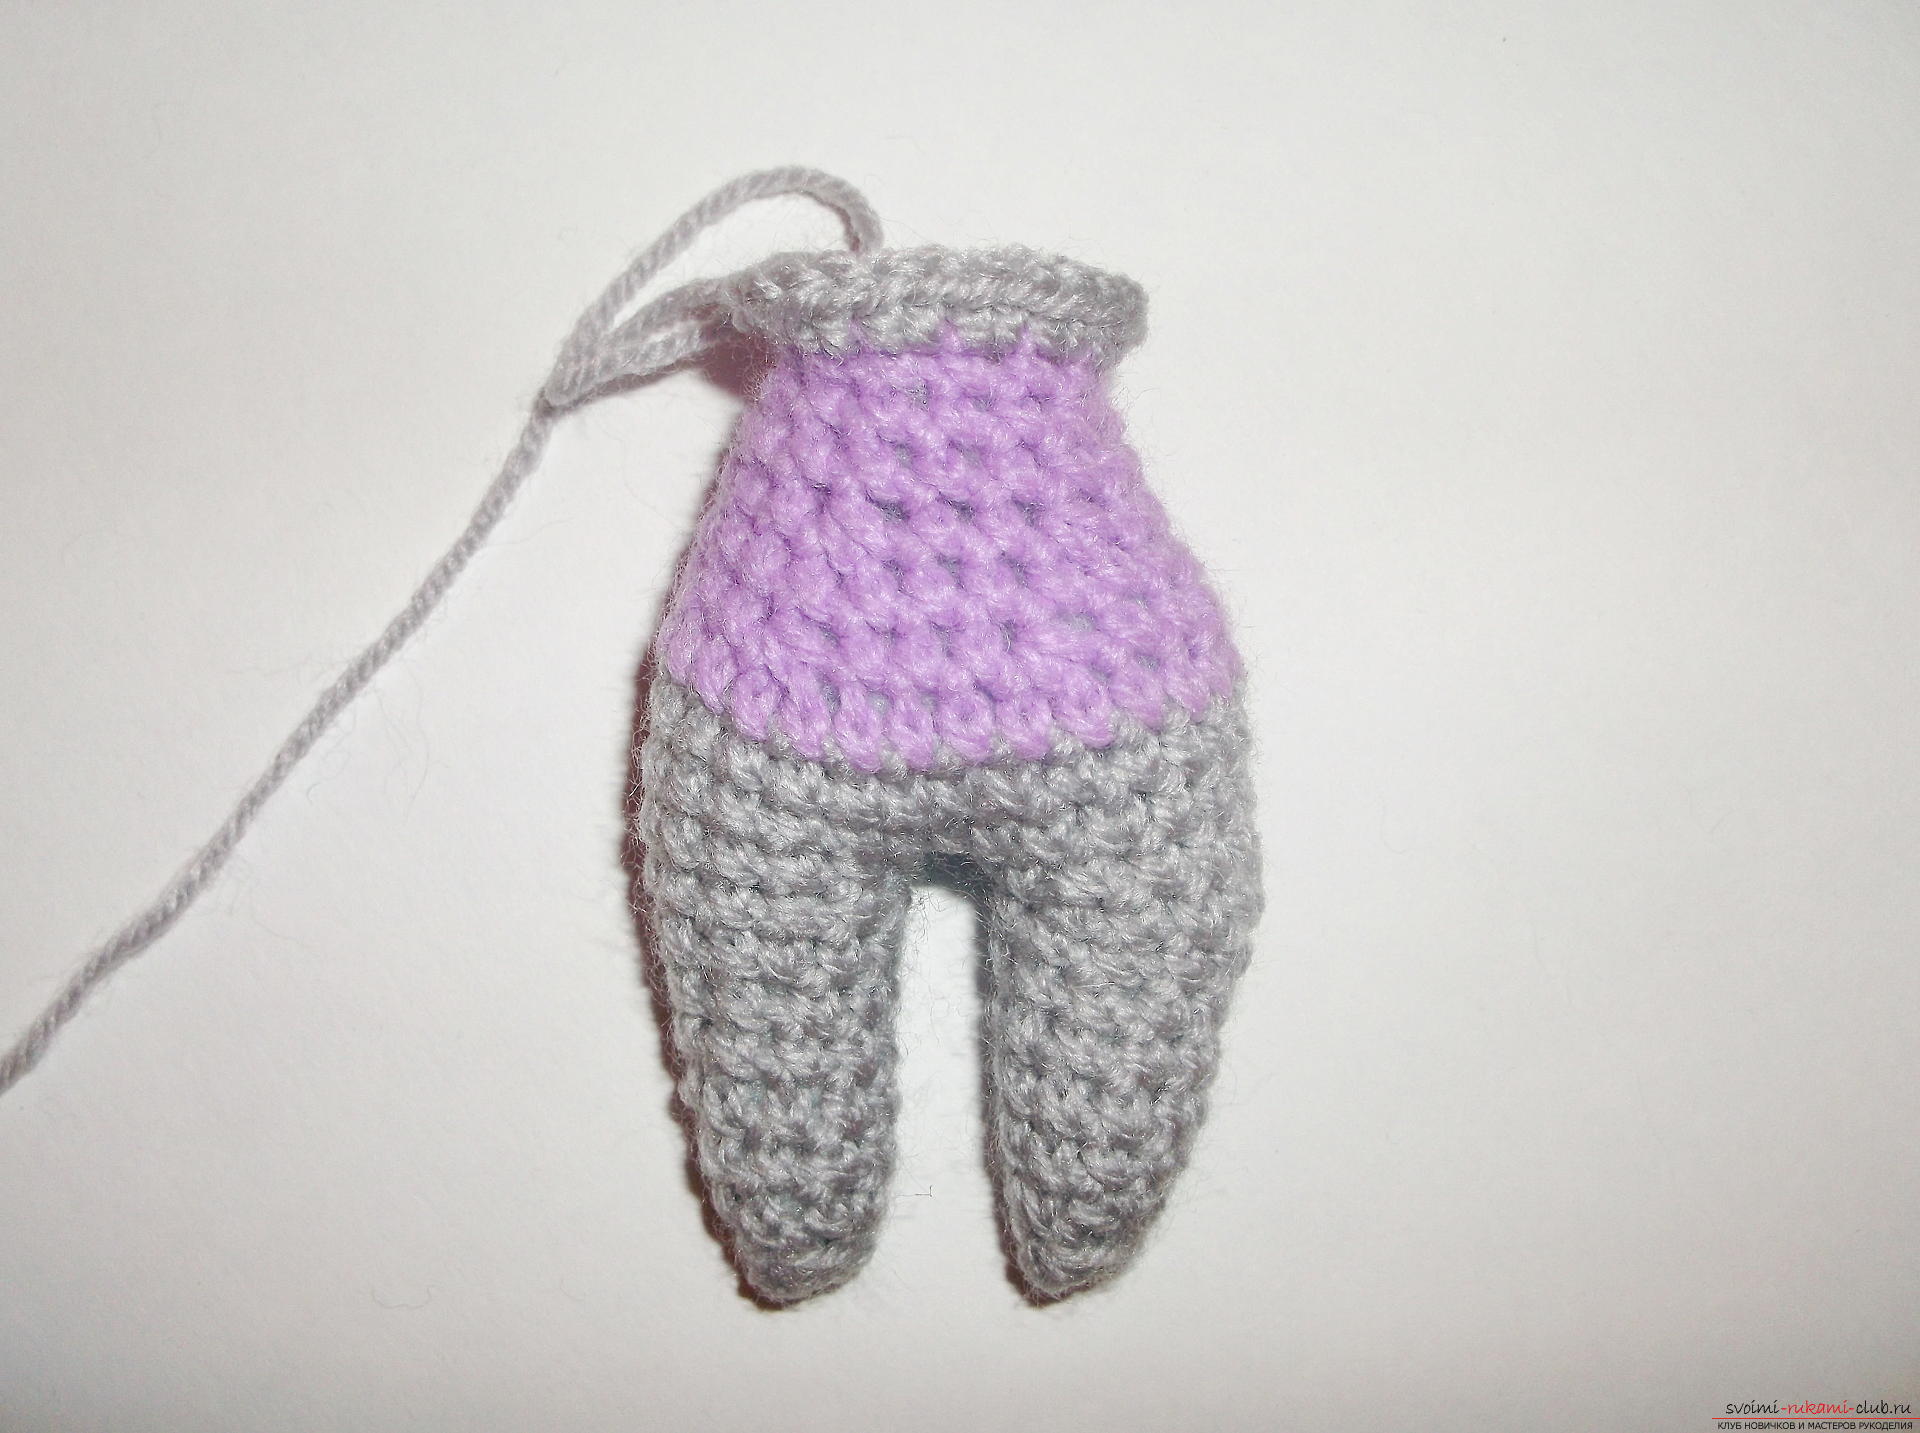 Further we will make increments in every fifth loop. Without increments we will fasten four rows and proceed to the adjustments. In two rows we will make four penalties, and in the next two on six. And we will tighten knitting.
 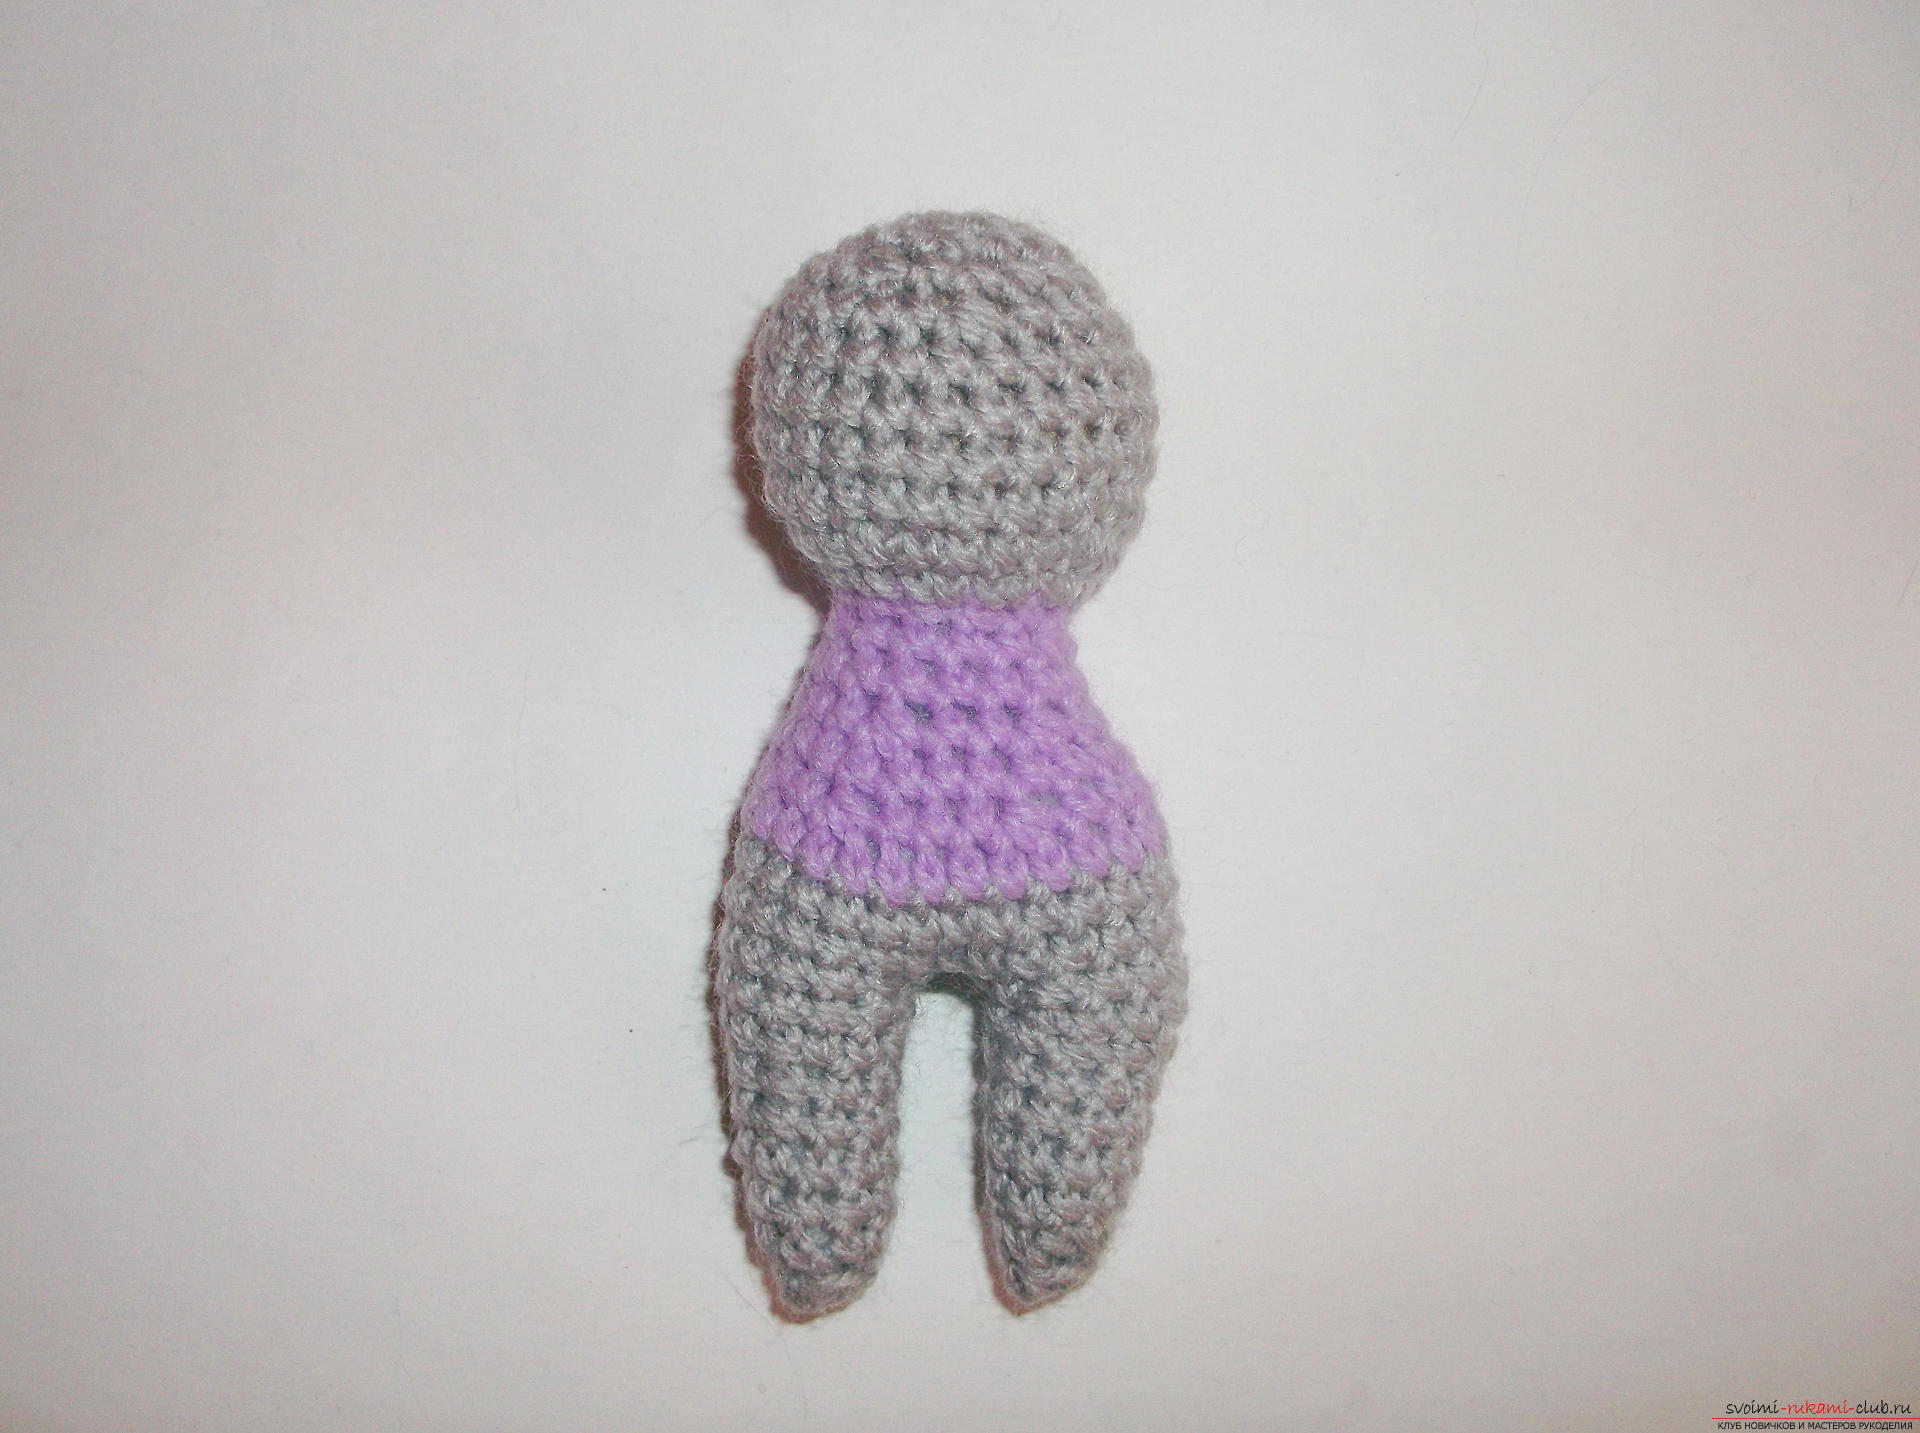 Do not forget to stuff the toy with filler. It is better to fill more tightly, so that the bear does not crumple and does not change its shape. Now tie the front paws to the teddy bear. They will be gray. And so we take gray yarn for their knitting. Again, make a sliding loop and again in it we will fasten six bars. In the second row we will make three increases. And we'll fasten eight more ruffles without adding.
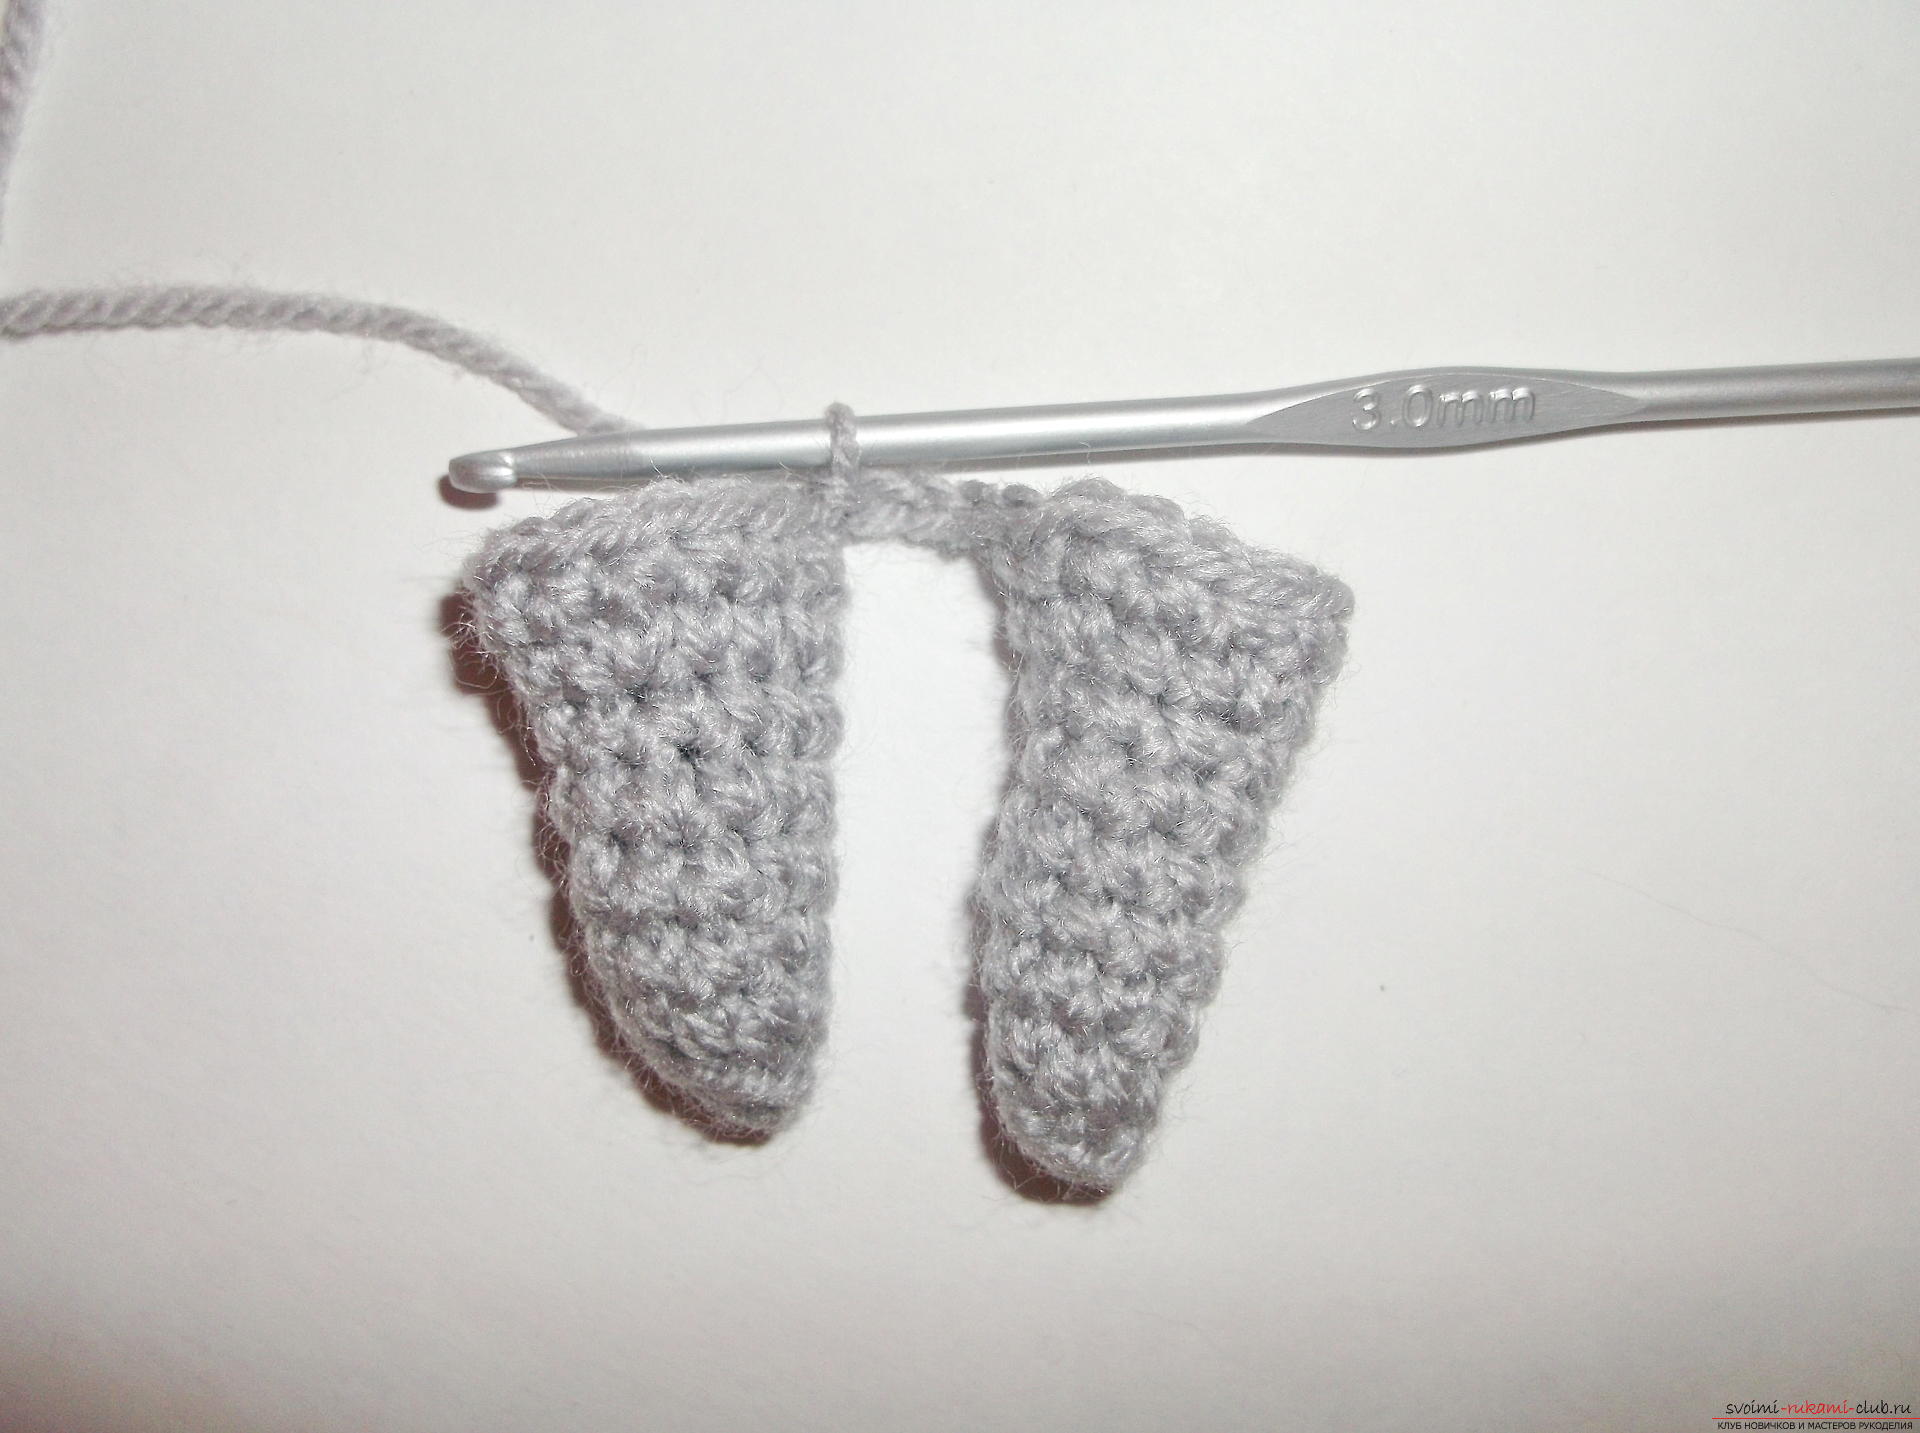
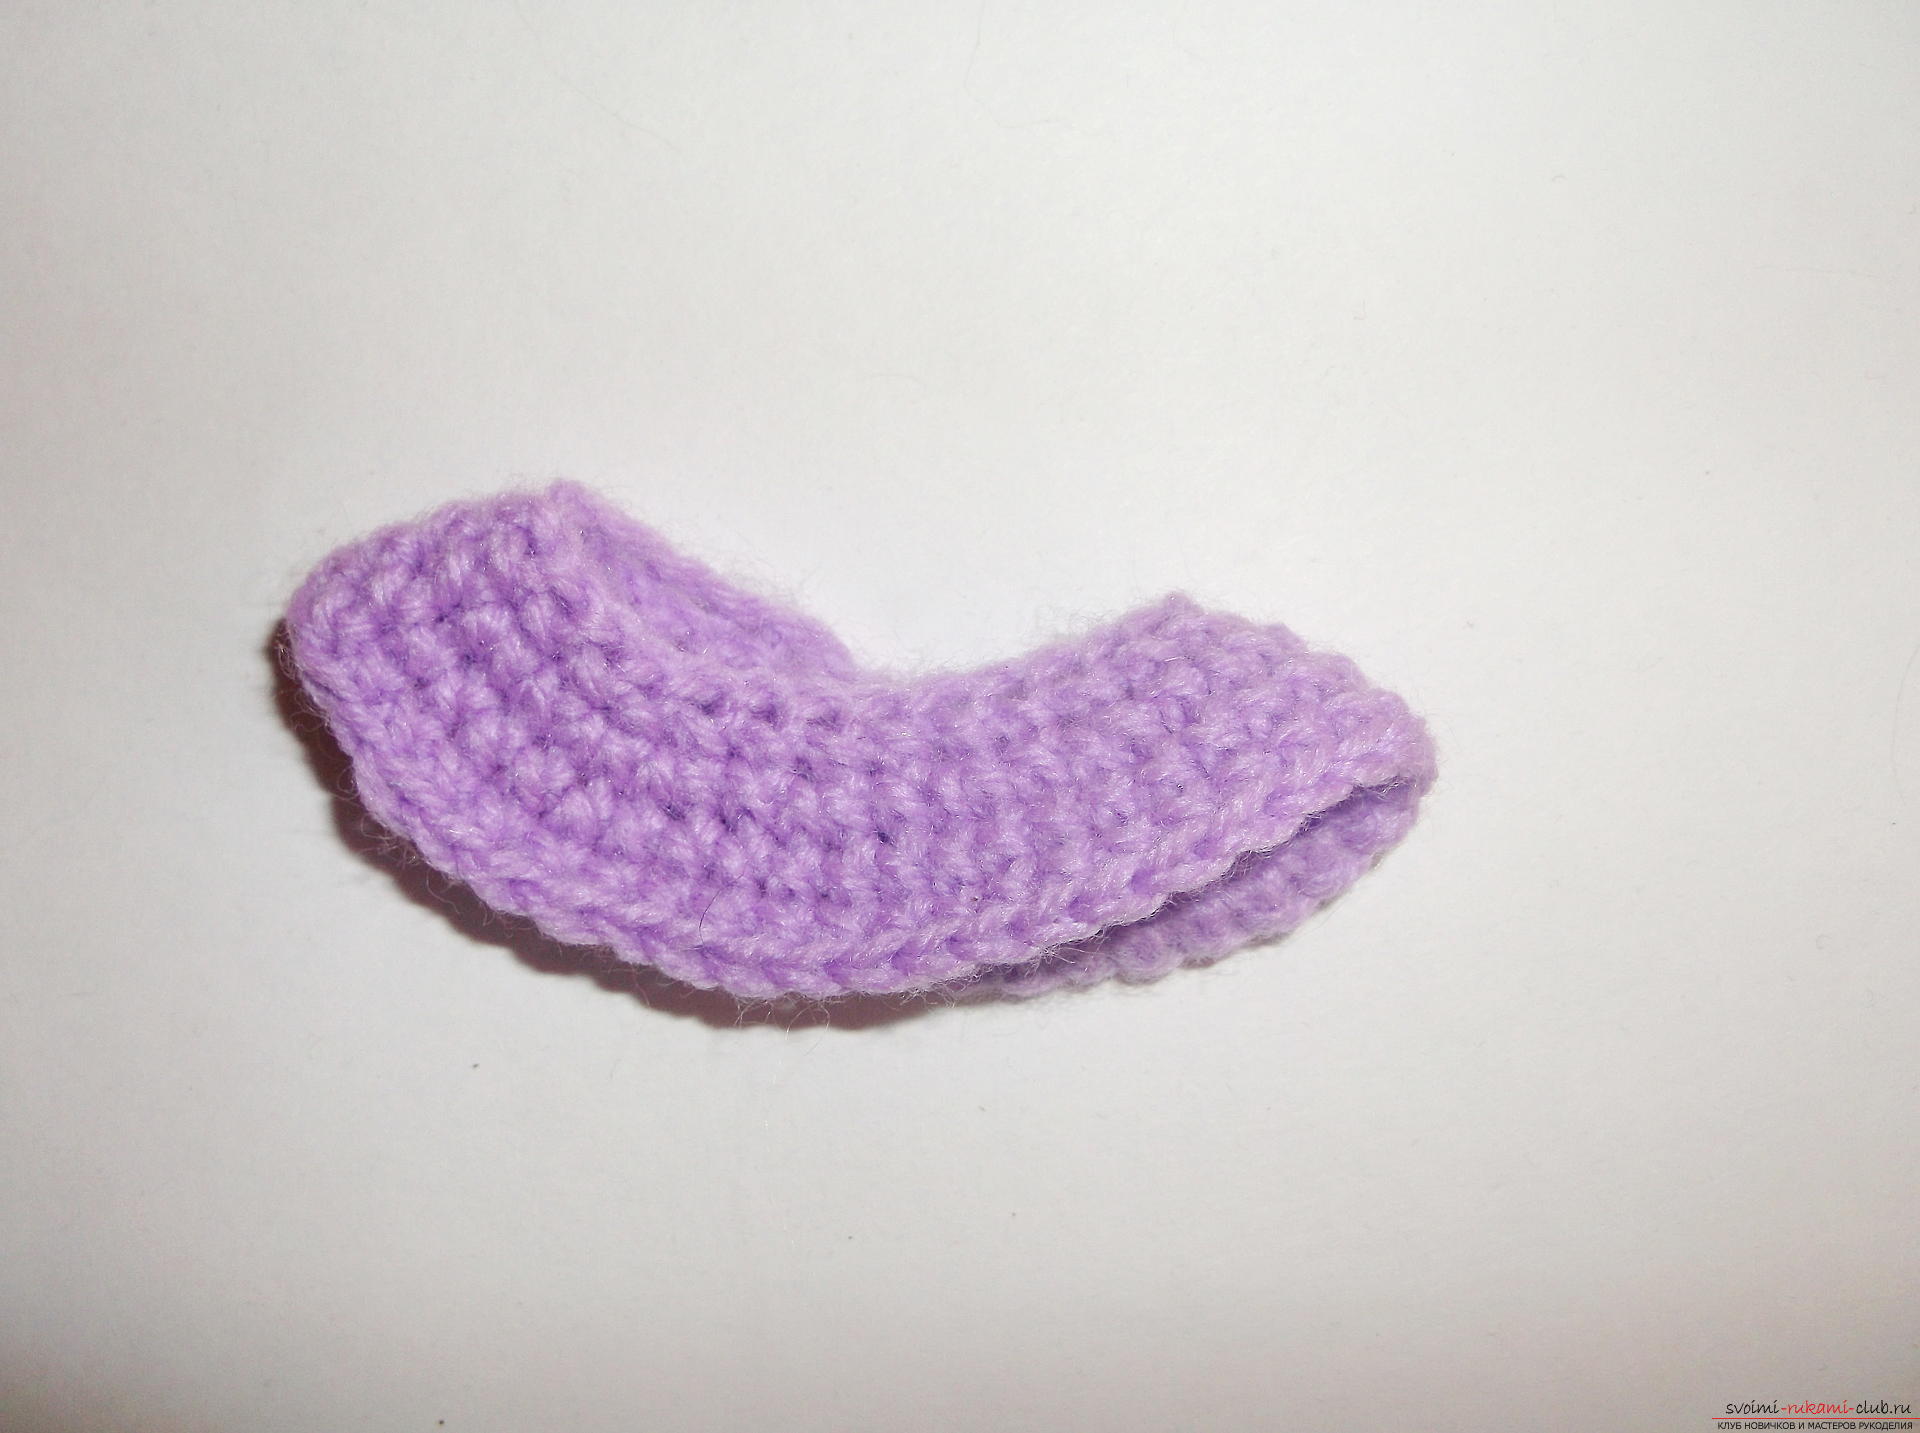
  Next we will knit ears. They too will be gray in color. In the ringlet (sliding loop) we will fasten six bars and make six more increments in the next row. And in the third row we will make three increases. And the ears are ready.
  Tie the hem of the dress. It is knit very simply and quickly enough. For his knitting we will take lilac strings. Pick up the air loops and close them in a ring. The number of these loops should be enough for the girth of the trunk. We will make one row of rows without crochets. And in the second we will make an increase in every second loop. We make two rasters without additions.
 Now we sew the front legs and put on the skirt. To the skirt did not fall off, it also grabbed with a needle and thread. We also sew the ears to the head of the bear cub. It is important to sew the ears on one straight line so that everything is smooth.
  And it remains to decorate the teddy bear with a muzzle. To do this, we take small beads and sew them to the place where the eyes should be. And with brown threads we make a nose and mouth. Just embroider the triangle, filling it with threads. And under it we embroider a mouth. To make the bear even nicer and more interesting, we'll add a little blush, because our bear cub is still a girl. Carefully, not to overdo it, rumyanim teddy bear cheeks. In the foot, you can give some flowers, for example, a bouquet of lilac from beads. That's teddy bear ready!
Comments
Related posts:
 How to tie a cute little toy crochet? A step-by-step guide with photos and description of the binding technique
 How to crochet a Christmas tree toy - a ball? A step-by-step guide describing the technique of binding and photos
 How to tie a small toy - a cute kitty crochet? Detailed description of the technique of binding, a list of necessary materials and step-by-step photos
 Master class with photo and description will teach how to crochet a toy knitted dwarf
 How to tie a bracelet from colored rubber bands "Friendship" on the forks? Step-by-step guide with photo and explanation of weaving technique