
How to connect a merry snowman with an amigurumi with his hands with a description and a photo.
In this article, we will tell you in detail how,how to crochet a snowman amigurumi with your own hands. After all, as you know, there are not many such funny toys. Therefore, making your own, such a wonderful product, you will please your child with an original and soft toy. Our step-by-step description and photos will help you in this.
 We make details of the head and body of a snowman
Row 1. It is necessary to make a set of two air loops, and then we sew six columns without holding the cape in the 2nd loop from the base of the hook (the result is six loops). Row-number 2. You need to make an increase six times in a row. Ryadochek number 3. Repeating 6 times a segment: an increase + one column without a crochet. Ryadochek number 4. Repeating 6 times a segment: an increase + two columns without a crochet. Rows number 5. Repeating 6 times a segment: an increase + three columns without a crochet. Rows number 6 - 10. Repeated 6 times segment: an increase + three columns without a crochet. 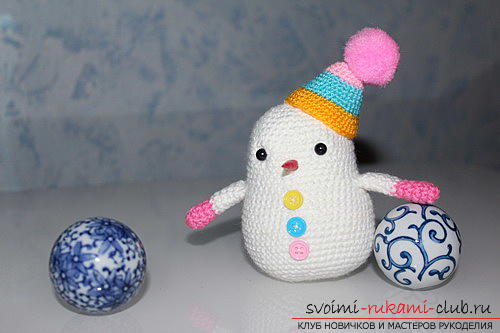 Row-number 11. Repeating 6 times a piece: three columns without a crochet + 1 reduction. Row. Repeating 6 times a piece: two columns without a crochet + 1 reduction. After this, you need to fill the filler of these parts. Row. Repeating 6 times a segment: an increase + two columns without a crochet. Row-number 14. Repeating 6 times a segment: an increase + three columns without a crochet. Row-number 15. Repeating 6 times a segment: an increase + three columns without a crochet. Row-bar No. 16. Repeating 6 times a segment: an increase + four columns without a crochet. The rowers number 17. Comes with no changes. Row. Repeated 6 times a segment: an increase + five columns without a crochet. Rows number 19 - 29. It is made without any changes. Then we cut the thread and fix it.
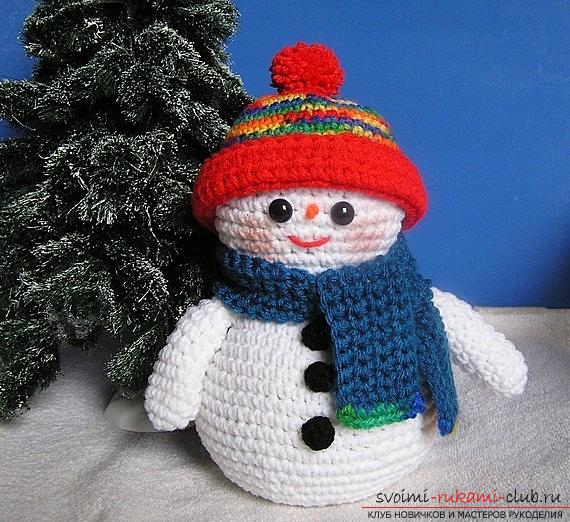
How to tie the base of the product?
Row 1. It is necessary to make a set of two air loops, and then we sew six columns without holding the cape in the 2nd loop from the base of the hook (the result is six loops). Row-number 2. You need to make an increase six times in a row. Ryadochek number 3. Repeating 6 times a segment: an increase + one column without a crochet. Ryadochek number 4. Repeating 6 times a segment: an increase + two columns without a crochet. Rows number 5. Repeating 6 times a segment: an increase + three columns without a crochet. Ryadochek number 6. Repeating 6 times a segment: an increase + four columns without a crochet. Ridge 7. Repeated 6 times a segment: an increase + five columns without a crochet. Then you should leave a long enough string to make the attachment to the snowman's body. 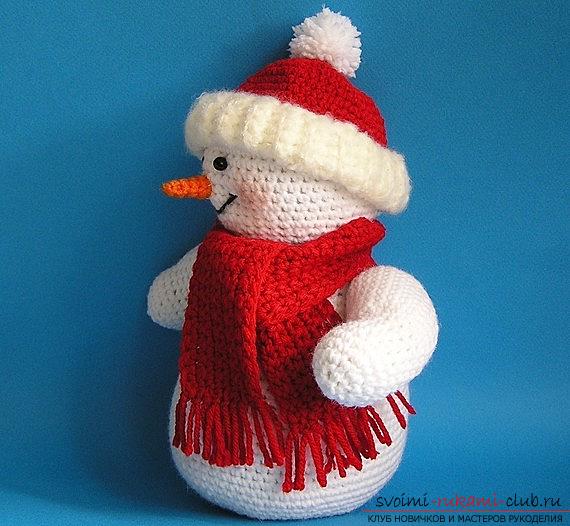 We knit the handles of our snowman. We use a blue thread from the first to the fifth rows, then we work with a white thread. Row 1. It is necessary to make a set of two air loops, and then we sew six columns without holding the cape in the 2nd loop from the base of the hook (the result is six loops). Row-number 2. You need to make an increase six times in a row. Rows number 3 - 5. Knitting is carried out without changes. Ryadochek number 6. Repeated 3 times a piece: two bars without a crochet + 1 reduction. Row 7 - 11. Knitting is carried out without changes. Row. Repeated 3 times the length: one column without a crochet + 1 decrease.
 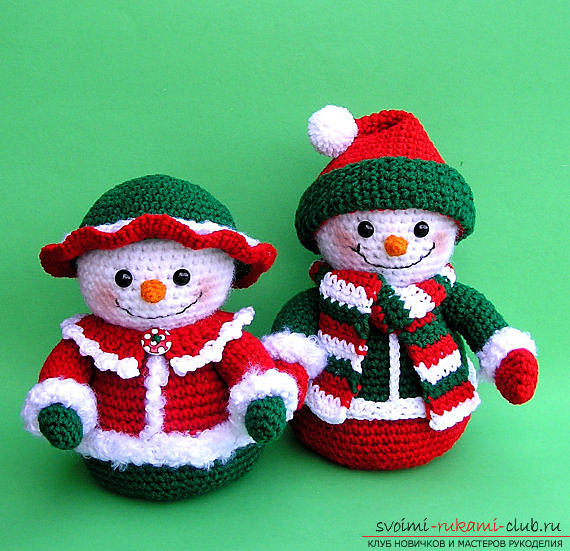 We knit a snowman's hat.to carry out by rows only for a back loop. Do in all rows one loop for lifting. In one color, perform fifteen air loops. Row 1. It is necessary to make fourteen columns without a crochet in the 2nd loop from the base of the hook (the result is fourteen loops). Row-number 2. We need to make fourteen columns without a crochet. We use a different thread color
  Rows number 3 - 4. We need to make fourteen columns without a crochet. We use the first color of the thread. We knit rows number 5 - 6. We need to make fourteen columns without a crochet. Thus, we carry out the repetition until the thirty-eighth row. It is possible to make the cap a little wider, making a little more rows. Rowdock number 39. We need to make fourteen columns without a crochet.
  Fortieth row will be connecting for the edgesHats, making the bandage only for 1 loop. It is necessary to leave a rather long edge of the thread, hold it through the upper edge and tighten. We knit a scarf for a snowman. Binding must be done in rows only behind the back wall of the loop. The second color to perform sixty-one air loops, then make a turn, starting with the 2nd loop, we knit sixty columns without a crochet, then turn again and tie another sixty.
  We knit a nose in the form of a carrot for a snowmanUsing hook number one, we knit: two air loops, six columns without a cloak, in the first row it is necessary to increase 6 times. In the second - the sixth row we perform twelve columns without a crochet. Then you should go to the hook of a smaller volume. Seventh row: four times to tie a column without a crochet with a decrease. Carefully fix the thread.
Another version of the snowman amigurumi
To create it we need to stock up:
- threads of four colors (main - white, all other shades - of your choice);
- hook number two;
- a small stick of bamboo;
- pompomichik;
- three buttons of secondary colors;
- nail polish bright red color;
- one pair of peepholes;
- ball-weights of glass;
- needle;
- scissors;
- pencil sharpener;
- glue-moment;
- filler.
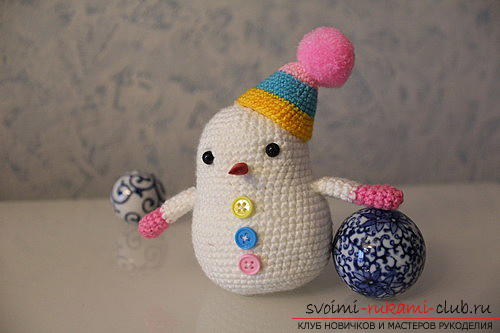
 Do you already like it? Then we proceed to the implementation of this type of product, namely, its spout. We thought for a long time about what to make of it, and eventually came to the conclusion that it is necessary to procure such accessories: it is necessary to sharpen the rod with a special tool to a conical shape; - treat with a nail varnish in two layers, allowing the layers to dry thoroughly; - "nose" cut off from the stick; - After that, the nose of the product is ready. If you want to decorate the whole tree with snowmen, then use all the other sticks. And then we go to the main scheme. How to connect the head and torso of a snowman? The first row: hold a set of six loops, the so-called ring amigurumi. The second row: to make increases in all rows. Third ryadochek: 6 times in a row we sew one column without a crochet in combination with one increase (in the end we get eighteen loops). Four ryadochek: 6 times in a row we tie two bars without a crochet in combination with one addition (in the end we get twenty-four loops).
  Fifth ryadochek: 6 times in a row we tie three posts without a crochet in combination with one increase (in the end we get thirty loops). Sixth row: 6 times in a row we sew four bars without a crochet in combination with one addition (in the end we get thirty-six loops). Seventh ryadochek: thirty-six columns without a crochet (in total we get thirty-six loops). Eighth ryadochek: five bars without a cape we tie in a combination with one addition (as a result we receive forty two loops). The ninth ryadochek: six bars without a cape we sew in a combination to one increase to repeat six times (as a result we receive forty eight loops). The tenth - twelfth ryadochki: forty-eight bars without a cape we sew (as a result we receive forty eight loops).
 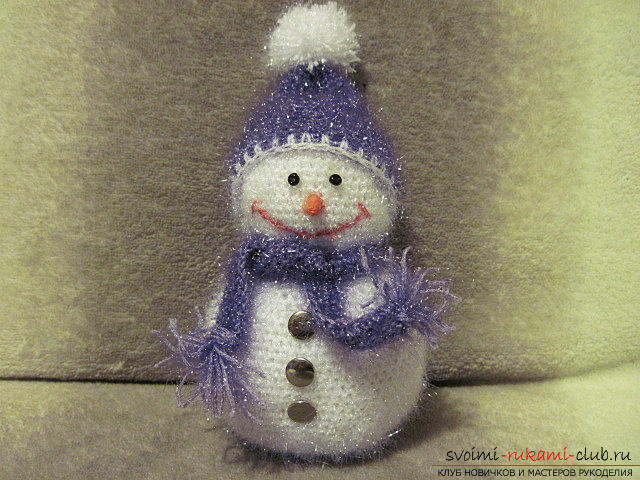 Thirteenth row: Six bars without a cape we sew in combination with one increase repeat six times (as a result we receive forty two eyelets). Fourteenth - fifteenth ryadochki: forty-two bars without a cape we sew (as a result we receive forty two loops). Sixteenth ryadochek: forty-eight bars without a cape we sew (as a result we receive forty eight loops). The seventeenth ryadochek: six bars without a cloak we sew in combination with one increase repeat six times (in total we get forty eight loops). Eighteenth row: Seven bars without a cape we tie in a combination with one increase repeat six times (as a result we receive fifty four loops). Nineteenth ryadochek: fifty-four bars without a cape we sew (as a result we receive fifty four loops). The twentieth column: eight rows without a cape we sew in a combination with one increase to repeat six times (as a result we receive sixty loops). Nineteen first - twenty-fifth row: sixty bars without a cape we sew (as a result we receive sixty loops). Twenty-sixth row: eight bars without a cloak are tied in combination with one increase repeat six times (in total we get fifty-four loops).
 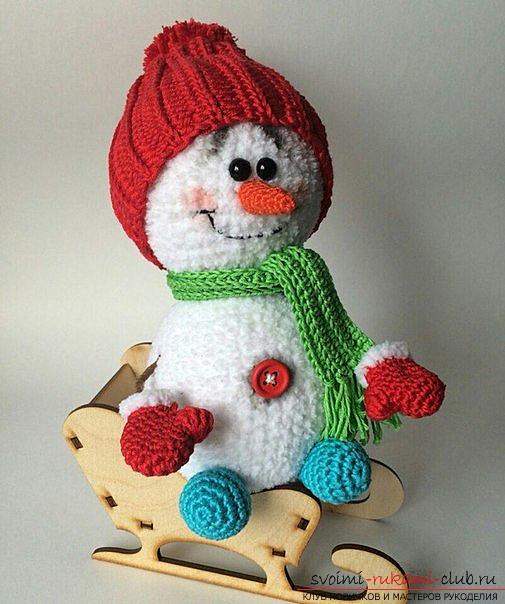 Nineteen seventh - twenty-eighth row -fifty-four bars without a cape we sew (as a result we receive fifty four loops). The twenty-ninth column: seven bars without a cloak are tied in combination with one increase repeat six times (in total we get forty eight loops). The thirtieth row: six bars without a cloak are tied in combination with one increase repeat six times (in total we get forty two eyelets). Thirty-first ryadochek: five bars without a cloak are tied in combination with one decrease (in the end we get thirty-six loops). Thirty-second ryadochek: 6 times in a row we sew four bars without a crochet in combination with one decrease (in the end we get thirty loops).
  Thirty-third ryadochek: 6 times in a row we tie three bars without a crochet in combination with one decrease (in total we get twenty-four loops). Thirty-fourth ryadochek: 6 times in a row we tie two bars without a crochet in combination with one decrease (in the end we get eighteen loops). Thirty-fifth ryadochek: 6 times in a row we sew one bar without a crochet in combination with one decrease (in the end we get twelve loops). Thirty-sixth row: to conduct six deductions. Then we fill the part with filler. In this case, it is necessary to place balls for weighting in the lower element in order to provide better stability. In order for the product to be suspended, rather than standing, it is necessary to tighten the hole, and we tighten and fix the thread itself. In the end, we get something similar to a white pear. We knit the handles of the snowman. First, we intended to tie the handles out of the wire. In this case, they are given a shape of branches, and winding them with strings of brown color. We wrap the rings very quickly, but it's quite difficult to wrap the sticks ourselves. But we replaced them with hands with mittens.
  First row: to conduct a set of five loops, the so-called ring amigurumi. The second row: to make increases in all rows. The third - the sixth ryadochki: in a row we tie ten posts without a crochet (in the end we get ten loops). Then we change the color of the thread. The fourth - the eleventh row: in a row we tie ten bars without a crochet (in the end we get ten loops). We end the binding of the element with one connecting column.
  How to tie a hat for a snowman? To ensure the conical shape of the cap, it is necessary to carry out not six additions in a row, but three. As a result, the cap will come out more elongated. The first row: hold a set of six loops, the so-called ring amigurumi. The second row: to make increases in all rows.
  Third ryadochek: we tie three columns without a crochet in combination with one increase three times (in the end we get fifteen loops). The fourth ryadochek: 3 times in a row we tie four bars without a crochet in combination with one increase (in the end we get eighteen loops). Fifth ryadochek: 3 times in a row we sew five posts without a crochet in combination with one increase (in the end we get twenty-one loops). Then we change the color of the yarn.
 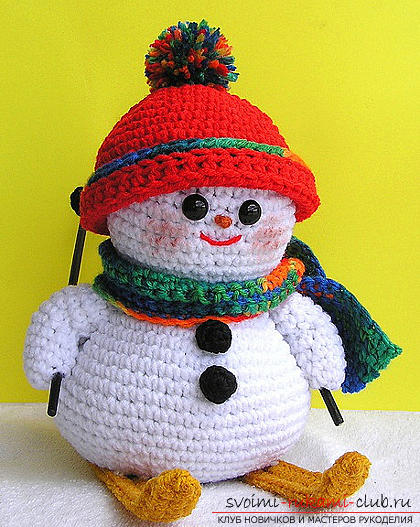 Further knitting is carried out following a similarprinciple, in all further ryadochkah need to add one column without a cape in all the intermediate areas between the surplus. In our case, the cap came out with strips of different widths, and you can make a product with symmetrical stripes. After the cap itself is completed, you need to leave a long string to hold the fixation to the head and at the same time remember to attach the pompomchik.
 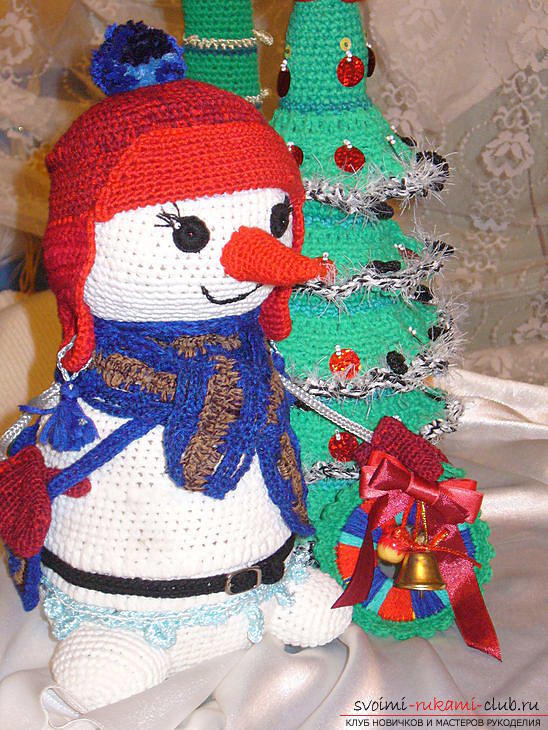 At the end of all actions, it is necessary to assemble a snowman. It is necessary to sew hands and eyes, a cap and a spout to the base of the body of the snowman. All! Your snowman is ready!
Comments
Related posts:
 Cat Amigurumi in the form of a heart to Valentine's Day with their own hands - master classes with descriptions and photos.
 Master class on knitting monkey amigurumi crochet with their own hands with step-by-step description and photo.
 How to tie a horse amigurumi crochet with his hands with a step-by-step description and photo.
 Gifts to March 8 with their own hands - a bear amigurumi for a mother with a description and a photo.
 We knit crochet toys amigurumi with our own hands with detailed descriptions and photos.