How to make Christmas balls from threads, step by step photos and a detailed description of the creation of balls of thread, using glue and balloons
No New Year can not do without a festiveChristmas tree decorated with colorful toys. The most popular of them will, of course, be the balls. You can buy them in the nearest supermarket, choose from a variety of sizes and shades, but it's much more interesting to make a New Year ball with your own hands. In this case, you will be sure that the craft is exclusive, you can choose the colors that suit your taste and interior. Christmas balls made by own hands will add a touch of comfort and can become an excellent decoration not only on the Christmas tree. They will make a beautiful wreath, an original mobile phone or even a panel. Material for needlewomen in creating Christmas balls is a lot of things. Among the simplest and most accessible are the threads. But with a drop of fancy, even such an ordinary thing can turn into something original, bright and beautiful. Christmas balls of thread 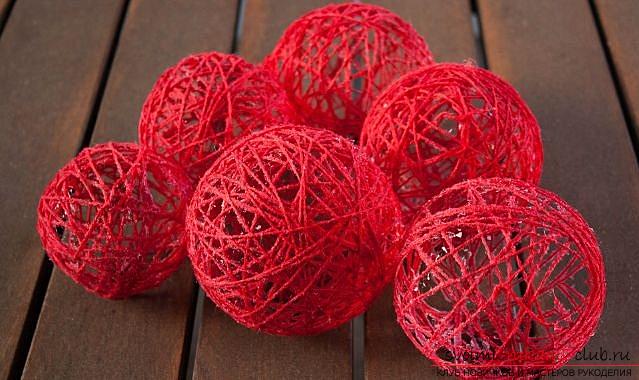 The master class is so simple and easy that even little ones can cope with it. It will take:
- Cotton threads of different colors.
- PVA glue.
- A needle with an eyelet suitable for threads.
- Balloons.
- Bright colored narrow ribbons.
- Scissors.
- Plastic cup.
- Rope, where you can attach the balls to dry out with clothes pegs.
First you need to inflate the balloons. Their size depends only on your desire and mood. Ready-made Christmas balls of thread will have exactly this diameter. Fasten balls best ropes, and not tie a knot in the bundle ball - this can complicate the process of blowing it and damage the winding of threads. 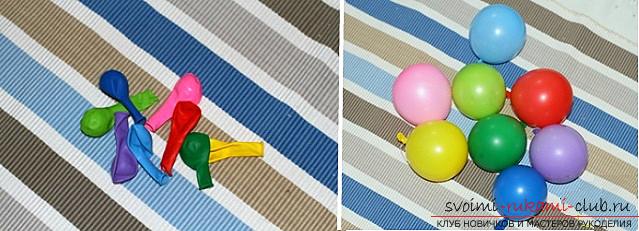 Now we need a plastic glass. With its help, applying PVA glue to the thread will not take much time. Of course, you can use a brush or even fingers for these purposes, but then the process will drag out. So, the thread from the skein is not torn off and we put it in the needle. Pour the glue into the glass. We need PVA, because it becomes transparent when it dries up and does not damage the appearance of the craft. Now take our needle and thread and pierce the glass with the glue, as shown in the photo. The needle can be removed.
 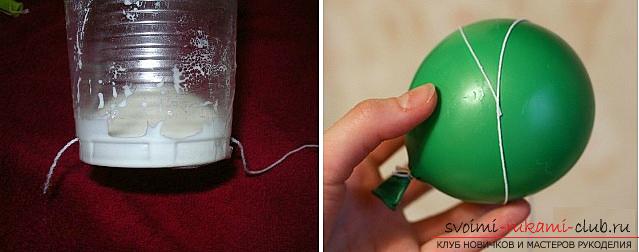 Next, take the ball in one hand, and the end of the thread,coming out of our device with glue in the other, and begin to wind the thread on the ball. It looks like how to roll up the balls with yarn. By the way, the thread is not very thick, so that the glue can penetrate them. Continue to wind the thread on the ball. It can slide off if this happens and a part of the winding just "goes" on its side, do not worry, just rewind it a few turns back to the ball. The density of the future crafts will depend entirely on your desire. Wrap preferably evenly over the entire surface. To create a more original craft, use several threads of different colors at once. Just pierce the glass with glue in several places.
 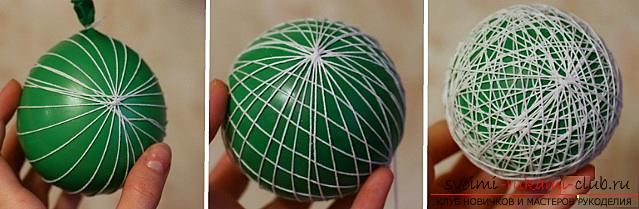 When you decide that the thread is enough, it will be necessaryhang the ball to dry. You can place them next to the heating batteries, this will speed up the drying process. Now it remains only to untie the thread that holds the air inside the ball, it is blown away, and you have a ball of threads left in your hands.
 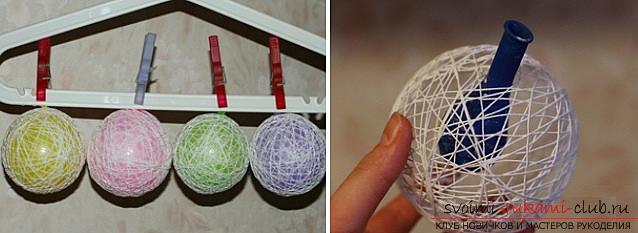 As a loop, for which the ball can behanging on a herringbone, use bright narrow colorful ribbons. You can choose shades that match the colors of the threads, or take contrasting, for example, for white balls - a red ribbon, for red - a saturated green or bright blue.
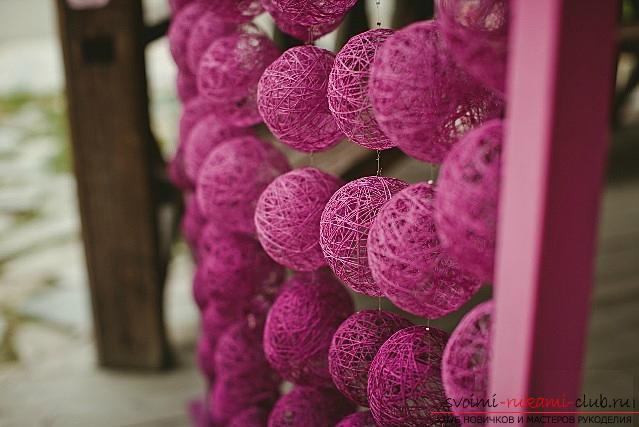
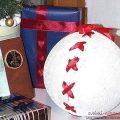
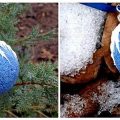
  These balls look beautiful and individually as an independent Christmas tree toy, and collected in a garland. They can decorate a window or hang it to the ceiling.
Comments
Related posts:
 Ornaments on the Christmas tree with your own hands - crocheted Christmas balls for the Spring 2016 Competition, Christmas balls at home
 How to make magic Christmas balls from threads with your own hands you will learn from this article
 How to make a toy from a polymer clay - a ball, a detailed description and step-by-step photos of the work
 New Year's crafts, the creation of Christmas decorations from paper, the various creation of paper balls with their own hands, how to make a beautiful garland of paper with their own hands.
 How to make a beautiful tree topiari from napkins, step-by-step photos and a detailed description of the work on creating topiary with different colors