How to make a crow in origami technique you can learn from the material of this article
How to make a crow in origami technique will beit is interesting to learn both for adults and for kids. It is not necessary to collect a complex model from a huge number of triangular modules, although such a bird has a more realistic appearance and is colorful and interesting. To begin with, you can make a simple bird. From this, it will not lose its attractiveness, and even a child can easily cope with the work. Origami is an interesting ancient art form that attracted the attention of people from all over the world. Paper handicrafts in this technique are made with pleasure by adults and children of different ages. To begin with, it is necessary to add simple figures, and then more complex ones will not cause any difficulties. Today we will talk about the making of birds in the technique of origami. Birds are an integral part of our life. From an early age, the child gets acquainted with them, walking around the city, the park, playing in playgrounds or while relaxing with parents in the forest. In pre-school institutions, too much time is devoted to this topic. The kid will know what kind of bird it is, what its name is, where it lives and much more. A lot of different tales, legends, legends are also associated with various birds, for example, such as crow. It is the crow that we will try to collect today from a regular sheet of paper. How to make a crow in origami technique you will learn from the description of the work process and step-by-step photos posted in our article. If you or your child already have the skills of working with paper in the origami technique, then folding the bird can easily for several minutes. But even if there is no such experience, it is not at all difficult to assemble a figure, as you can see for yourself. To make a crow, we need to take colored paper in black. Suitable as a double-sided or one-sided paper. If the sheet has a rectangular shape, it must be square shaped. Thus, if there is a square sheet of paper with sides of nineteen centimeters each, an interesting figure of a crow will appear, the length of which is nineteen centimeters, and the height is nine centimeters. After preparing the initial material, you can proceed, directly, to the manufacture of the craft. The square of paper for the beginning, we will fold in half on a diagonal straight line and again unfold, giving it its original position. In case if paper used for painting is painted on one side, then with the colored side it should lie upwards, and white - on the working surface of the table. The workpiece must be placed so that the resulting fold is positioned along a horizontal straight line. how to do it right, can be seen in the photo below.  Now we need to turn the workpiece and map for ourselves, visually, the lines of the next fold, as we see it in the next photo.
 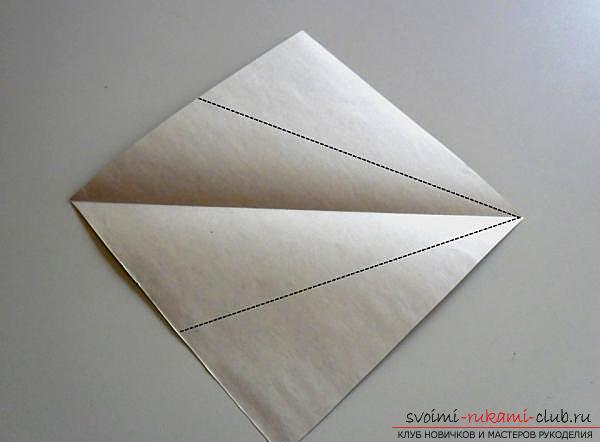 Starting from the corner on the right side, we need to bend both sides of our square along the previously marked lines (in the photo they are marked with a dotted line) towards the middle.
 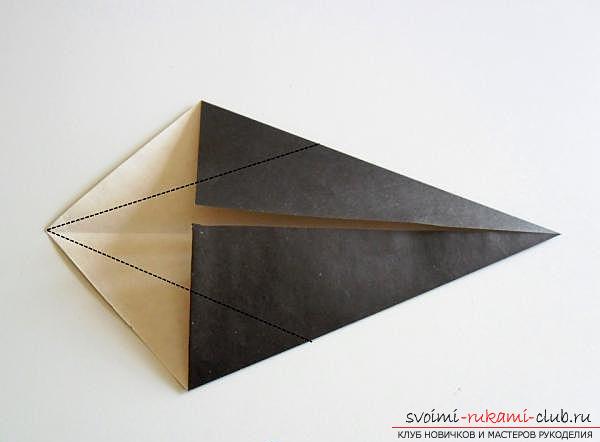 Short sides left from the left edgeWe need to bend the workpieces in half to the middle, as in the previous case, again, we will be guided by the dotted lines. As a result, we have a geometric figure of a rhombus.
 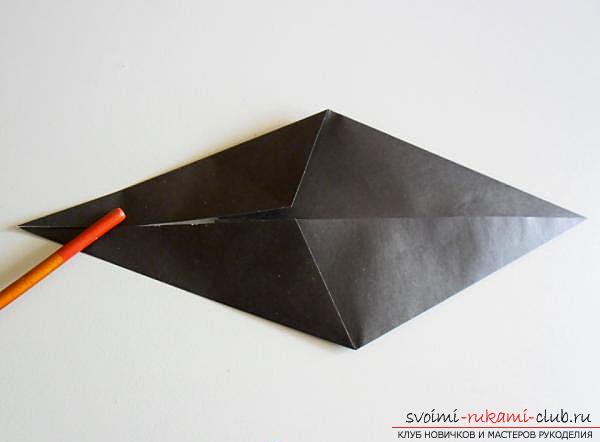 Now we will bend one edge (the upper one) and straighten the crease formed earlier. To make it easier to do so, be guided by the photo.
 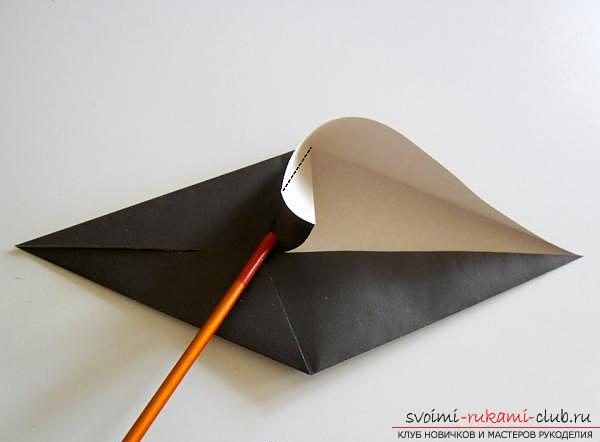 Again we will bend the sheet, according to the lines already availablefold. As a result of this action, we will have an extra piece of paper, which we carefully press fingers along its middle line. Start zautuzhivat need from the corner.
 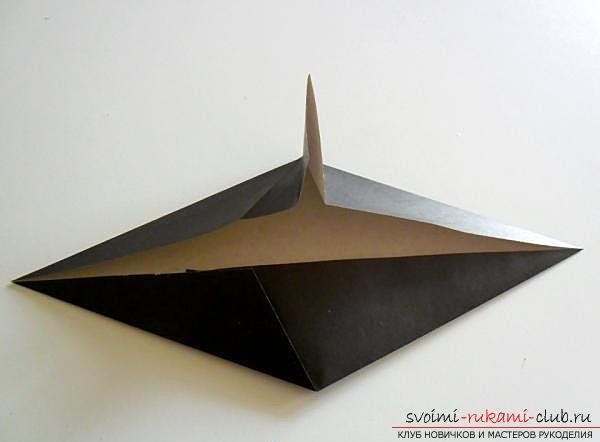 The next step is to bend this little detail. We need to bend it in the direction to the right side.
 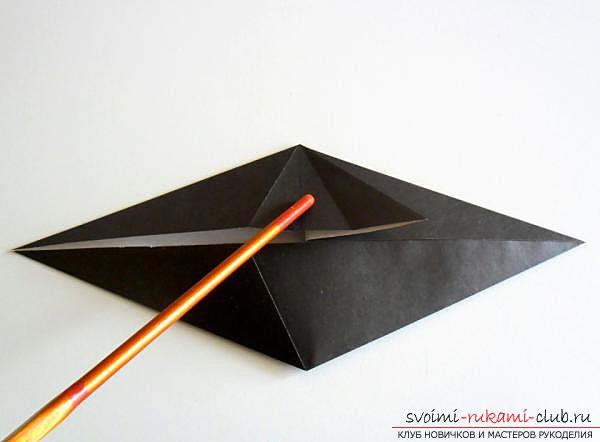 We will carry out similar operations with the opposite side of the workpiece, in the lower part of it.
 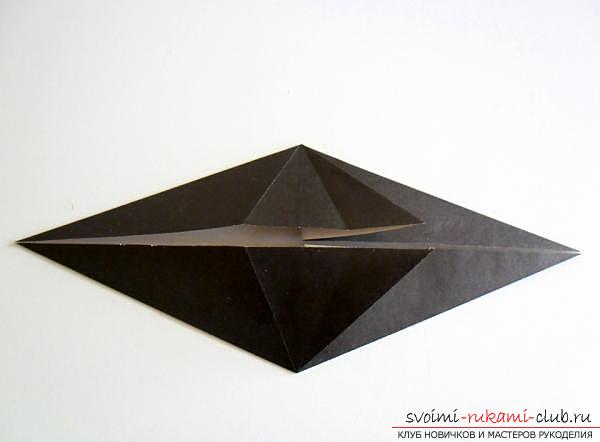 Small triangles we need to bend in different directions so that they slightly go beyond the craft. As a result, we will form the feet of our future bird.
 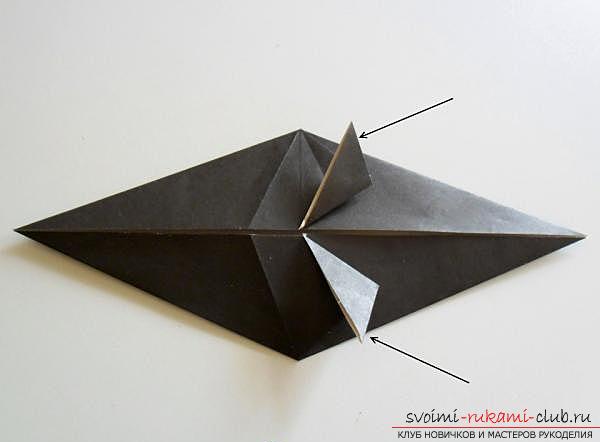 Now turn the workpiece so that its lower part is on top. We will not change the direction of the parts.
 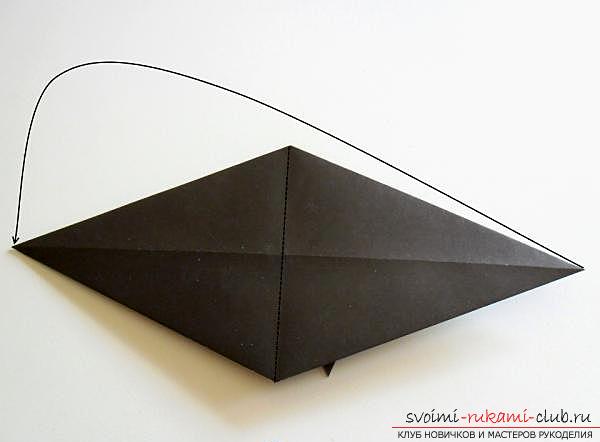 Fold the workpiece in half, moving its right side to the left side. The lateral angles should be connected to each other. We will get a figure, exactly the same as we see in the photo.
 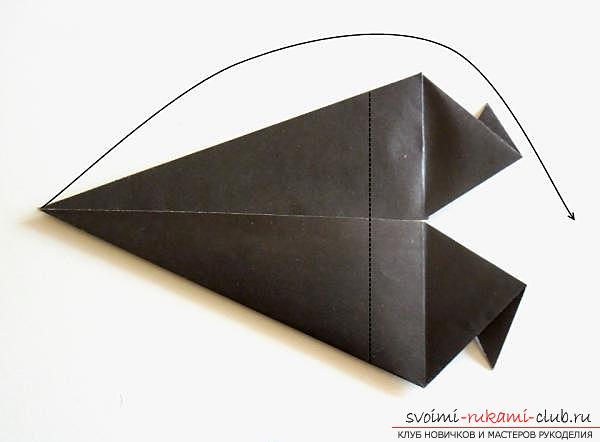 We bend the upper part of the craft again in the left side. Only in this case we make a new fold. To do this, we need to focus on the dotted line, which is in the previous photo.
 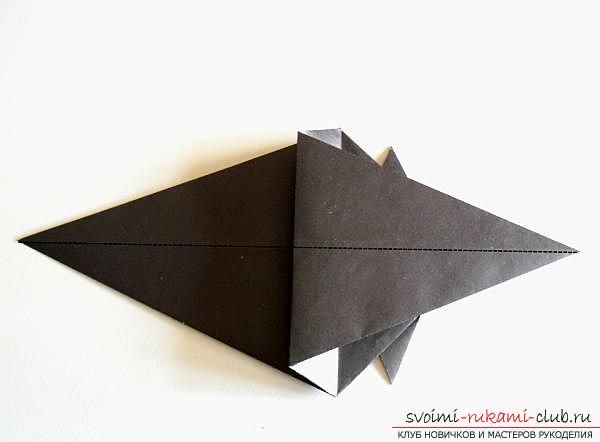 On the horizontal line, we add the artifice twice. As you can see in the photo, the fold line itself is on top, and all the other small elements, on the contrary, are at the bottom edge, inside the workpiece. So that we can correctly formhead, and also the beak of a crow, we need to mark the point on the existing fold. In the photo, this point is marked with a cross. After that, the part that is on the left side, bend down. During this action, we need to deploy simultaneously one and the other side of this part. Now we will define, as in the photo, the position in which the head of the crow will be.
 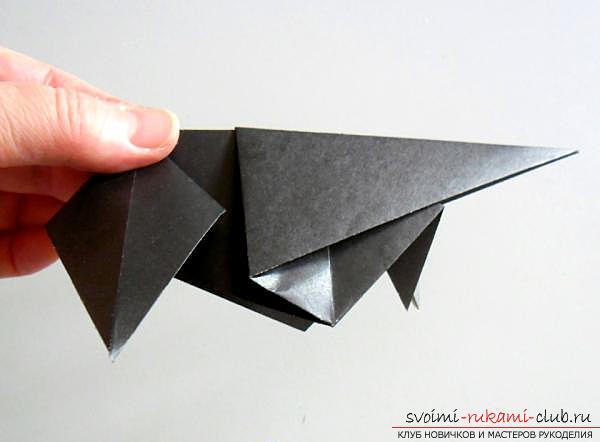 Well iron (smoothed) fingers all the folds of the craft.
 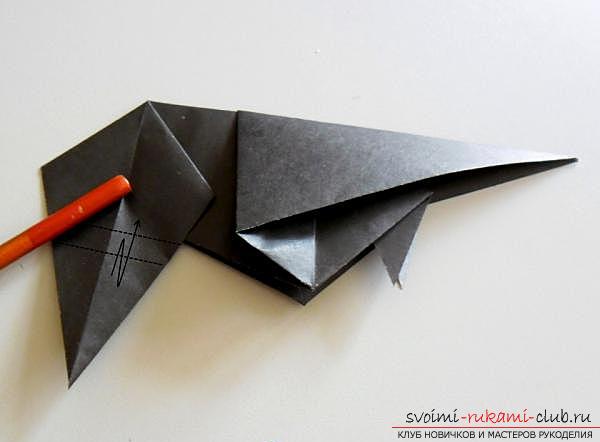 In order to get a beak of the necessary shape,we will make a crease on the newly folded diamond. The fold should be directed upwards. We formed the head and beak. The next action we will have is the creation of the wing. To be precise, we need to straighten it. To do this, take our crow for her paws with the left hand, with the other hand we need to gently pull the wing in the direction upwards, and then a little bit to the right side. As a result, the lower part of the crow's wing will be placed parallel to her abdomen.
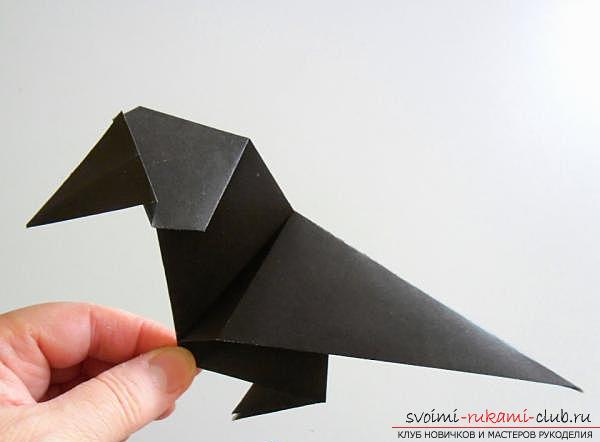
 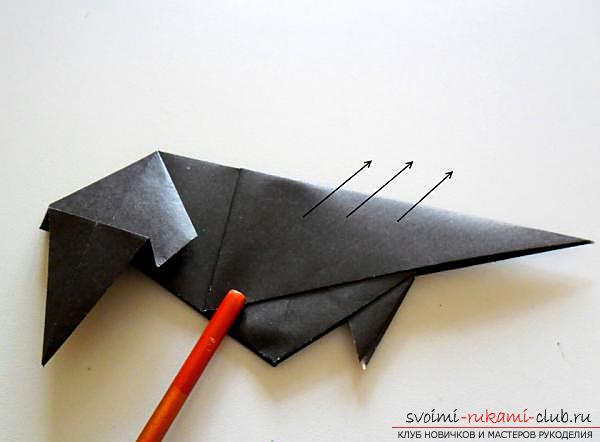 It remains to draw a felt-tip pen or to glue a bird with eyes and a hand-made article is ready. it turned out we have such a wonderful crow. Now you know how to make a crow in the origami technique of just one piece of paper for a few minutes of free time.
Comments
Related posts:
 How to make a giraffe in the origami technique of paper, you will learn from the material in this article
 How to carve a rag doll, you will learn from the material in this article and be able to do it yourself
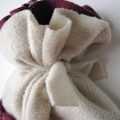 How to carve a children's cap from fleece, you can learn by reading the materials of this article
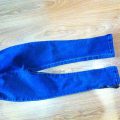 How to find trousers on an elastic band without much difficulty, you can learn from the materials of this article
 Learn how to make a small swan from the modules, you can from our article