How to make a doll of polymer clay with your own hands? Lesson and photos
Fans of building something new and creating interesting objects also often turn to traditional art, which is also present in the subject of polymer clay.
How to make a doll of polymer clay with your own hands? Lesson and photos
 This lesson will tell you how we canmake a suitable shape for our doll, what materials for this we need and what should be used at the time of creating such a special object.
- It will be necessary to use polymer clay from the special brand Fimo Puppen.
- It will be necessary to use molds made of silicone
- It is required to use surfaces for work - it can be glass, or a ceramic tile on a smooth field.
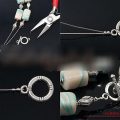
- Special cuts for polymers (knives)
- Set of stacks
 To begin with, we need to preparea suitable image that will be suitable for our figure. These are the parameters of the pose, the dimensions for the figure, its external characteristics. In addition, it is best to work these parameters on paper, using a pencil. As a basis, you can take a ready-made version, or an illustration. When the picture is ready, and the picture is clear, start developing.
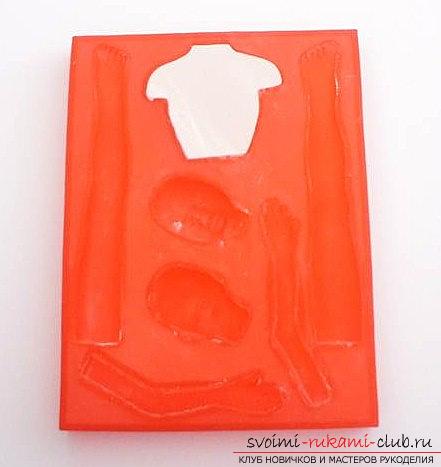
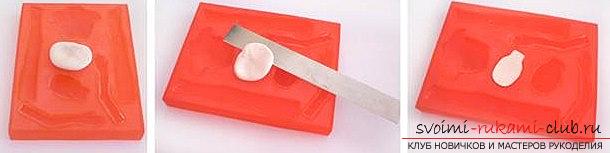
 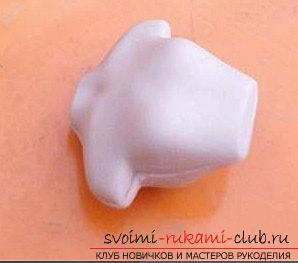 For novice masters of the caseUse forms of silicone to create a person's shape. This form can be bought on hand-made sites on the Internet. For plastic dolls, a special plastic is used, which will be harder than usual. Therefore, the material should be thoroughly processed and heated.
 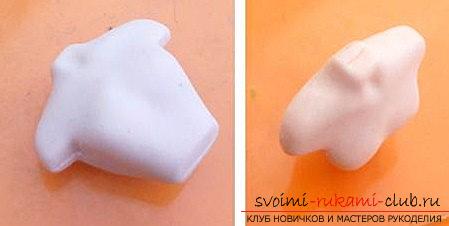 Torso of the doll We make the trunk of our futuredolls. To begin with, it is necessary to tightly compact a piece of the right size into a special groove shape. After that, we wait for cooling and cut off what has not climbed into the plate-shape. Without damaging this part, we pull it out of the mold. You can also additionally fix this form by placing the desired piece in the freezer. This procedure should be done for two times. We get two parts for the future torso. The part that will be the front - should remain without special changes. For the second, you need to give a special look, which will emphasize the figure of the back. With the help of fingers, we make the procedure for smoothing the clavicles, neck (dentition) and chest. With the help of fingers and stack we will make seams between these elements. Stitches smoothly so that they do not diverge in the future.
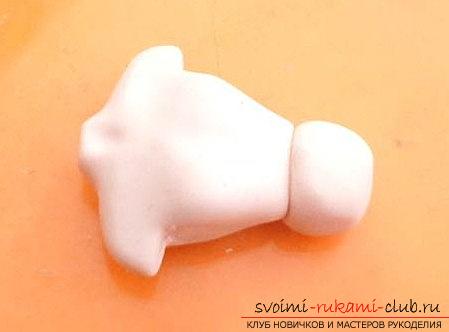
 We work on the waist. To do this, it is necessary to flatten the ball and make a suitable shape that will be combined with the width and torso parameters. Also we make smoothing of the subsequent seams. The main feature of plastics is the ability to bake an element more than once. The trunk needs to be baked for 15 minutes at a temperature of 130 degrees (celsius) Head of a doll
 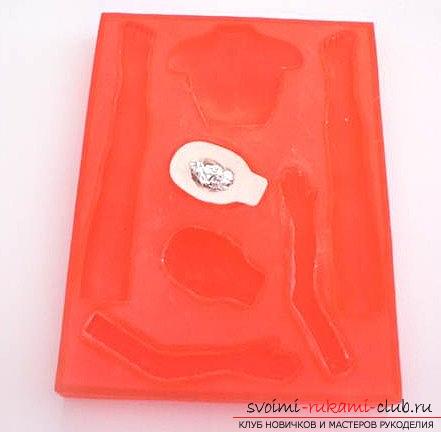 Next, we form the head of the doll. You can make the shape of the face, as well as the occiput, respectively. Also, you can make a groove that is filled with foil. Thus, the doll will be lighter and a lot of plastics we do not use. The face is being formed. With the help of stacks we correct our errors, create our own vision of the doll's face.
 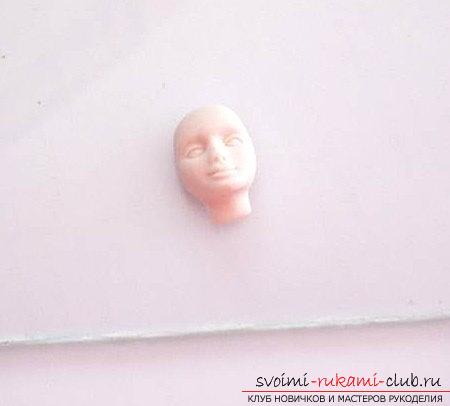 Legs of dolls
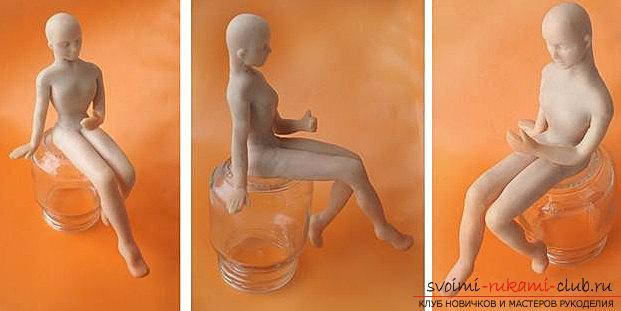
 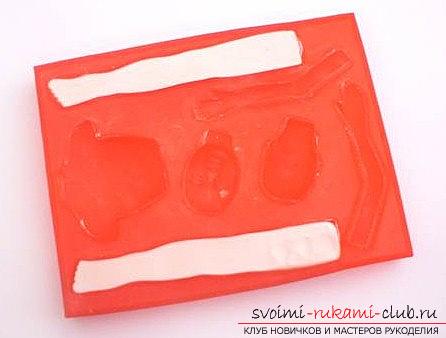 Forming the legs requires the creation of two parts -front and inner. We fill the plastics for two legs. After, it is necessary to take out and combine our parts. For this doll the seated variant is selected, so it will be in a special position. We smooth the seams.
 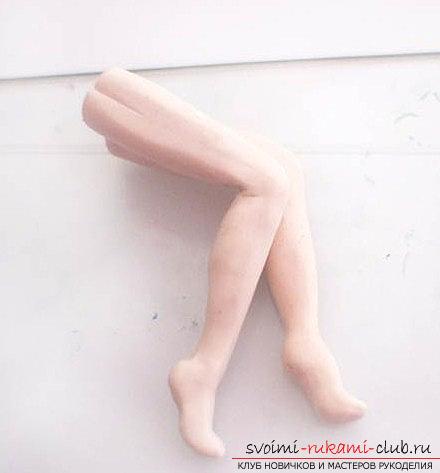 With the help of a blade, we cut off unnecessary materials (ankle or under the knee). The second leg should be the same as in size, and in visual qualities. After - it is necessary to connect the legs and trunk. The body in this case is already ready and it is not damaged, fixed with a ball of the plate, with which we will connect the two elements. Two pieces of the ball will become a bridge between the legs and the trunk. Next, you need to determine the planting of the future figure. It is necessary to smooth the seams in the moment where the hips and legs will join.
 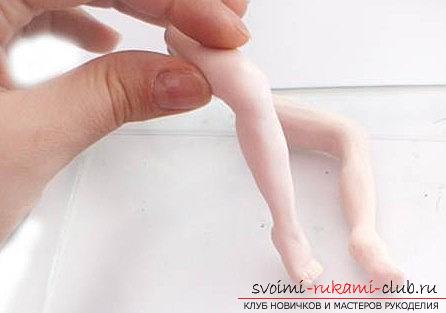 Preparing the doll for baking
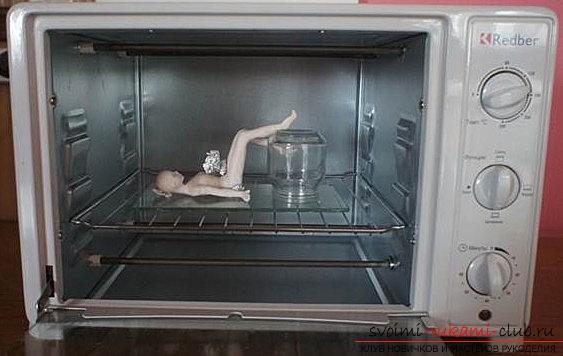
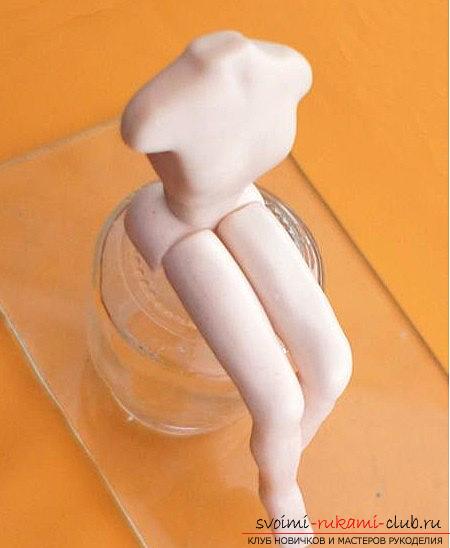
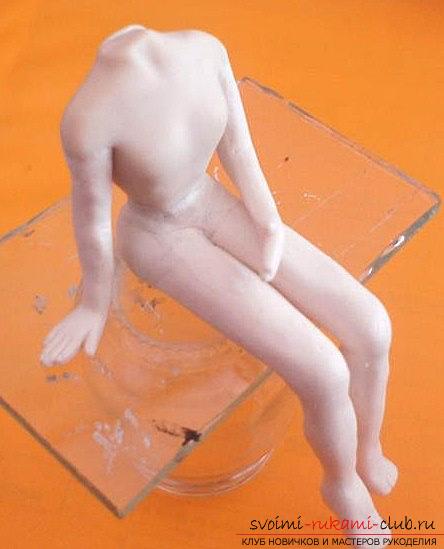 Simply create transitions of a smooth type. No one requires special anatomical research. Create hands that also need to be attached to the trunk. They are made from a special form for hands. Attach these elements and equalize. Last we attach a head. Here you need to be careful not to break anything. Determine the rotation and tilt of the head, as well as what your object will do.
 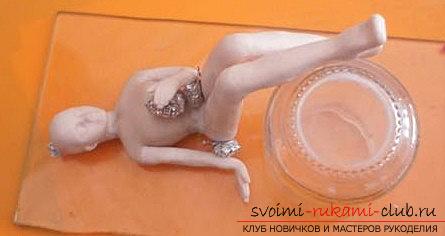 After that - you need to bake a figurine. To do this, put it in the oven and wait until it hardens. It is desirable to fix the elements as accurately as possible. The fact is that at the moment of pounding the figure, it will slightly "melt" and accordingly - one of the parts can simply fall off. Firmly fix all parts of the body. Expect about 15 minutes at a temperature of 130 degrees. Pupa is ready!
Comments
Related posts:
 Lambs in the form of earrings - how to make New Year's earrings from polymer clay own hands?
 Create a beautiful decoration of polymer clay with your own hands - lesson
 We make a gradient of polymer clay with our own hands - a lesson and a master class with a photo
 How to make pearl earrings with your own hands? Needlework from polymer clay
 How to make a love gum love is made of polymer clay - a lesson and modeling