How to make a tulip according to the origami scheme - origami for children and adults
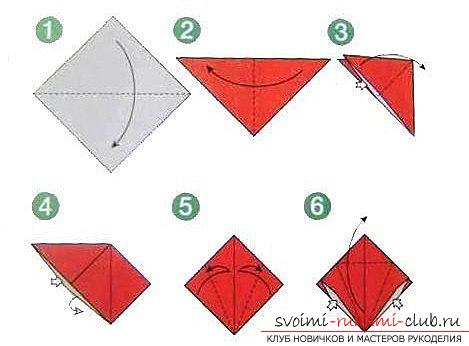
In order to make an origami-tulip,it is necessary to use the traditional square of paper. For this purpose it is necessary to use two-sided and preferably, colored paper of the same color. Next, you need to fold the sheet of your paper into two pieces. First, do this horizontally, and then turn the paper and do this kind of vertical action. After, you need to expand the sheet. In this case, you created a medium line for future work. 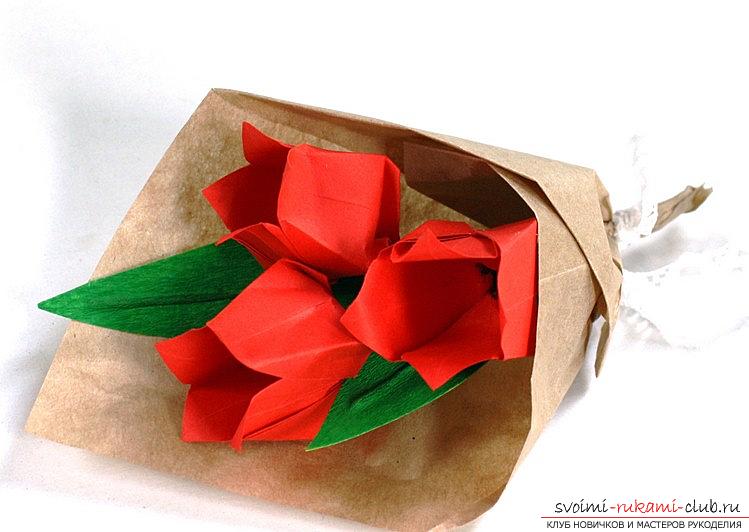 Tulip is a beautiful spring flower thatcan please many with the advent of the long-awaited burgeoning period. A vibrant flower always pleases the eye, but, the flower of paper looks more creative and, moreover, more durable. In addition, to learn how to create such a tulip can help any child. After all, you can give such a gift to your mother or grandmother on the 8th of March in the spring days. In addition, origami-tulip is perfect for creating a beautiful composition.
Beautiful Origami-tulip
 Then it is necessary to fold the sheet in the same waypaper twice in a diagonal, just in order to make a fold line for yourself. It is necessary to make the origami of the tulip more beautiful. It is very important that the corners also overlap each other, the folds should be sharp and sharp - then the tulip will be more beautiful. Further, it is necessary to connect together the lower and upper parts of the middle of the square, which will be marked with red dots. Then, they must be simultaneously pushed inside, to the left and right sides. Pockets for the tulip As a result, you will get a special trehgulnik, which will have internal pockets. After, it is necessary to continue to fold the tulip with paper. The corners of the upper layer in the lower part of the trefoil must be raised upwards, to the tops of your treguolnik. Then, you need to turn the workpiece over and do the same manipulation again on the other side. Next, you will get a diamond, which will have a cut in the middle. And, from two sides. Next, you only need to work with the top layeryour tulip. To do this, it is necessary to bend down first the left corner of the diamond and then, slightly moving into the center line of your future tulip, into the right corner. Then you need to open the right corner and also tuck in it the left corner. Next, turn your tulip blank and rotate the same operation for the other side. Now it remains to bend each petal to the sides (there are four in total). Then, you need to find a small aperture through the tulip of your origami, through which you can inflate the flower to provide the conditions of bulkiness. Now your origami-tulip is ready. This idea is very simple to perform and does not require too much effort. It can be implemented by any novice master who has the time and the desire to learn. Everything is quite simple and easy, it is only necessary to try out modern technologies of creation.
Comments
Related posts:
 Origami herringbone with her own hands for beginners. Simple origami for children and adults.
 Origami tulips by hand. Lessons in the creation and photography of materials.
 This detailed master-class origami for children of 8 years will teach how to make an origami snake made of paper.
 A simple frog lesson with my own hands for origami technique - how to make a frog?
 We perform a bird-parrot according to the origami scheme, origami animals from paper with their own hands