With the help of the instruction and the schematic image, making an origami penguin is not difficult
Origami penguin is an exciting activityfor many Japanese art lovers folding birds from paper material. It is here that you can find a detailed instruction on the folding of an ordinary penguin and his imperial brother. Fascinating assembling schemes Of course, before you start making the next model, you should look at the origami photo in order to present a visually future model. The image of the emperor penguin origami is presented below. 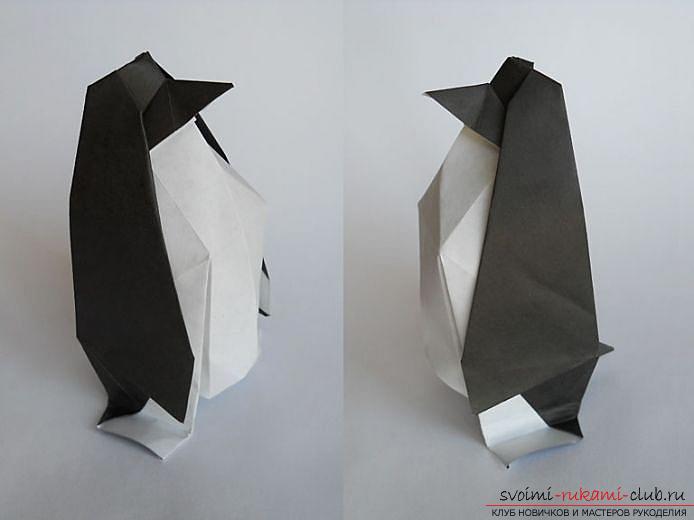 When assembling models of any birds, includingThe penguin is important to follow the instructions exactly. Only then the assembly of experienced and especially beginner masters of art origami will bring pleasure. For the convenience of assembling origami penguin from the imperial class, the following diagram is presented.
 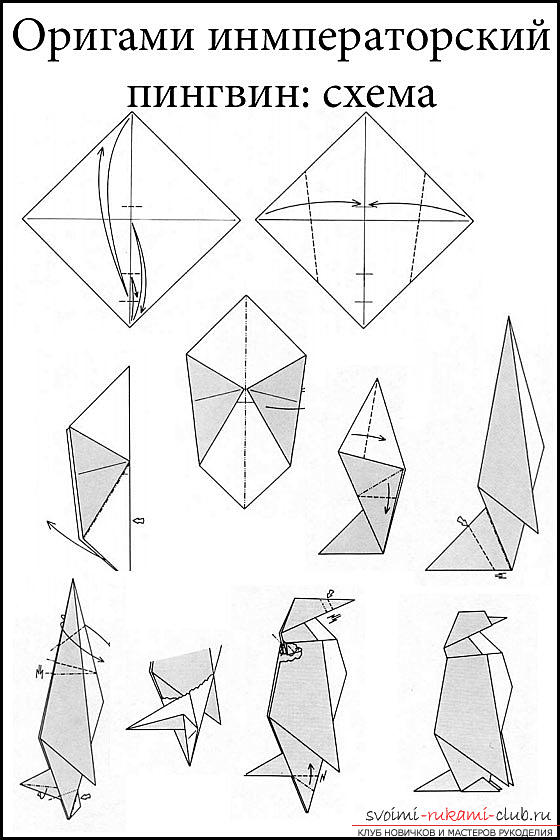 Believe that the manufacture of the model under this schemetakes a minimum amount of time. Initially, of course you have to peek at the scheme. And after making several models, it remains in the memory for a long time, the hands themselves begin to work miracles. It is worth noting that the assembly of the imperial penguin is somewhat more complicated than the ordinary bird depicted in this photo.
 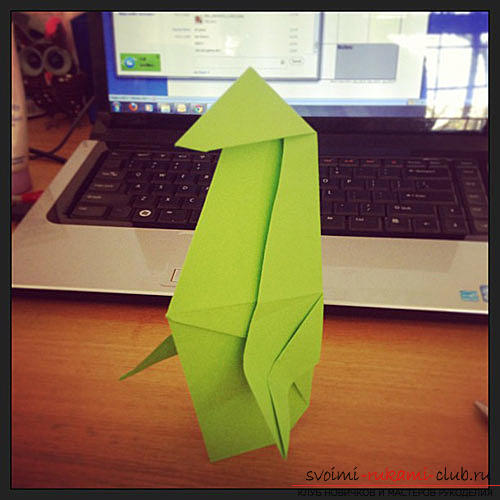 Therefore, we recommend beginning masters to begin learning the basics of origami art from the penguin with a simpler scheme. It is presented below.
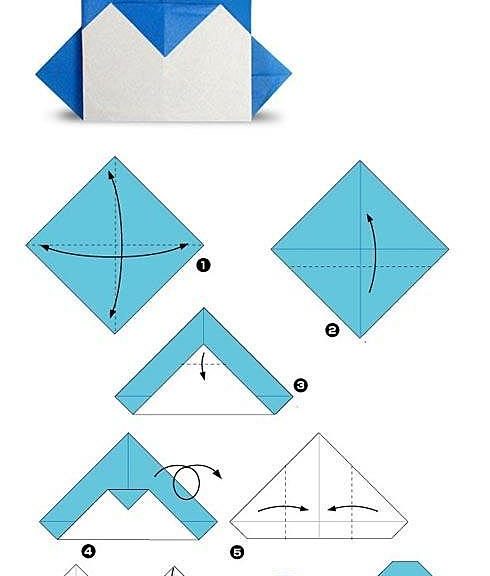
 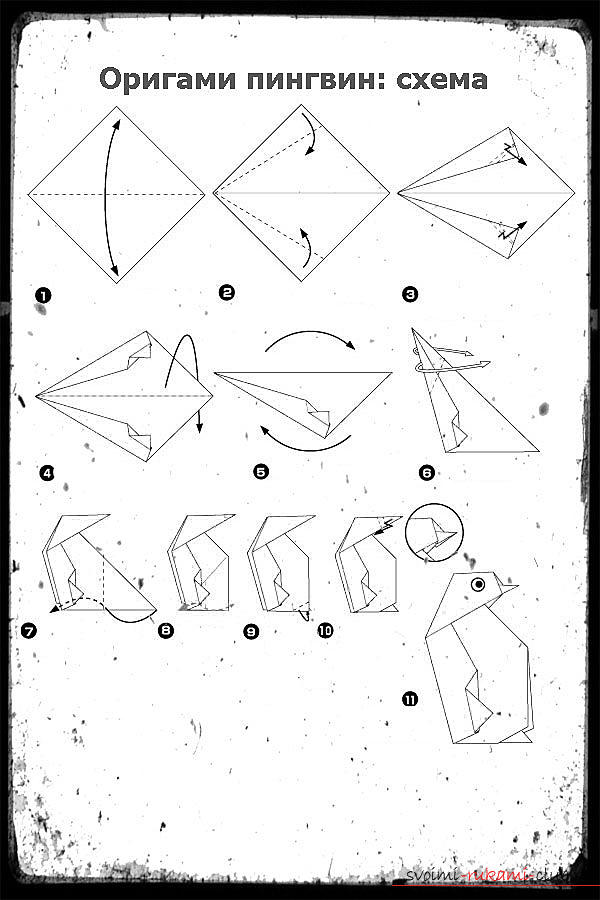 Assembly Instructionwith the addition of a sheet diagonally. For the convenience of assembling a bird, the bend line of the paper bends well on both sides. The next step is the formation of the bending of the corners to the central fold. It is worth pointing out that the corners are bent on the left side, only a third of the size. Repeat bends on both sides. On the diagram, which was above, you can see how in the third step of the assembly it is necessary to make bends of the L-shape. Then the workpiece is turned 180 degrees. In the next step, the master is required to fold the workpiece in such a way that the bends before it are left outside. In the sixth point of the diagram it is shown how to bend the acute angle formed during the assembly of the cone. After that you will see the second sharp corner. It must be bent to the obtuse angle. At the bottom of the resulting figure formed an angle of 90 degrees. By means of its bending, the paws of the bird are obtained. Similarly formed beak. The last steps are applying the image of the eyes and giving the model the desired color, provided that the penguin was collected from white paper. Penguins embody the living world of Antarctica, the spirit of severe weather conditions of that region. To create offspring penguins for a time leave the cold continent. By using the above instructions and the scheme, you can make a whole colony of penguin, tell your child about the behavior of this amazing bird. For a good example, it's worthwhile to create small penguins. This will help the proposed scheme.
 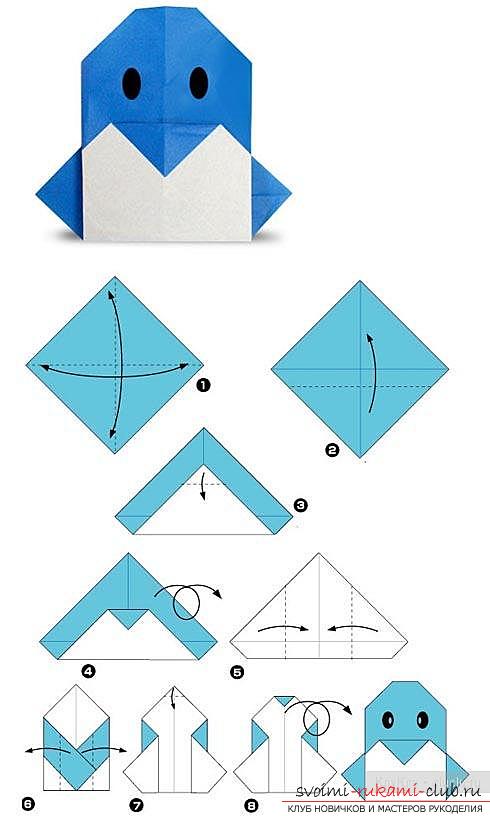 Guided by each item, you will not have any problems when assembling. A fascinating game in the world of Antarctica will attract the interest of children to create figures of origami.
Comments
Related posts:
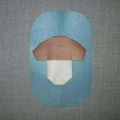 This detailed workshop of origami for children of 8 years will teach how to make an origami-mushroom from paper.
 This detailed master class with a photo and description will teach you how to make origami for beginners - origami-crow from paper.
 How to make a tank using the origami scheme of paper? Assembly diagram and lesson
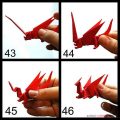 A simple origami mythical dragon made independently by means of schemes
 Make yourself an origami volumetric ship-battleship without difficulty you can use the scheme