The basic lesson of step-by-step drawing will allow you to master a simple technique of drawing with a pencil
The basic lesson of step-by-step drawing is necessarybeginners. Thanks to the detailed description, you will be able to learn how to hold a pencil, hold lines, apply shading, and much more. It is these seemingly insignificant moments that will help to avoid mistakes in the future and to reproduce on the paper the image you need. Before you teach a child to draw, you need to learn a few things that are just necessary in this technique. The basic lesson of step-by-step drawing will give you the opportunity to get the necessary information, and the photos that you can see below will help in practice to fix the material. We will learn to draw with a pencil. Only having mastered this kind of drawing, you can proceed to more complex, for example, drawing with watercolor. The basis of the technique is drawing lines. To get the right size, have the right slope, you need to hold the tool correctly (in this case it's a pencil). If you want to shade a small area or carefully draw a separate detail, we keep the pencil in the same way as the pen. When we do the first strokes, residual large, then hold it in the middle so that its opposite end is in the palm of your hand. Draw lines At first glance, it seems that it is very simple. Indeed, the complexities are small, but it is necessary to learn these lines correctly. They should be smooth and precise, have the same length and so on. To get the knack, you first need to learn how to draw the lines at the same distance in parallel to each other. It will be especially difficult for a child to do this for the first time. Then you can display the lines in the form of a spiral, zigzags and so on. Their outlines should be quite clear, as in the photo below. 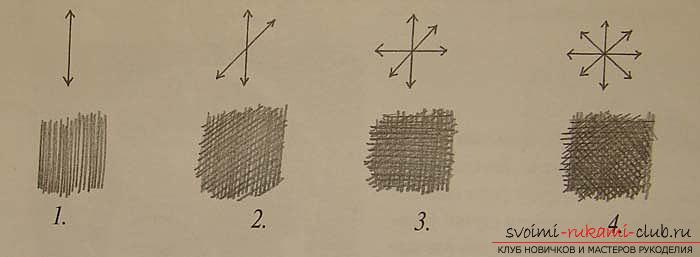 Hatching Having mastered the technique of applying lines, it is possiblego to hatching. The dashes arranged in a certain order (hatching) are used to obscure or display a particular plane and its texture. It can be created with the help of strokes arranged mutually perpendicular, spiral, crossed diagonally and so on. The main thing is that the shading has the same density (homogeneity). Only having mastered uniform hatching, it is possible to begin to create a more complex version of it - having a different density. This skill is useful in drawing, when it becomes necessary to display the shadow in the picture, change the light, change the tone.
 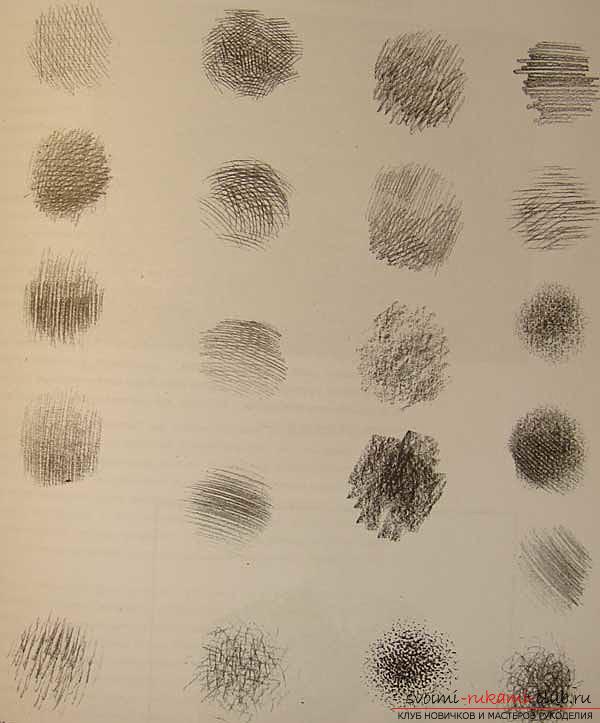 Locking an object Locking an object in the drawing -it is putting it in any form (simple). The shape can be a pyramid, a cylinder, a cube or a sphere. Of course, an object can not be inscribed in a geometric figure accurately, but, most importantly, that it is there, without leaving much space (free). Initially, simple boxes of identical size objects are drawn - basic forms and their combinations. Virtually any of the known objects of natural or man-made origin can be inscribed in such a form or one of its combinations. An example of this action you can see in the photo.
  Consider an example of how to perform a lock. With the help of handy tools or pencils (as we see in the photo) you need to clarify the shape and size of the existing model.
 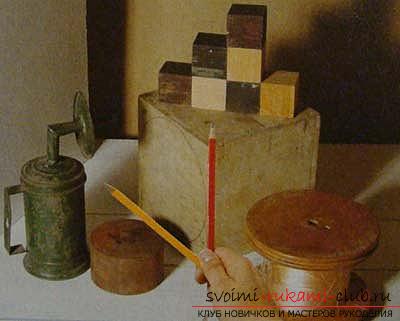 Then, with the help of lines, the angles and the obtained measurements must be transferred to a sheet of paper.
 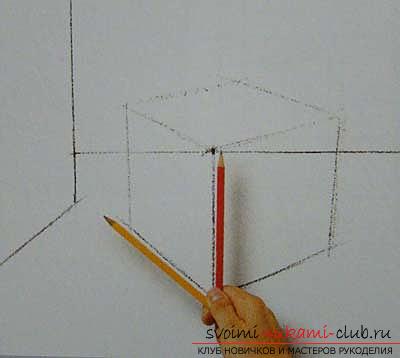 Again, using the pencil, we check the dimensions of all the elements.
 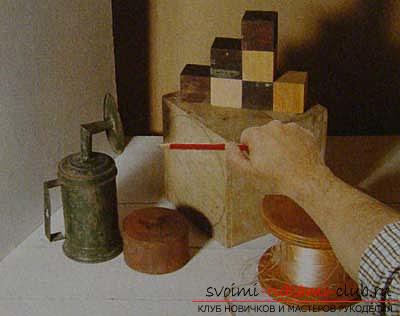 We mark them in our figure.
 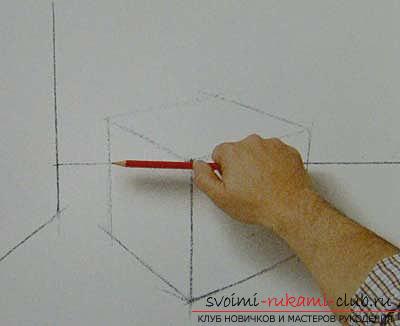 All the steps are repeated several times, so much that the result is a grouping (proportional). Only after this, we block all the elements, observing the dimensions, into the base forms.
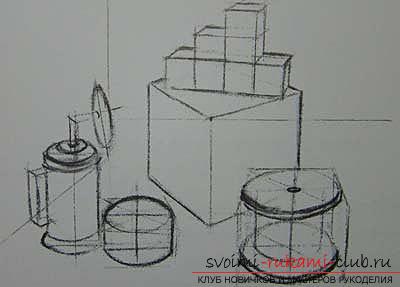
 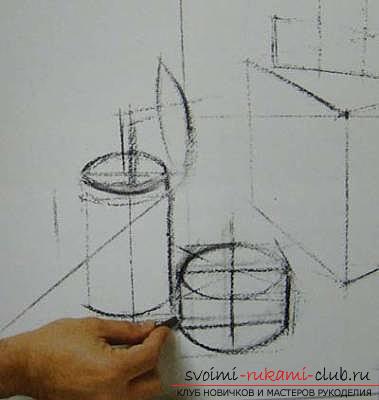 In the figure below, we see the last stage of the lock. In the future, naturally the drawing is supplementedseparate strokes, shades and so on. If you master the basic techniques described in the basic lesson of step-by-step drawing, the subsequent actions will not cause any difficulties.
Comments
Related posts:
 The image of objects in the technique of drawing with a pencil is not a complicated process
 Drawing a portrait in pencil - lessons of drawing a portrait with your own hands
 Schemes of the dragon, made in the technique of origami, will help to master the technique of working with paper
 A simple step-by-step drawing of spring flowers, tulips, with children will make it possible to learn the basics of painting
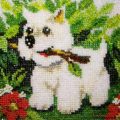 Master-class on embroidery of a small picture with beads will help to master this technique of needlework