Basket for nuts from needles. Original master class with description for beginners
Variety and availability of natural materialsgives very great opportunities for needlework and creativity. You can make interesting and useful things for home decor from almost everything that comes to hand, besides, such accessories fit perfectly into the now fashionable style of eco-interiors. So, for example, during a walk in the forest, I got the idea to weave a basket of needles. It turned out to be quite easy and it turned out the first time, besides the result looks very neat and pretty. Do you want to create an eco-interior or decorate a room in rustic rustic style? Feel free to create decor from natural material! In this article, we'll show you how to make a basket of fresh and dried needles. 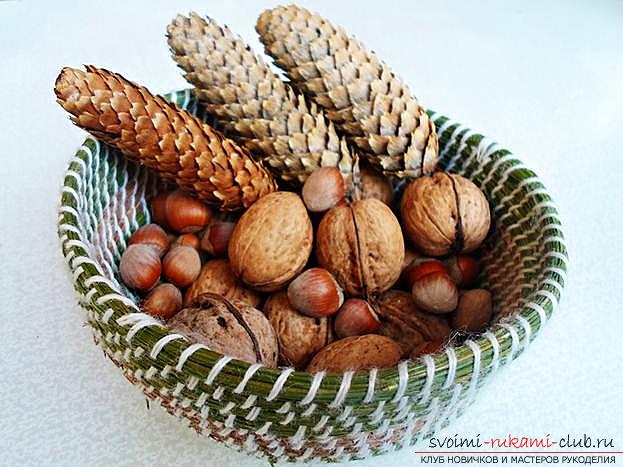 Materials and tools for work:
- needles dry and fresh
- strong threads
- thick needle
- scissors
Tip: if you do not like the idea of fresh and dry needles, a similar pattern can be used to weave a bowl of other bent natural material.  How to make a basketConiferous trees with long needles, for example cedar or pine, as the longer the needles, the easier it is to work with it. We decided to check out which needles, dry or fresh, easier to weave. Practice has shown that there are practically no differences, therefore the product combines both types of material at once. Fresh needles do not require special preparation, it is elastic enough, clean and cuts off without scales, so the only thing that needs to be done is to lay down all the needles in one direction. Dry needles need to be sorted out further, leaving only whole needles and throwing out the broken ones. After that, place in a bowl with hot water and let stand for about 10 minutes, so it will become softer and more plastic, besides it will be washed off with dust and sorines. Lay pine needles from water on paper towels or newspapers and cut off scales, as they slightly spoil the appearance of the finished product.
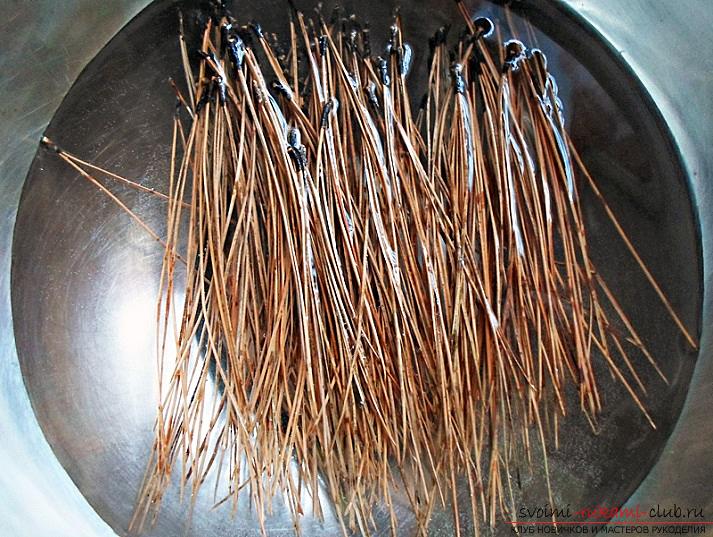
 You can simply tear off the ends with your hands ortweezers. Allow the needle to dry, leaving it for a short while in a warm place. We begin to make the basis. To do this, take a small bundle of needles, about 1 cm in diameter and fix it, tying it with a knot of threads. Then we thread the spiral around this beam, about a third of the length of the needles, then we bend and turn the needles into a tight "cochlea".
  Then we gradually add new needles so that the thickness of the bundle remains the same in all places and just tie it to this "cochlea".
 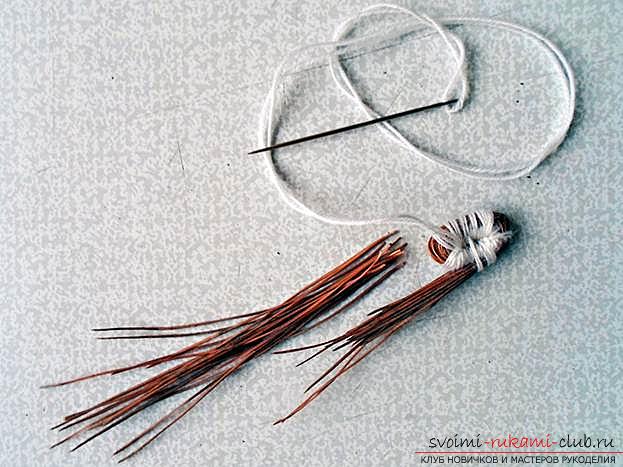 Threads should be strong enough, as it is necessary to tighten the needles so that it does not crumble, and it is good to combine with the needles in color, for example white, black or green.
  From the way you roll the tourniquet, the shape of the bottom dependsmore round or oval. It turned out that it is a little more difficult to make a base from fresh needles than from a dry one, as it is more elastic and a greater force is required to turn it into a tight "cochlea", so for the first time it is better to take dry needles. Around the base gradually make circles, winding a new set of needles and sewing it to the previous one, for a more robust product and aesthetic appearance, you should grab somewhere a third of the finished series.
 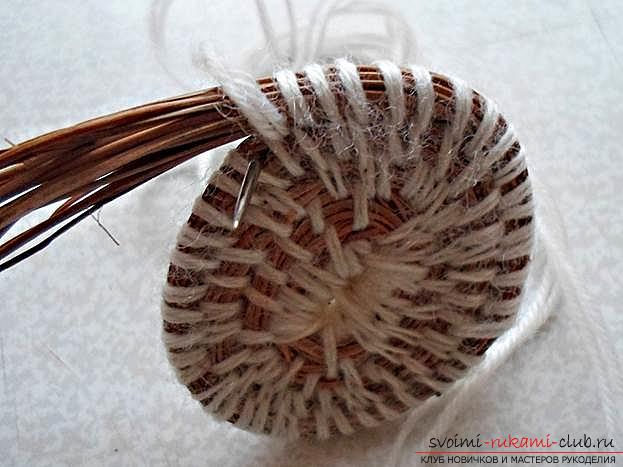 The thread should be taken as long as possible, withwhich you can work with when it ends, attach it to the tail of the remaining one and make a few knots, cut off the ends and hide them between rows, neatly covering with the needles of a new row.
 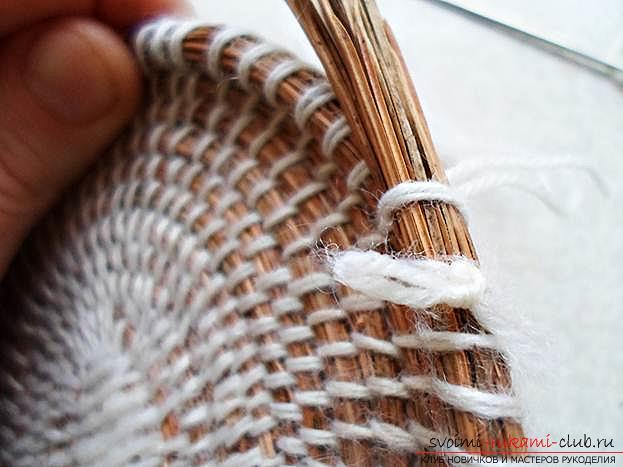 When the base is large enough, you can correct the appearance of the "snail" in the center and close it with more beautiful stitches.
 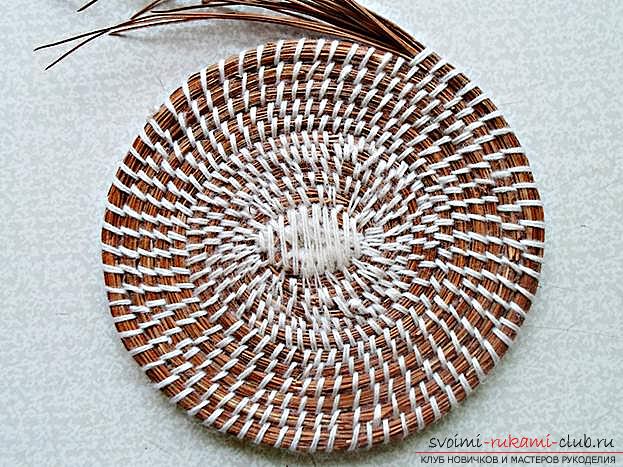 The diameter of the substrate depends on which product you areplan to do. When it is large enough, you can proceed to the manufacture of walls. To do this, the next row of weaving a little lift above the base, so the work will be held simultaneously in a circle and a little up with each new row.
 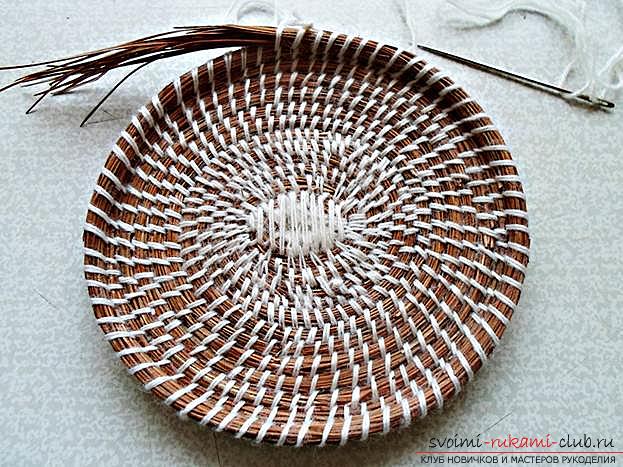 After making 3-4 rows, add fresh needles of green color, so until the needles dries, the product will look more interesting and elegant, and please you with a pleasant aroma.
  Through an equal number of rows, change the color of the needles, alternating between dry and fresh.
 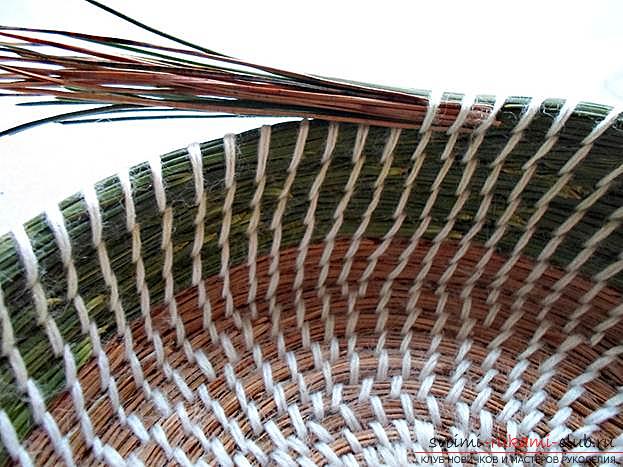 If you want the product to be in the shape of a bowl, then each row is slightly removed from the center, so its diameter will gradually increase.
 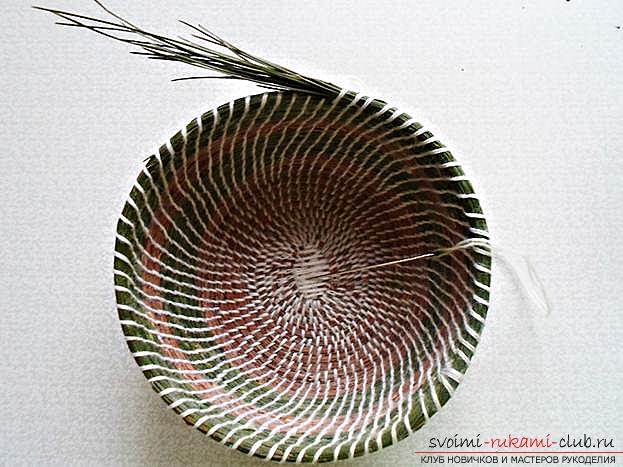 When the altitude is sufficient, stopadd new needles and conventional stitches close the tips of previous needles. After the last stitch, take the thread to the inside of the product and cut it so that it can not be seen.
 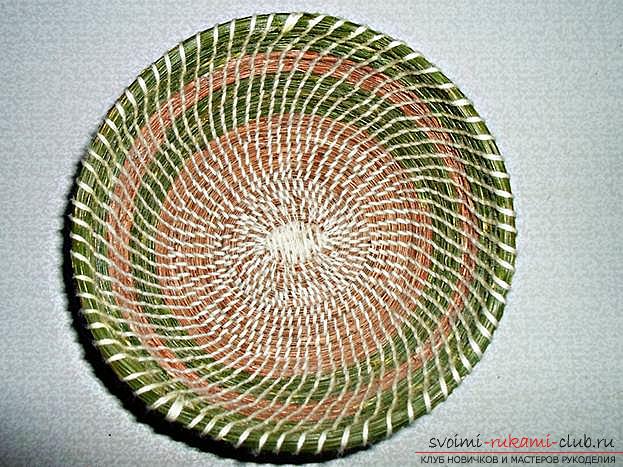 We got a basket for nuts. She really likes children, because it smells of pine needles. It is possible to tell to kids, that to them this basket was transferred by a kind fairy-tale squirrel.
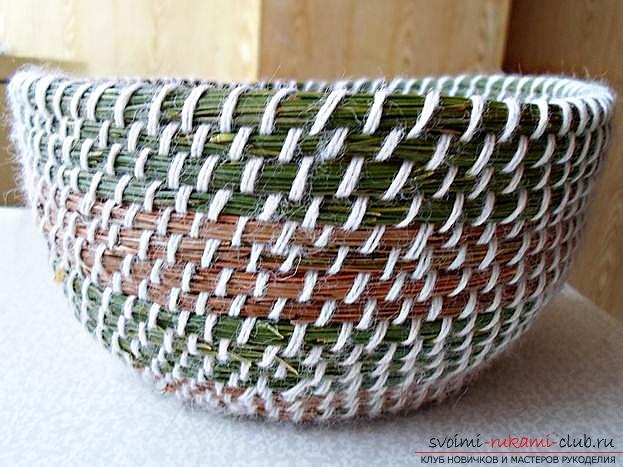
Comments
Related posts:
 Basket with flowers, quilling for beginners
 An original and simple master class for beginners to create soap in the form of roses with their own hands.
 Master class with photo and description will teach crochet crochet, which will be understandable for beginners too
 How to glue princesses of paper. Detailed master-class with photo and description for beginners
Beautiful booties "Zephyrki" for the baby. A master class for beginners with a detailed description of the steps.
How to glue princesses of paper. Detailed master-class with photo and description for beginners
Beautiful booties "Zephyrki" for the baby. A master class for beginners with a detailed description of the steps.