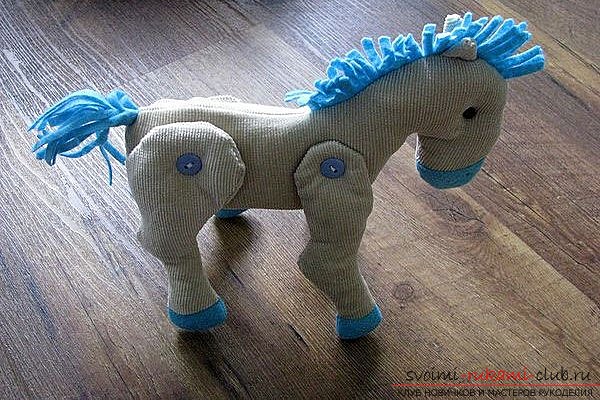
Beautiful and original ideas for the design of a soft horse toy. We make wonderful gifts for the holidays for our beloved children
Your favorite child always wants toto acquire the best things. However, an expensive toy is not a guarantee of high quality. A young mother can have a little time to learn the basics of sewing and sewing, and then create an amazing soft horse for her child. It will not be big in size, but made with love! What materials will be needed to create a horse?
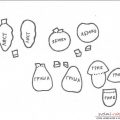
You will get a pattern that is shown in the picture. When you save a picture on a personal computer, then you will get it more than shown here.  First of all, you should cut out a pattern. If you want to sew a small horse, then the length is approx. should be 24 centimeters, and the height of approx. - 18 centimeters. After the sizes have been correctly chosen, print out a pattern on the usual sheet of a format А4. From the main fabric you need these details:
- 2 details of the trunk of the horse with the head. One of them is required in the mirror image;
- Two pieces of each horse's hoof;
- Two pieces of each horse's hoof in mirror image;
- Two ears are triangular in shape. Create them from the scraps. The sides of triangles should be 2.5; 2.5 and 2 centimeters.
From blue fleece, such details were created:
Moreover, from fleece to the main parts can be sewed on spouts (2 pieces) and hooves (8 pieces). How to sew a fleece on the nose and the hooves of the future horse? You can do this as follows:
In the photo you can see how and where the line is laid. One of the legs of the horse is shown, but after sewing. 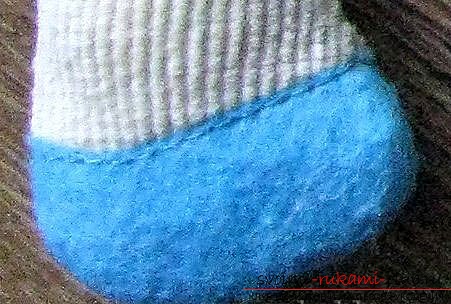 Details of mane and tail can be cut into fringe. Their width is about half a centimeter. For sewing it is necessary to leave not cut details about one and a half centimeters wide. A little advice. All the details of the mane and tail are best cut with a scissors zigzag from the side that remained visible afterwards. Get a complex fringe edge. We turn to tailoring the ears of the horse. They can be created from the remaining scraps. Triangular piece should be folded in half, and lay one line. Turn out the tab through the not sewn side of the triangle. Obtained double ears. However, if you prefer these ears more like in the original model, then you should treat the circle along the edge with a zigzag, overlock or stitch seam by hand from the fabric before folding and stitching. This method is applicable only to a sleepless tissue.
  We proceed to stitch the trunk of the horse. First, take one of the details of the trunk of the horse, and place it on the table in front of you. Prikolite or immediately sew to this part the turned ears with the unprocessed open cut upwards, and combine the seam line. The eyelet should be folded approximately between two triangular marks on the lair of the horse. See the pattern for more understanding. Similarly, sew or pin all the details of the mane. To connect patterns it is necessary one on top of the other, so that the mane is dense and bright. Prikalyvayte them between the marks on the head and back of the horse. The uncut piece left for sewing should go up, because everything that goes into the seam will be hidden there. Tail before sewing must be twisted with a "snail" and similarly, or pin it to the back of the horse. On top of the received part, attach the second ear of the horse, correctly aligned with the first. At the current stage the horse is represented by one detail, in which the tips of the ears are directed to the center, as well as the fringe of the mane and tail section. For the outer edges of the detail does not protrude, in addition to the allowances for the seams of manes, tail and ears.
 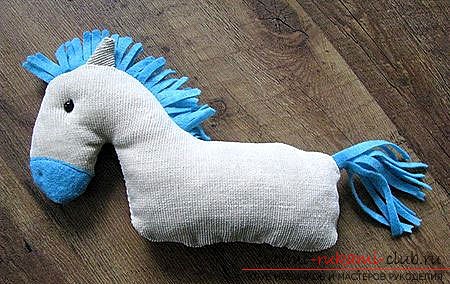 The second part of the trunk is applied to the half-finishedhorse, face down. Stitch the seams. The resulting halves are stitched, leaving in the lower region a small hole for turning the product out and filling it. Before turning the product, it is necessary on the pattern where there are bends, to cut the allowances for seams. The main thing is not to touch the padded seams in any way. The product is inverted. Ears with a mane look great on a horse. Now you need to fill the horse with filler. On the nose, you can embroider the nostrils from both sides. Use French knots for this. To create eyes, use black beads. A secret seam should be sewn holes on the abdomen, which was left, in order to fill the horse filler. The trunk of the horse is completely ready! We begin to create legs to the animal. The details of future hooves are stacked in pairs and stitched, while leaving small holes for padding and eversion. We cut the allowances, turn out the hooves and fill them with filler. After, sew the holes with a hidden seam. Try on the resulting hooves to the trunk of the horse. Now you can use buttons to sew. They must be combined with the matter of the trunk. Using a special scheme of button fastening, you can sew the hooves to the body of the horse. Thus, you can sew the legs to the body of the horse. Threads are better to use such that they perfectly match with matter. By the way, they should be strong enough. That's all! You have yourself sewed a horse to your beloved child. It's not so difficult to sew a toy to a kid, especially if you sit down to understand the instructions and allocate time. Your baby will always play with such a soft product, because it was created by his own mother, who does not regret anything for her beloved child. Most likely, you will still wonder why you did not sew soft toys to a child before? After excellent results, it's important not to stop and try to learn how to create even more beautiful things that your baby will truly appreciate and love, because Mom has put so much love and effort into their tailoring.
Comments
Related posts:
 Beautiful and original ideas for the design of children's toys made of felt. We make wonderful gifts for the holidays for our beloved children
 We make beautiful and original patterns of bright New Year's toys. Holidays became even more pleasant and beautiful. Simple instructions and photos
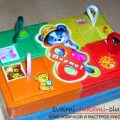 We make interesting toys out of the box with our own hands. Original ideas. View Results
 New and original ideas for a coat for a girl. We make clothes for the child in the latest fashion of 2014. Simple instructions and photos
 New and original ideas for the design of children's clothing. Original and simple solutions that will help you make an excellent gift to your child. Simple instructions and photos