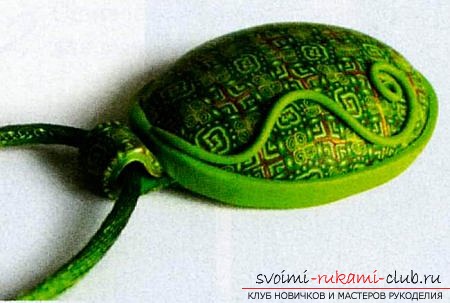
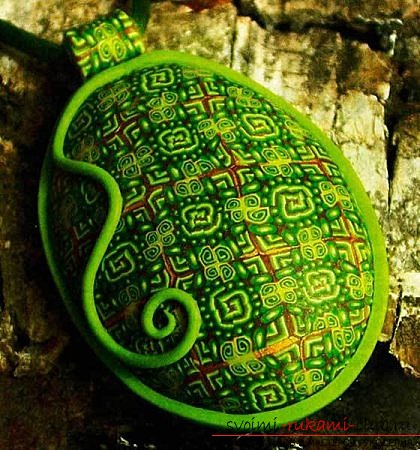
A beautiful pendant made of polymer clay will be an excellent decoration or souvenir for memory.
 Polymer clay provides an opportunitywork in different techniques, which are united by one term "Plastic". In this master class, we will introduce you to one of these techniques, which is called a "kaleidoscope." To sculpt it is a pleasure! This technique allows you to create original, beautiful things with your own hands. Try and you create a beautiful product with a bright symmetrical pattern. An example of such a product is a pendant. We will do it in this master class. Materials for work:
- baked polymer clay: green, white, light green, yellow, bronze.
Necessary tools:
- A sharp knife (clerical or feather knife);
- Blade from the clerical knife;
- toothpick;
- smooth cylindrical glass beaker;
- foil.
So, we proceed to work on the coulomb of the Takea piece of yellow clay. Form a rectangle - roll it out with a glass, flatten it with your fingers. Carefully and evenly stretch the workpiece in length, gradually moving from one end to the other. 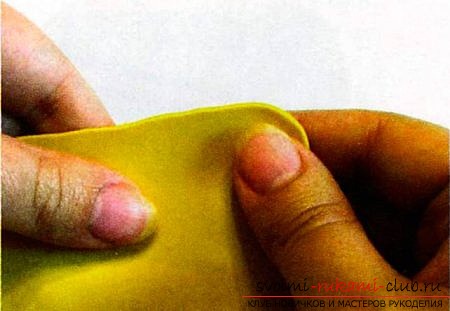 Exactly the same rectangles are formed from light green, white, bronze and green plastic. We cut the edges with uneven edges.
 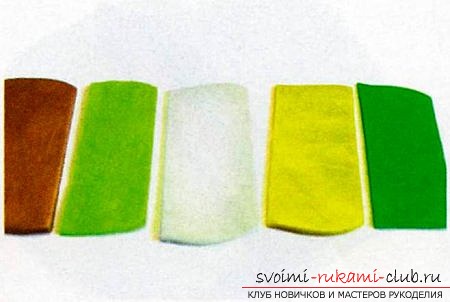 Fold the rectangles on top of each other inthe following order: bronze, light green, white, yellow, green. A little roll out the workpiece, so that the layers are tightly adhered to each other. Strongly flattening is not necessary.
 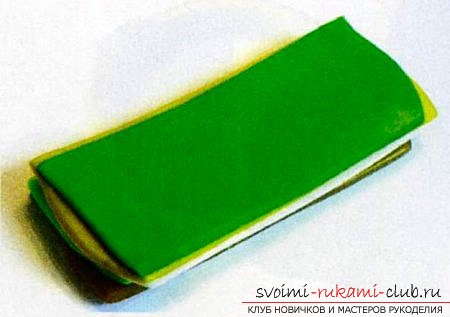 Cut off the uneven edges and divide along two equal parts. We put these parts together.
 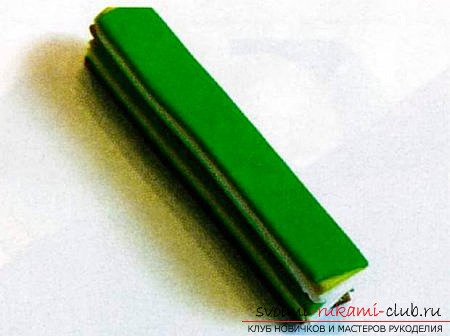 Slightly roll out, cut off uneven edges, placing the blade, at an angle of 45 degrees. We cut into two parts along.
 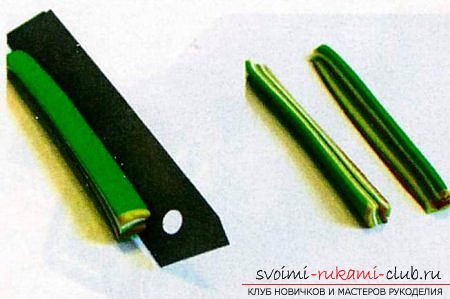 We roll a thin "sausage" from white polymer clay. We lay it on a yellow cloth along an even edge. We wrap the white "sausage" with a layer of yellow plastic. The extra part of the yellow canvas is cut off.
 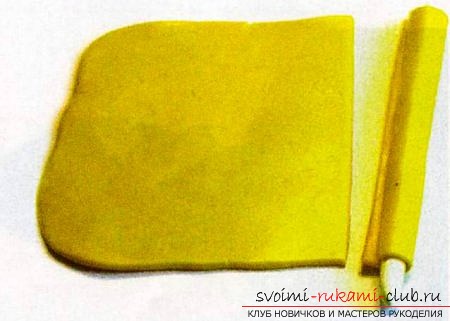 Gently roll the resulting "sausage" to smooth the seam on the yellow layer. Then wrap the resulting piece with green, green and bronze plastic.
 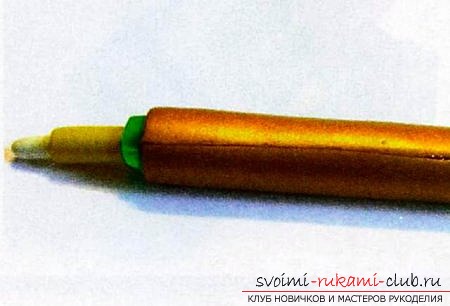 Roll out the "sausage" so that it becomes morelong and thin. We cut off from it a part equal in length to the previously made striped triangular preform. Lightly flatten it with a glass. The rest is rolled even thinner.
 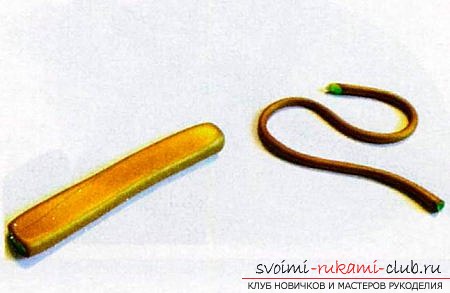 From the original rectangles we cut moreseveral plates of equal size. We stack them on each other: yellow, white, bronze, green. Slightly roll out, cut off uneven edges, put the green side up and tightly roll into the roll.
 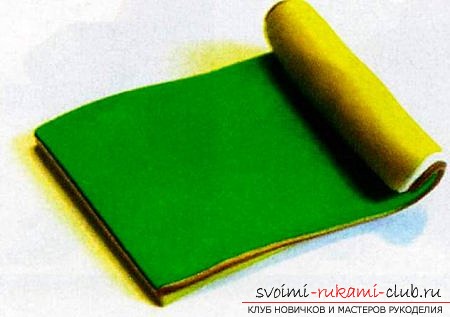 The rolled roulet is rolled out and stretched in length, so that it becomes thinner.
  We put together pieces of equal length of allprepared parts. We start with a triangular striped workpiece. To her side, press the flattened bronze "sausage". Further at the base we put a yellow roll. Crop excess length.
 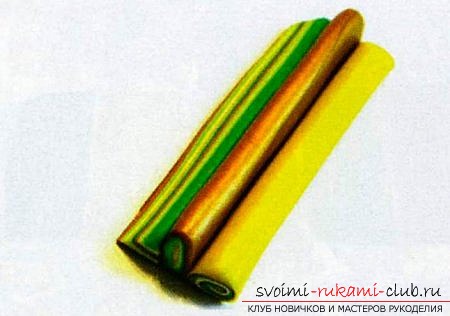 Now roll the thin "sausage" from the green plastic and place it in the hollow between the roll and the bronze "sausage".
 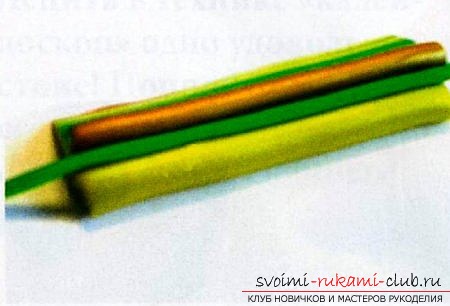 We put two more bronze "sausages" and a second triangular workpiece on top. In the cross section, we should have a triangle.
 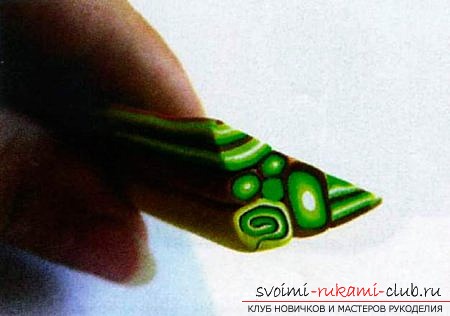 We cut the workpiece across into two equal parts. We stack them with each other in a mirror. The workpiece was obtained with a square in cross section.
 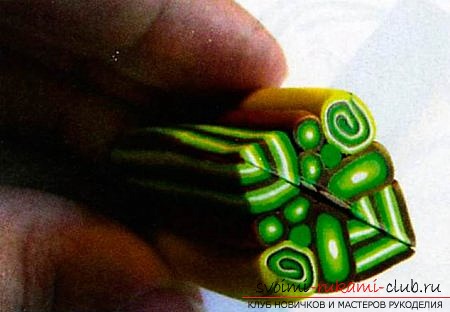 Evenly compress the workpiece from all four sides, stretch it in length. In this case, it should not lose shape and have the same thickness along the entire length.
 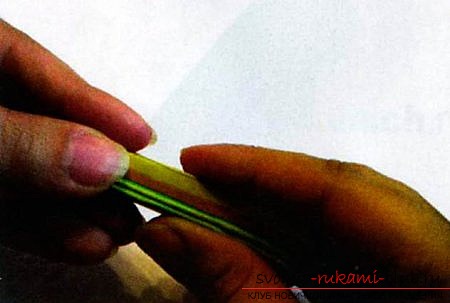 We cut the workpiece into two equal parts,we stack them with each other, in a mirror. Once again we divide into two parts and fold again. On the square end of the workpiece we see a symmetrical pattern. It remains only to evenly squeeze and pull out the workpiece, so that the picture becomes smaller.
 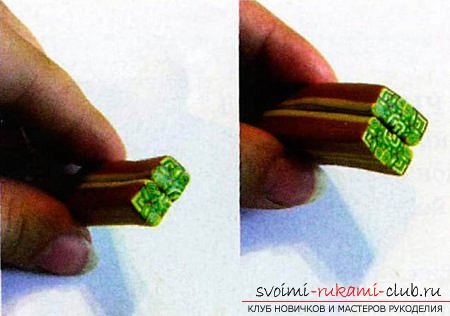 After being stung, slightly roll out the workpiece from all sides to give it the perfect shape.
 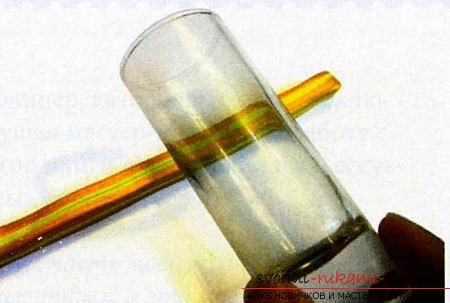 We take the remaining scraps, roll the ball out of them, flatten out and roll out a thin and even cloth.
 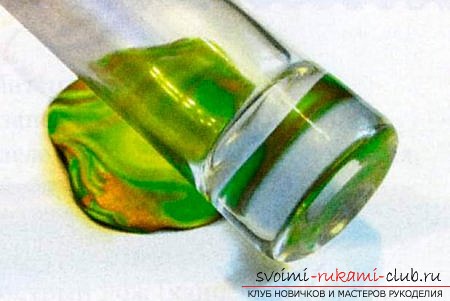 We cut the workpiece into pieces with a thickness of about 1 mm. Carefully lay the cuts on the blade end-to-end with each other, pressing and aligning their shape with a toothpick.
 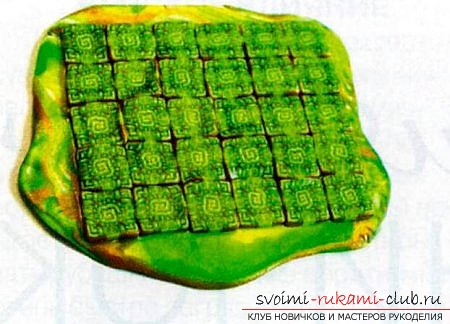 Lightly press the fingers, roll out until smooth and smooth surface and disappearance of irregularities and hollows at the joints.
 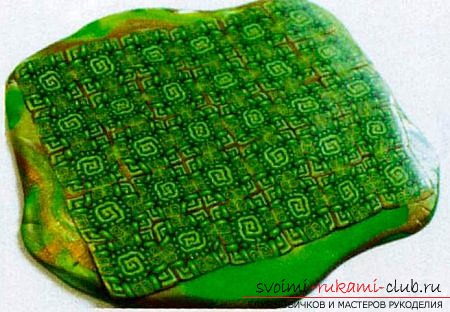 From the remains of plastic we roll the ball and give it the shape of a cabochon. Cover it with a canvas with a pattern, gently squeeze the edges of the side of the toothpick.
 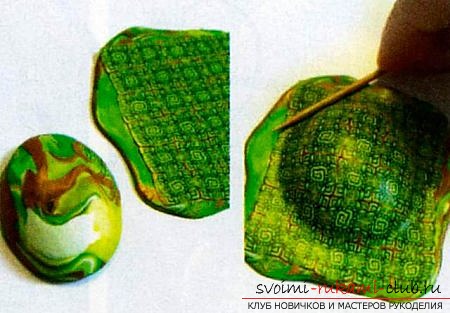 With a sharp knife we cut off the excess of the canvas. From the remaining blade we cut out a strip with a blade with a pattern.
 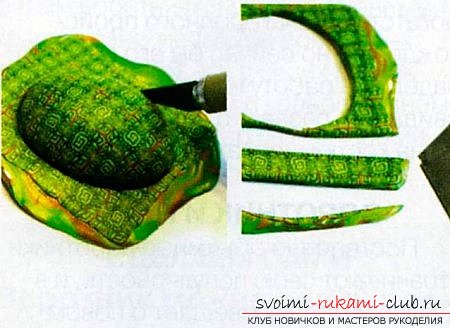 Fold it in half to get a loop. Lightly roll out the toothpick at the base of the loop. At an angle cut off the excess part of the strip.
 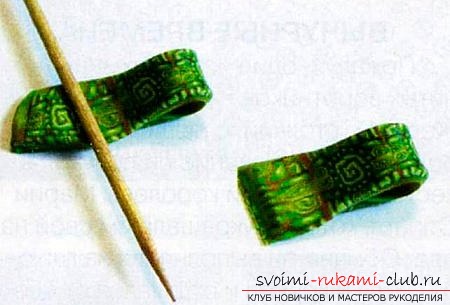 We set the base of the loop under the cabochon and press it to the bottom surface. From a slice of salad plastic we roll out a long narrow cloth, cut out of it an even strip. Crop the end at an angle.
 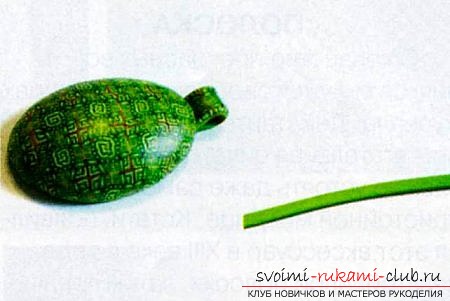 We turn the cabochon from the place where the loop is fastened. At an angle, cut off the extra length and combine the ends, closing the frame. The place of the joint is smoothed with the side of the toothpick.
 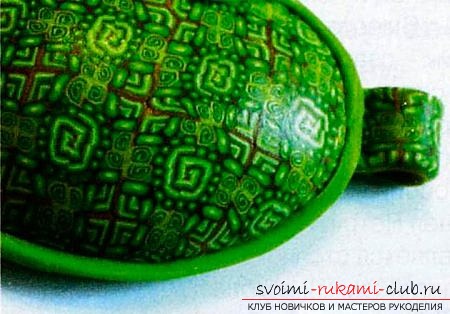 We roll a thin and even "sausage" from the samelight green plastic. We decorate it with a pendant, laid with a wave with a curl at the end. The product is put on foil and bake in the oven for 30 minutes at a temperature of 130 degrees (temperature and duration of baking can be clarified on the packaging).
 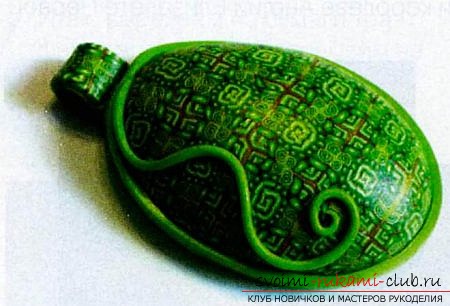 After baking, we take out the product from the oven and give itit should cool down. Only after cooling it will be finally firm and firm. To complete the work on the pendant, pass a string or chain to the top loop. Tips That the plastic does not stick to the workingsurface, when rolling roll the foil under it. To ensure that the workpiece does not crumble under the knife, and the cuts are properly formed, before cutting, we put the workpiece for a while in the refrigerator, so it will become harder.
Comments
Related posts:
 This detailed master class with photo and description will teach how to create with your own hands a set of jewelry made of polymer clay - a pendant and earrings with a turtle.
 This detailed master class contains the technique of working with polymer clay and will teach you how to make Keynes and beads from polymer clay.
 How to make a love gum love is made of polymer clay - a lesson and modeling
 Flower hairpins made of polymer clay - crafts and homemade articles by their own hands
 How to make earrings from polymer clay in the form of snowmen, detailed master class with photo and description