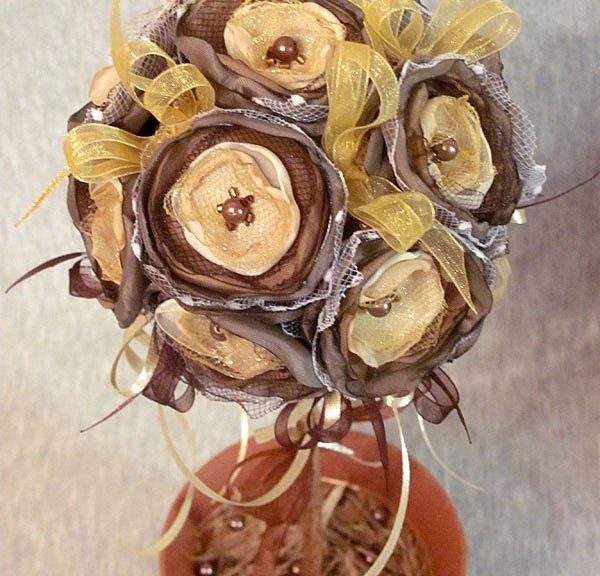
A beautiful tapestry of tapes can be made by yourself. A simple master class with a step-by-step photo.
In this master class we will make a topiary from tapes. For work we need:
- a bowl,
- gypsum,
- brush,
- scissors,
- glue "Super moment gel"
- rayon,
- grid,
- thread,
- needle,
- tweezers,
- candle,
- beads,
- beads,
- thin satin ribbon,
- tape from organza,
- newspaper,
- PVA glue,
- acrylic bronze paint,
- chiffon,
- glutinous glitter,
- rod for the trunk,
- stationery knife,
- glue "Moment crystal".
1. From an ordinary newspaper, by folding, we form a ball of the size we need, I have this ball 10 cm in diameter. 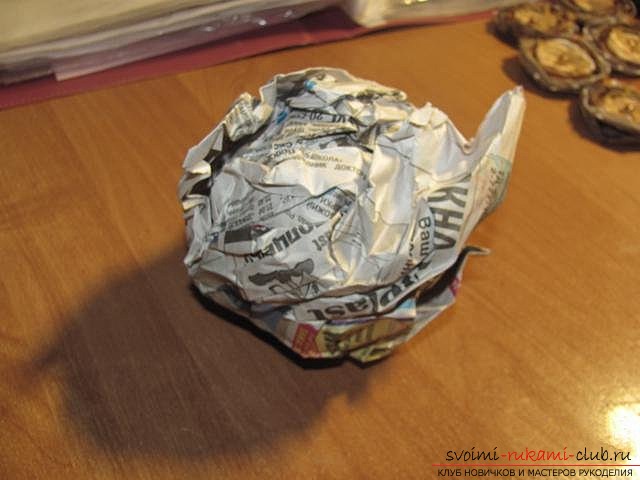 2. We wrap our ball with threads.
 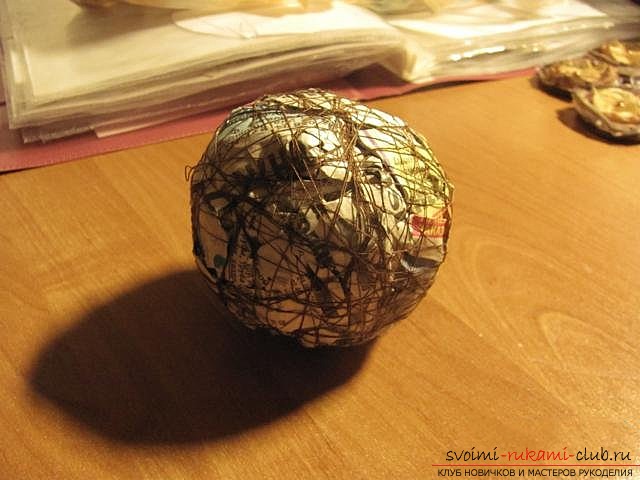 3. Choose a suitable length and width of the stick. Do not forget that the lower part of the stick will be completely in the pot, so you need to consider this length. I use dry poplar sticks, it is easy to remove dry bark from them and they, despite the small size are always very textured with different protrusions. We do not throw away the husks from the bark, it is still useful.
  4. With a stationery knife, we dig a hole so that our stick can fit into it.
 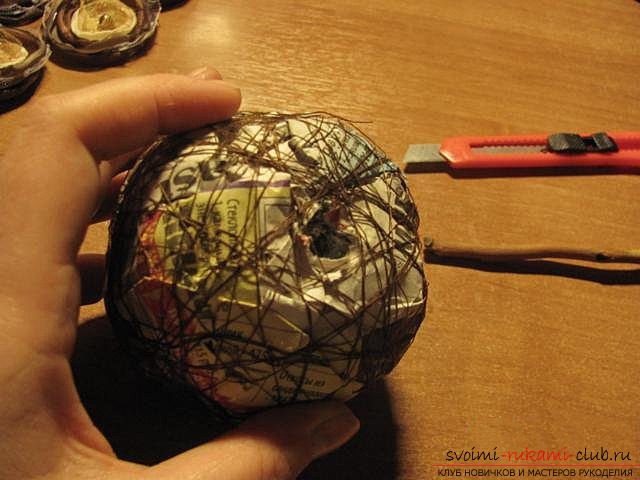 5. Pour into the hole with the help of the glue "Moment crystal".
 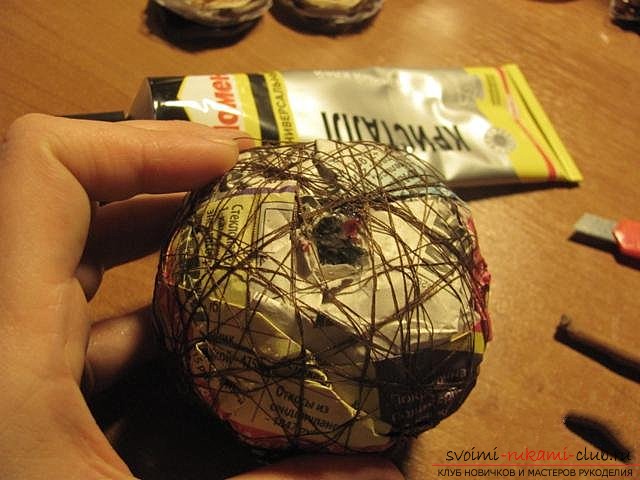 6. We insert the stick and completely wait for the glue to dry.
  7. Then the whole ball is well coated with PVA glue.
 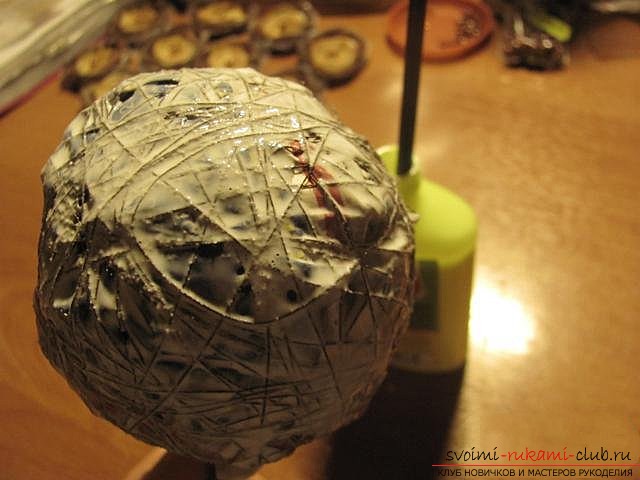 8. From the top, we once again wind with threads, to give a more round shape. Wait for the glue to dry out.
 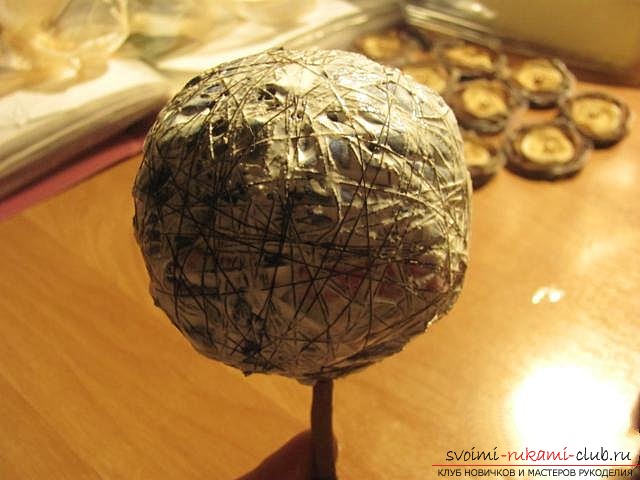 9. We fill the pot with gypsum and insert our tree. Keep the barrel until the gypsum hardens a little, wait until the gypsum dries completely (the drying time should be indicated on the package with gypsum).
  10. We paint a tree with bronze acrylic paint in one or two layers - you can see for yourself how the paint falls, if you make several layers, you must completely dry the previous one before applying another one. Then the tree trunk is covered with glitter glitter with sparkles in the color of the paint.
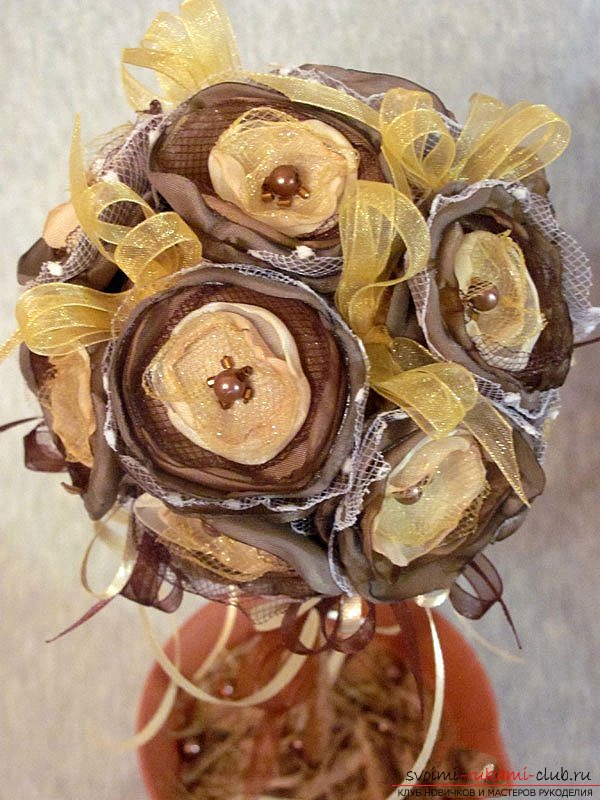
 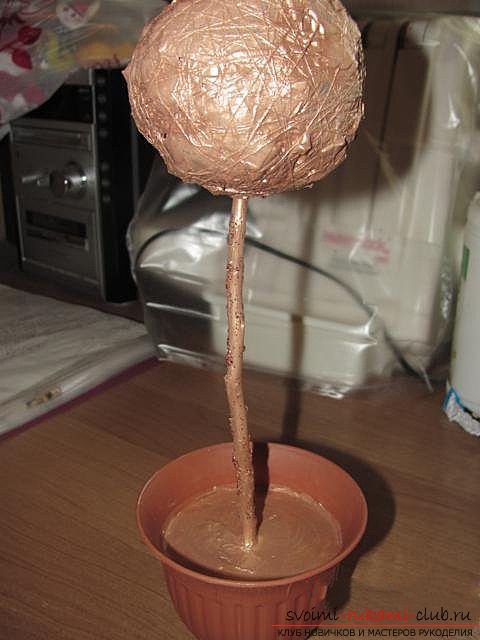 11. Now proceed to the design of the tree crown. Cut out a circle of diameter 6 cm from artificial silk of a chocolate color, from a synthetic silk of brown color a circle with a diameter of 6 cm, from a white mesh a circle with a diameter of 6 cm, from light brown artificial silk 2 circles with a diameter of 5 cm, from a brown mesh a circle with a diameter of 5 cm, chiffon circle with a diameter of 3 cm, of milk artificial silk, a circle with a diameter of 3 cm, a circle with a diameter of 3 cm from a gold mesh. This quantity of petals will be required for us to produce one flower, and for the whole tree, 17 colors will be needed, lichestvo petals and immediately zagotovte them for the entire tree. If your crown is more than 10 cm in diameter (and not the same as mine), then you may need more colors.
 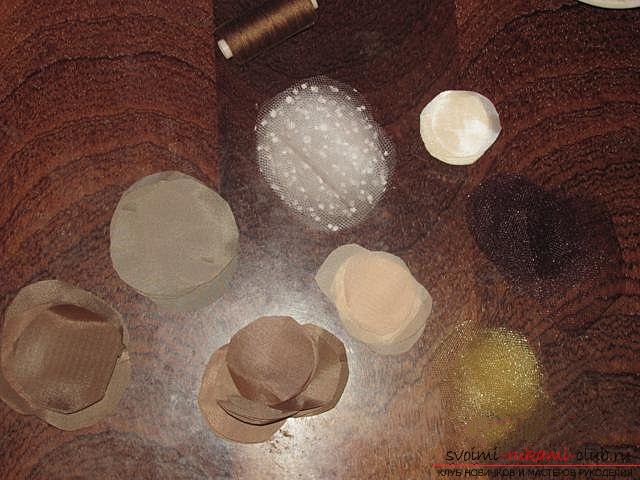 12. Using tweezers, bake the edges of the petals over the candle.
 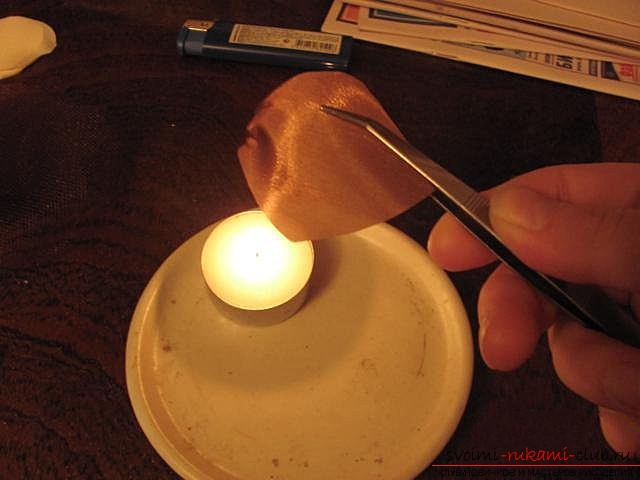 13. Collect the flower, first the chocolate petal and from the white mesh sewn with one or two stitches in the middle.
 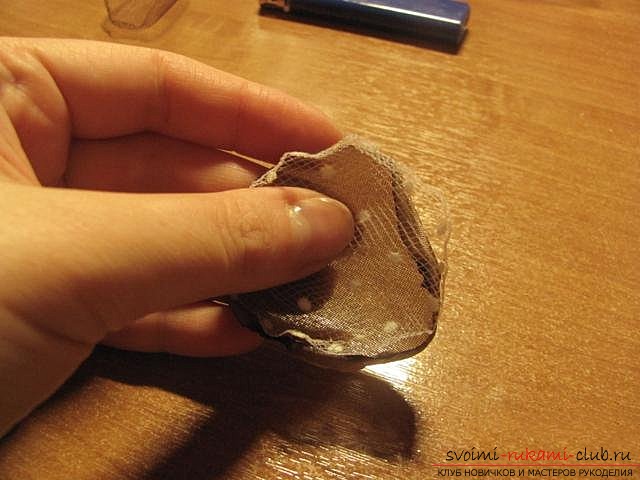 14. Then, from above, we sew a brown petal.
 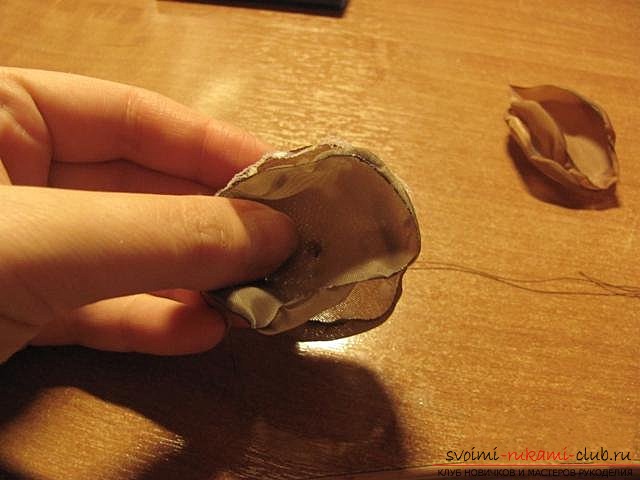 15. Next, two petals of light brown color and a brown mesh.
 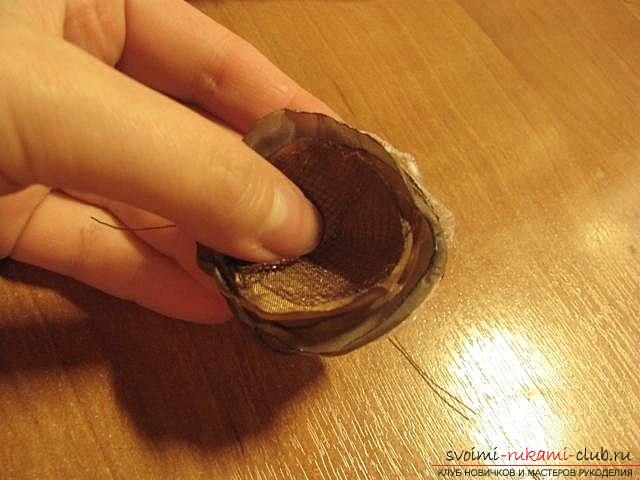 16. Behind them a petal of chiffon, then milk color.
  17. And on top is a petal made from a gold mesh.
 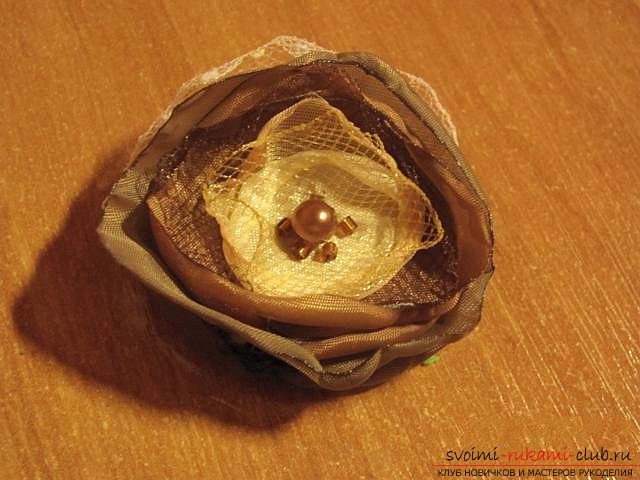 18. In the center we sew beads and beads.
  19. So do all 17 colors.
 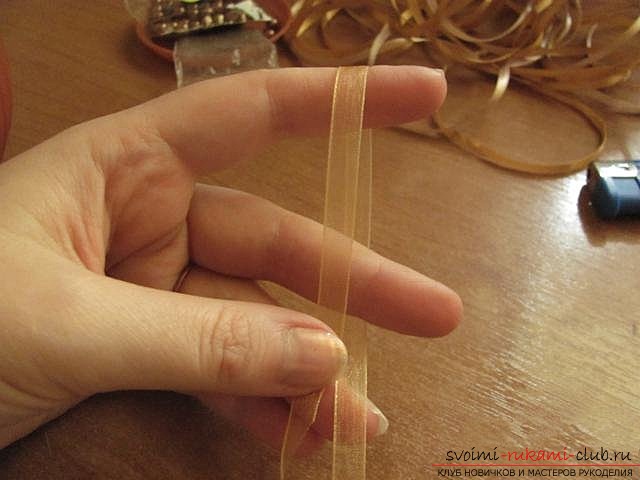 20. Now we begin to tie a bow from a thin organza tape of beige color. To do this, put a tape on the index and middle finger, hold the tip with a large and ring finger.
 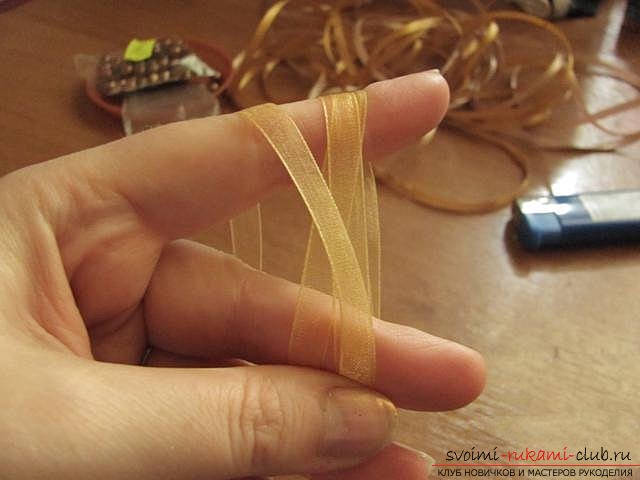 21. Twist the tape around your fingers twice (you can and more, then the bow will be more fluffy).
 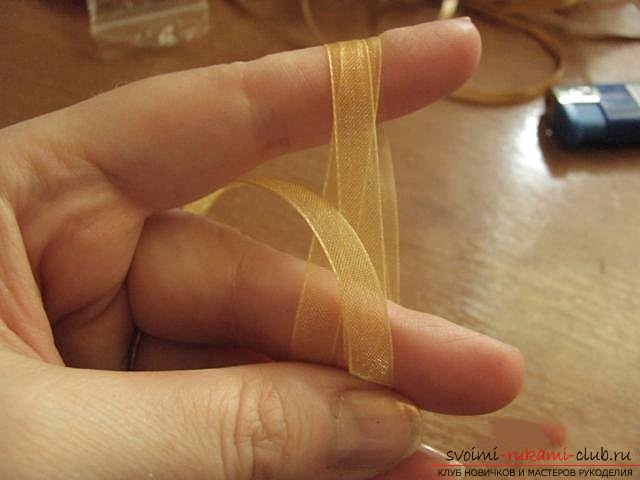 22. At the last turn we fill the tape between the fingers.
 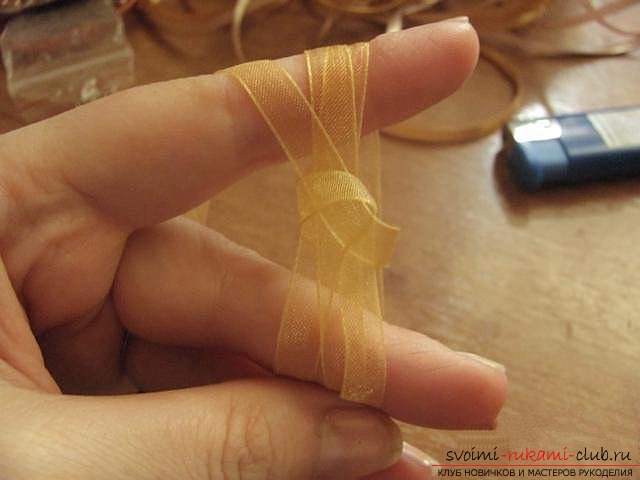 23. With this tape wrap the wound bands in the middle and insert the end into the loop.
  24. Tighten the knot.
 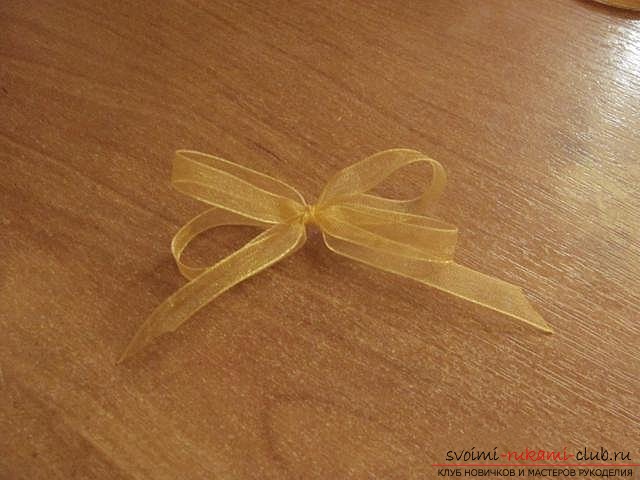 25. Cut off the tip, remove the ribbon from the fingers and straighten the tips with a cigarette lighter.
 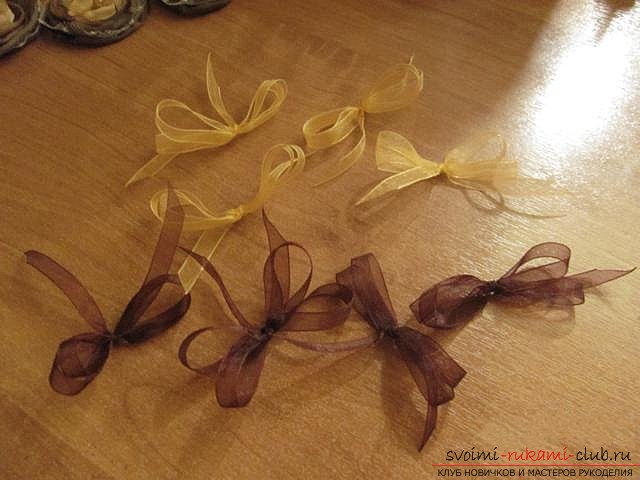 26. So make 4 light bows and 4 dark ones.
 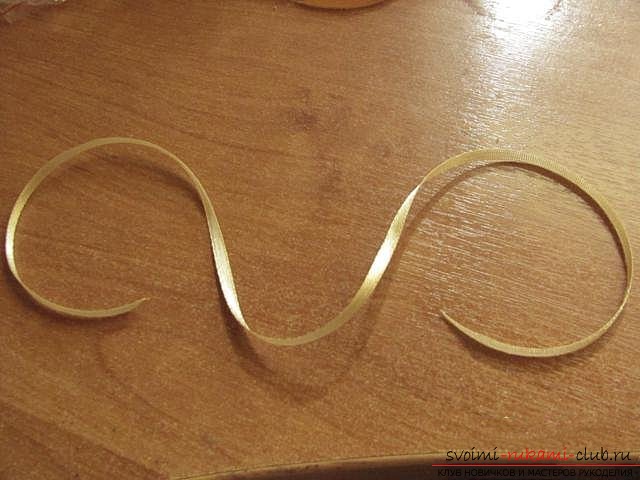 27. From a thin satin ribbon of beige color, we will make more bows.
 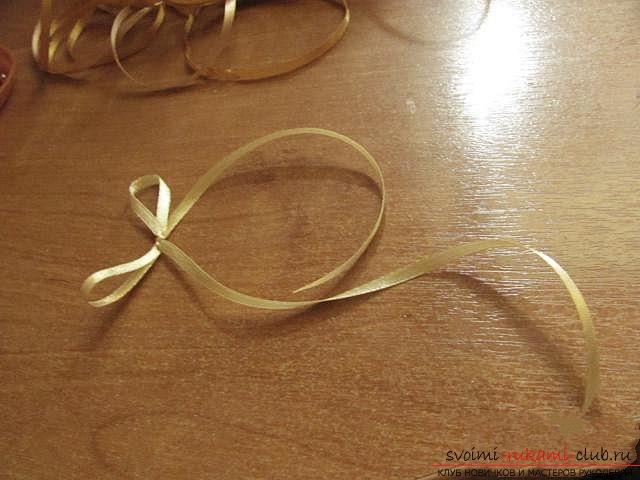 28. We tie a bow in the usual way, but so that the tips are long, it's good if one is slightly longer than the second.
 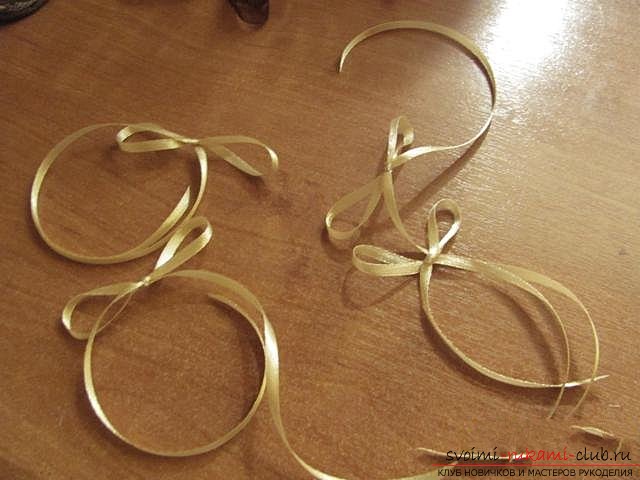 29. So make 4 bow.
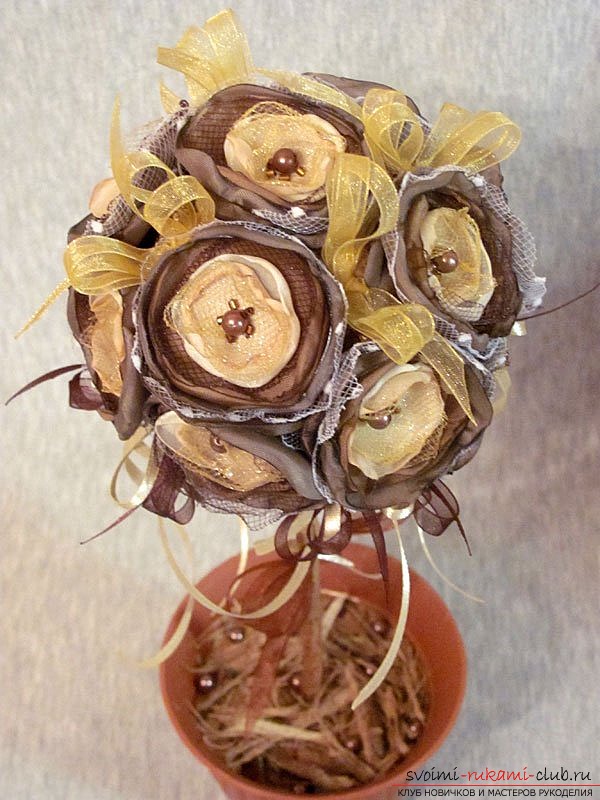
 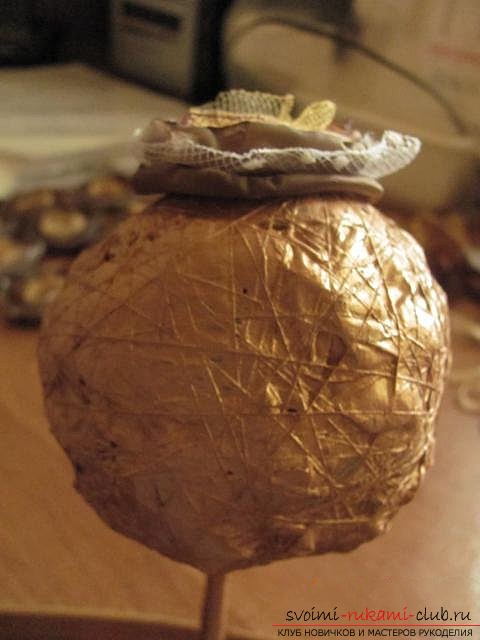 30. We begin to collect the crown. At the very top on the glue "Super moment gel" we glue one flower.
 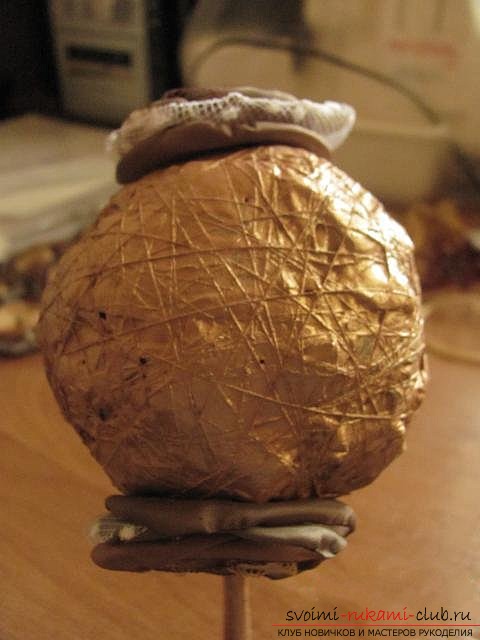 31. The second is glued at the base, close to the stick.
 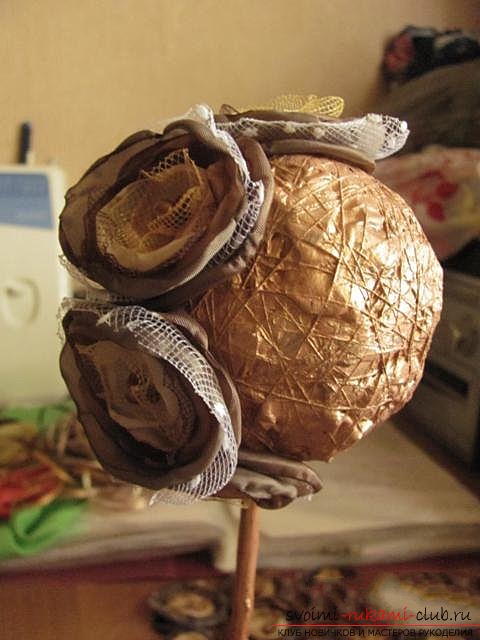 32. Now between them we glue two flowers.
 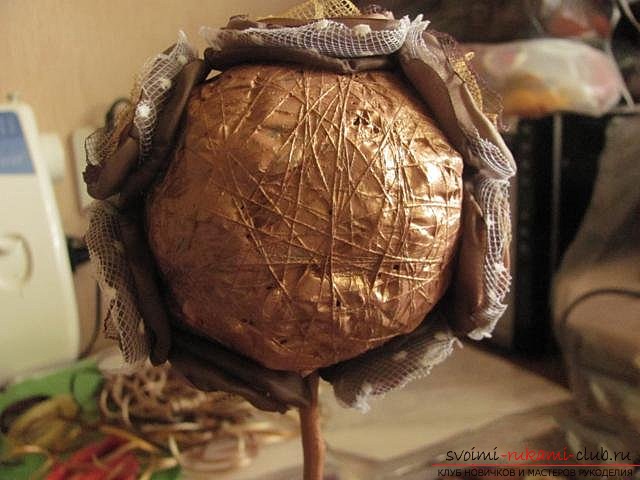 33. Just do the opposite side. We got a ring of flowers around the ball.
 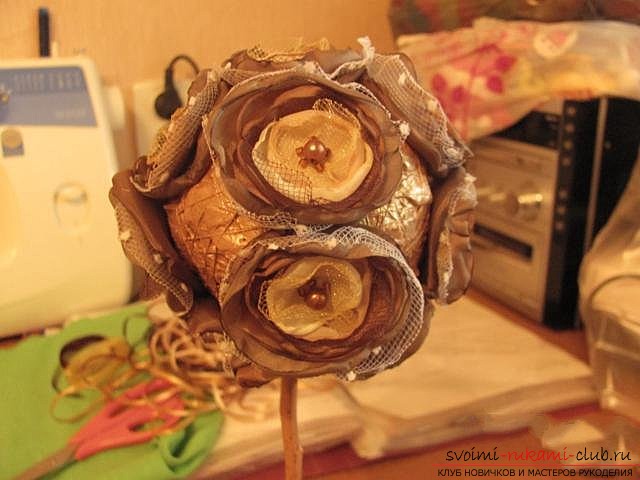 34. Now we make such a ring perpendicular to the one already available.
  35. And the four remaining flowers are glued to the empty seats.
 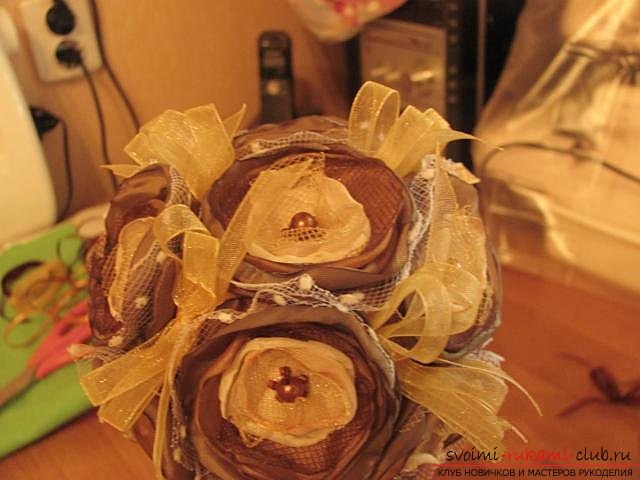 36. Around the top flower we glue 4 light bows of organza.
  37. Below, around the flowers, which stick a dark bows at the stick.
  38. On top of dark bows sticking bows with long tails.
  39. We tie a fluffy bow from a dark organza ribbon.
 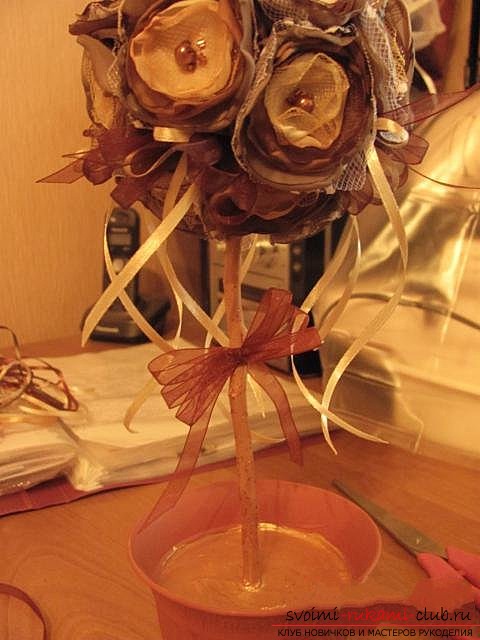 40. We glue on the middle of the trunk on the glue "Super moment gel".
 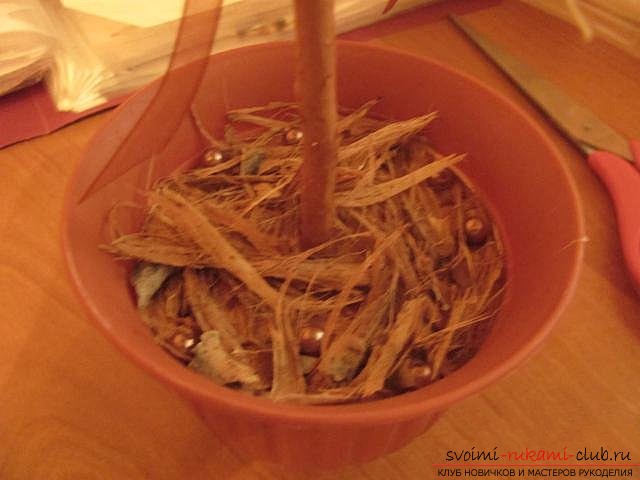 41. At the base of the tree we glue the husks from the bark, which we removed from the trunk and several beads.
 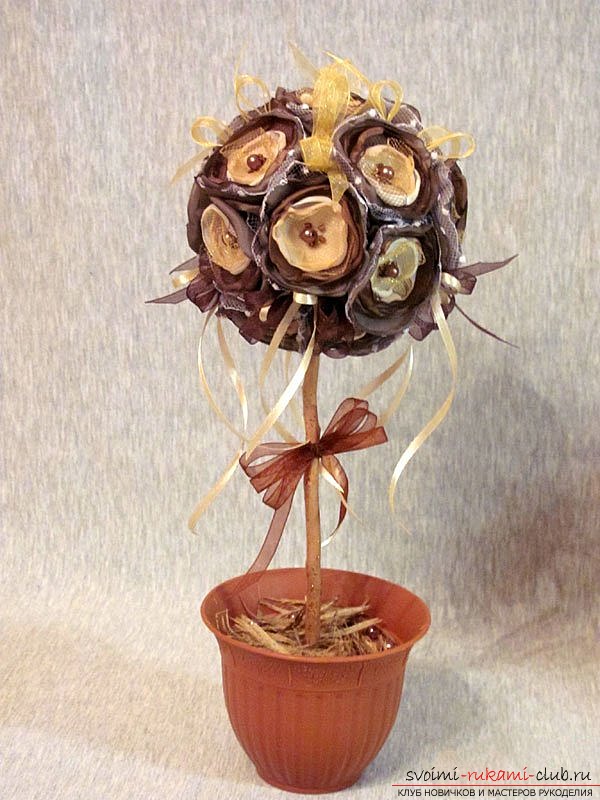 42. Everything, Our topiary is ready!
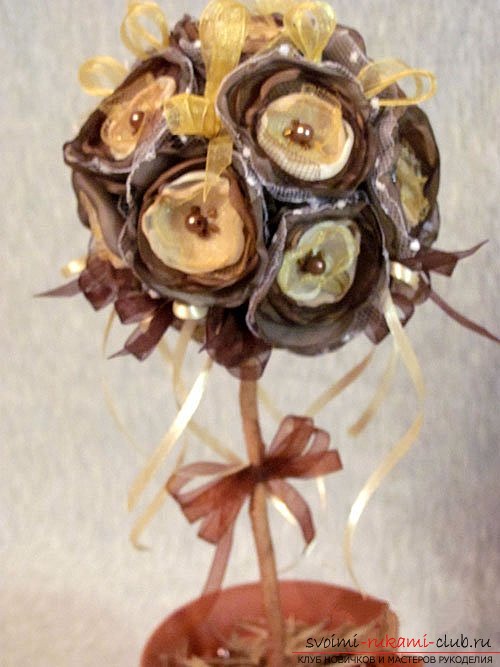
Comments
Related posts:
 Master class with a description and photo will teach how to make decoupage of a bottle of champagne with your own hands
 Master class on knitting monkey amigurumi crochet with their own hands with step-by-step description and photo.
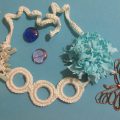 This master class will teach you how to make jewelry yourself, a homemade necklace can be crocheted
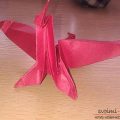 This detailed master class contains an origami-dragon scheme from paper, which you can make with your own hands.
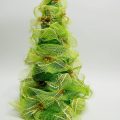 How to make a Christmas tree for the New Year with your own hands? A detailed master class with a photo on creating a Christmas tree from the grid will help you learn how to make a new article