Bench for a child with their own hands
 To please the child so easily! And for this it is not necessary to go to an expensive toy store. Everything is much simpler and more complicated at the same time. If you love and know how to make - you definitely want to please the native fidget. And today we offer you an interesting idea - to make a bench with your own hands - for a baby under 2 years old or his favorite dolls!
To make a bench with your own hands, you will need:
wooden vegetable box (from the vegetable market); twoshort planks; screws or nails; acrylic paint; brushes; saw; hammer; scissors; rubber spatula; three-layer napkins with a pattern; glue for decoupage or pva; clear acrylic lacquer.
Bench do-it-yourself: master class
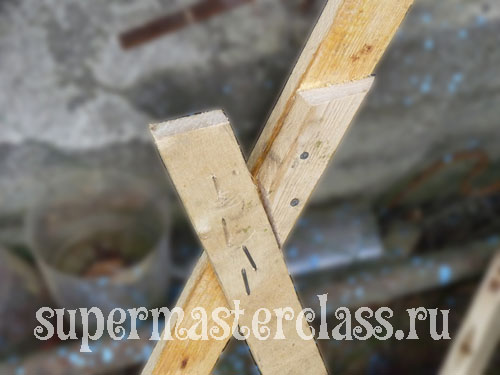
one. To begin with we will prepare for work a wooden vegetable box. It must be disassembled into separate plates; pull out all the nails out of it; clean up debris, if any. The surface of each plank needs to be thoroughly polished - after all, we are doing a little thing for the kid! 2. Work on the assembly bench start with the legs. To do this, fold the two planks from the box crosswise, and fix the place of the intersection with nails.  3. Measure out the height of the bench you need; Cut off the excess at the right angle - see the photo below.
 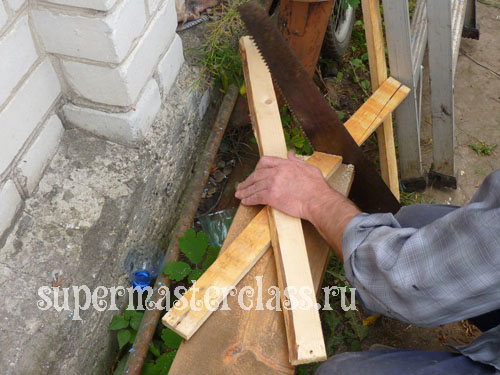 4. Now is the time to turn the crosspiece and nail the plate to the backrest for the bench.
 5. Measure out the size of the sidewall.
 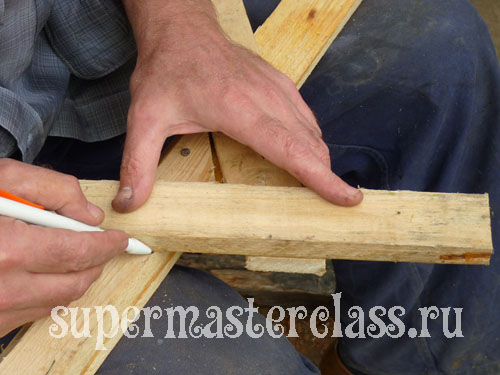 6. We make a cut down on one of the two boards of the backrest of the future children's bench.
 7. Take the seat. For him we need a wide plank. On it you need to make notches, nadpili, whose width will be equal to the width of the board, from which we have just made a bench frame. These pieces after the corresponding nadpilov can be knocked out with a hammer.
  8. Place the bench seat on the previously made legs.

 9. For the back we need the remnants of the boards from the vegetable box. We attach it to the legs with nails or short screws.
  10. Do not forget to strengthen the back with additional straps.
  11. Stops fasten down to the legs of the bench: this will prevent it from overturning.
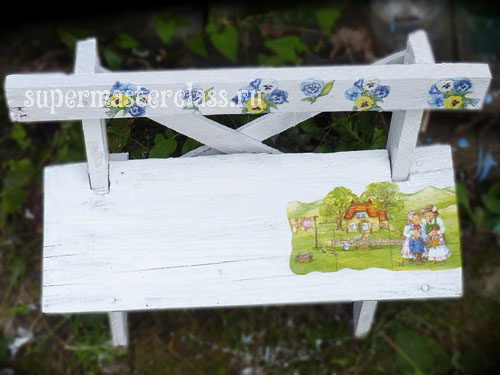
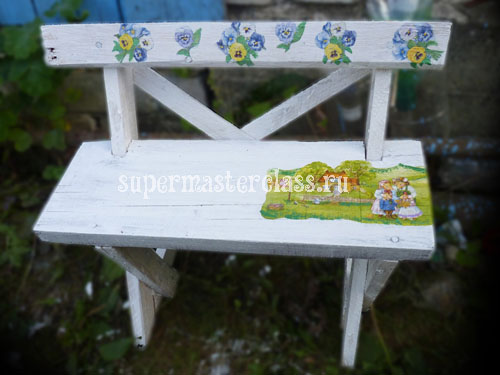
 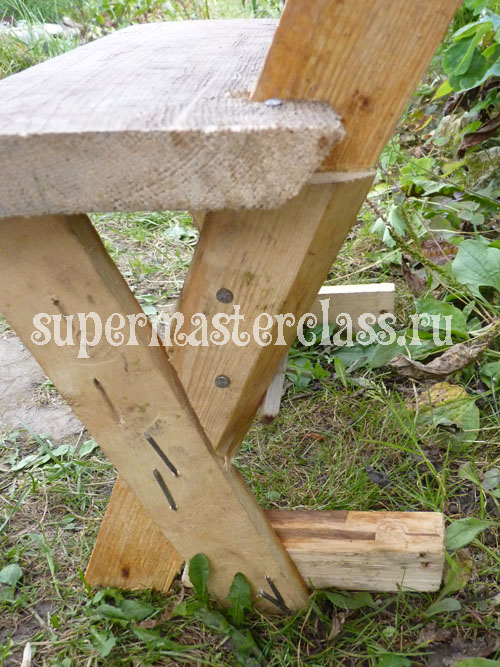 The bench for the child is ready. It remains to give her an attractive look. Therefore, to begin with, let's paint it white with acrylic paint, in 2-3 layers with intervals for drying each layer.
 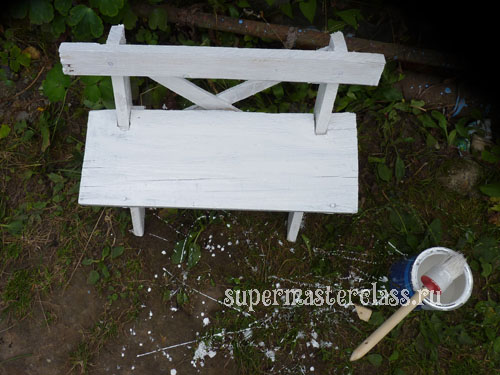 We decorate the bench with our own hands in the decoupage technique. Cut out flowers or any other motifs from a decoupage napkin.
  Unnecessary layers of napkins are separated (the bottom two) - they do not take part in decorating. We work with the top layer, the one with the pattern.
 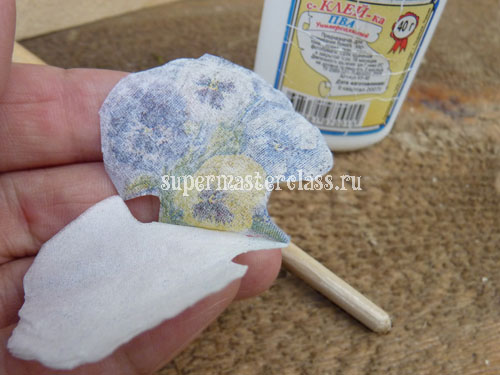 We glue over the area on the bench that we intend to decorate with a pattern.
 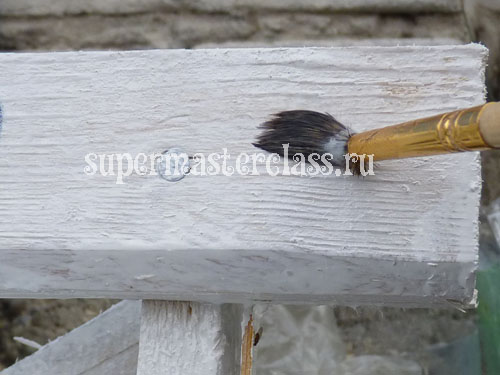 Cut out the motifs pressed to the place with glue; re-cover with glue; smooth with a brush and (if necessary) rubber spatula.
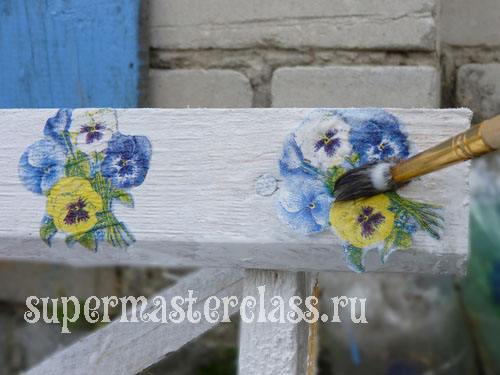
 You can paint the decor elements with acrylic paint to match.
  When the glue and paint is completely dry, the drawings should be coated with acrylic varnish in 2-3 layers. A bench made with your own hands will surely fall in love with your baby and be remembered forever. Eva Casio specifically for the site Previous article: Next article:
Comments
Related posts:
 Gift for March 8 from the child. Crafts for mom and grandmother own hands.
 A detailed master class will teach how to sew pants for a child with their own hands quickly and simply, without patterning.
 Cozy palm bench with own hands
 Bench-table with your own hands for a dacha or a private house
 How to make toys for the development of fine motor skills of the child's hands / Toys with their own hands, patterns, video, MK