Birch from beads, turn-based weaving for beginners (video)
Content
- Master class - summer birch of beads
- Birch of white beads
- Video: master-class of weaving of birch from beads
Even for the ancient Slavs, the birch was a sacred tree. Her beauty was fascinating. She was worshiped and considered this tree healing.
Beading is able to help us recreate thisA tree in all its glory. And in its various variants. If you know the basic techniques and learned all the basic schemes, then, undoubtedly, you will be able to weave with the help of beads almost any of the trees, whatever you like. Besides,
The best way to improveTechnique of work with beads. In our master class you will find both a photo and a video about how to make a birch tree with your own hands. And most importantly, such a master class of weaving from beads is not at all difficult even for beginners.
Before you start the weaving of a birch tree, you mustA master class will be useful in a photo or video format, as well as a step-by-step instruction describing the weaving in all its details. To make a birch with your own hands, choose a photo or video, on which you will see the tree you like. Although you can draw a sketch, thought out carefully all the details or simply depict your birch tree in the form of a diagram that simply indicates the shape of the branches or the bends of the trunk. By depicting your future tree in this way, you can easily follow your idea, looking at the illustration or photo whenever you experience difficulties.
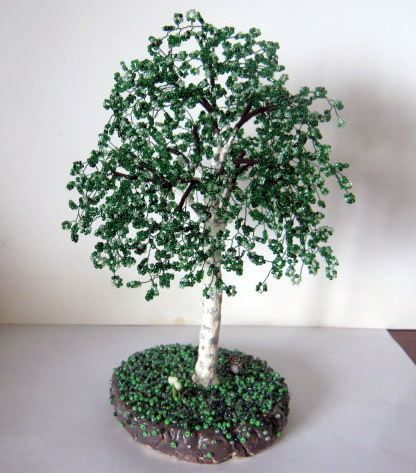

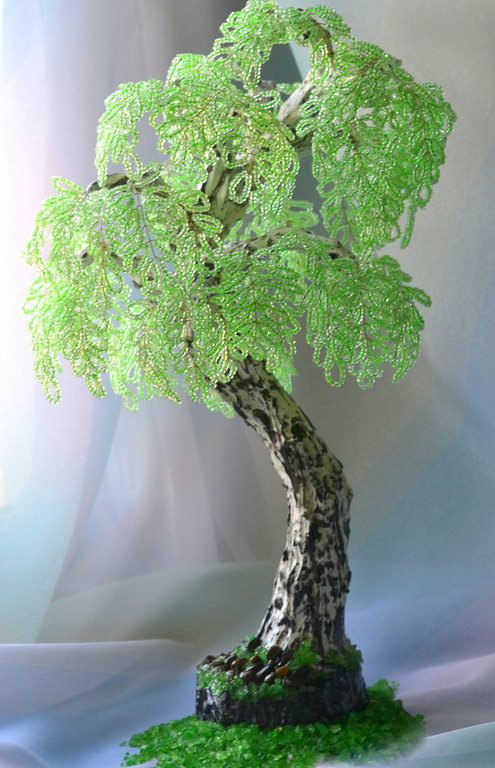

Master class - summer birch of beads
To make a birch in the summerOption, choose the beads you need. Well if it's a few beautiful shades of green. It should be somewhere around 70 or 80 grams. In addition, beadwork requires the presence of wire, which in this case should be of two kinds. The first is used to create branches of birch, from which the crown is formed. And the second, more solid, made of aluminum or copper is used to create a trunk. Then, from the trunk and the crown, you will need to make a tree. Also necessary will be silk threads for shoes or a white floss for wrapping wire sections of twigs, as well as black gouache, white water-based paint, putty, varnish and all sorts of decorative elements. It can be still some kind of beads, stones, moss or any other natural materials.

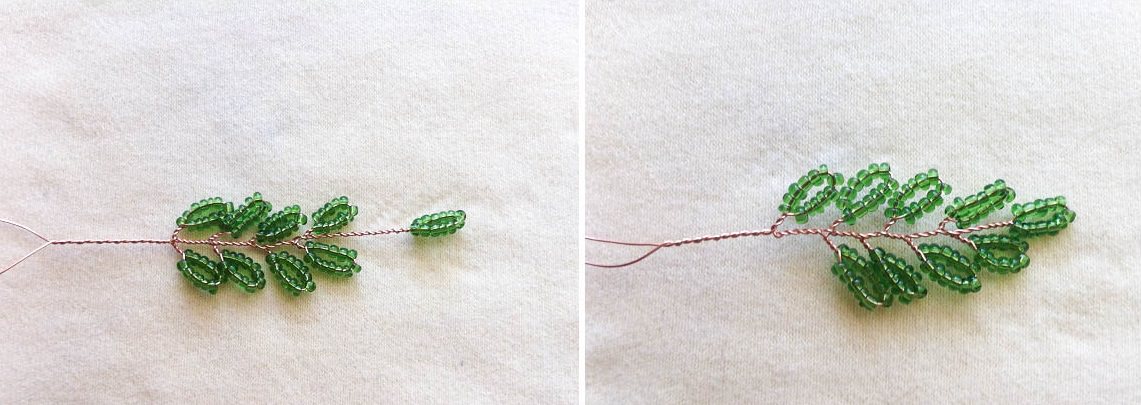
So, take the first wire and thread on itOwn hands beads. Then back off from the edge of 15 cm and begin to form a branch. The following scheme is used for this. Twelve beads fold an eyelet, and then retreat 1 cm and repeat manipulation. Thus, 9 loops are created and the wire is cut off from the last loop of 15 cm. This is the first option for creating blanks. But there may be another way. In this case, we first need to make four loops through 1 cm from each other, and make the fifth loop, having deviated 2 cm from them. After completing the fifth loop, we add four remaining ones after 2 cm after it. This beadwork is called loop. To create your own tree, use either of the two suggested methods.
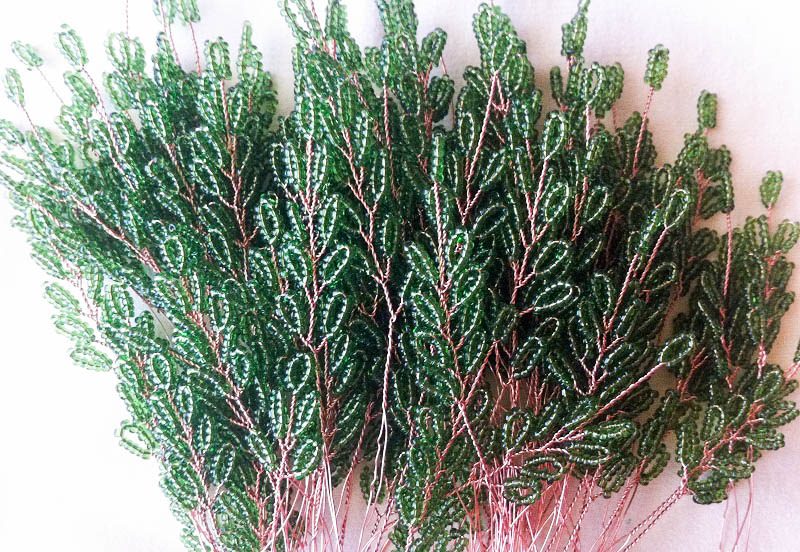
After you have created a large numberYou need to make birch branches. For this, we twist together both ends of the wire, starting from the loop, which is located in the middle. After passing the last pair of loops, we weave the wire 4 cm more. The number of loops on your birch can be different, but it must always be odd.
Now we form the crown. Weaving all the blanks is completed, and we need to start collecting the tree. Do not forget to glance occasionally on photos and videos depicting your chosen sample. For the top of the birch we select 10 blanks. And for all other branches use the same scheme. Take a piece of wire thicker and tighten the workpieces to it. For branches, use three to five blanks and seven or more. The latter form the very bottom of the crown.

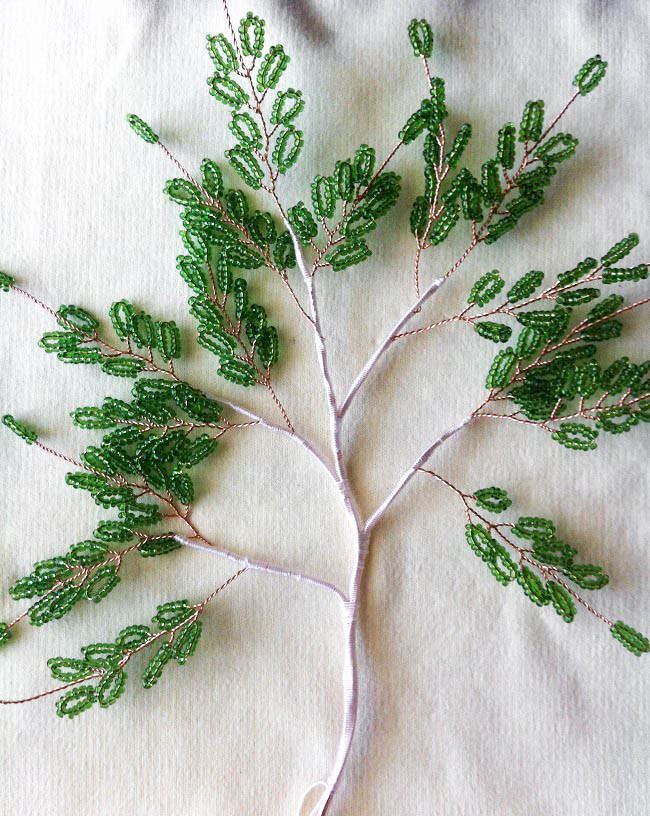
If the tree depicted in your photo or videoContains any bends of the branches, it is necessary to form them before you fasten the branches to the stem wire. Collect the top of the birch and attach it to the frame. Then attach the branches, placing them as if on a spiral staircase.
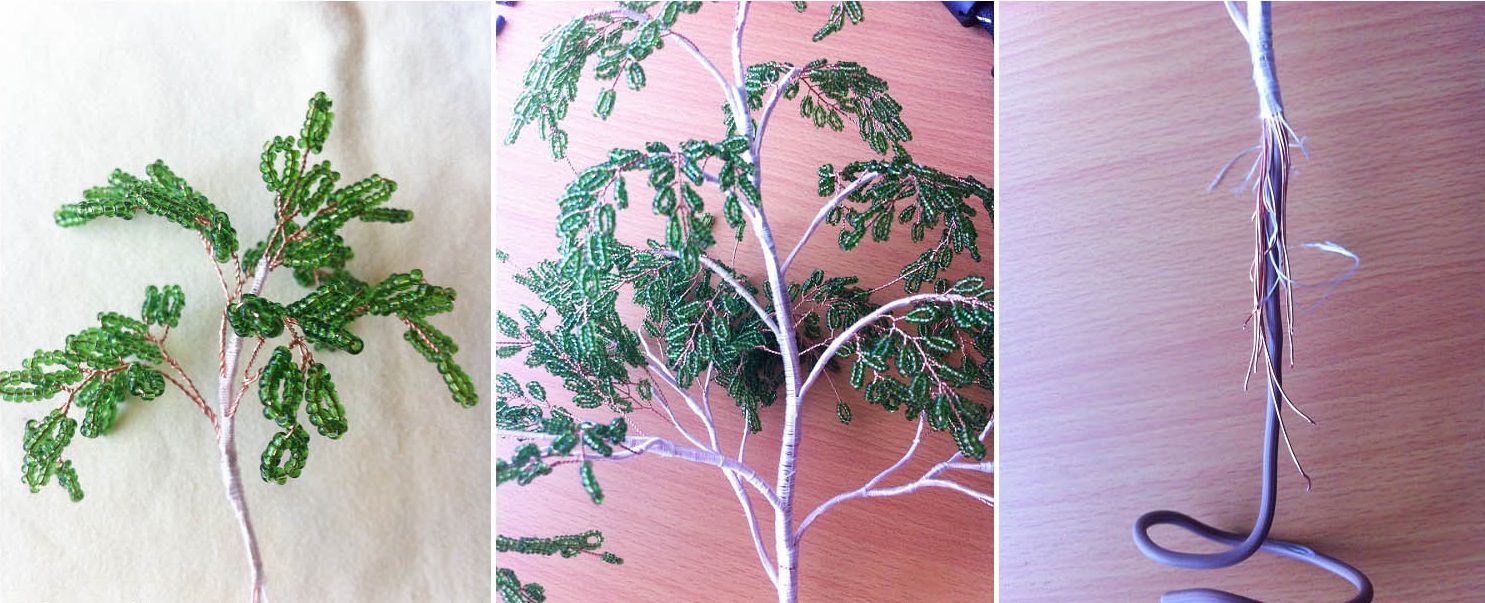
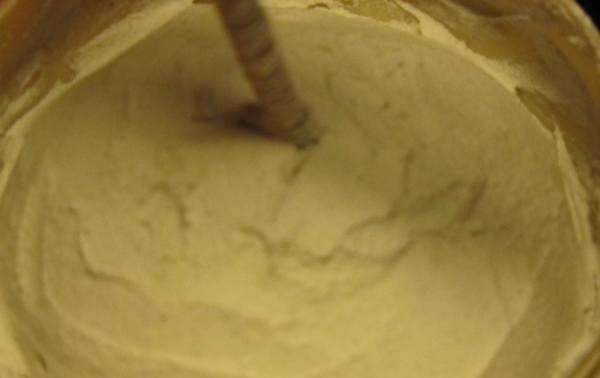
After weaving and assembling the birchIt is necessary to install it. For this we need a tray or an unnecessary plate made of plastic. In a separate bowl, pour in the gypsum and mix it with water until it becomes like a thick sour cream. This mixture should not contain lumps, so mix thoroughly. Quickly pour all this into a tray and slide it into a loop formed at the end of the barrel wire. Ask someone at this stage to help you. And while the assistant will hold your trunk, form a stand, helping yourself with a knife. To the tray your stand will not stick.
Now dilute the putty with water and add it there.PVA glue. And with its help we form the trunk and branches. Try to work out grooves and notches in order to reproduce the real tree bark. Leaving it all dry up.
In addition, it is necessary to make holes forLanding on the basis of decor elements. You can create them in two ways. It is still possible, at the stage of forming the gypsum base, to insert into it the cocktail tubes, which are removed after full hardening. And you can use a drill and make holes in the already hardened basis.


When everything is very well dried up, we proceed toThe most interesting, namely we begin to decorate our birch. We paint the barrel with white water-based paint and after drying it we apply the strip with black gouache. To do this, use a dry hard brush. We dip it into the paint and, performing horizontal strokes, distribute the strips along the entire trunk. For the reliability of the coating, add a little glue of PVA to the paint, then it certainly will not spread under the varnish. At the same time, the bottom of the tree needs to be painted more intensively. Do not forget to wrap all the beaded parts with foil, so that after painting your birch tree looked neat, and was not soiled.

You can certainly not paint anything. Just very carefully wrap your burruzku with white threads and draw stripes on it, using a black marker or a marker for this. Only take into account the fact that the felt-tip pen under the lacquer coating can easily flow. So, either use the paint, or leave the product not varnished. Now we plant beaded decor and lay out pebbles and moss. You can specifically for this purpose weave flowers and bushes from beads. And you can create a whole bower under the birch, and build a miniature fairy house on it or organize a trickle. Or fall asleep with something fluffy and green imitating a juicy grassy coating. In general, do not limit your fantasy in anything. Finally, the entire tree is covered with a thin layer of varnish from the aerosol can.

You can use some form to createThe basis, for example, an old and unnecessary plastic box, which then, after the setting of the gypsum, it will not be a pity to break, if such a necessity arises. Although the commonly used form is covered with polyethylene over the edges of which, subsequently, the solidified base is removed. Or pour the tree into a pretty little pot of the original form or covered with a cloth in the color of the crown.
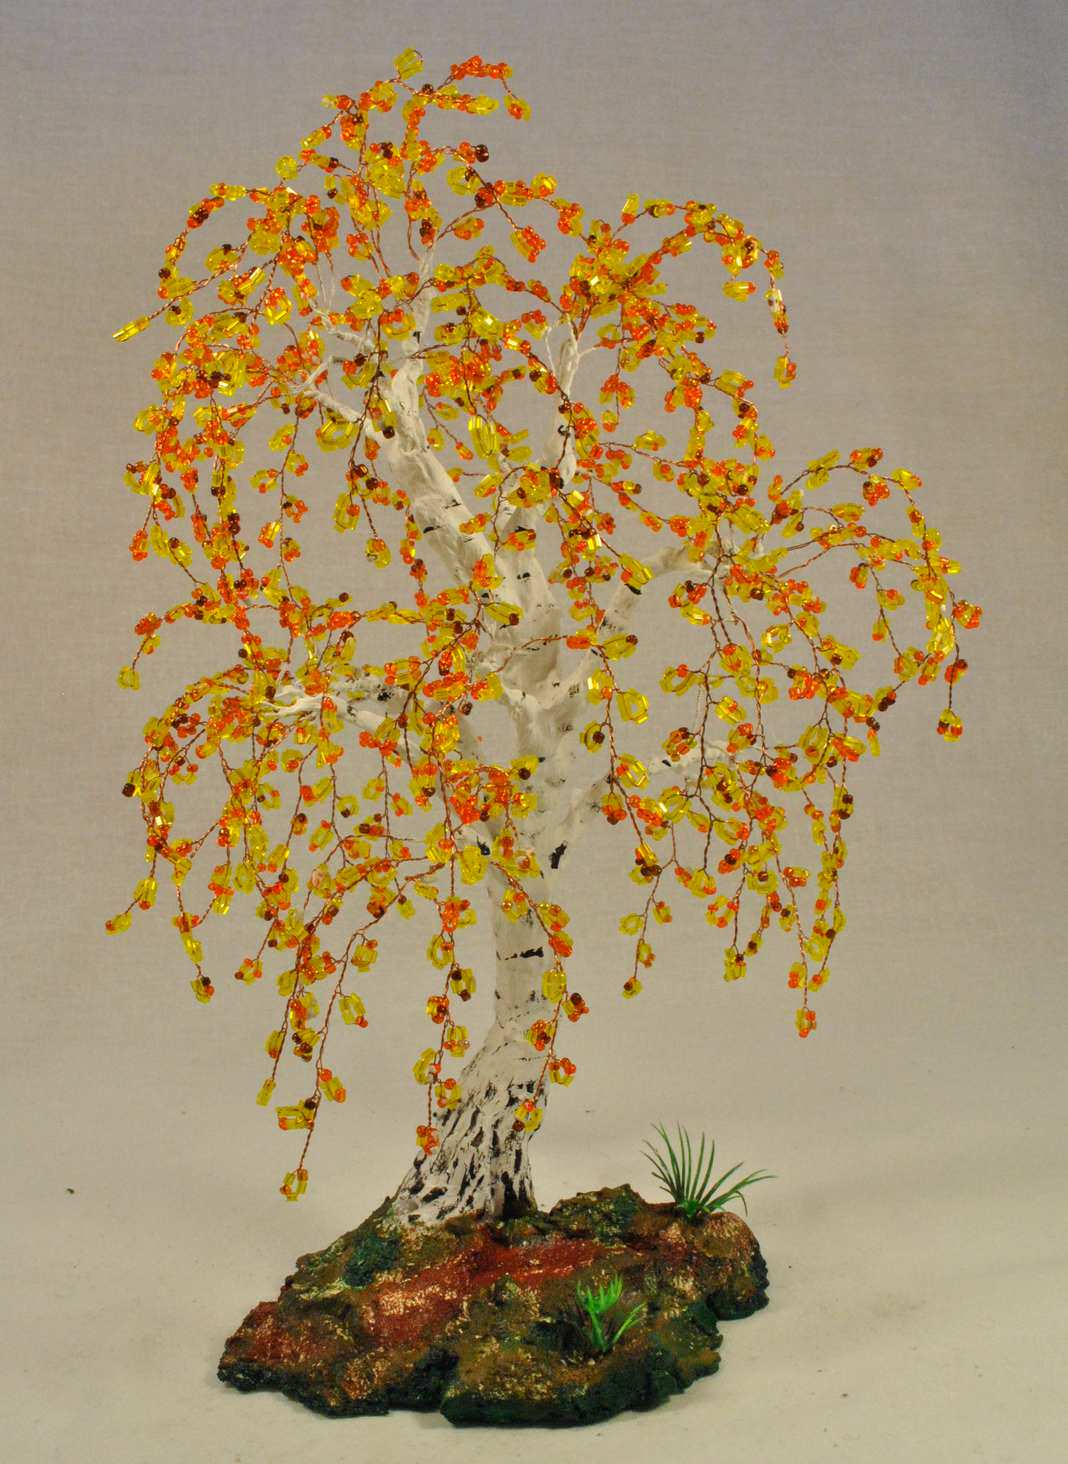
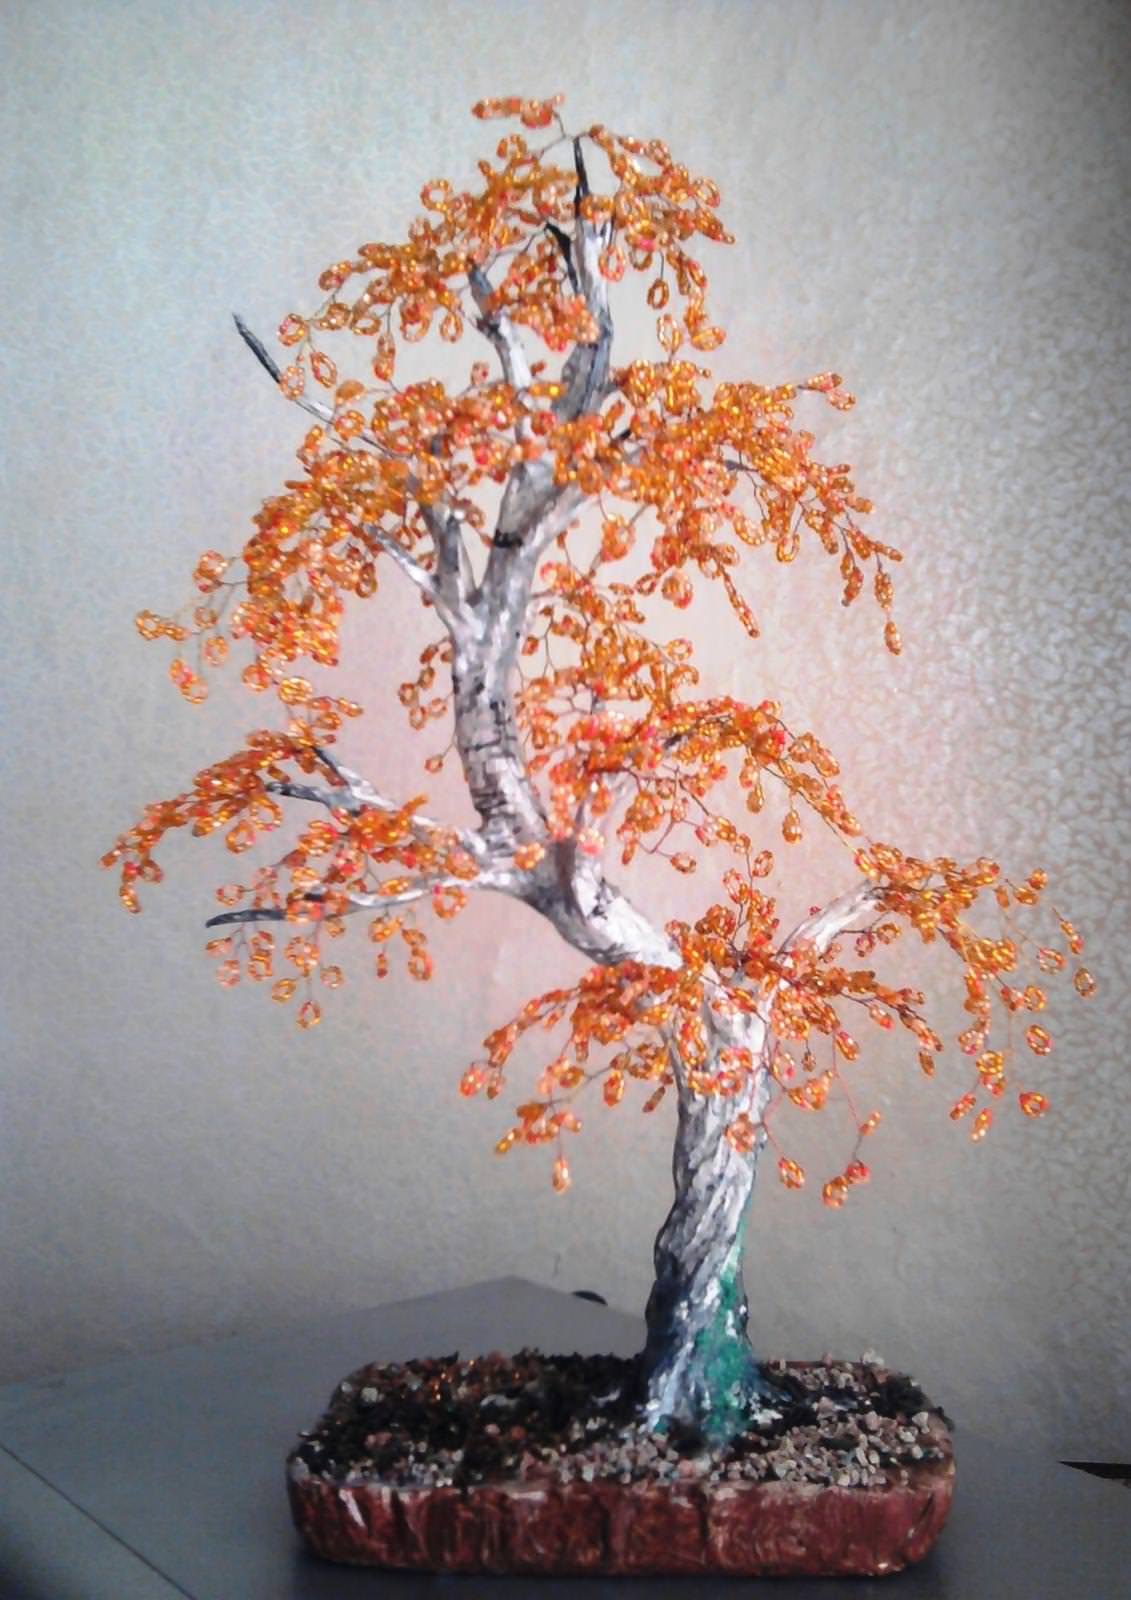
By the same rules, you can create an autumnBirch. Just use instead of green, different colors and shades of autumn. And not only in the design of the crown, but also decorating the stand under your tree. In general, yellow, orange and red shades are suitable. You can use them individually, but you can mix them. When decorating the basis of a birch or a pot, in which you can plant your tree, use small elements on the autumn theme.
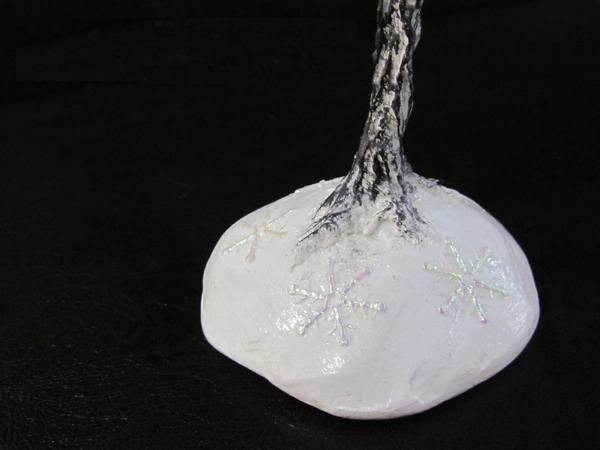
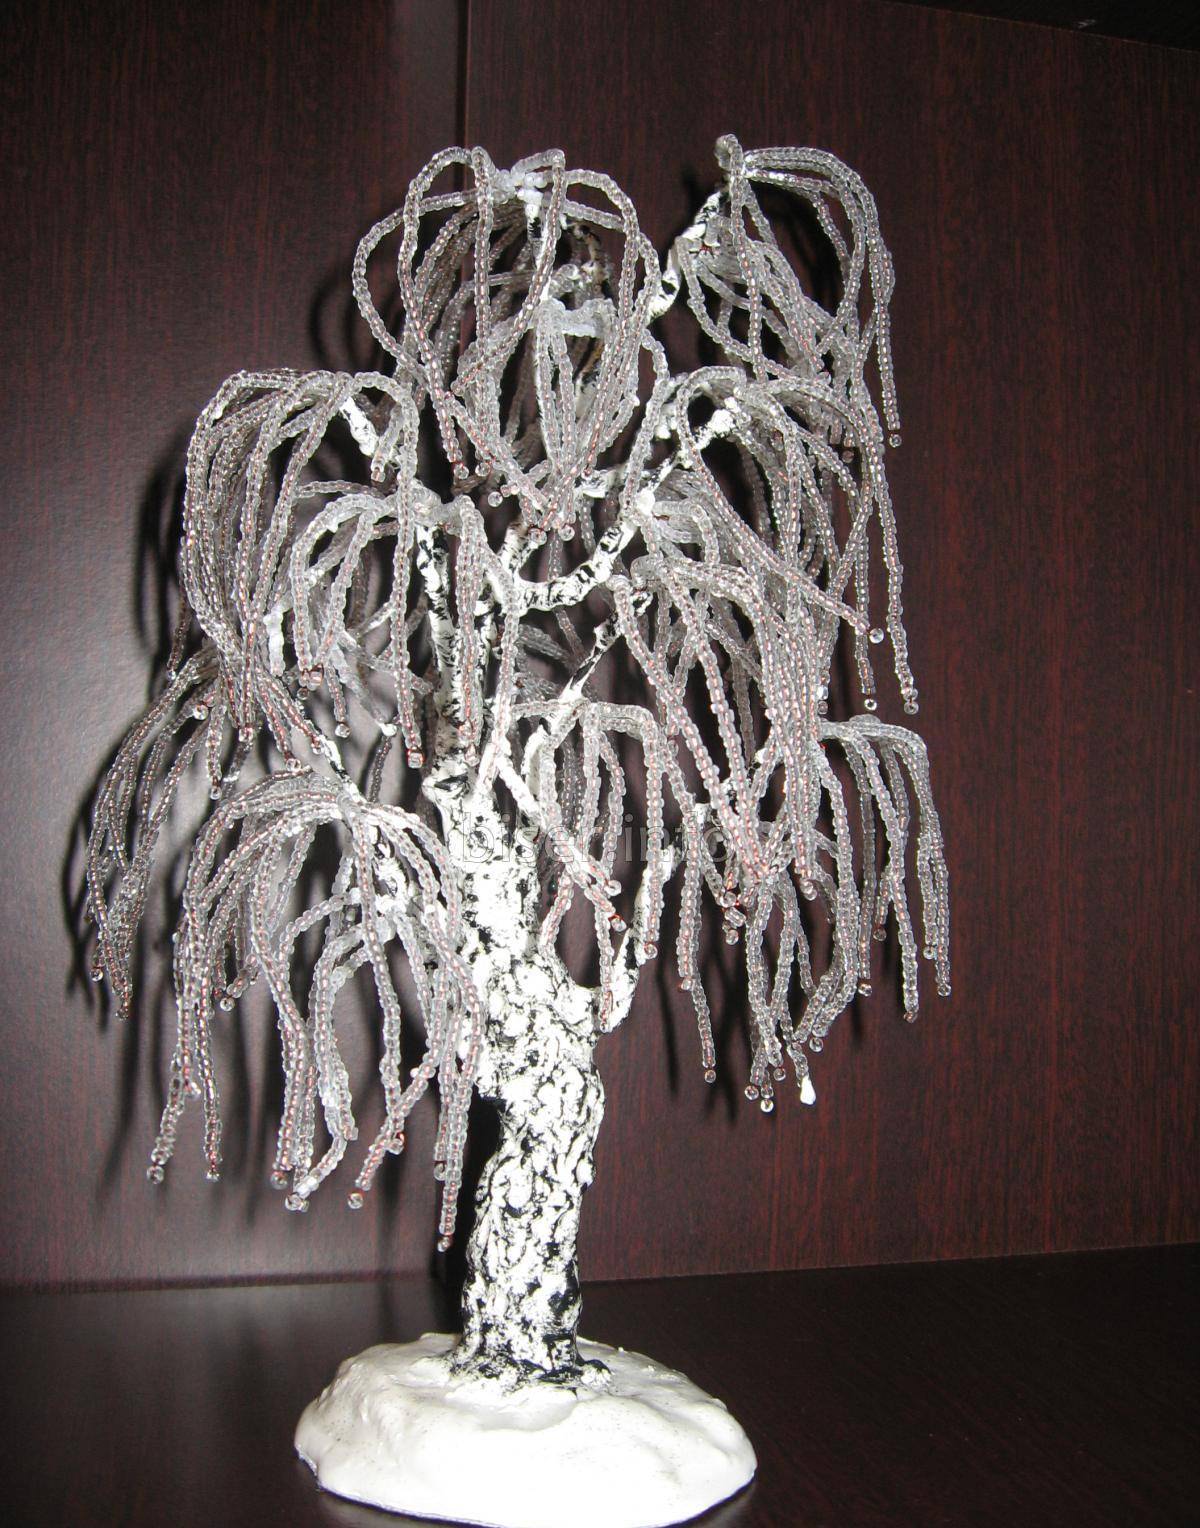
Birch of white beads
An alternative option for the green charmer, butNo less beautiful, there will be a winter birch. In addition, it can be a wonderful and original gift, for example, on one of the winter holidays. And for the new year, the graceful beauty will produce an even greater sensation than the beaded green herringbone. Such a master class of its weaving will have some differences from the previous one. In particular, in the method of braiding preforms for branches.
So, to create such a tree, we need beads of winter shades. It can be white matte or transparent, and also any silvery shades are perfect.
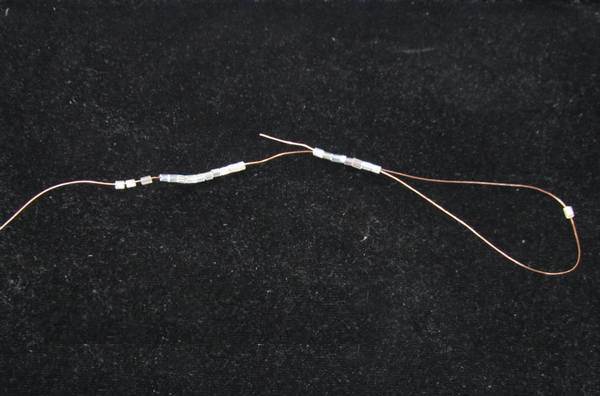
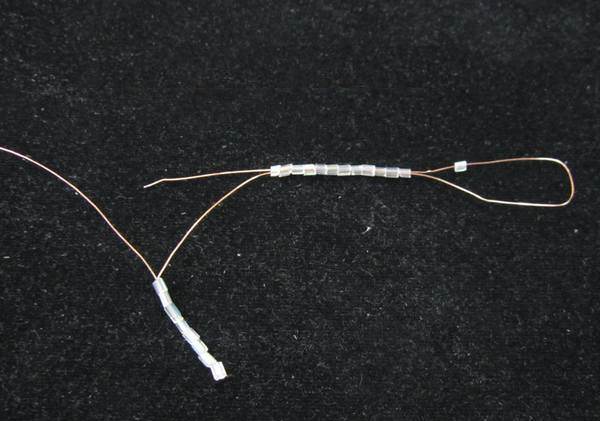
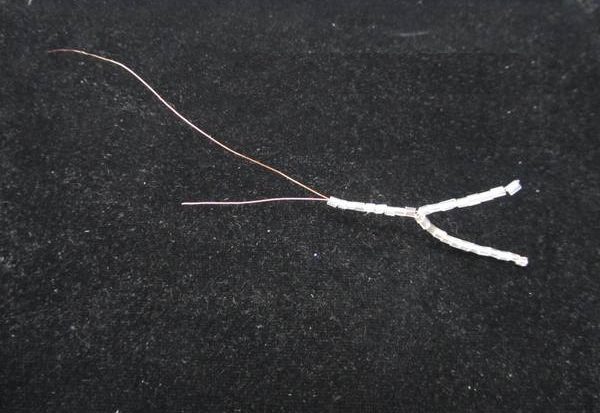
Consider the master class for creating a branch forA winter tree. To create it, you need to dial twelve beads on the wire. By the way the number of beads does not necessarily have to be equal to twelve. It will all depend directly on your idea. Collect different colors in any order. Better even mix them with each other beforehand. We leave one bead free, and through the rest we stretch the wire in the opposite direction so that in the end two identical ends are formed. Their length should be 15 or 20 cm. Now on one of the free edges we put on twelve beads and again we repeat everything. Connect the two wire ends together, and put on eight more. Then bend one of the wires and put 20 beads on it and stretch the wire in the opposite direction, but only to the middle of the row. On the same part, we put on 9 beads and deduce it back first at 8, and then towards the adjacent edge of the wire. Again, we put the beads on both ends of the wire at once and again create branches. Thus, we make as many branches and as many branches as we need. For the top of the tree we use the shortest ones.
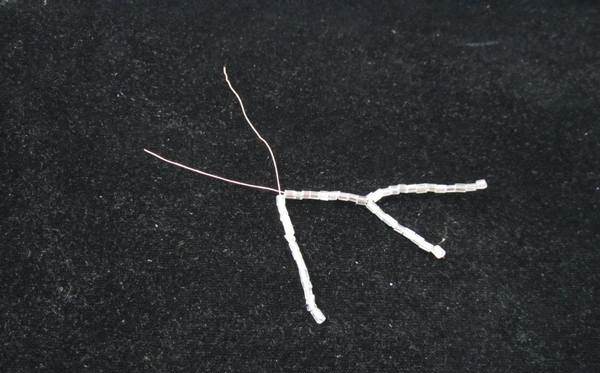
To form birch branches useBranches of different orders. Springs of the first order should be both long and short. The first should be - 24, and the second - 27 pieces. Of these, we need to make branches of the second order, using for each three pieces of the first branches. But the branches, which are in order the third, will consist of two branches of the second order.

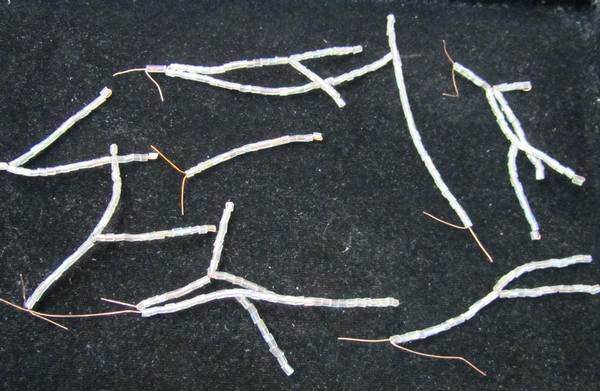
Wind the branches to the trunk of the birch with tiers. It is better to make them in the number of three. Only first bend all the branches, in this way, as they should look in the final version. This is necessary to ensure that during the process of attaching them to the trunk there are no overlaps or, conversely, large voids between the branches. The greatest distance can be between the branches of the third tier. Branches here can move away from each other in different directions and do not have to be located clearly along one line.
Form the barrel and stand as well as in thePrevious master class, using plaster and putty. Just make sure the foundation is in the winter style. Use beads and sequins in white and silver shades. Also a wonderful additional decoration will be small figures on New Year's themes or miniature winter birds and the same natural material, only zadekorirovanny under the frosty time.