Black and white Kanzash flowers - master class and a detailed lesson with video and photo description
You can see the expanded video oncreating Kansas colors from the master, if you do not understand any step, below is a detailed photo description of the master class. Kanzashi technique is unique in that it combines materials of different textures and colors, and as a result, unique flowers are obtained that are used as jewelry for hair or other accessories. Taking the tapes in hand, you can start a magical creation, as a result of which incredible, but very beautiful flowers are born. 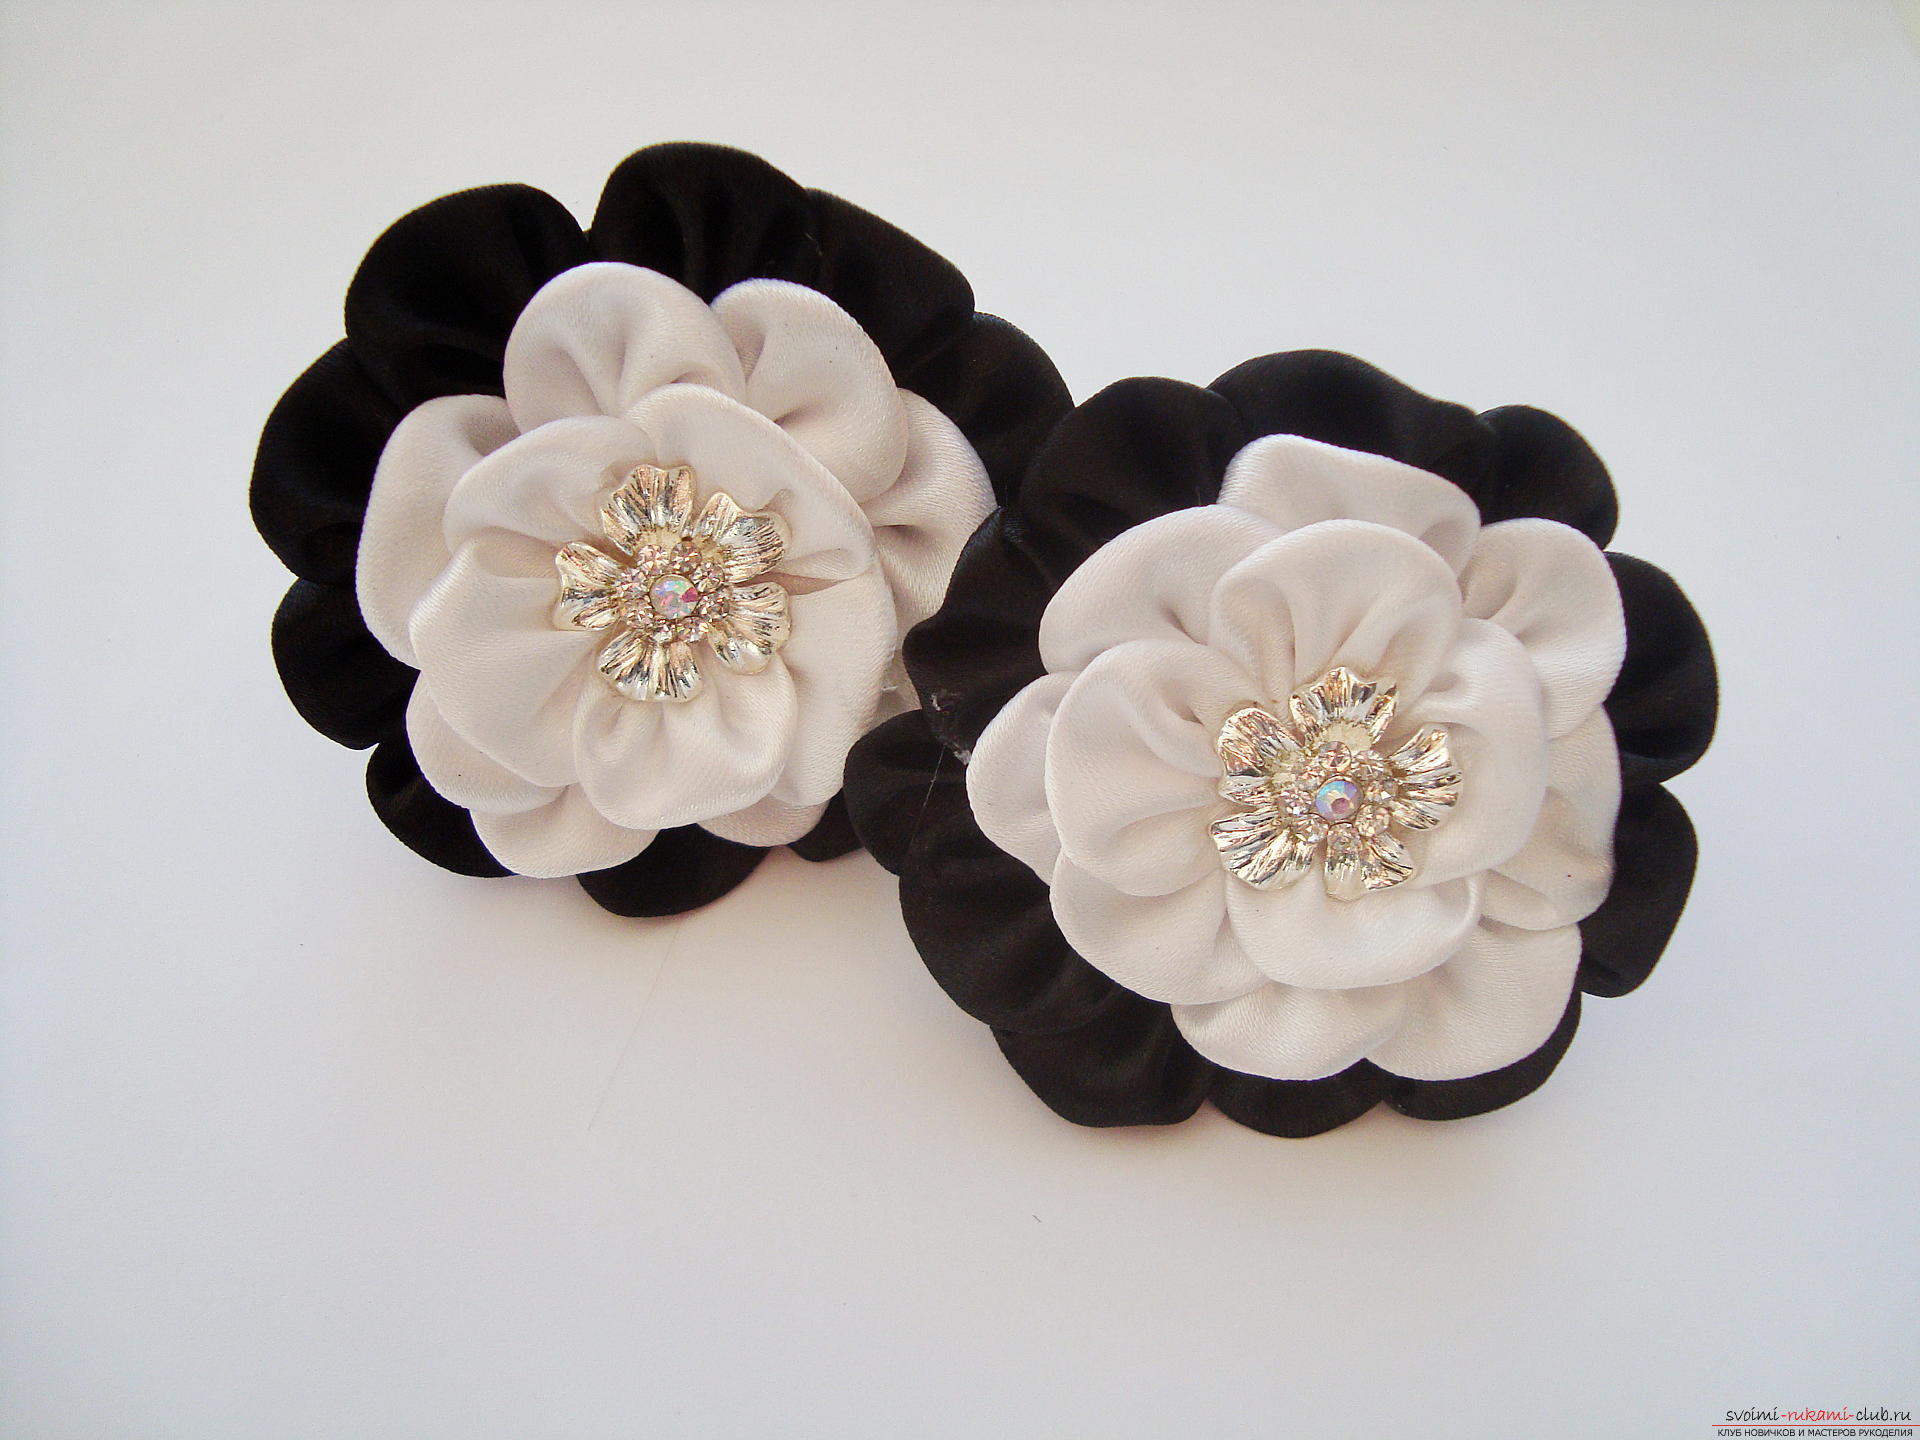 For girls and young school girls from the simplest satin ribbons of white and black, you can create in kanzashi technique flowers on hair bands that will decorate any hair and securely fix hair.
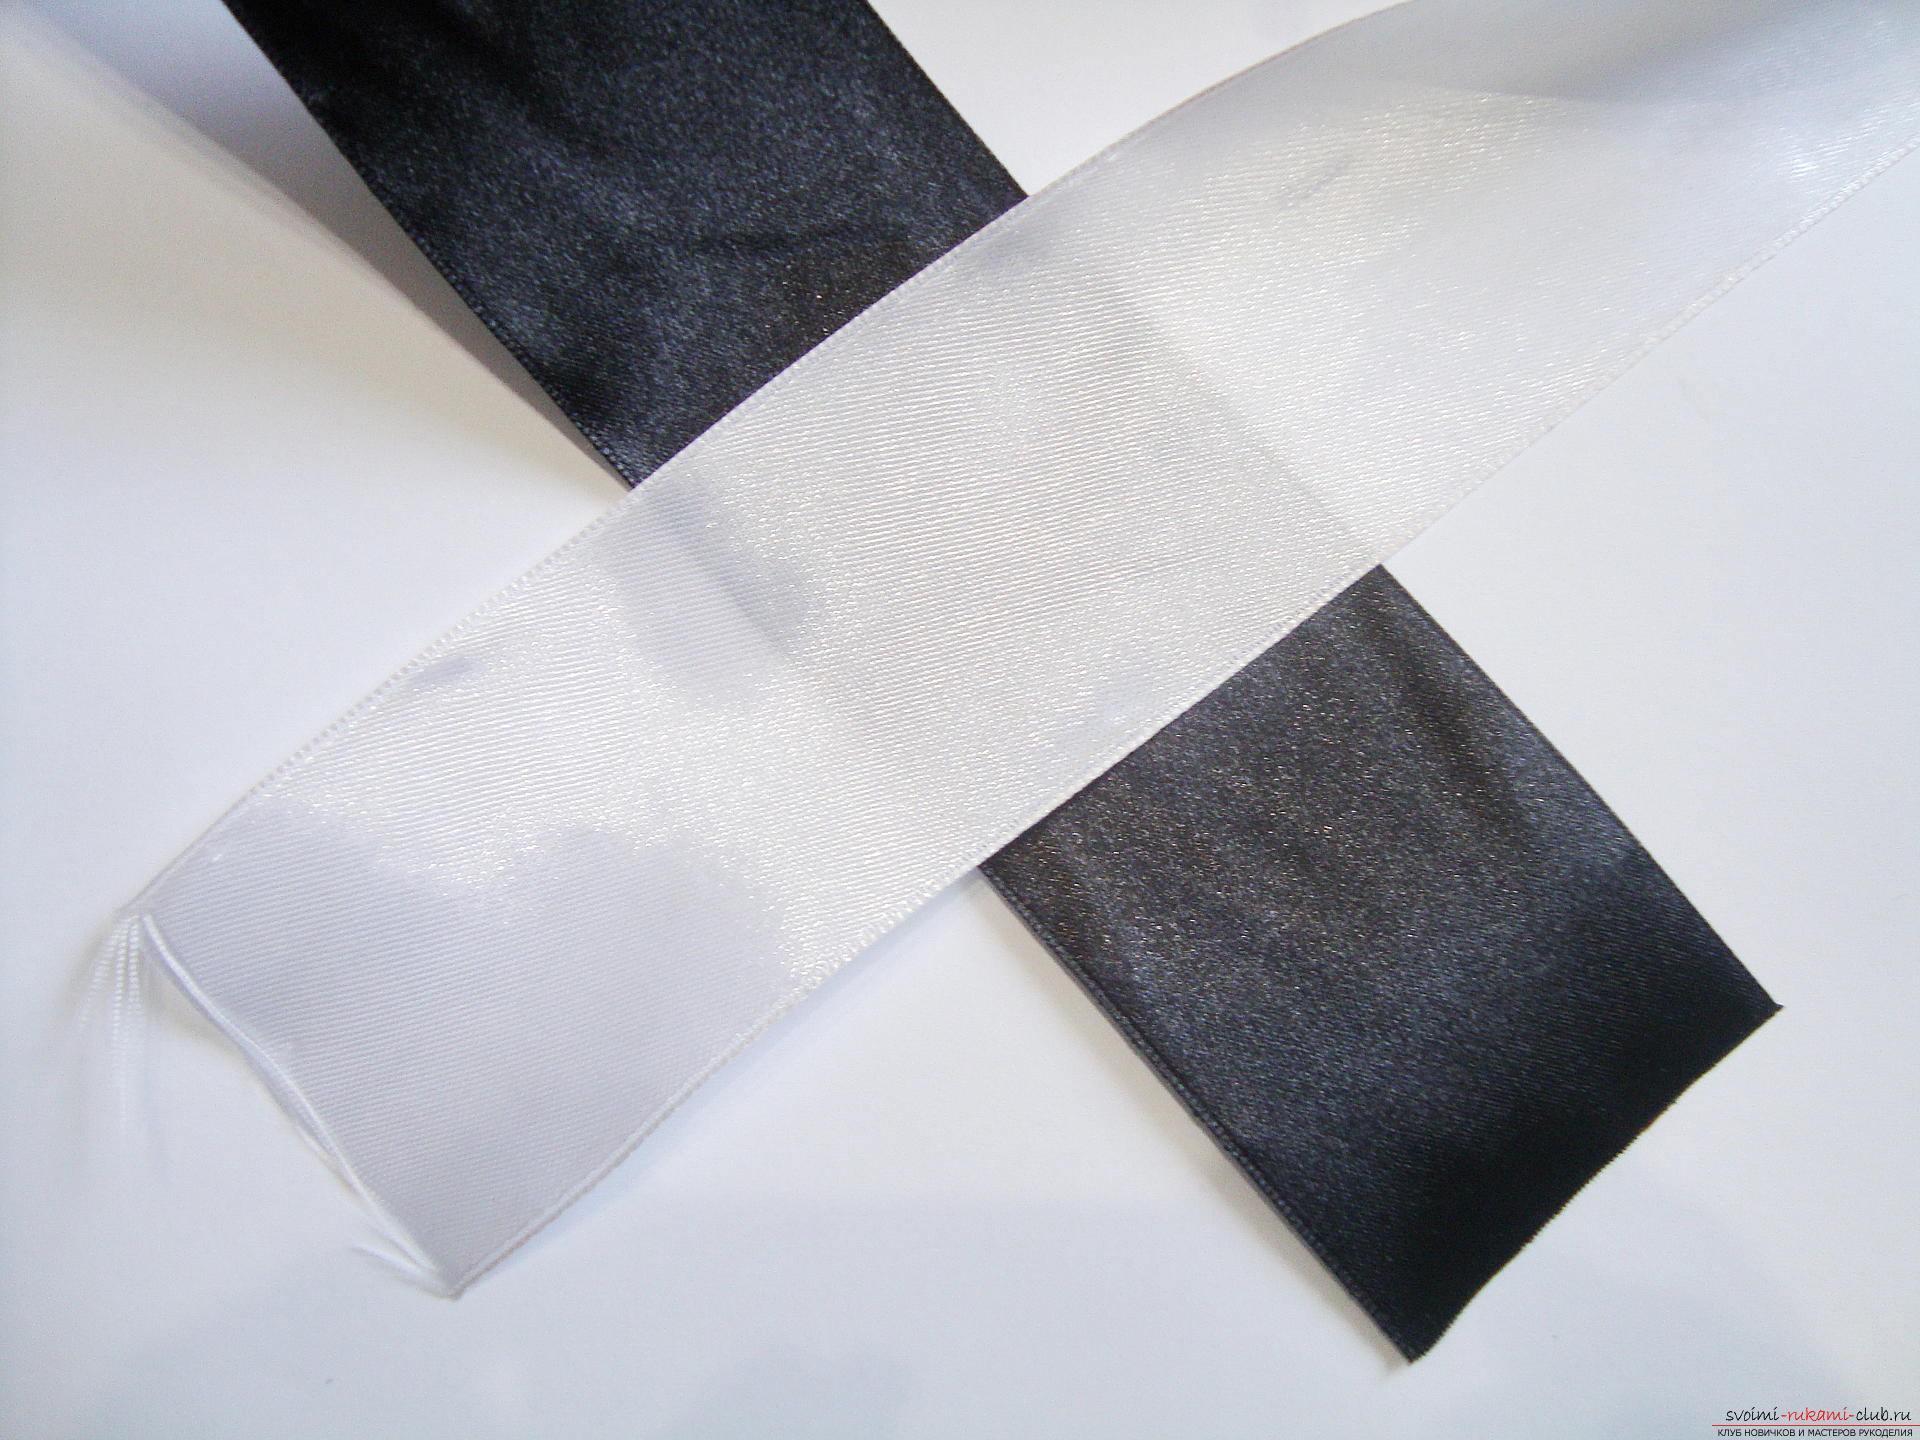
To create colors in Kansas technique you will need:
 Start to work with a clear understanding,what color you want to get a flower. If the accent in the product falls on a white color, then this medium creates two circles of petals, if desired, you can change the order of the petals and create black levels inside. You can alternate the rims of the petals in colors and create an outer layer of white petals, the second round will form black elements, and closer to the middle of the tiers will be repeated. Thanks to the imagination, you can create several variants of works using the same tapes, and if you add new shades, the variety of products will be infinite. This technique of Kanzash is unique: from one material dozens of variants are created even if one version of the petal is used, but in this technique it is possible to sculpt both sharp, round, and inverted, and double petals, etc. Having decided with the coloring of the product, proceed to cut the ribbon into squares, as many petals as necessary should be blanks. These flowers 7 cm in diameter were used for 10-12 black parts and about 13-15 white elements. The size of each square is five centimeters, that is, the side of the workpiece is proportional to the width of the tape.
 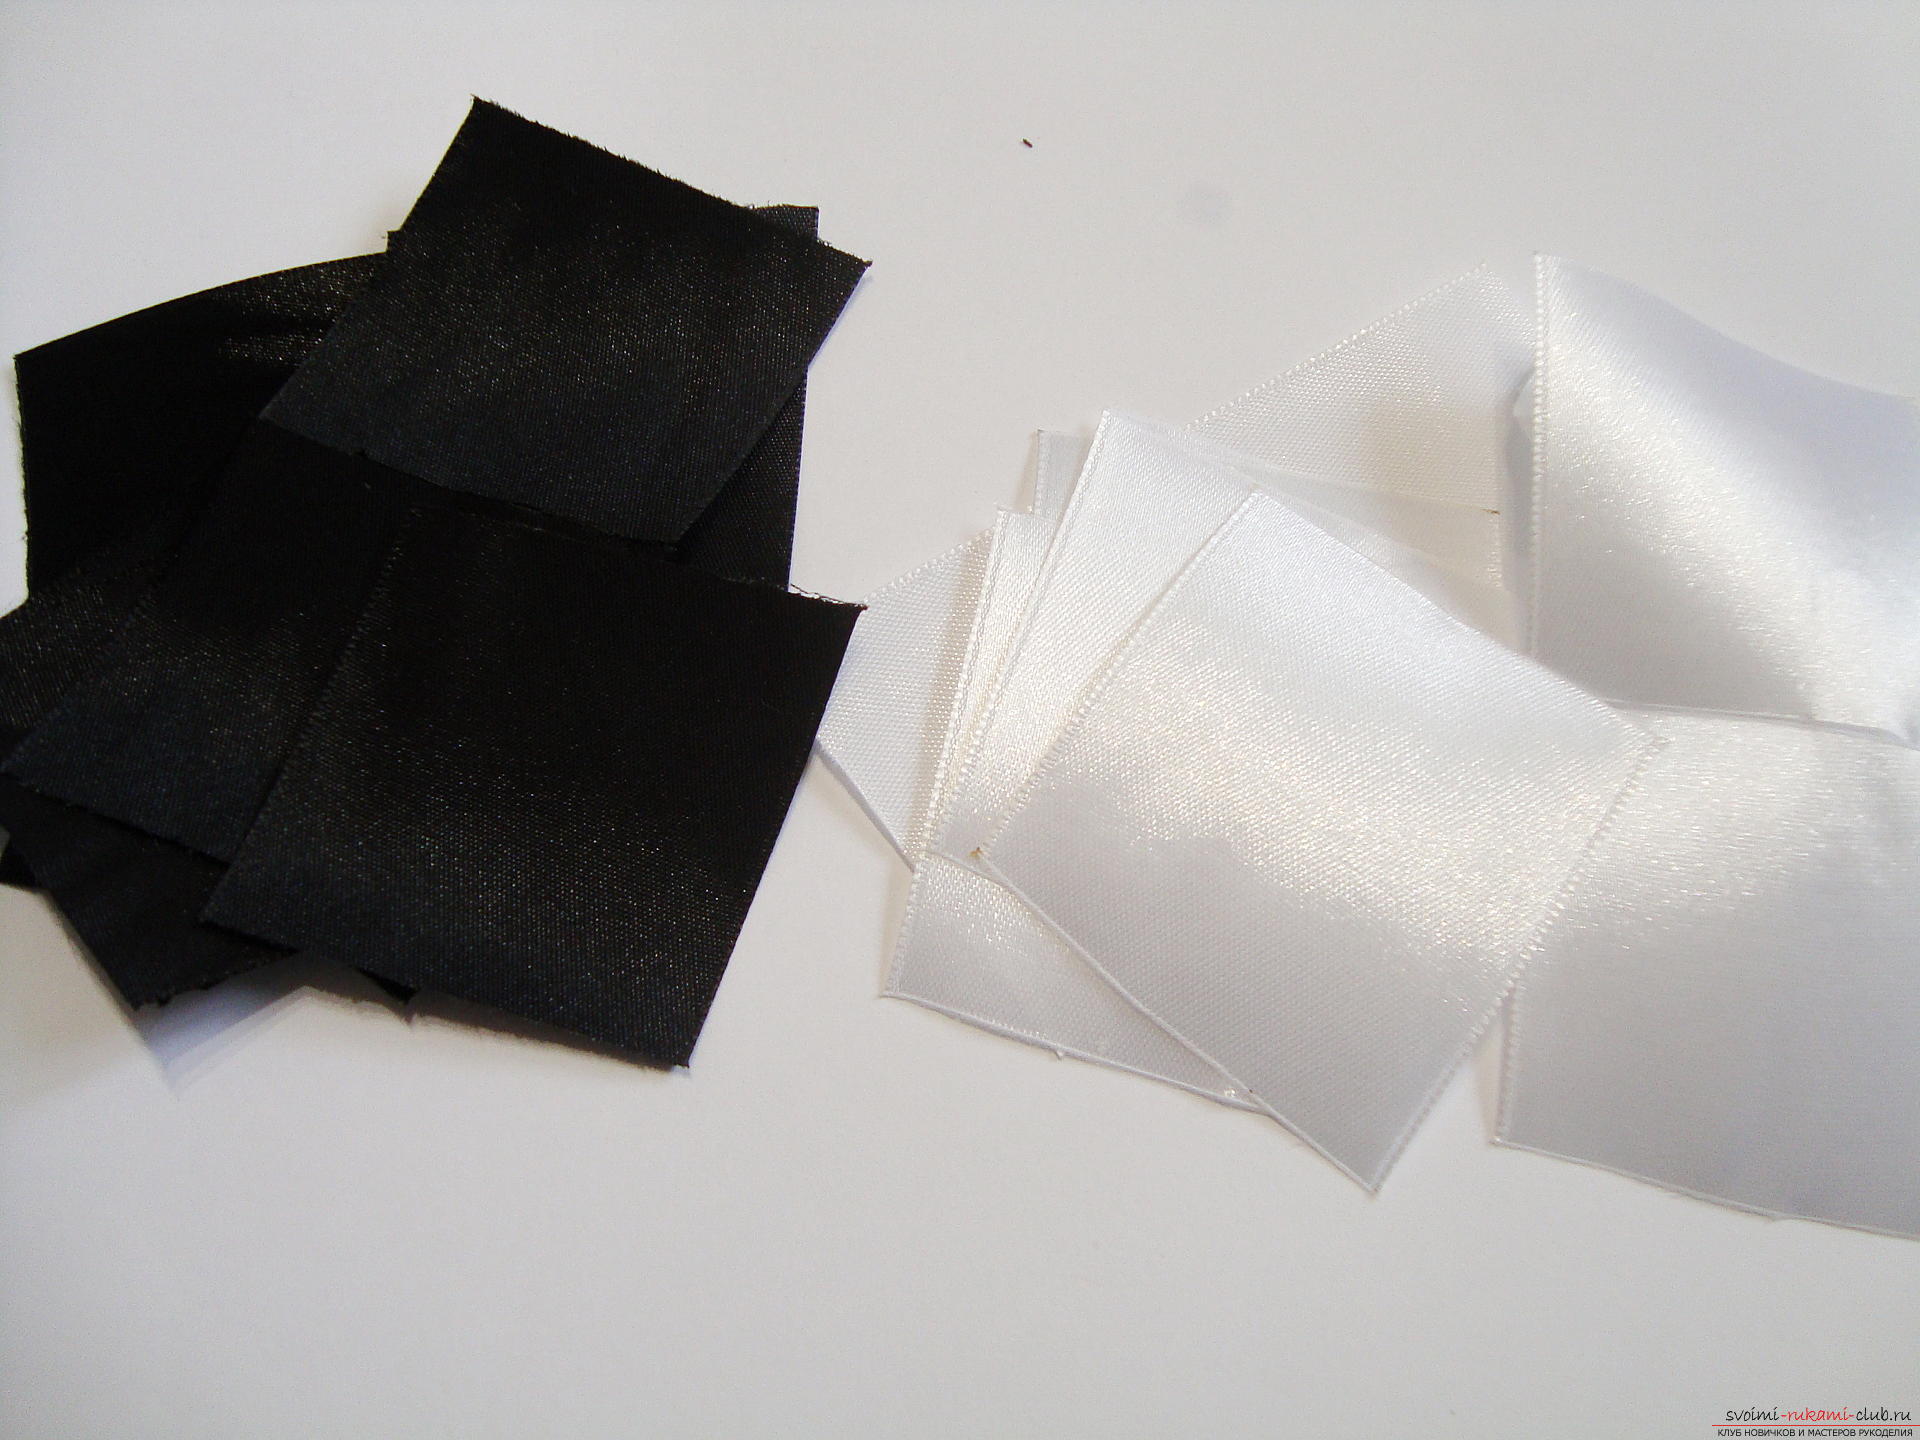 From each formed square billet it is required to create a two-layered triangle, for this simple movement create a bend in the center of a detail: from one corner in a direction to the opposite.
  To create unusual rounded petals,which create these Kanzash flowers, you will need to create crevices on the blanks. The first bend depth of about 1 mm lies directly in the center of the workpiece (from the bottom right corner to the opposite middle). Fix this room at the bottom of the part so that it does not dissolve.
 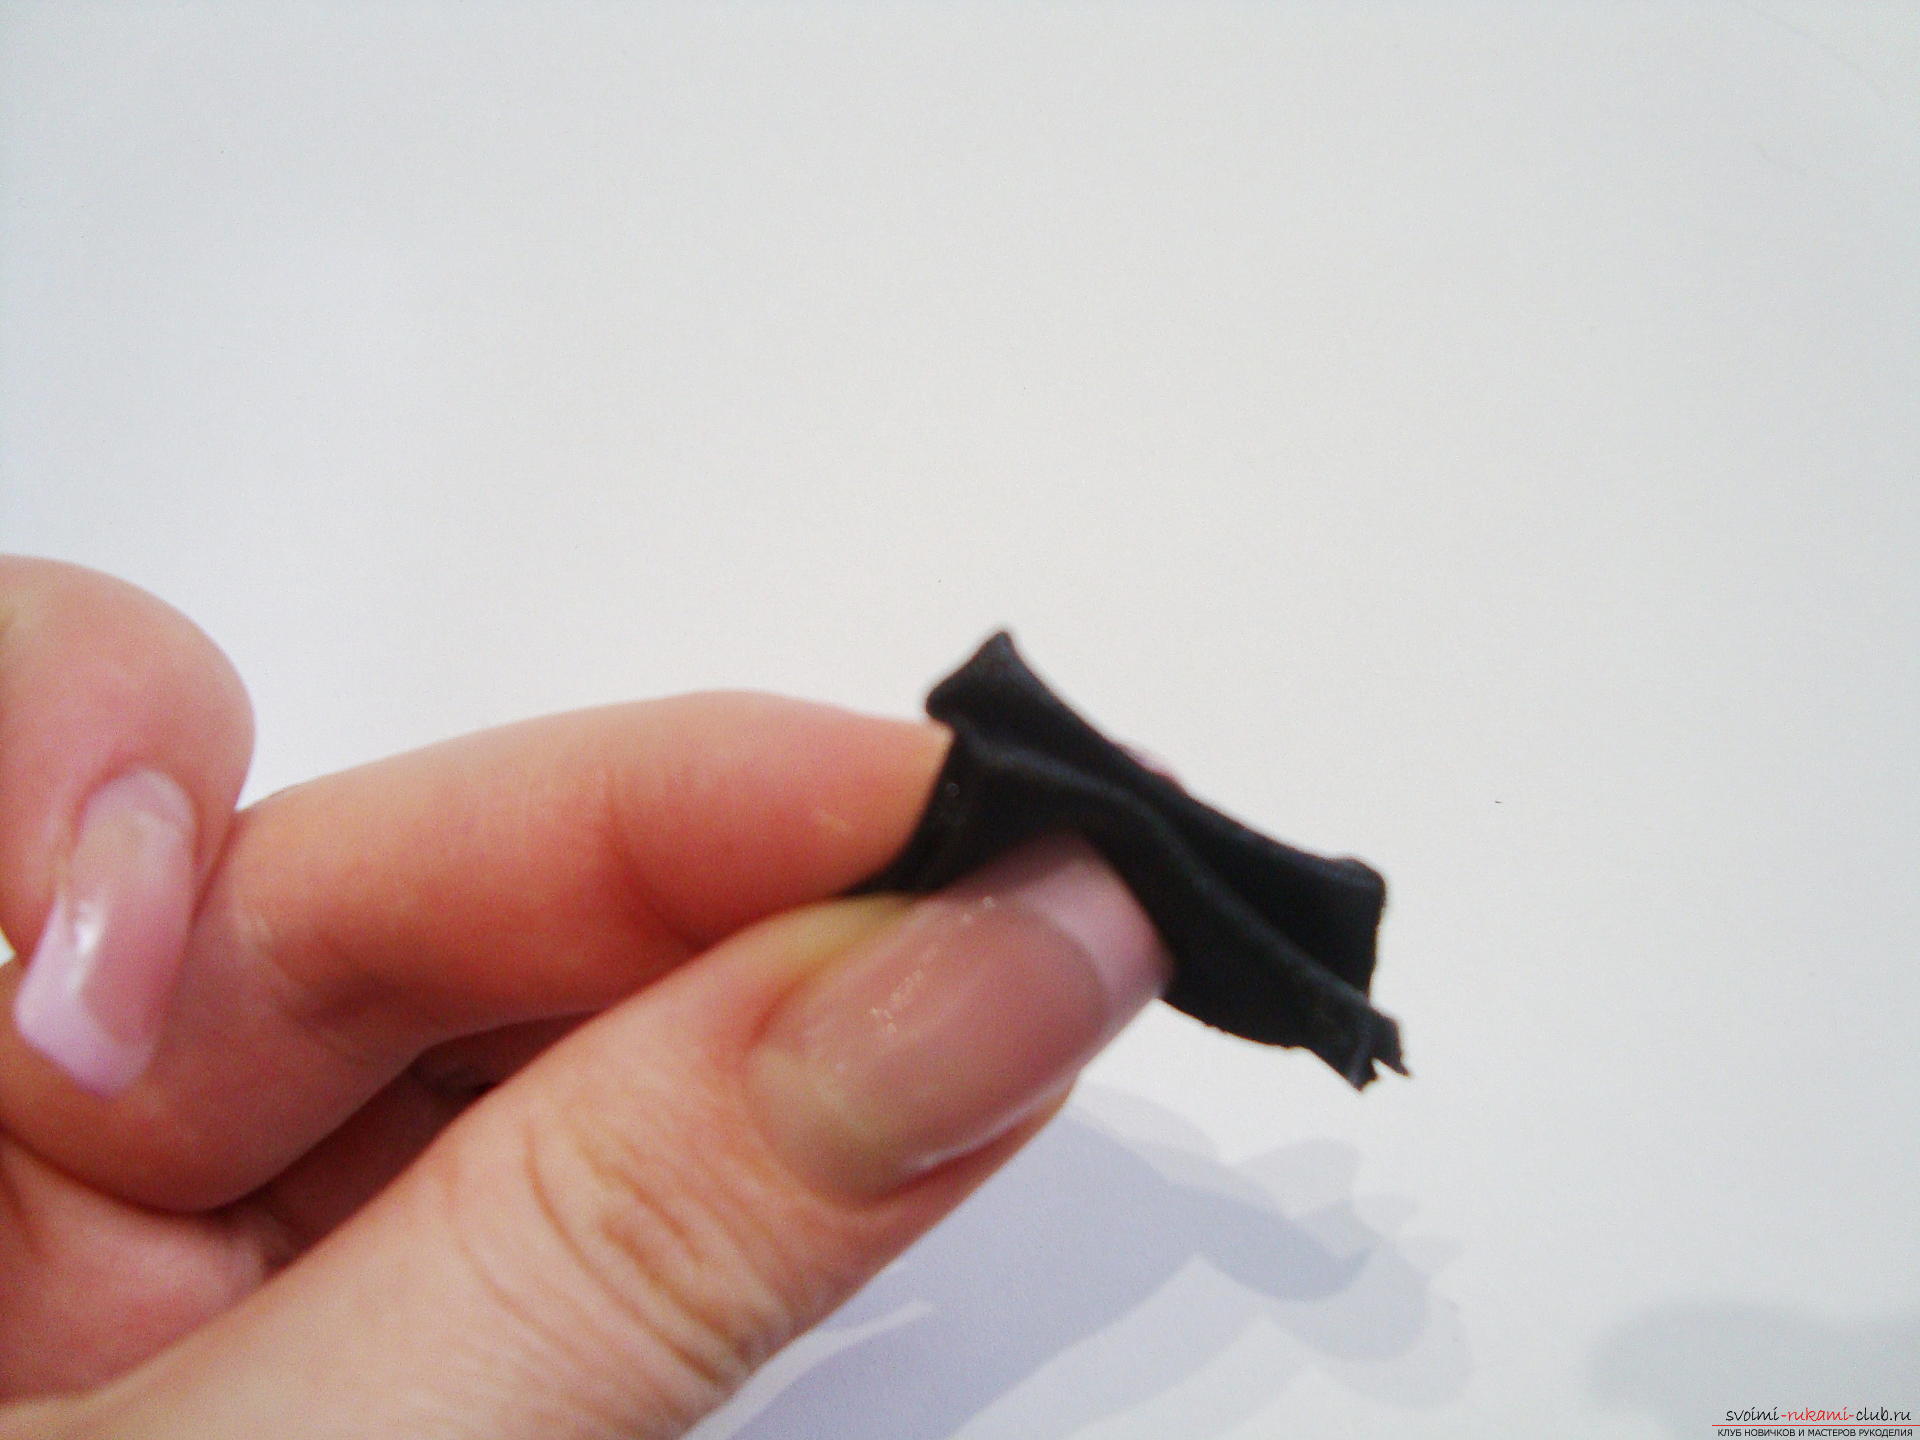 Retreating another 1-2 mm from the middle bend,it is necessary to create a pair of symmetrical veins. To do this, once again create on the atlas of the creases, it is very important to observe the distance from the center for the right bend and retreat the same millimeters for the left deflection.
 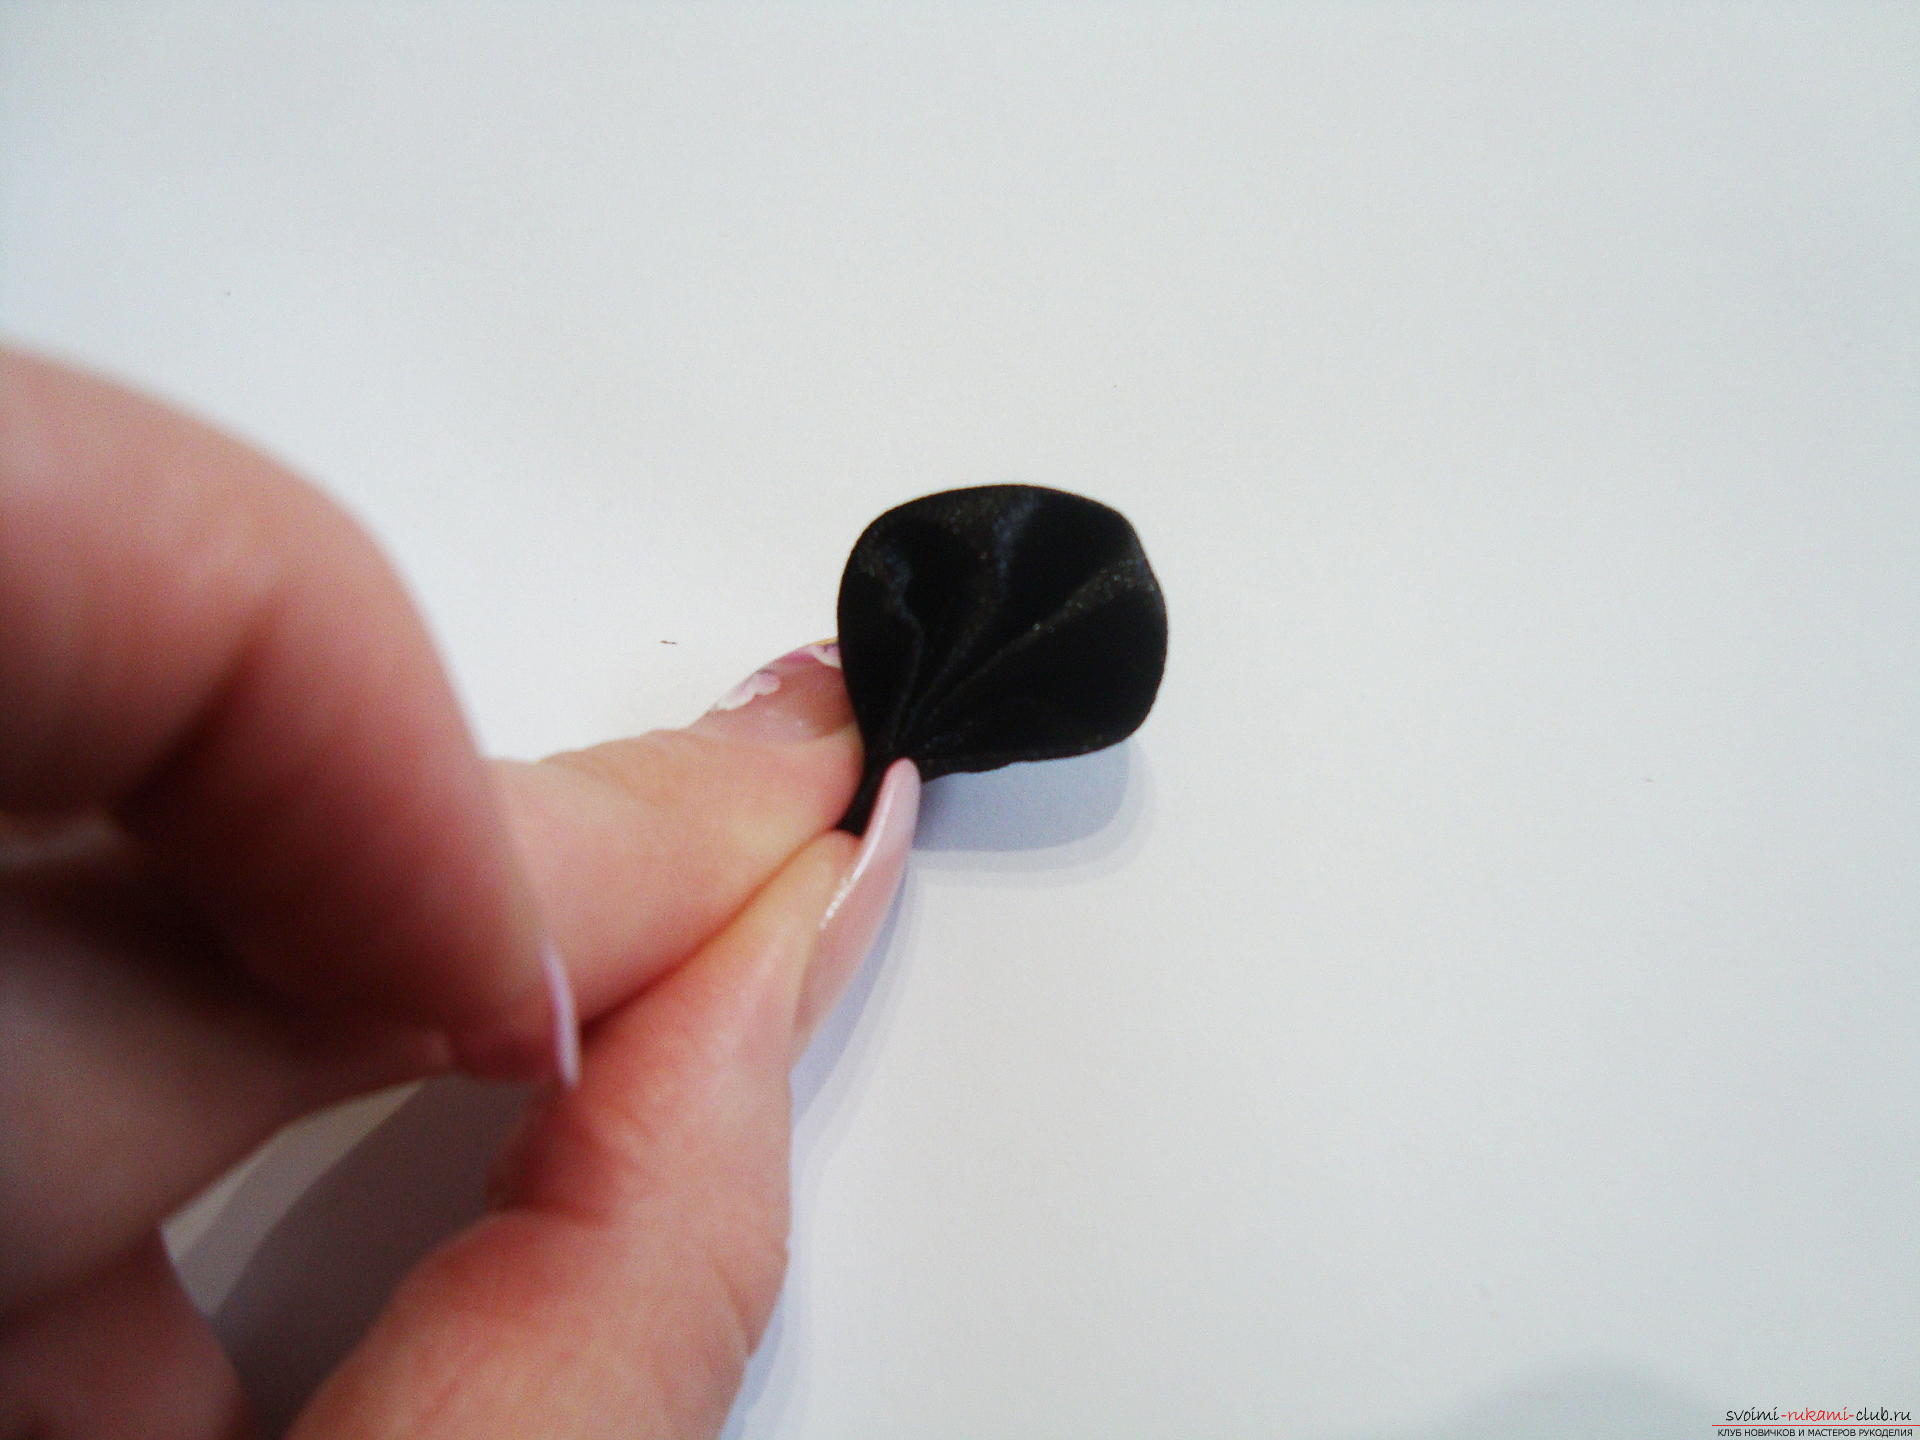 On the extreme parts of the part, too, smallbends, and it turns out the harvesting of this round petal. To keep this form, you need to solder the atlas with the burner in the given form, together with all the bends. To do this, take the incandescent burner, press the workpiece side by side to the glass surface, fix the part in this position with a ruler and cut off the lower part of the element. With the help of the ruler, you need to press the layers of tissue and hold them, this will help to assemble the satin in the places of the creases.
 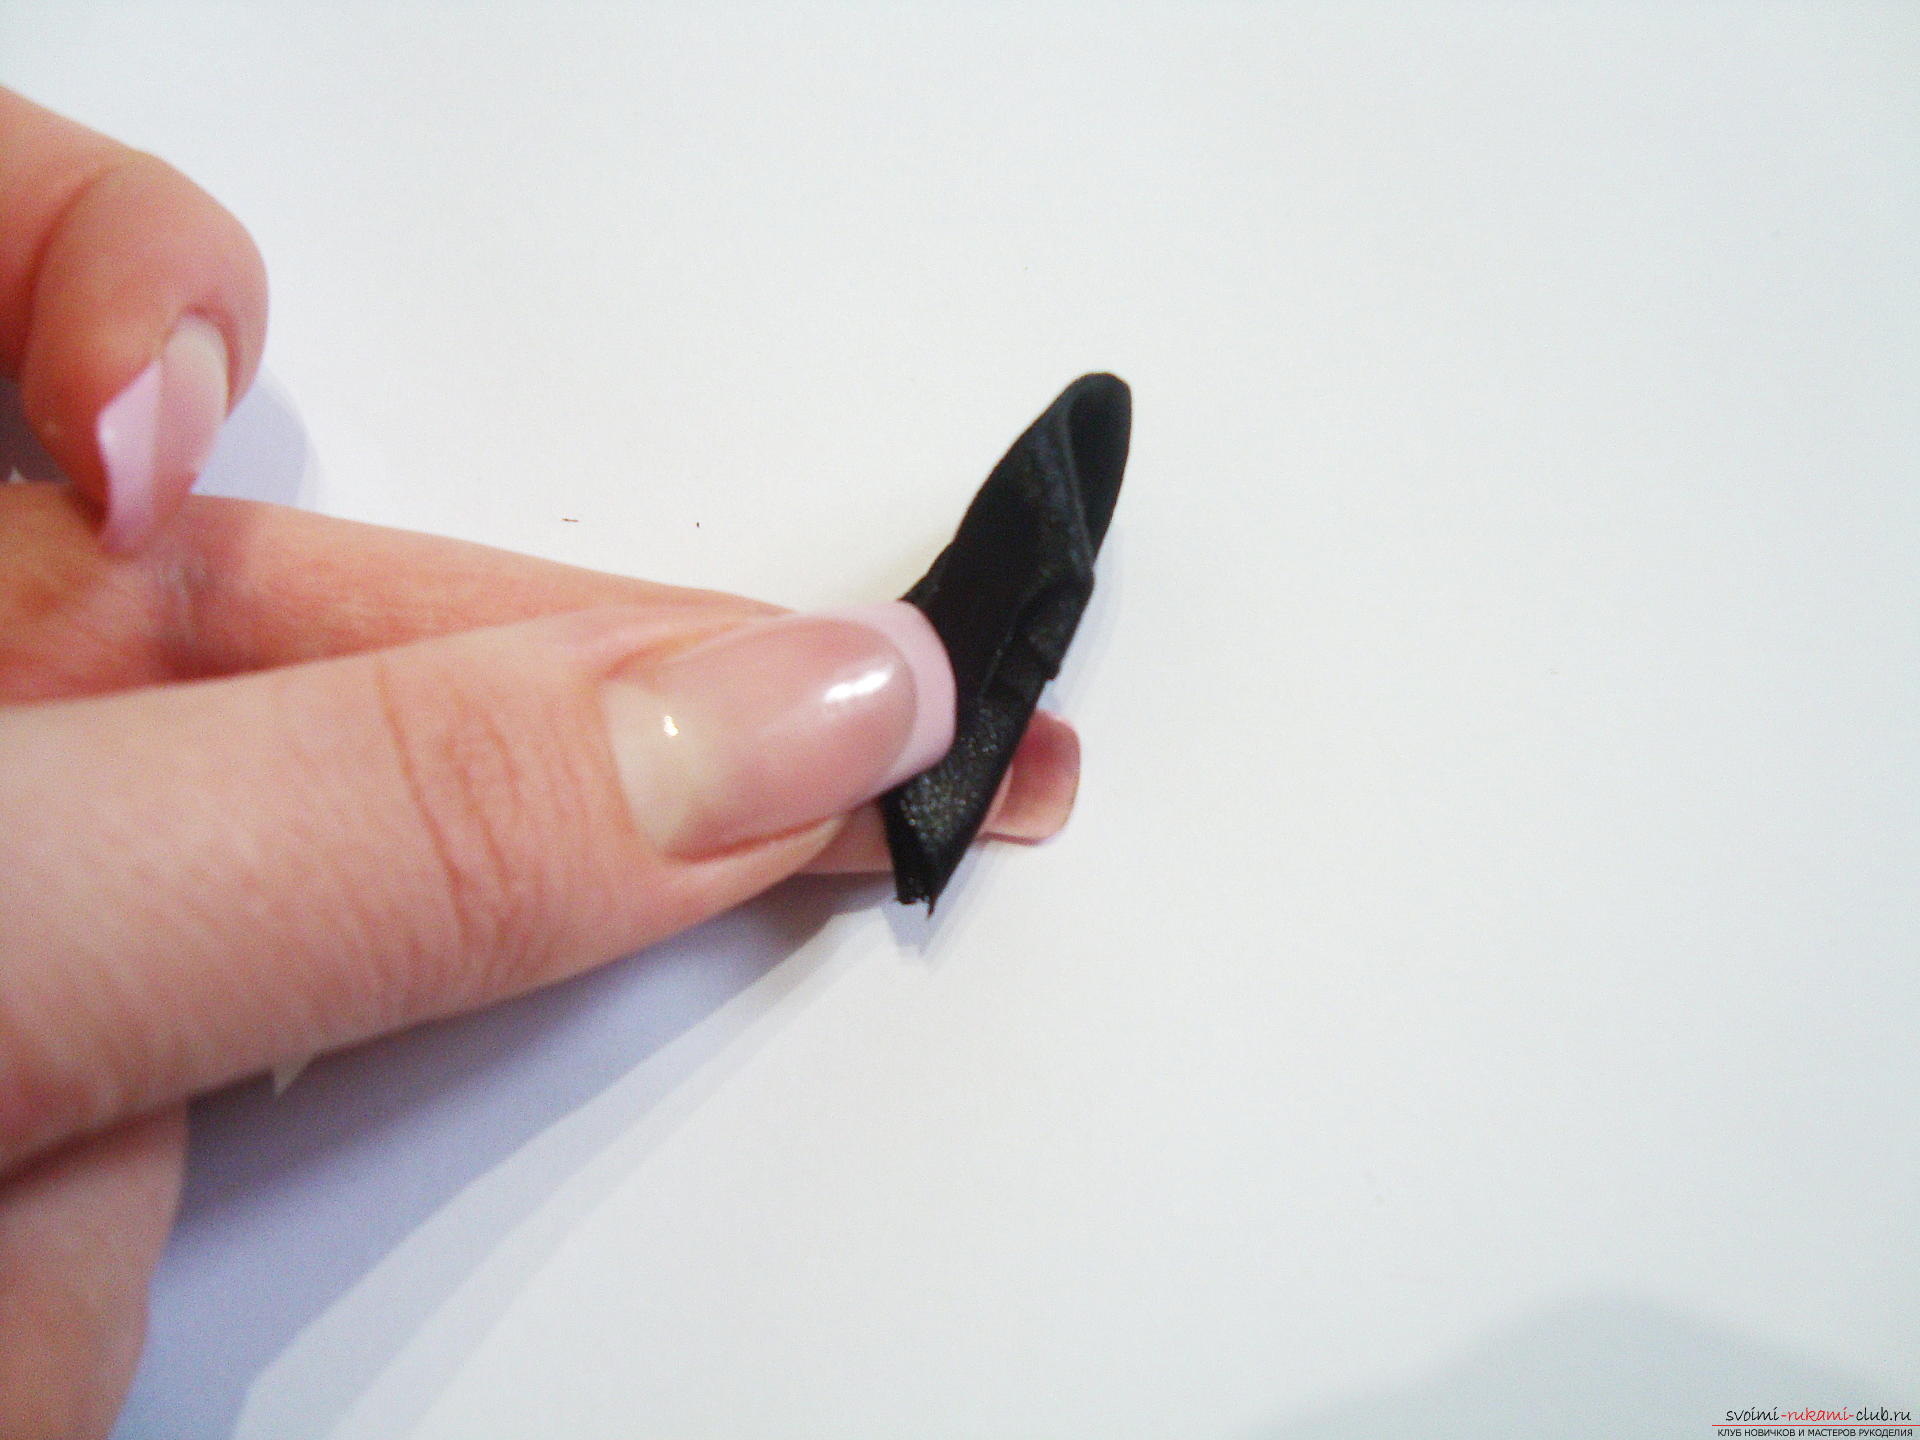 Turn the work over and with the help of hotScrape all irregularities on the back of the petal. If this is not done, then the petal will not lie densely on the base, but will crumple up on these folds. The base of the petal is once again slightly cauterized to become even, and subsequently it was easy to glue it.
 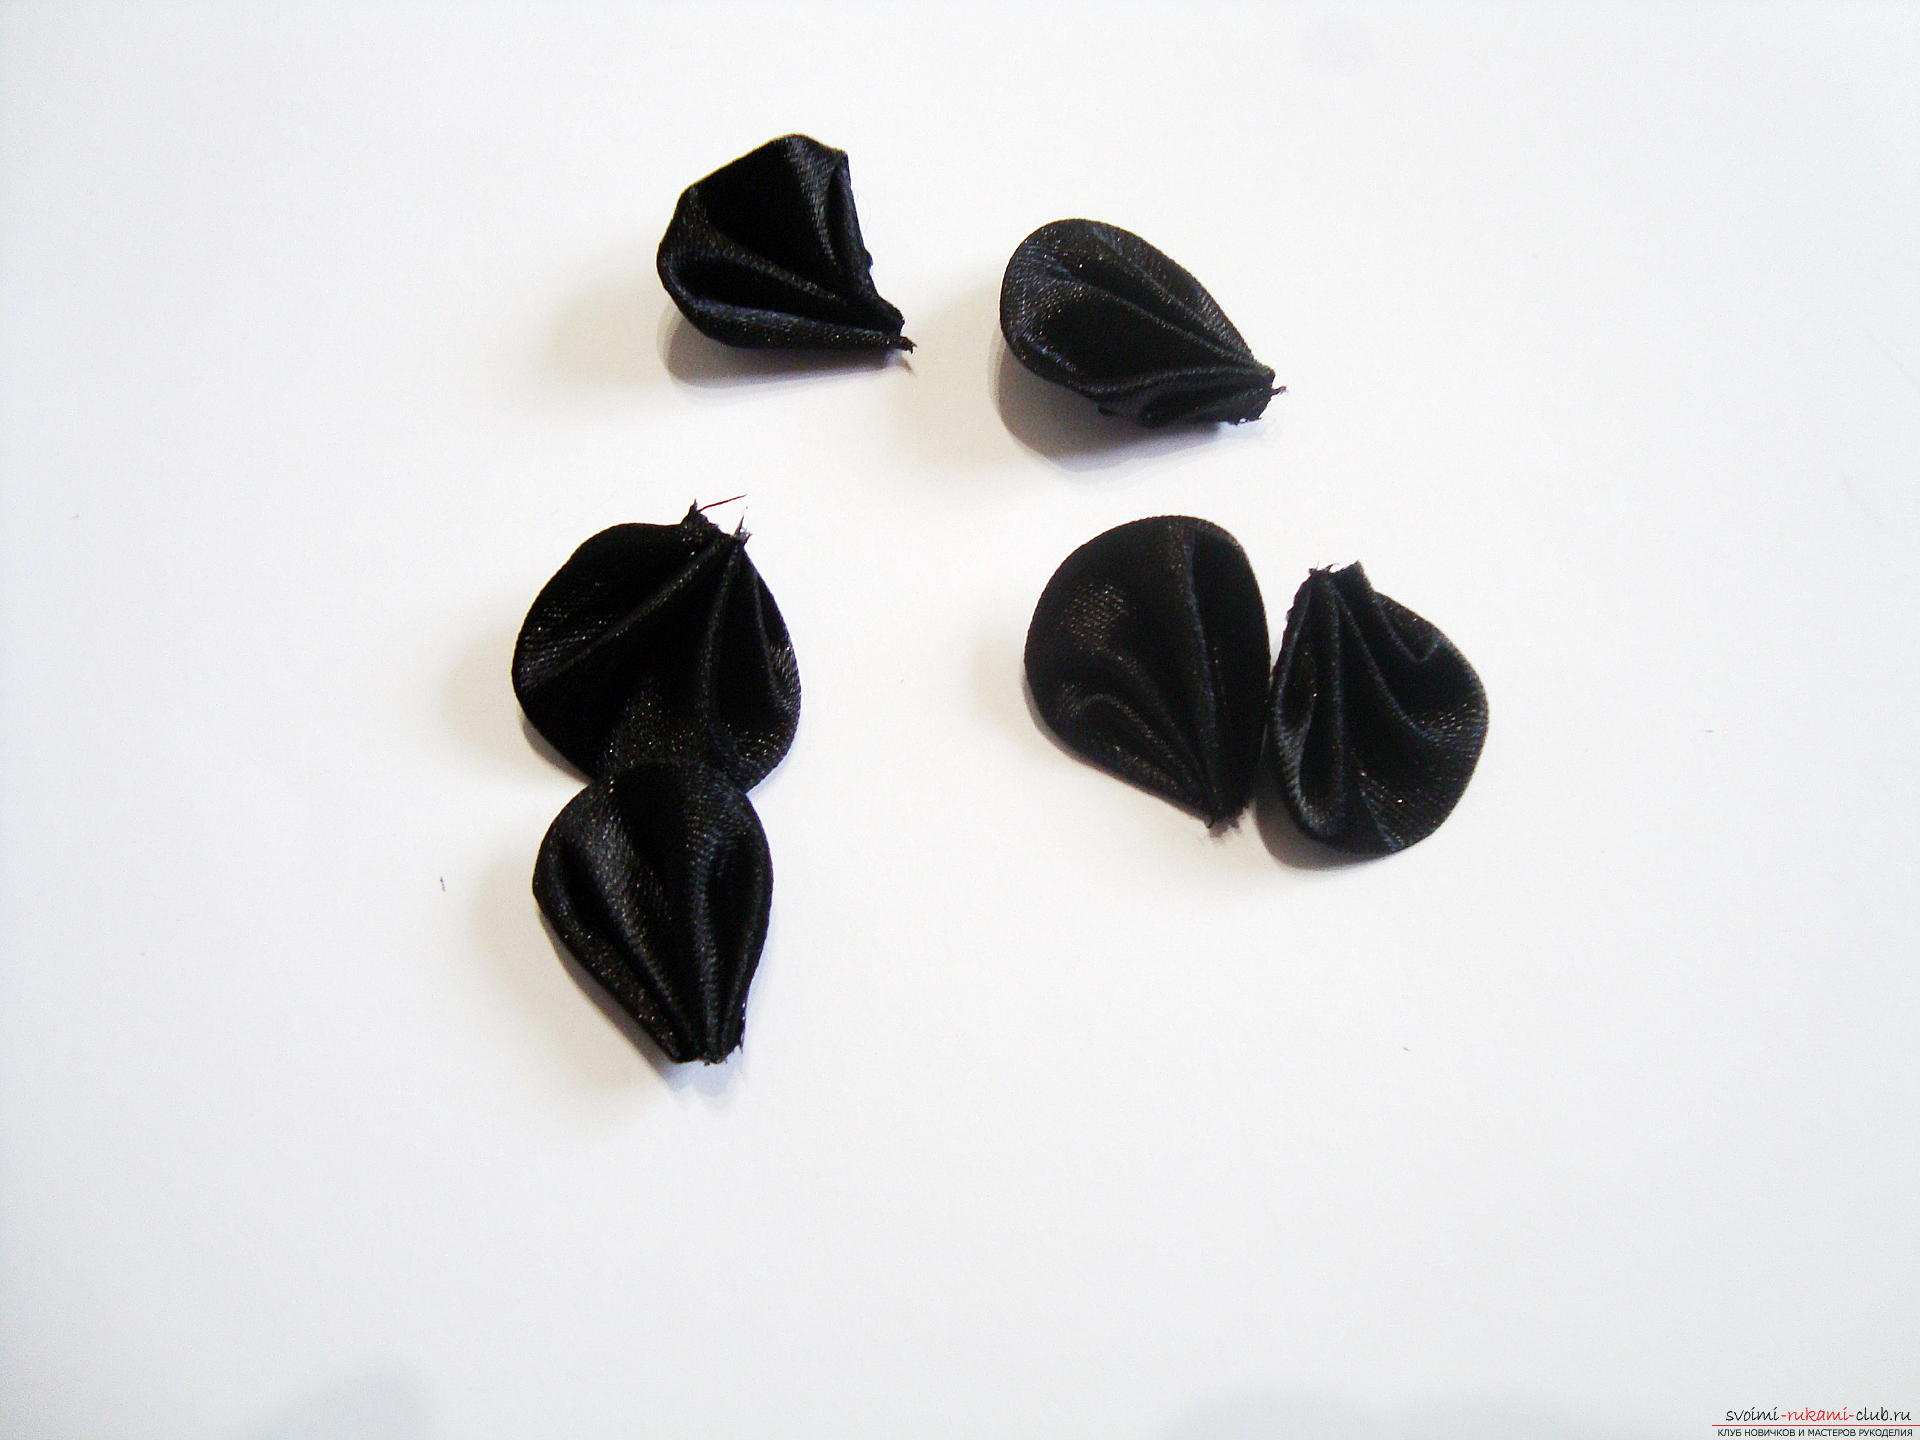 Cut cardboard circles with a diameter of 6 cm(the petals will protrude beyond the contours of the circle, so the product will be about 7 cm). Each circle needs to be covered with a black satin. The resulting circles are needed as the basis of the flower, so that it can be pasted several rows of petals.
 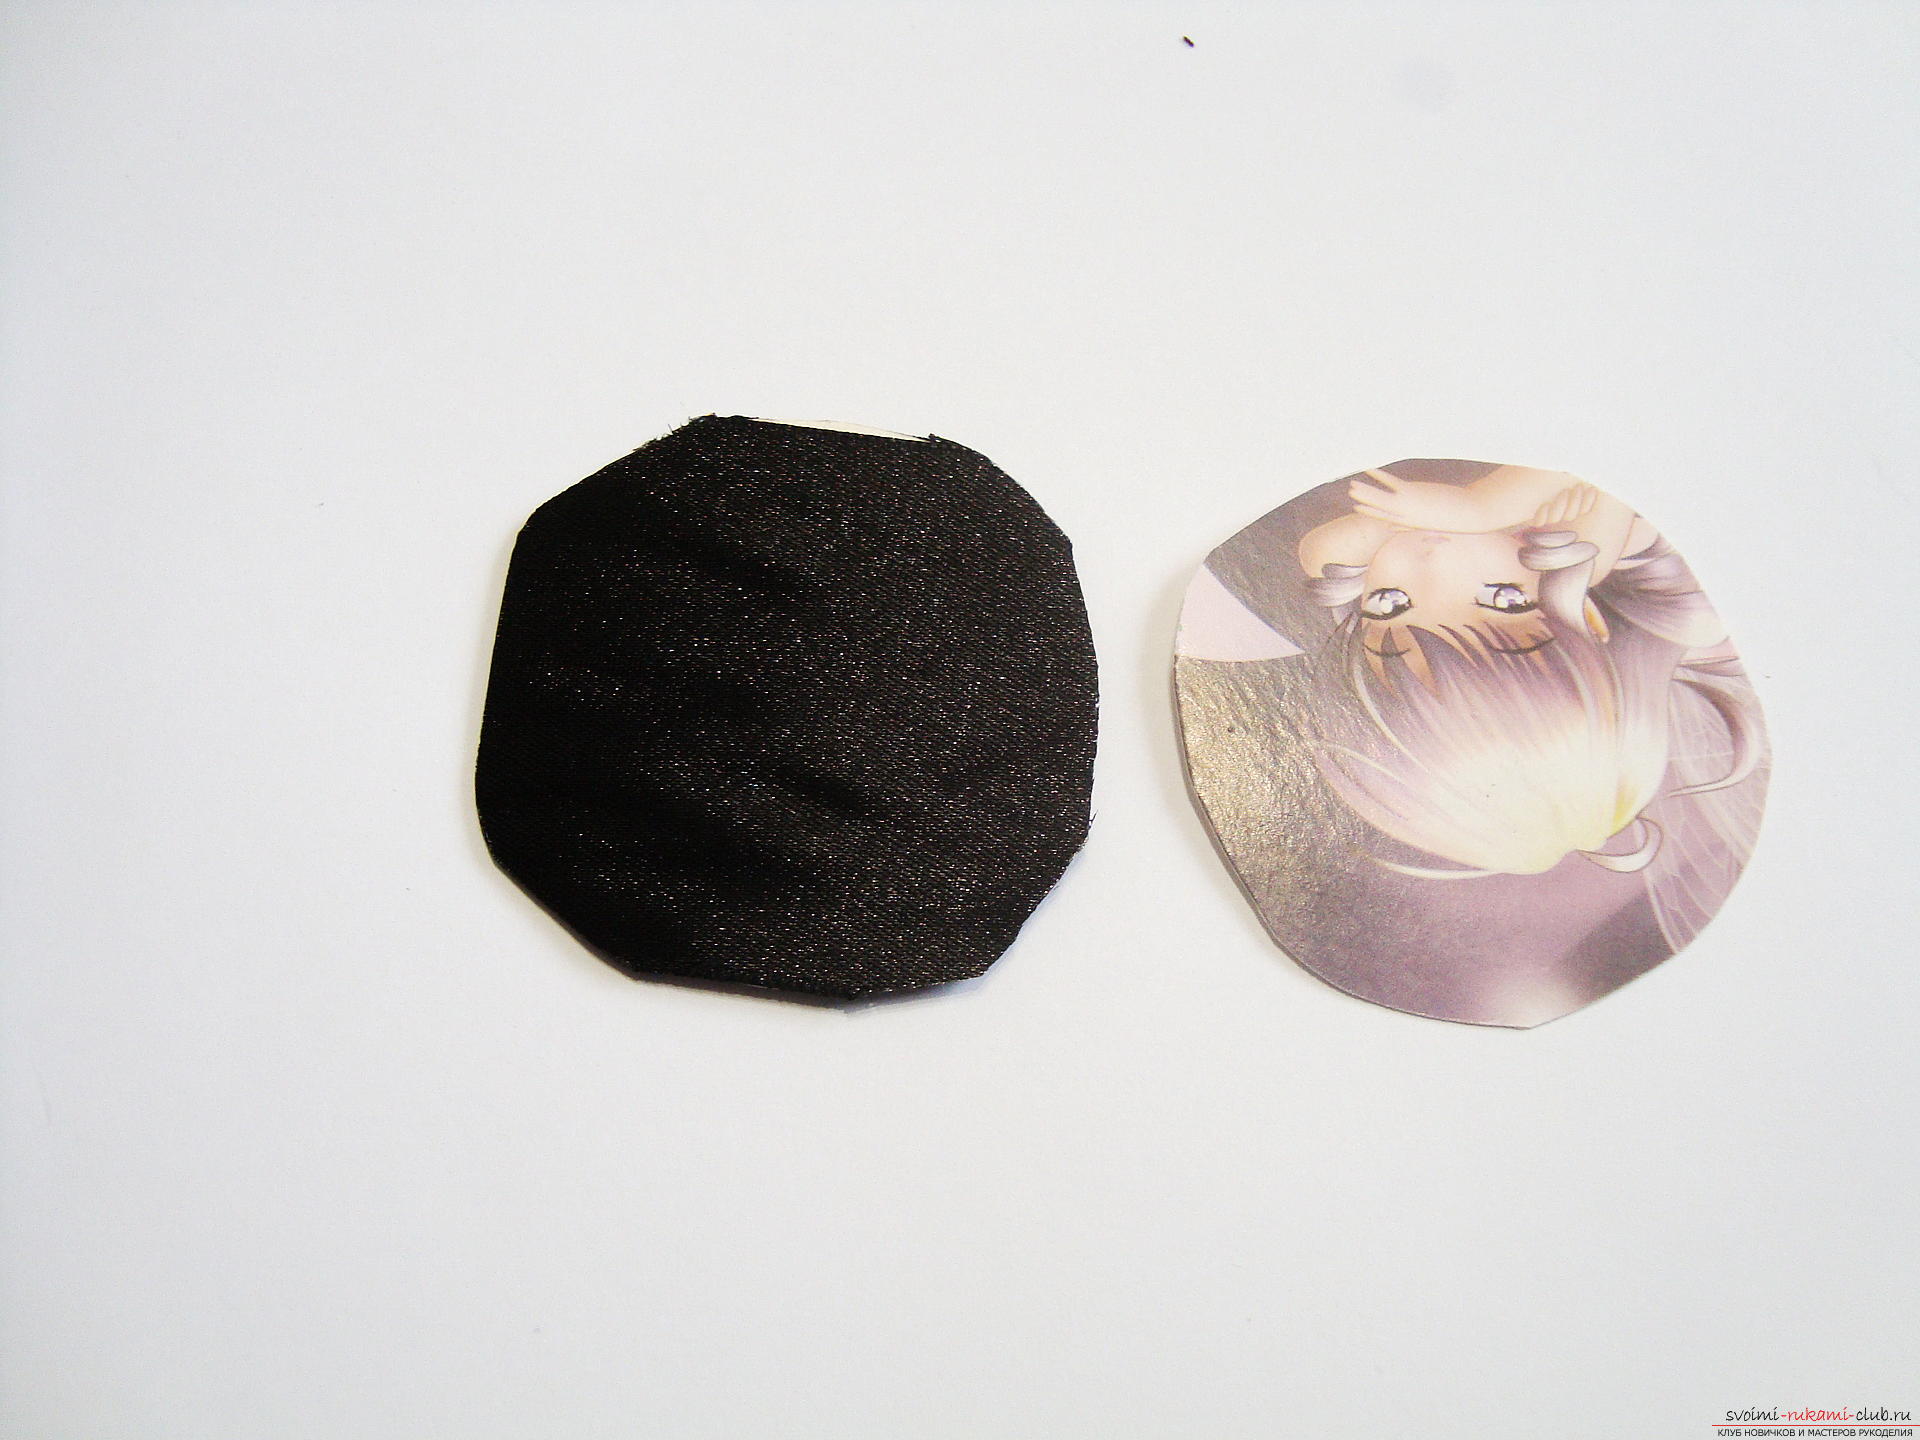 Of the blanks of white color are created similarparts. Most often, when using white tape, less paint is used, and the satin feels more subtle to the touch, so it's easier to create such fancy petals from a white ribbon. Bends are created according to the same pattern: first in the center, and then symmetrically on the sides, in total five jams are formed. If the white fabric is thinner than the black one, then the work of the burner is accelerated, since it requires very little touch with a hot tool and the entire part is immediately soldered.
  In the next step we proceed to assembling the flower,this will require hot glue. On one petal, apply a drop of glue and immediately fix the part on a round black base. The second petal lies next to each other, loosely clinging to the first. To make the petals tightly adhere, they need to be pressed slightly to the base.
 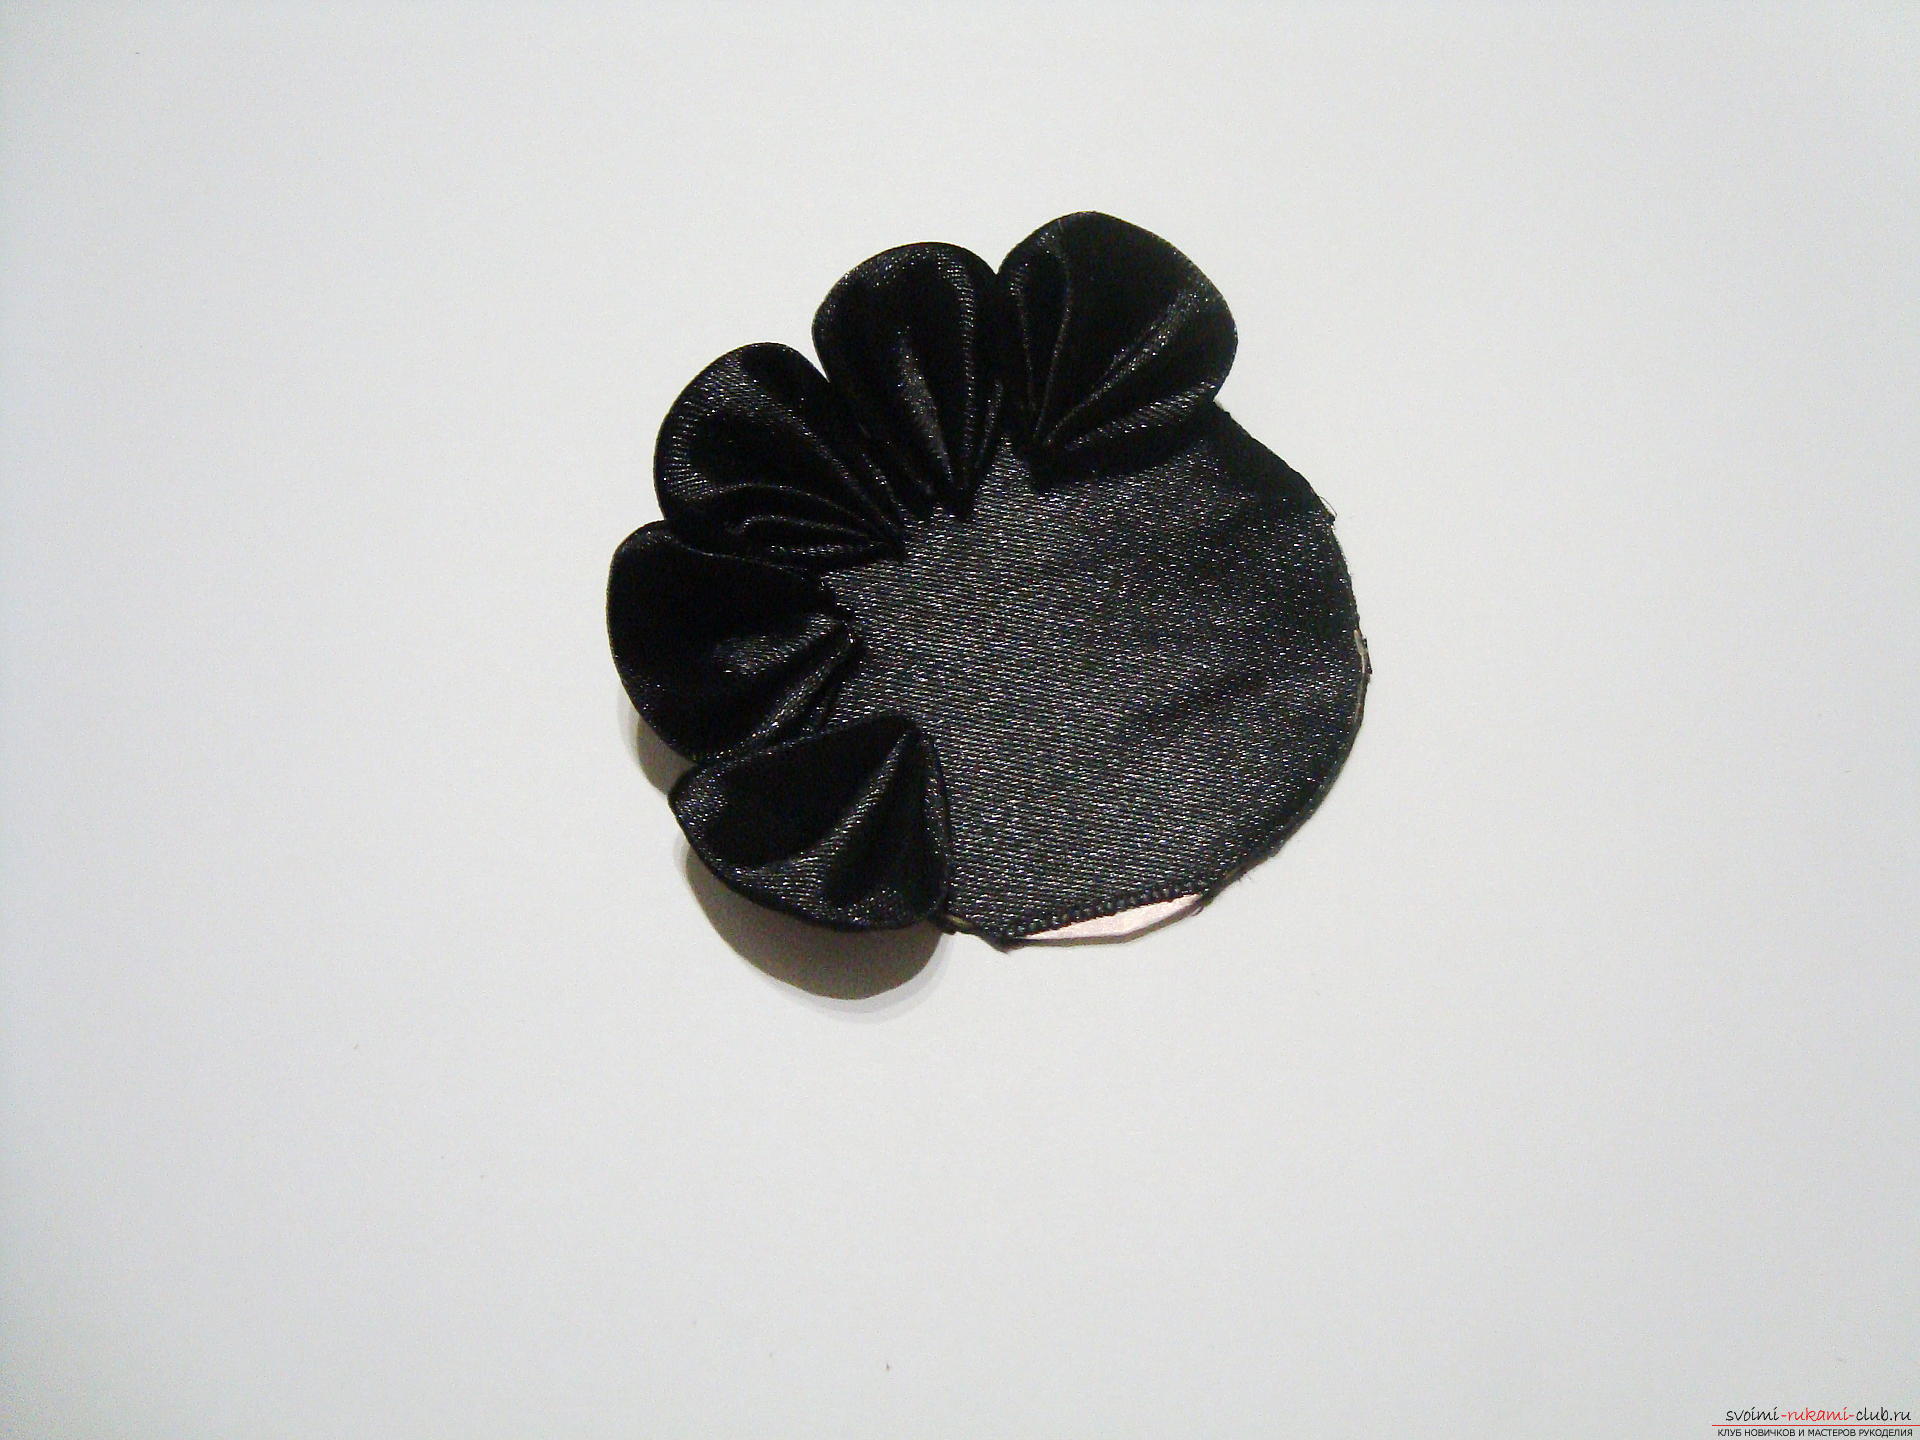 Form the first tier strictly along the edge of the workpiece in order to form an even beautiful circle.
 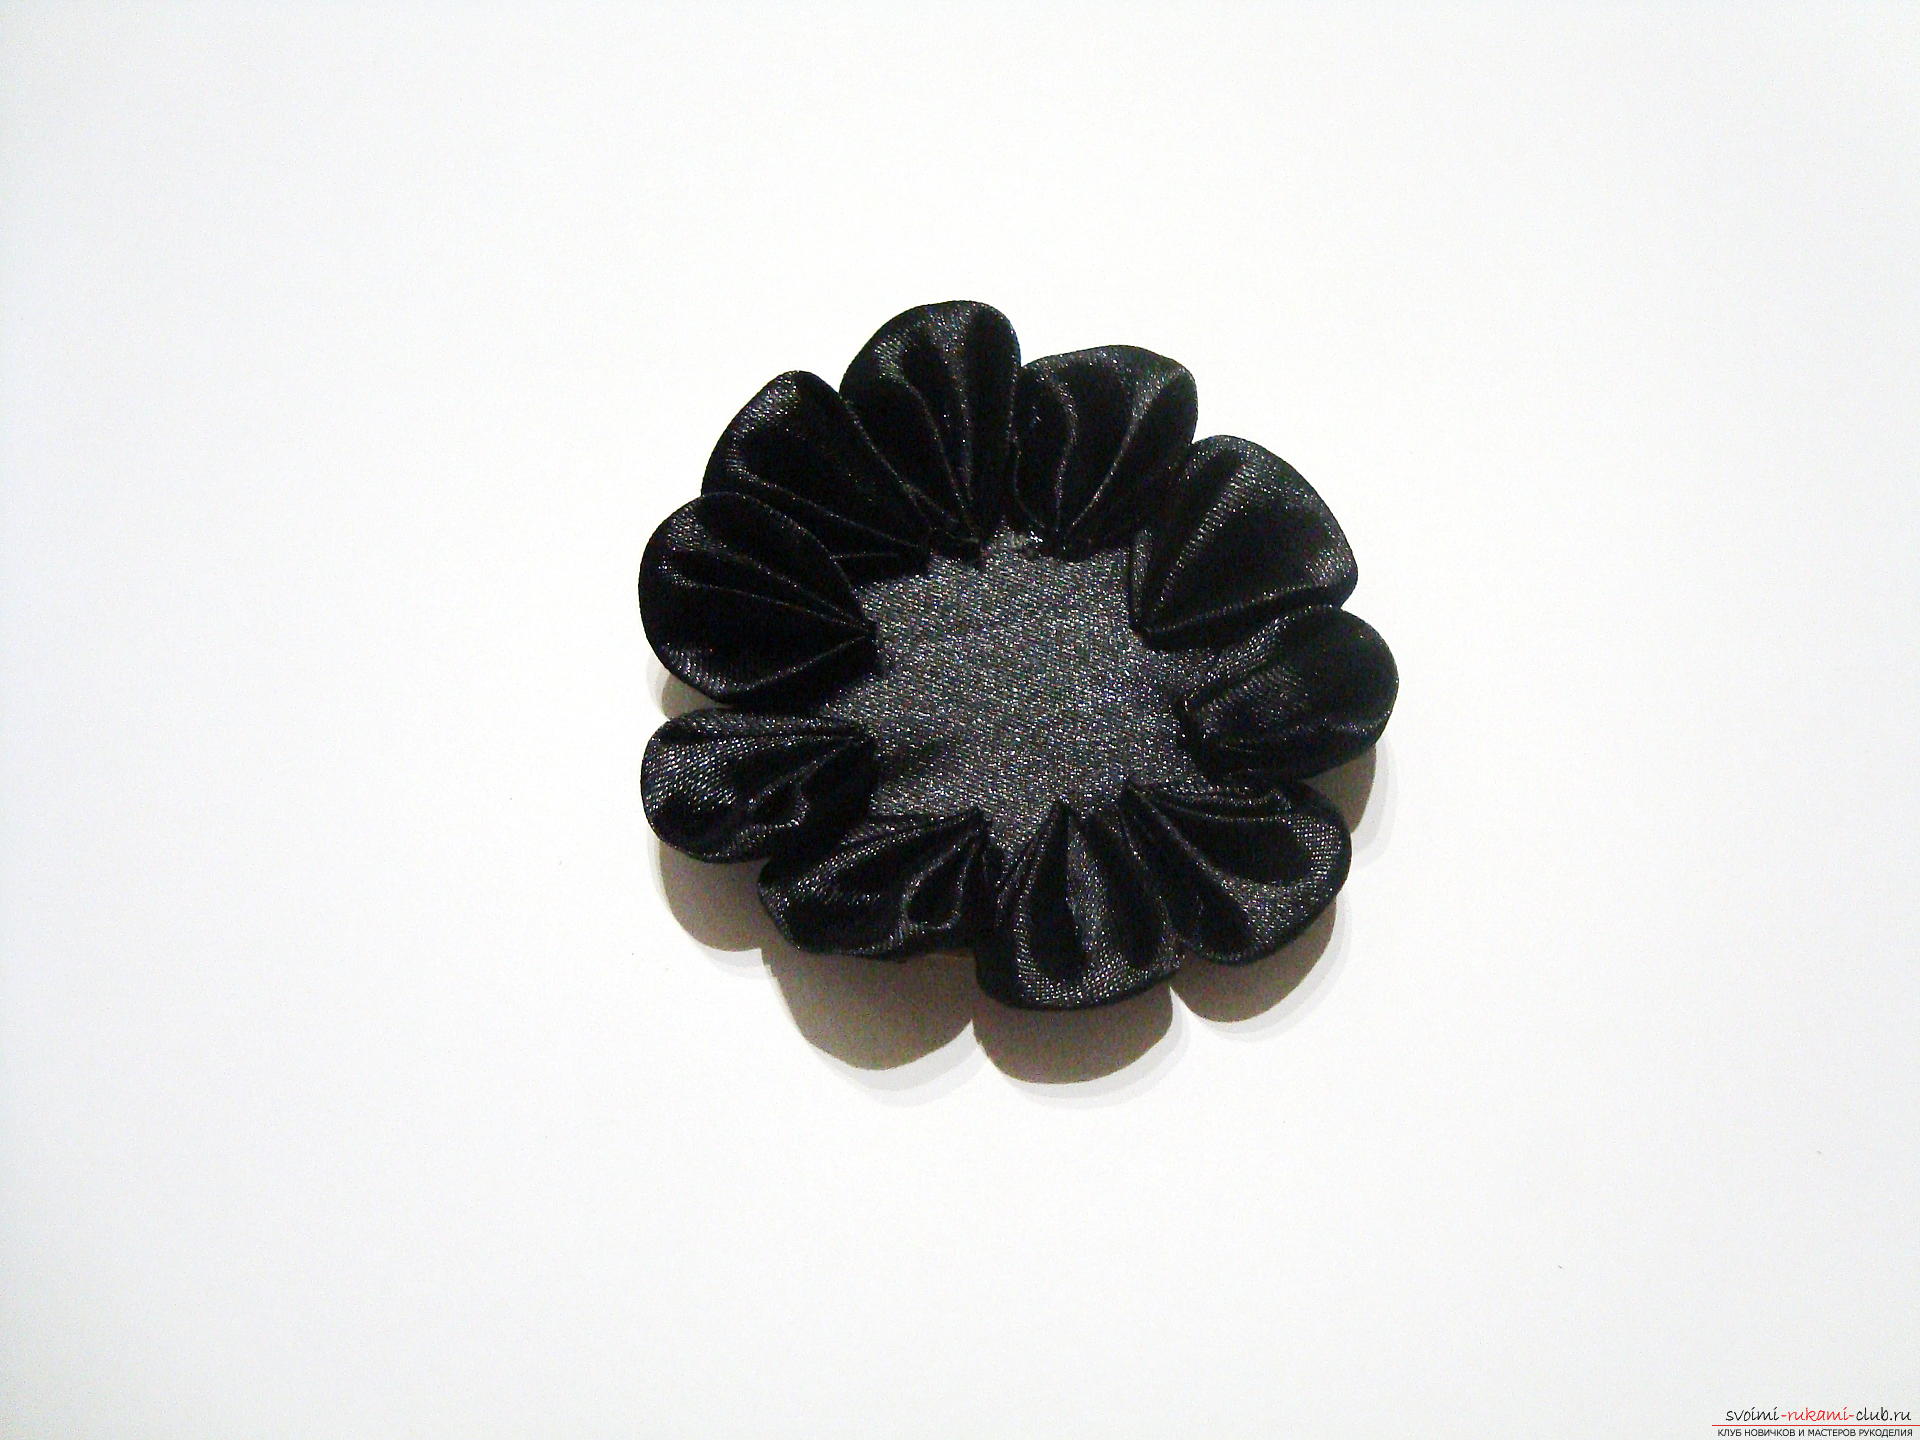 Now we form the second tier of white petals. When fixing these parts, it is necessary to retreat slightly to the center of the workpiece. White petals are glued and on a black base, and are slightly attached to the black elements.
 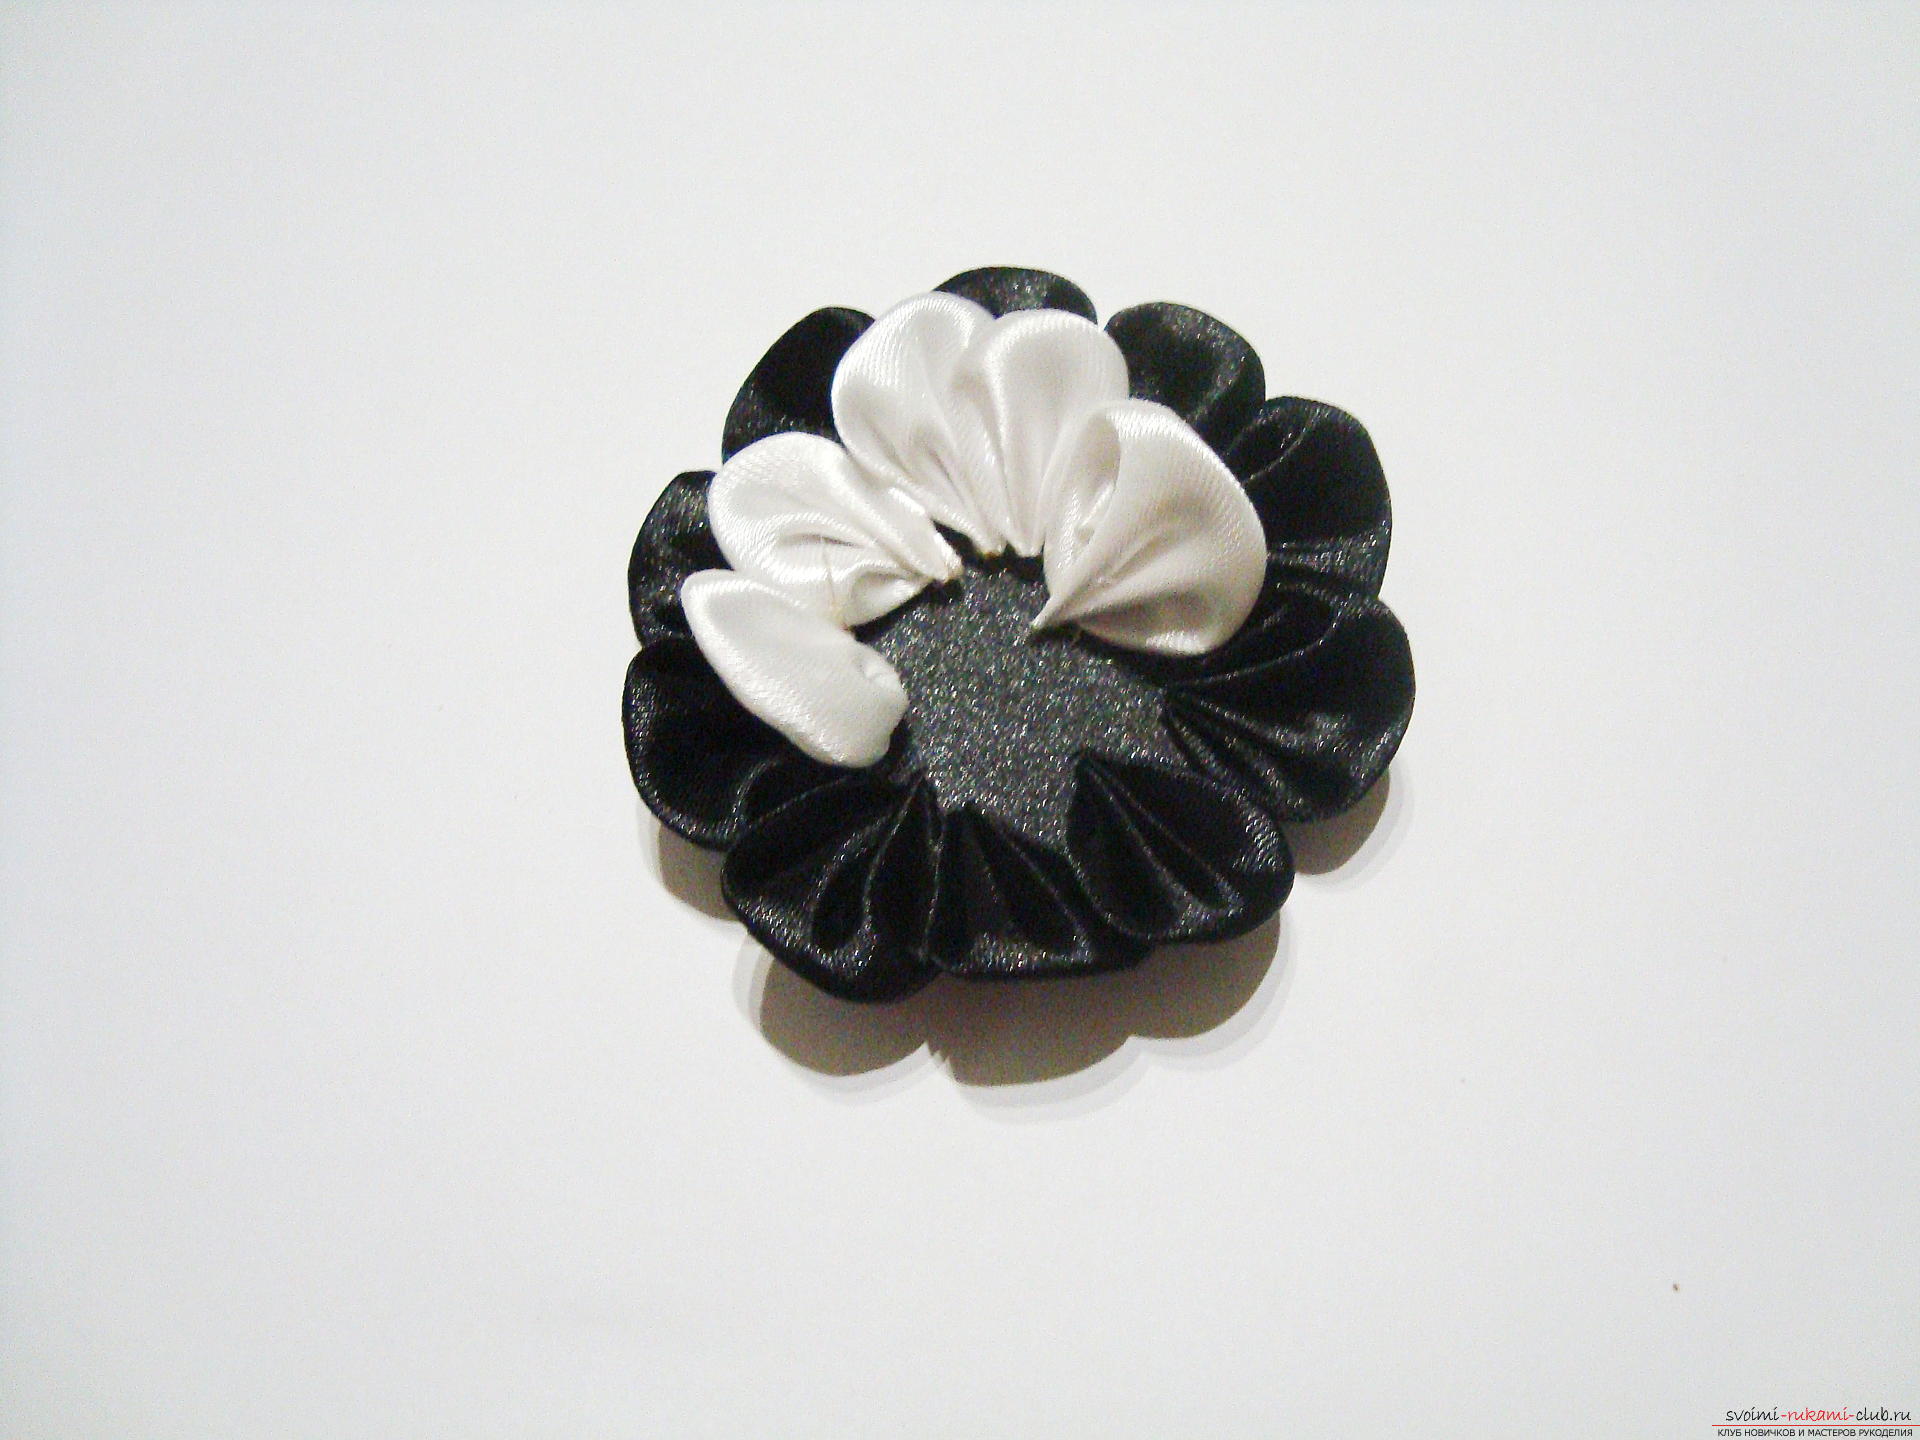 From white petals it is necessary to form one morethe tier, whose petals are in contact with each other in the central part of the workpiece. It should be noted that if you prepare cardboard blanks of a larger diameter, then you will spend a different amount of petals, then it may be necessary to form 4-5 tiers of rounded parts, of course, in the end you will get a more magnificent, densely packed work. In the very center of the work there will be an ugly junction, such a flower will not be desired by some people in the form of jewelry, so the core of the product should be covered with an additional element. In this work, I used the tip of the wedding hairpin, it fits perfectly into the composition of the atlas.
 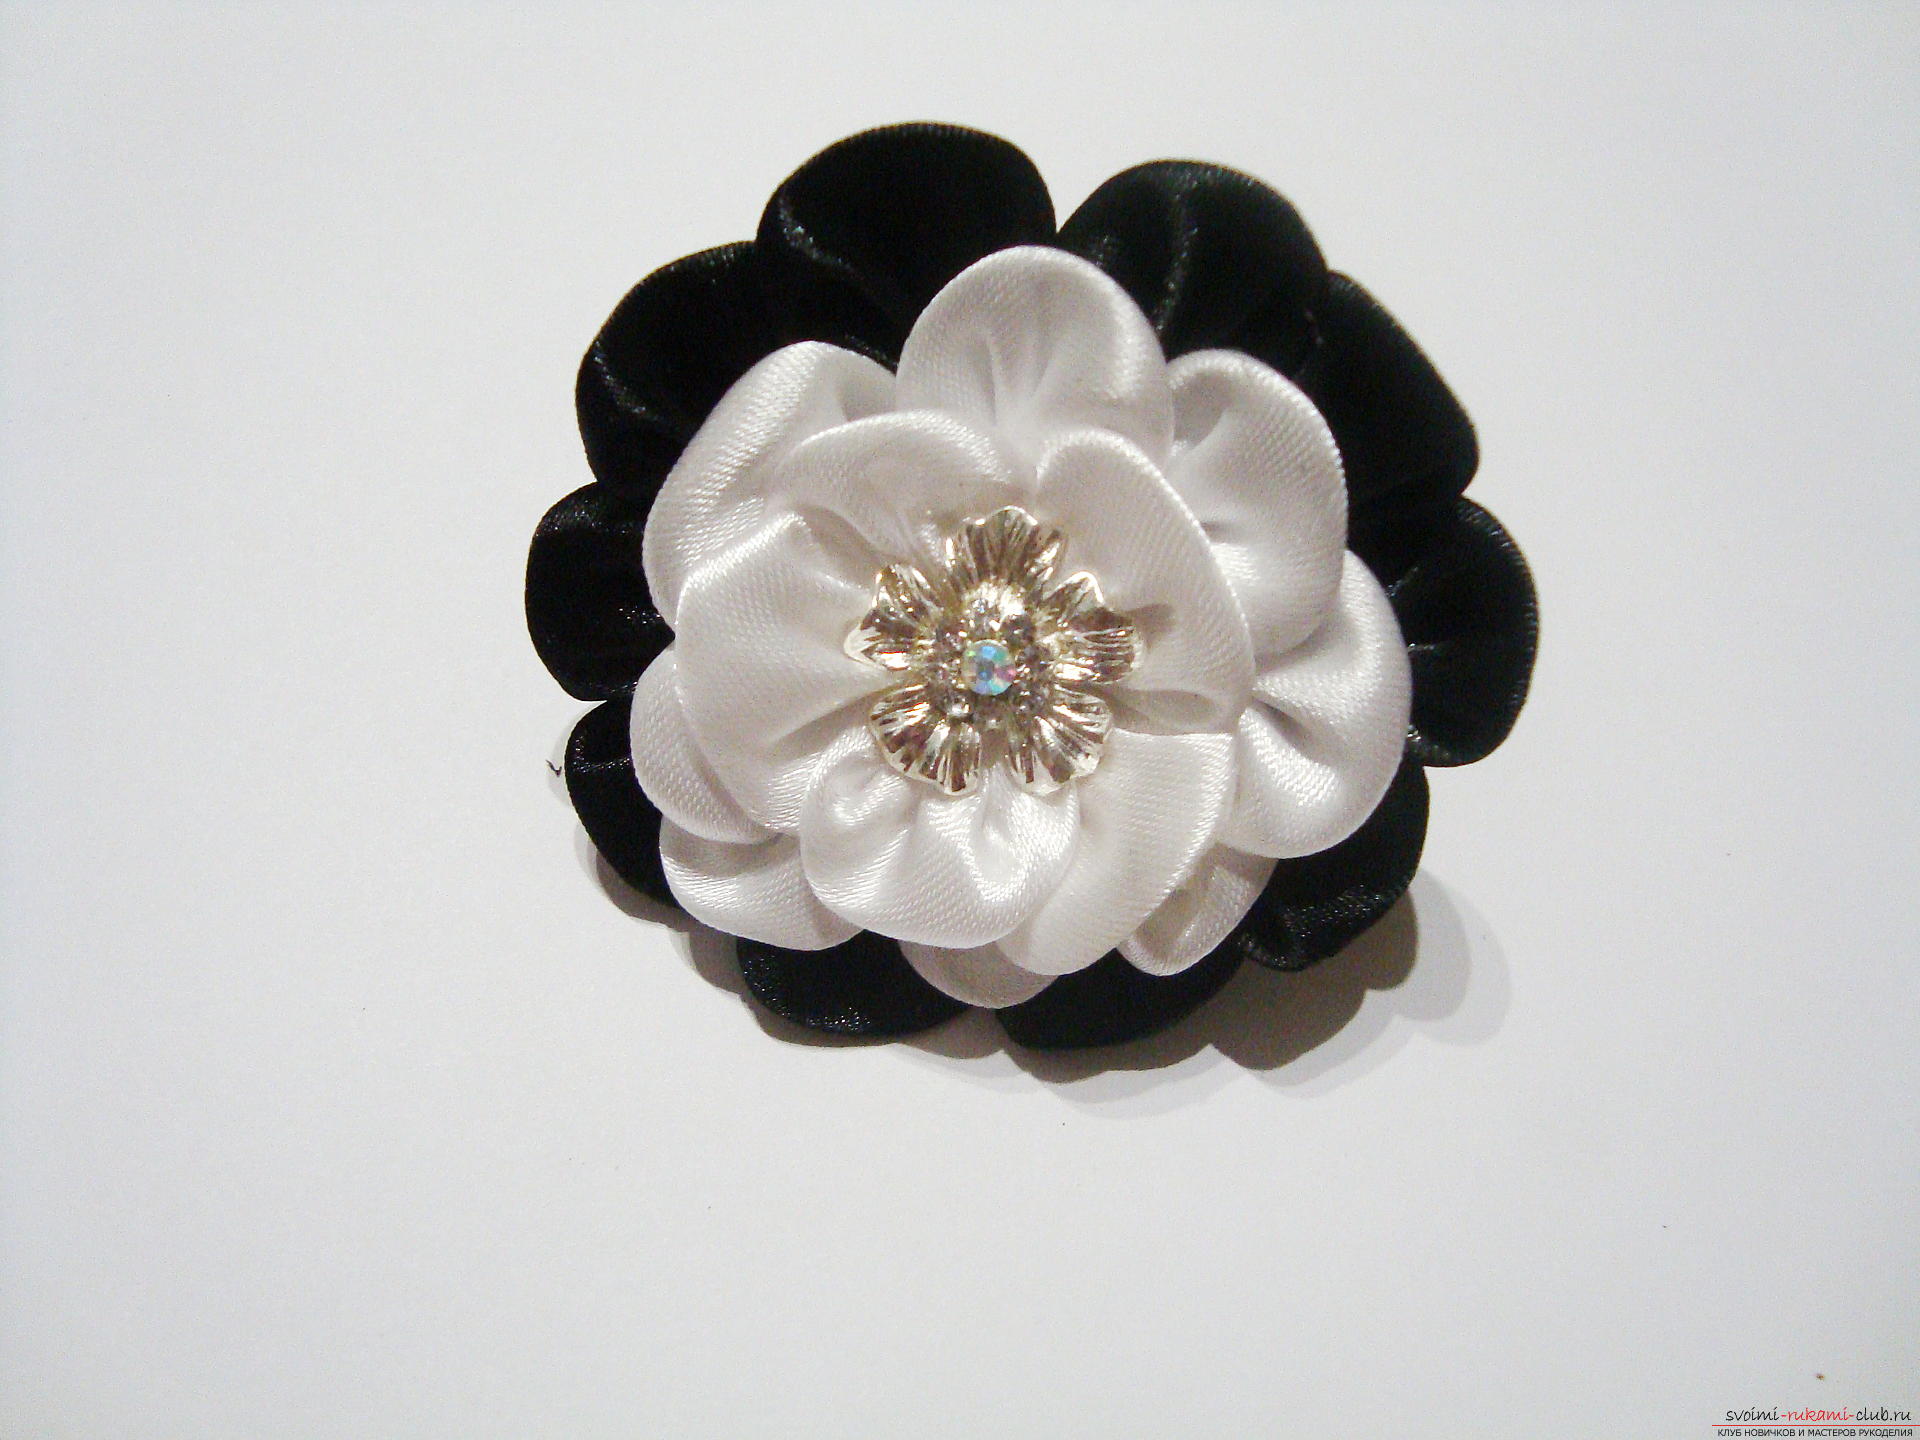 On the underside of the workpiece is a rubber band forhair. It is fixed with glue and an auxiliary cut from a tape 3 mm in width and about 2 cm in length. This cut is glued across the rubber bands and tightly pressed against the base, this safety element permanently binds the elastic band and flower base to ensure that the product has served more than one year.
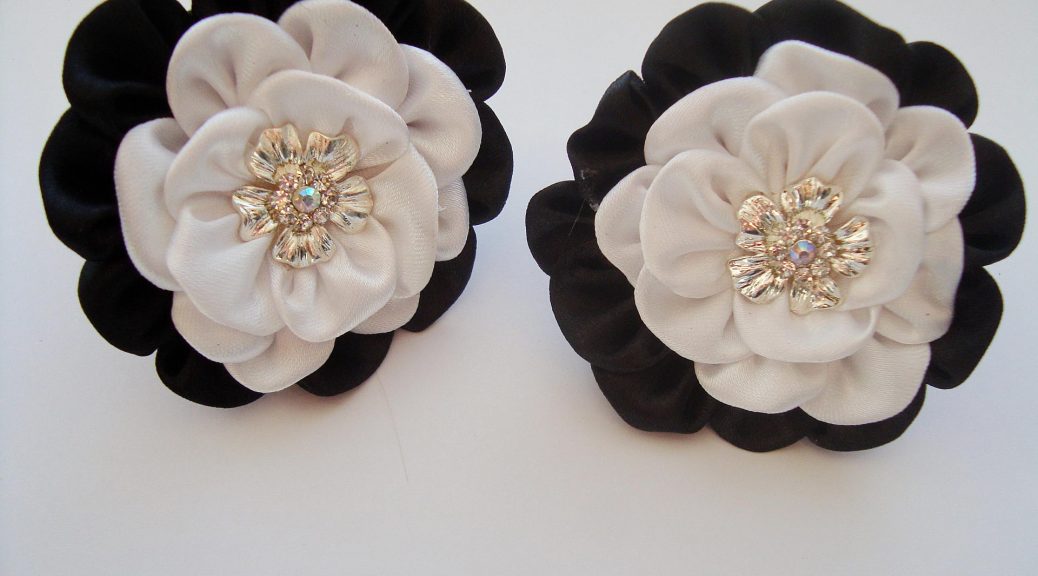
And here is the ready-made version!
Charming flowers Kanzashi ready. Erasers with black and white flowers are easily attached to the braid or collect hair in the tail. 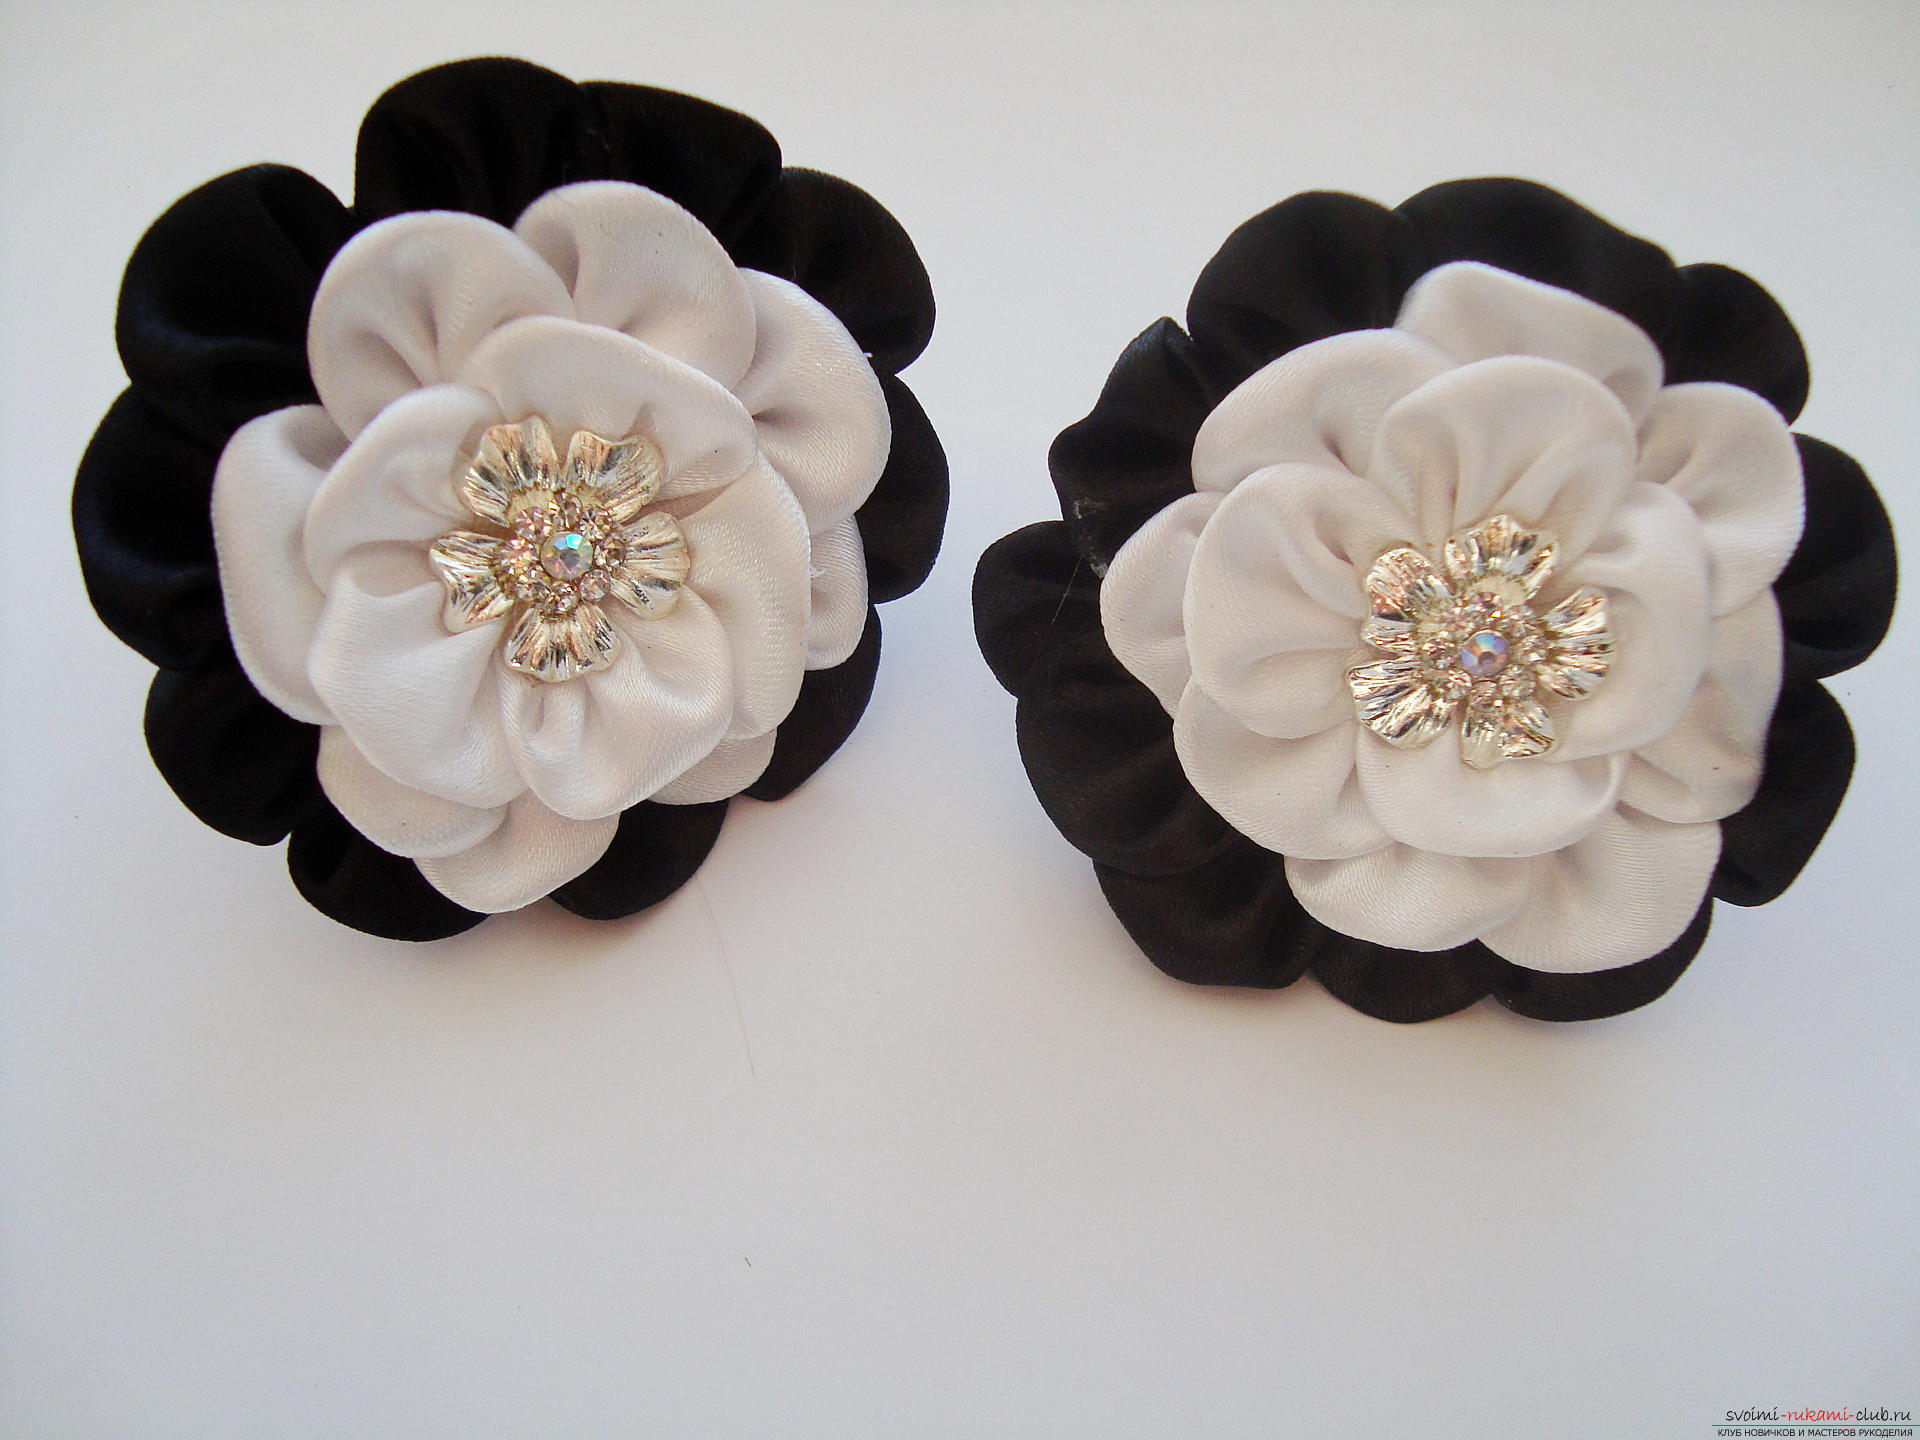
Comments
Related posts:
 This detailed master class with photo and description will teach you how to make your own flowers from polymer clay for hair clips.
 This master class with a photo and description will teach you how to make flowers - roses - from polymer clay in texturing technology.
 This detailed master-class crafts made of paper with his own hands with a photo and description will teach you how to make a daisy with wishes.
 A detailed master class with a photo will teach you how to make knitted flowers, you will get a carnation crochet.
 Booties spokes: step master class (photos, video tutorial)