
How to mold a rose from polymer clay, master class with a detailed description and photo.
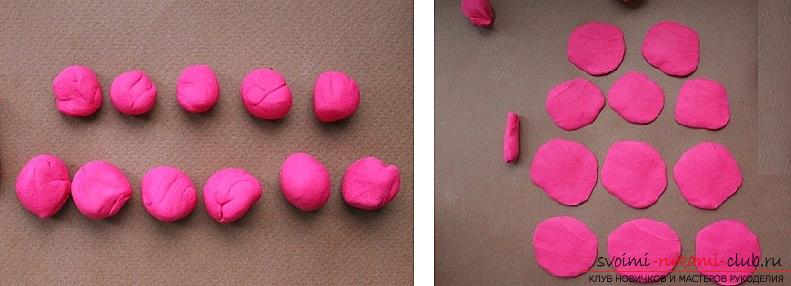
Rose - an amazing flower with a centuries-oldhistory. All over the world it is recognized as a symbol of beauty and remains popular outside fashion trends, unlike other colors. Ancient Greeks, this flower was considered a symbol of the goddess of love of Aphrodite, the Indians believed that the goddess Lakshmi was born from a pink bud. Roses were displayed on the arms of noble births in medieval Europe. Everyone knows the war of two English houses - Lancaster and York, called the Wars of the Scarlet and White Rose. By the order of Peter I roses were planted in Russian gardens. From these flowers get an unusually fragrant oil, petals add to tea or make jam. Roses are sung by poets sculpted by sculptors, cast from silver or gold, embroidered with silk and carved in wood. To perpetuate the image of a beautiful gift of nature can be with the help of such wonderful material as polymer clay. Plastic has a variety of shades, allowing you to convey any color of a real flower, it is easy to mold and easy to buy in many craft shops. Before you begin to sculpt roses from polymer clay it is important to remember a few points. The working surface should be clean, as the clay instantly absorbs all foreign particles. To give a natural look to the petals and leaves, you can buy molds or vainers. These are silicone molds with the texture of a pattern of leaves or petals. They are different for each type of flowers and differ only in that the mold forms only on one side of the leaf or petal, and the weiner is two-sided. And lastly, if you did not have the finished clay in the right shade, you can always create it by mixing white plastic with other colors, or add a white shade of oil paints. Completed parts are better covered with wet napkins, so they do not dry up before the end of work. Flowers are molded mainly from "cold porcelain" or self-hardening plastic. Red rose. It will take:
- Polymer clay (for leaves green, and for flowers that she likes);
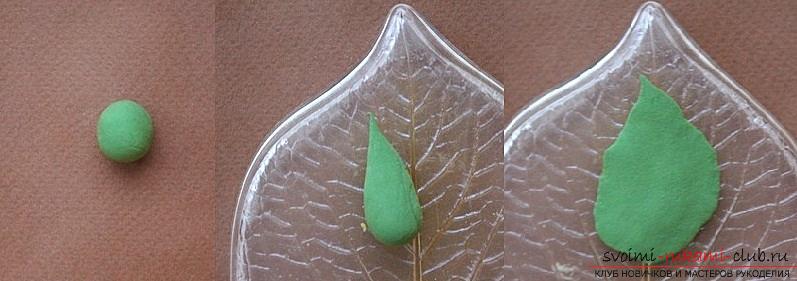
- Mold for the leaf of the rose;
- Wire for fastening leaves (fit number 26);
- PVA glue.
Flower.
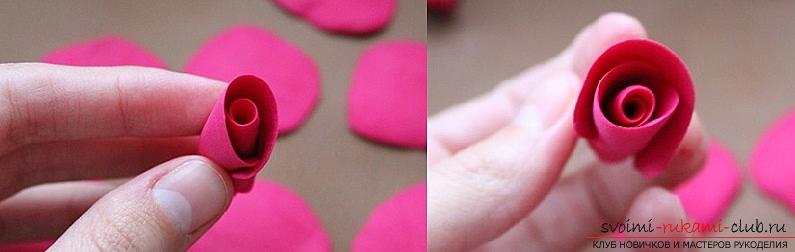
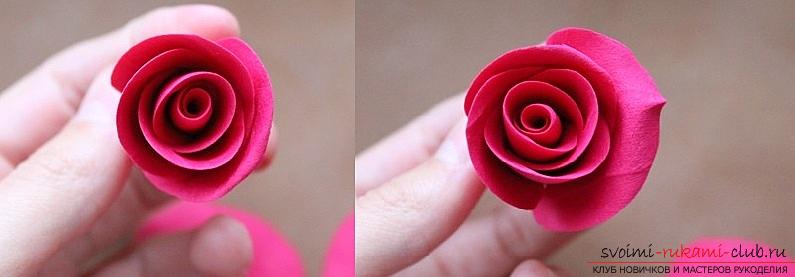
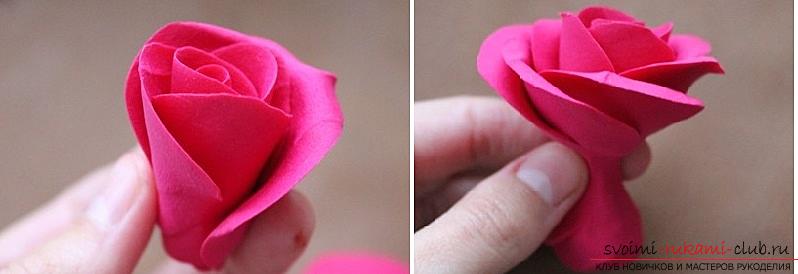
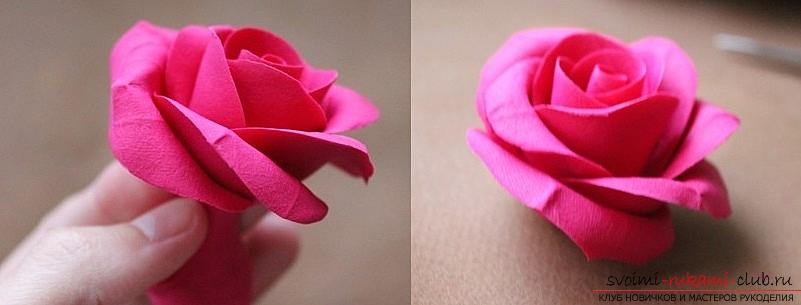
You can insert a rose in the wire, greased with glue or sculpt directly on it. Leaf.
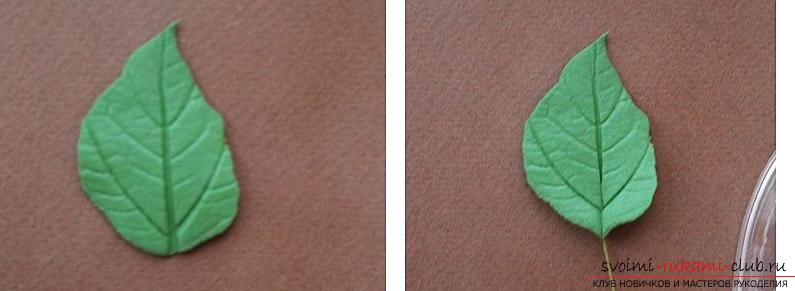
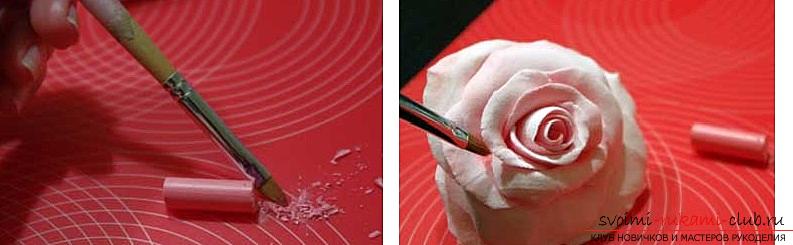
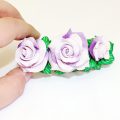
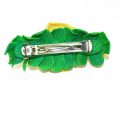
Dry the flower and leaf as indicated in the instructions. It is better to dry up with your feet, hanging it, so neither the flowers nor the leaves will break. Such a rose is good to use as an element of decor, for example, decorate it with a wreath. A gentle pink rose. It will take:
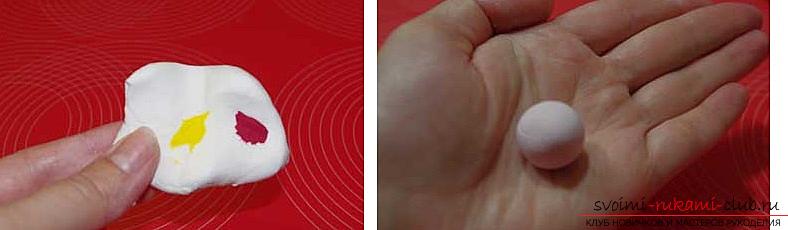
- Yellow, white, green and red clay "Deco";
- Stacks for modeling;
- Stationery knife;
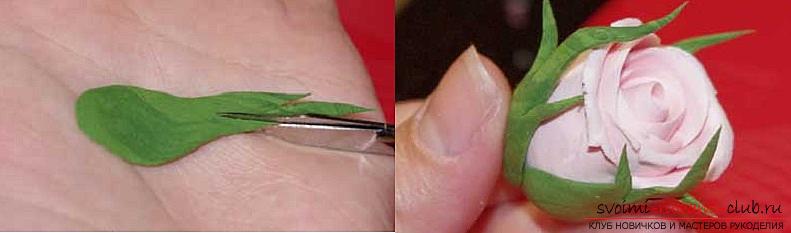
- Small scissors (better manicure);
- Solid pastel;
- Brush.
Flower.


Sepal.
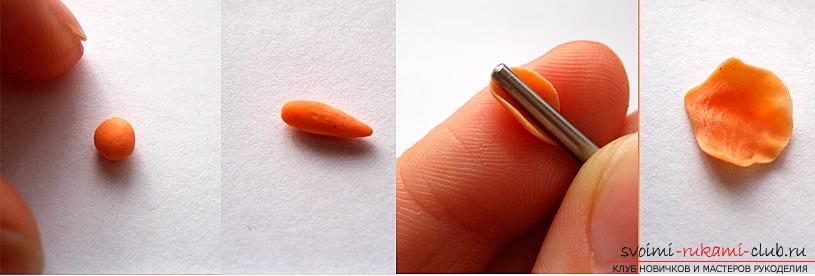
A pion-shaped rose made of self-hardening plastic. You can apply "cold porcelain". Required:
- Polymer clay is light and dark-colored apricot;
- Stacks for modeling;
- Instant super glue.
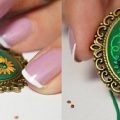
Such a rose will look beautiful and in pink tones. This master class shows how to make a small flower, which can decorate the earrings, bracelet or bezel on the hair. Mid.
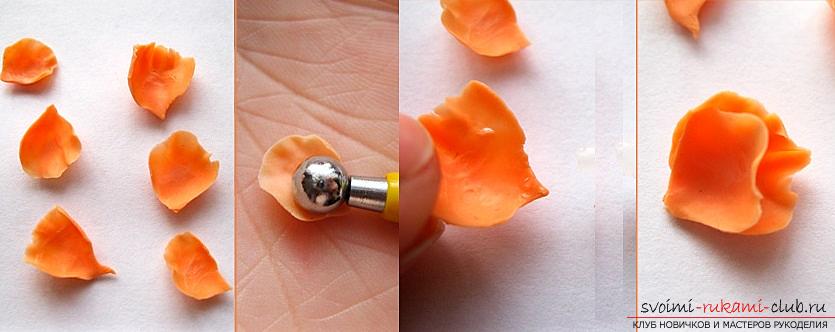


The edges.

A pion-shaped rose is ready.
Comments
Related posts:
 Master classes on the creation of bouquets of polymer clay with a description and photo.
 How to make a pendant or suspension from polymer clay with your own hands, master classes with photos
 How to make earrings from polymer clay in the form of snowmen, detailed master class with photo and description
 This master class with a photo and description will teach you how to make flowers - roses - from polymer clay in texturing technology.
 This detailed master class with photo and description will teach you how to make your own flowers from polymer clay for hair clips.