Buti elegant embroidery volume in the master class (photo and video)
Content
- Buti Technique
- Booty Master class technology plus trapunto
- Technique Marseilles peak
- Trapunto
- Video: Booty embroidery machines
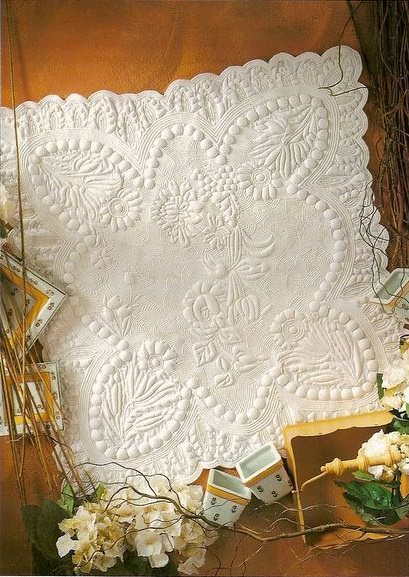
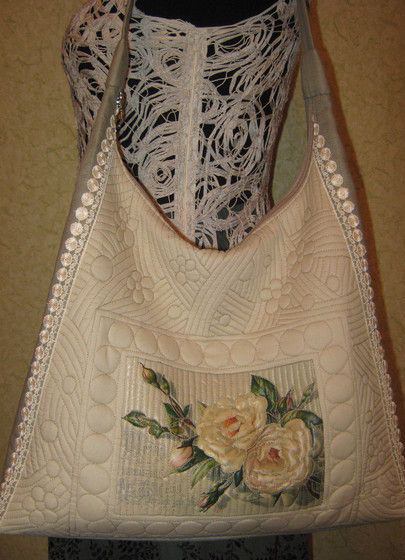
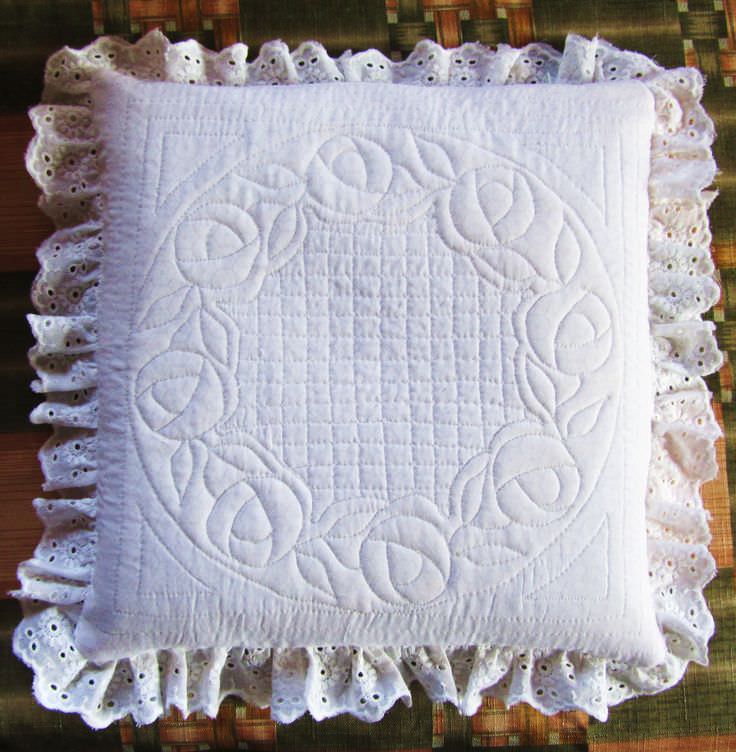
Embroiderers long time attracts and draws old anda magnificent view of embroidery, which is called Buti (BUTIS). Almost always, this embroidery is performed in conjunction with another, called trapunto. By combining two techniques, Buti and trapunto, born gorgeous fabric with raised patterns, which are filled with a soft filling. Pattern turns gentle and majestic, perfect for curtains, pillowcases, carpets and clothing. This technique dates from the early 17th century. It appeared in Italy, and by the 18th century had spread to the United States, where he continues to be well-known and popular to this day. Buti technique was applied not only in Italy and America, but also in the south of France.
Spread it in different countries explainedthe fact that even the simplest patterns and embroidery motives Buti look regal and elegant. Buti embroider technique is not easy, it's very painstaking work that requires endurance and persistence. This technique is a suture needle forward, performed by white cloth, folded in two layers. Thread for embroidery take this extremely white. Pattern Buti need to embroider as a closed system of lines.

Buti Technique
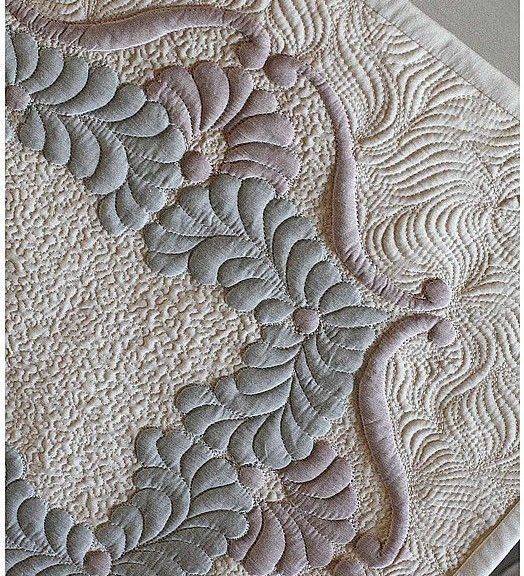
The first and main lesson is embroidery Butithat, after completion of the contour lines, the empty space between them is filled with thick white thread. As a result, embroidery acquires volume.
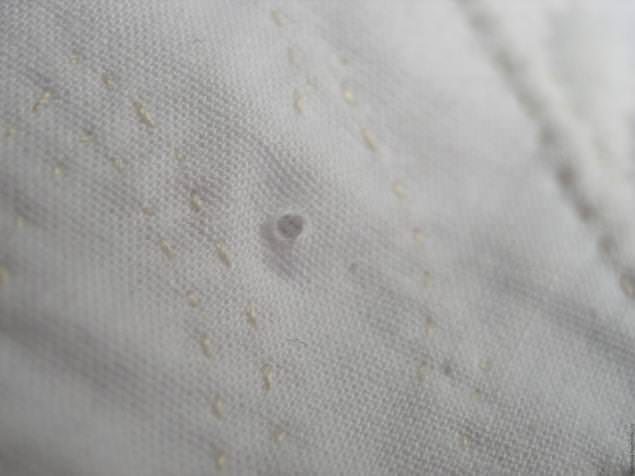
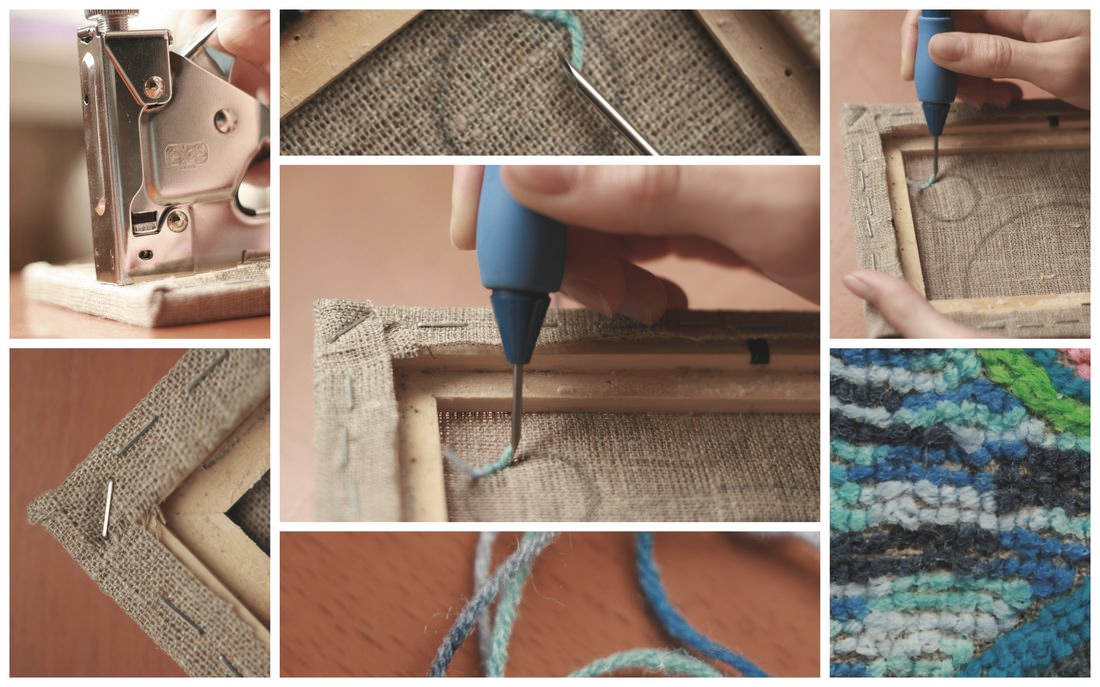
The second and no less important lesson for the acquisition ofButi skill in the art is as follows. First joined together two layers of white fabric stitching small stitches of red yarn on a path of motive. After that, from the wrong side of fabric pattern inside make a small puncture needle, and through him to carry out the packing cord between the tissue layers. As you can see, Buti technique is not only to embroider, but also includes other techniques. If embroidery Booty performed on not very thick fabric, such as satin, it is possible to do without the cut. In this case, the embroidery Buti requires such an operation: pushing the thread fabric long blunt needle and injected packing yarn (wool or cotton thread). Most importantly, the gasket must be the same color completely with the cloth.
In this technique, embroidery Booty looks the same as on the front side and on the reverse.
Booty Master class technology plus trapunto
It is necessary to prepare:
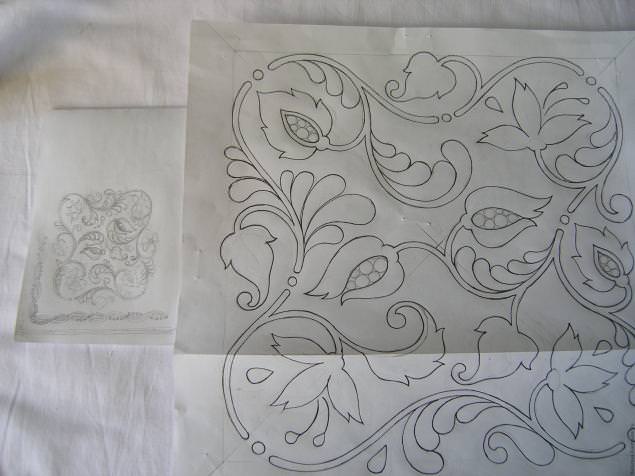
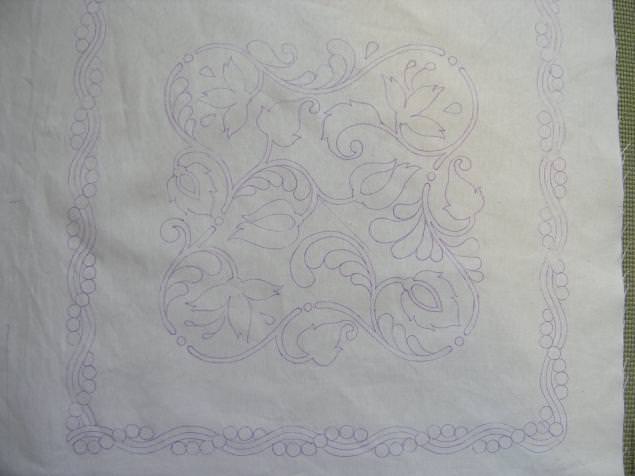
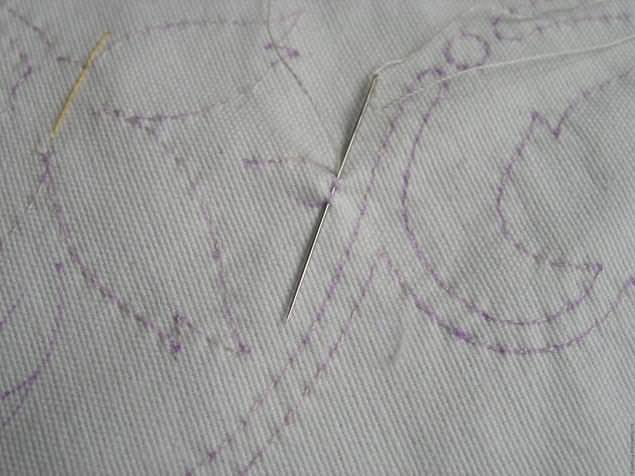
Our cloth has a square shape with a side of 50 cm. On the top sheet must be set figure. This can be done with glass and lighting from below. Overlay the pattern on the fabric marker. It is necessary to take such a marker, which is washed off in the wash. Now add the person and inside out and sweep away together. After that, we begin to whip small stitches (1-1,50mm). Embroider technique Buti closed loop motif, it is the most labor-intensive and time-consuming affair. But the embroidery is worth it, and the result will please you and all your loved ones.
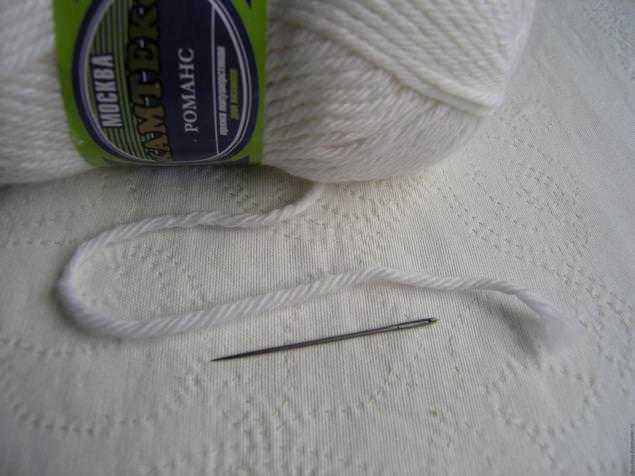
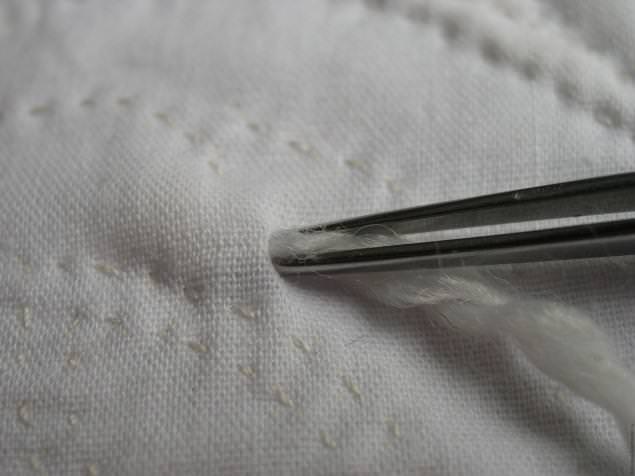
When this operation is finished, you must removedrawing. To do this, you need to moisten our embroidery Buti, to dry and to iron it. Stitch should be such that the right and wrong sides of the work is the same. This nuance is well seen on the video. For the full effect, which can give a master class, view this video is very desirable. The next part of the work on the embroidery Buti is to provide relief. Relief is the most important feature of Buti embroidery. For packing thread long lines, use a blunt needle with a large eye and long to be able to vdet thick thread. The needle should not be sharp, otherwise it will cling to the fabric when broaching. You can take a special tapestry needle. Making inlet of our thick needle. Do not need any cuts, simply moved apart filament fabric. Thanks to this operation, the yarn is easy to pass through the fabric. The secret to bootie technology when everything is done without incisions, and the person from the inside out the same. The filament yarn can pass through in a single layer, and can be folded in half. It all depends on how a convex product you want.
The tip of the thread in the hole refuel tweezers, and the veryhole carefully put in order the needle. The yarn in each of our weed out the stalk, then fills those elements that are larger. But large packing elements trapunto relates to the art, and not to Buti art. Trapunto in its original ancient form like a bootie. They differed only in that in the technique trapunto to push stuffing makes an incision, which in the end is sutured. In this case, the reverse side of the embroidery was obtained is not quite perfect. Now it is accepted to fill without a cut, but the push pad using fine forceps, and no needles. In this case, the wrong side of trapunto becomes the same as the reverse side of Buti. Stuffed yarn done in a needle or awl hole should be as long as possible. Then straighten the yarn needle and continue packing. And thus operate until the end, until we finish filling element.
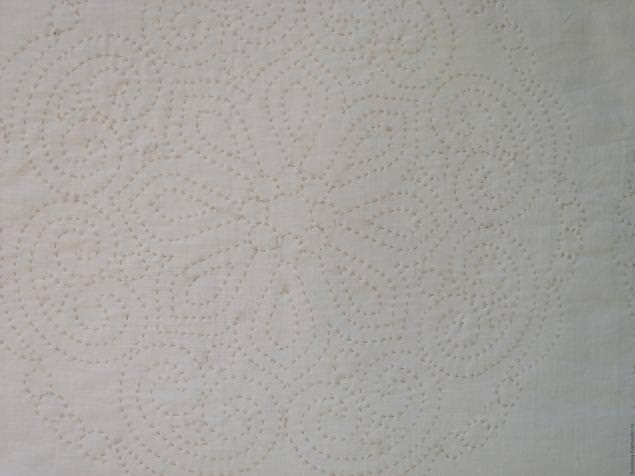


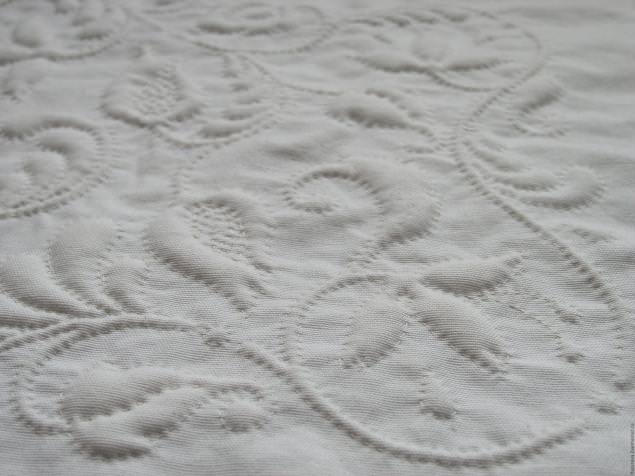

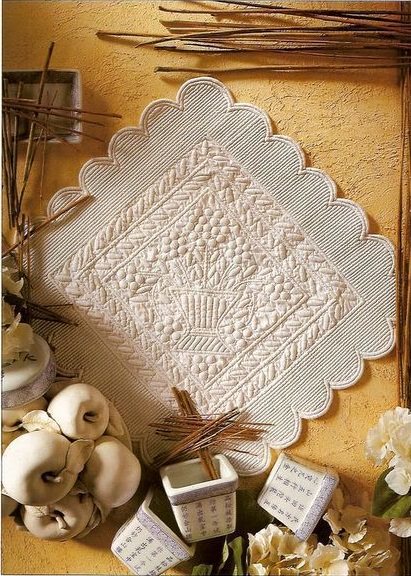
Motifs for embroidery Buti taken from everydaylife. It may be different colors or plants. After quilted motifs, their packed cotton cord. The main difference between the art bootie that samples are bilateral and equally beautiful look like a face, and from the inside. Background pattern of this technique is a quilted circuit filled with a cord, and located diagonally fabric. This pattern is called "noodles". Regally beautiful examples of Provencal bootie made made of thin cotton batiste fabric type, or the finest linen. Therefore, in the lumen such products appear contrasts. They are full of patterns constitute the basis of a clear contrast products.
Technique Marseilles peak

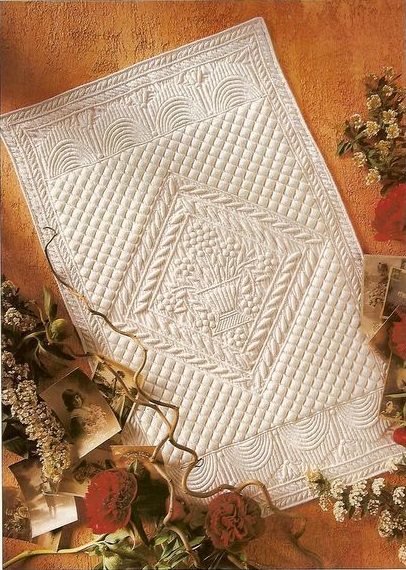
Now let's deal with the technique Marseilles peak. This is a great variety of Buti. The only drawback of the product made in this technique is its severity. It does not shine the light, as is a three-layer fabric. The first layer of cotton, the second of the padding polyester, the lower layer is made of lining fabric. Stitching such work longer stitches than Buti technology. There are differences also in the motives of the two species. Motives Marseilles peak mainly geometric. Generally skilled workers from France working in the Marseilles peak technique using printed Indian cotton prints. But this can be a simple white cloth. In this technique, made up like a garment, so covers and furniture covers.
Trapunto

Another close similarity of embroidery is ButiItalian trapunto. We have already briefly mentioned this technique. We add a little to our knowledge. In this technique, two layers of fabric used, as in the technique bootie. But unlike her, trapunto is one-sided. The inner side is very different from the front side, because it cuts to make printing of embroidered items. After packing small incisions closed with stitches. Sometimes trapunto operate as an upper layer of the product, and then connect it to the batting and backing. Next, all the stitching the layers together, as in the technique of Marseilles dive. This increase in the number of layers leads to correspondingly increase the volume of the product formed in trapunto art.
These masters can successfully combine allthese techniques give a great work of art, where every detail is unique. Especially highly valued the work done exclusively by hand. But
Buti, trapunto peak and is also very popular, as it accelerates and optimizes the sewing process.
Video: Booty embroidery machines
Comments
Related posts:
 Tablecloths embroidered ribbons in a master class (photo)
 Volume embroidery - the process of creating live paintings (video)
 Gobelin stitch and embroidery looped in photos and video tutorial
 Brick weave beads for beginners to master-class (video)
 Diadem of beads with your hands in the master class (photo)