Bezel by September 1 for girls with step by step instructions, detailed description and photos
The first of September is a holiday, to whichnot only schoolchildren are preparing, but also mothers of junior high school students. On this day, your student needs to be dressed in all festive and light, but if the school uniform in most institutions is standard, then the hair can be decorated with the sweetest accessory in a snow-white color. In this master class, it is clearly demonstrated how to create a magnificent bow for the rim from different ribbons with your own hands. 
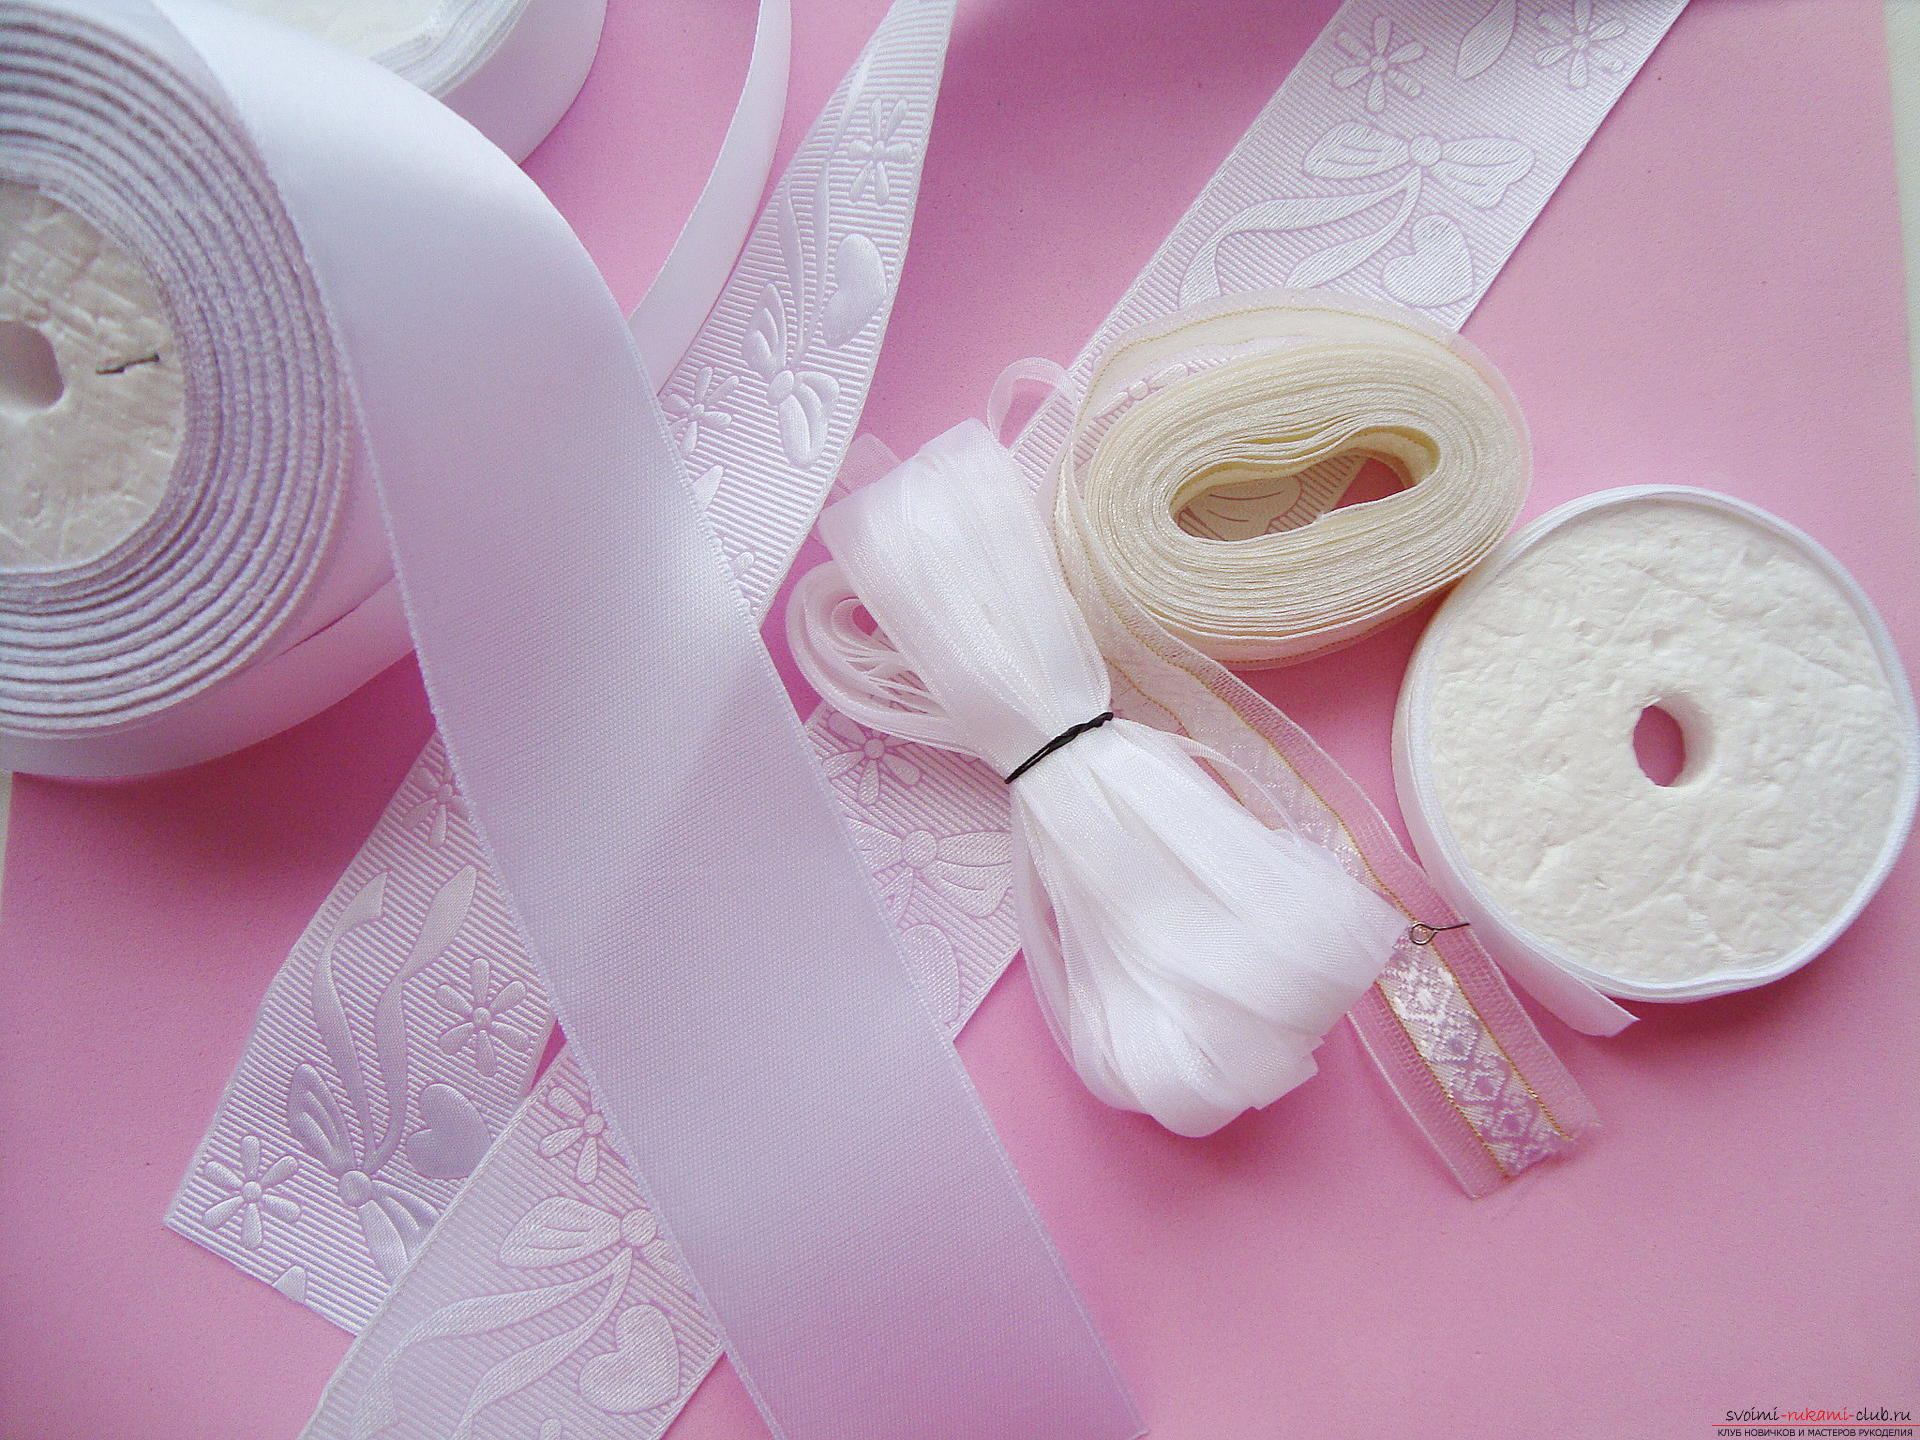
 To create a school rim, prepare:
 First, for the rim, a foundation is being prepared by September 1. It will need three cuts of 16 cm in length from the widest single-colored tape.
 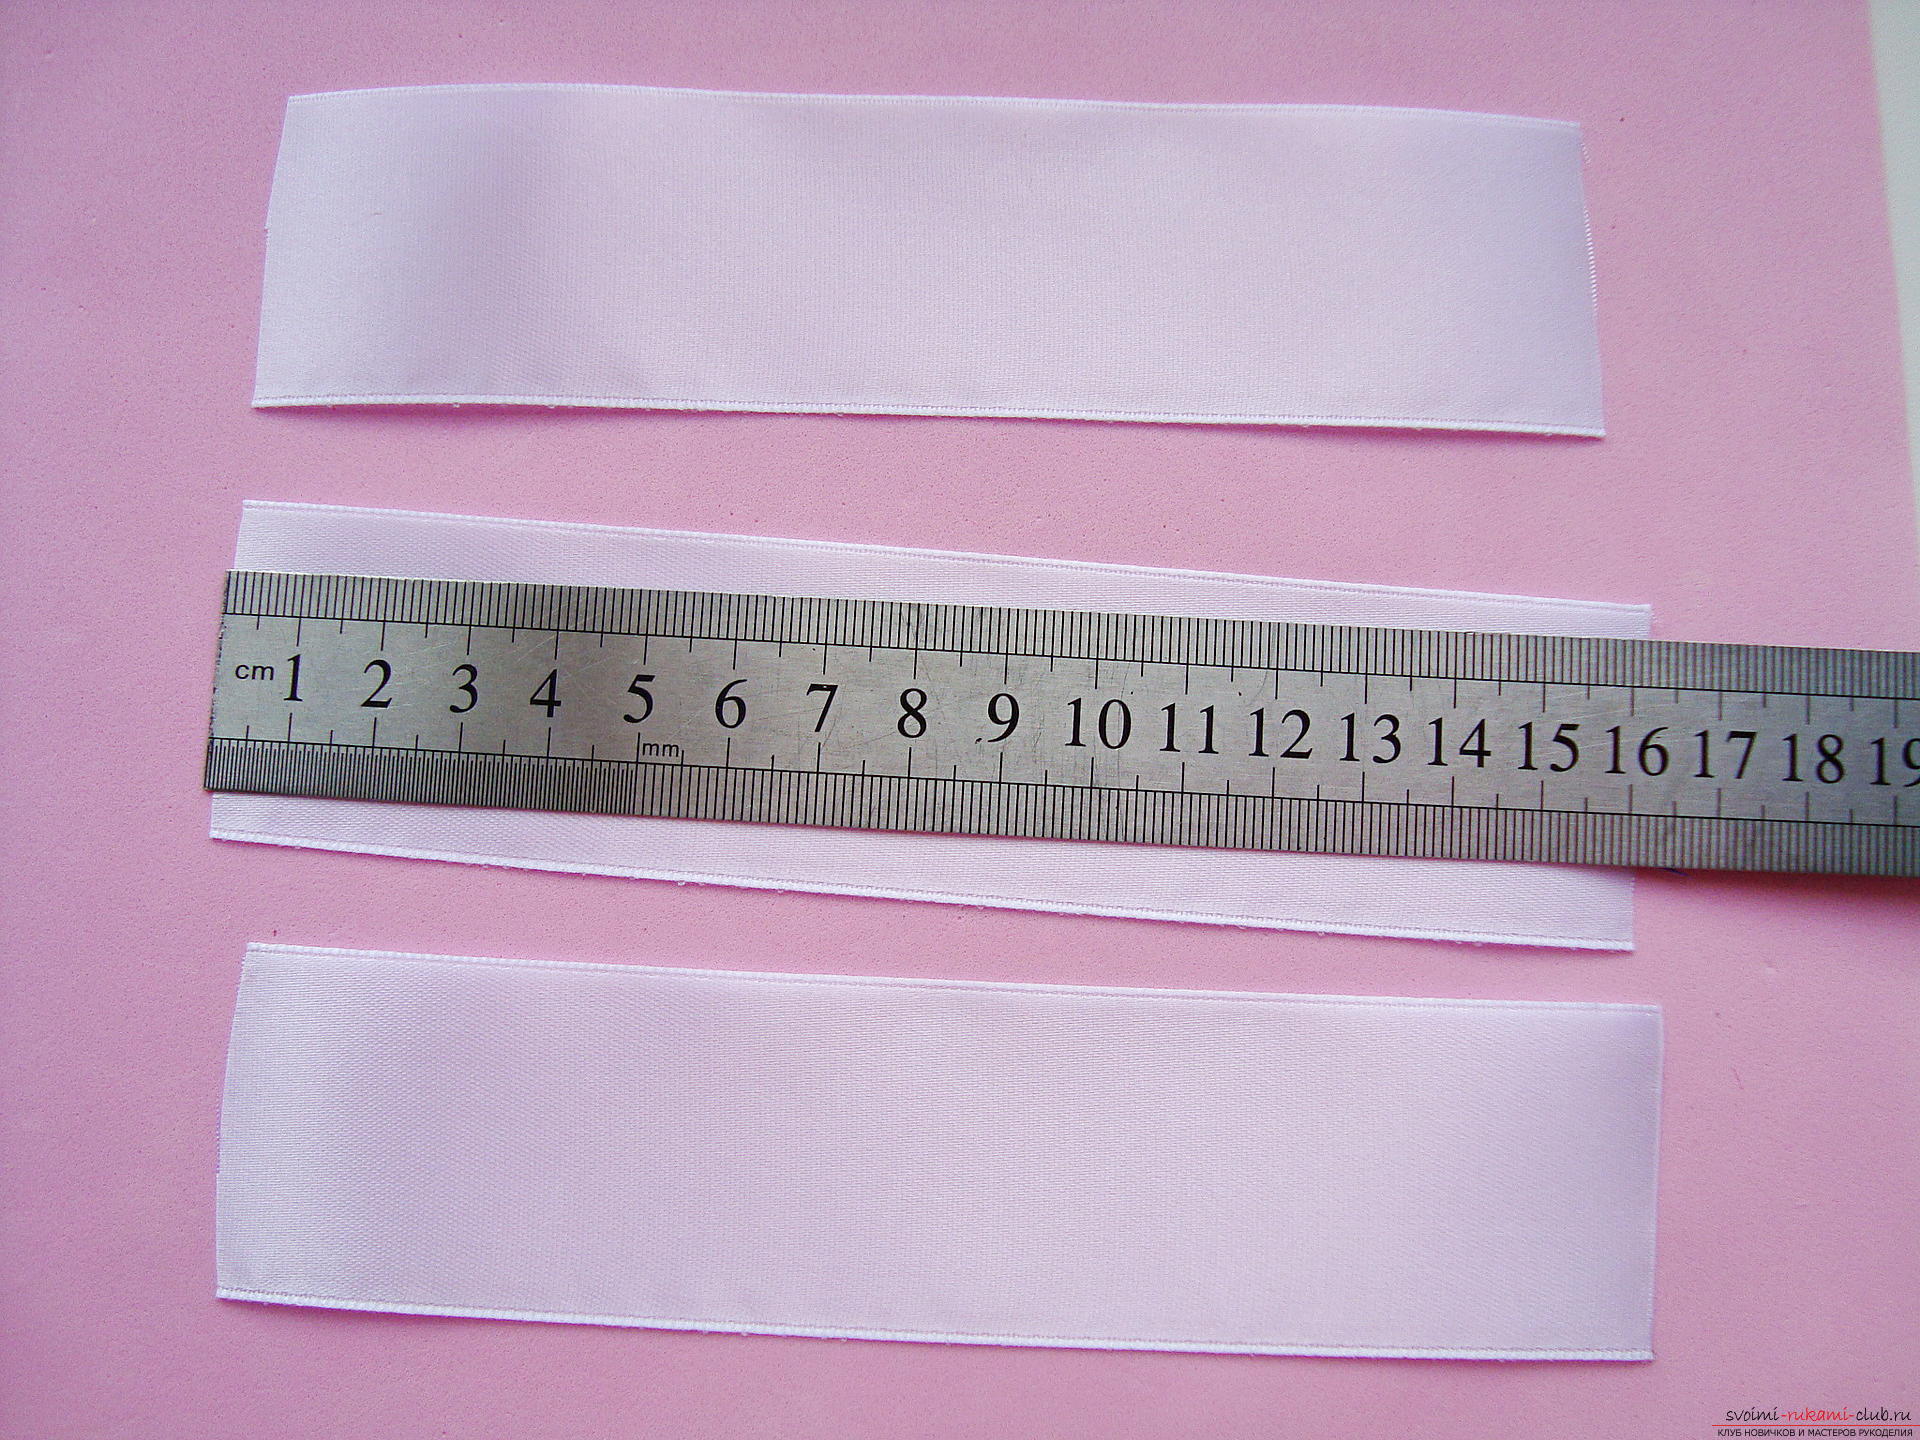 Cut each edge of the cut at two corners and burn this place so that the thread does not get caught when the product is worn.
 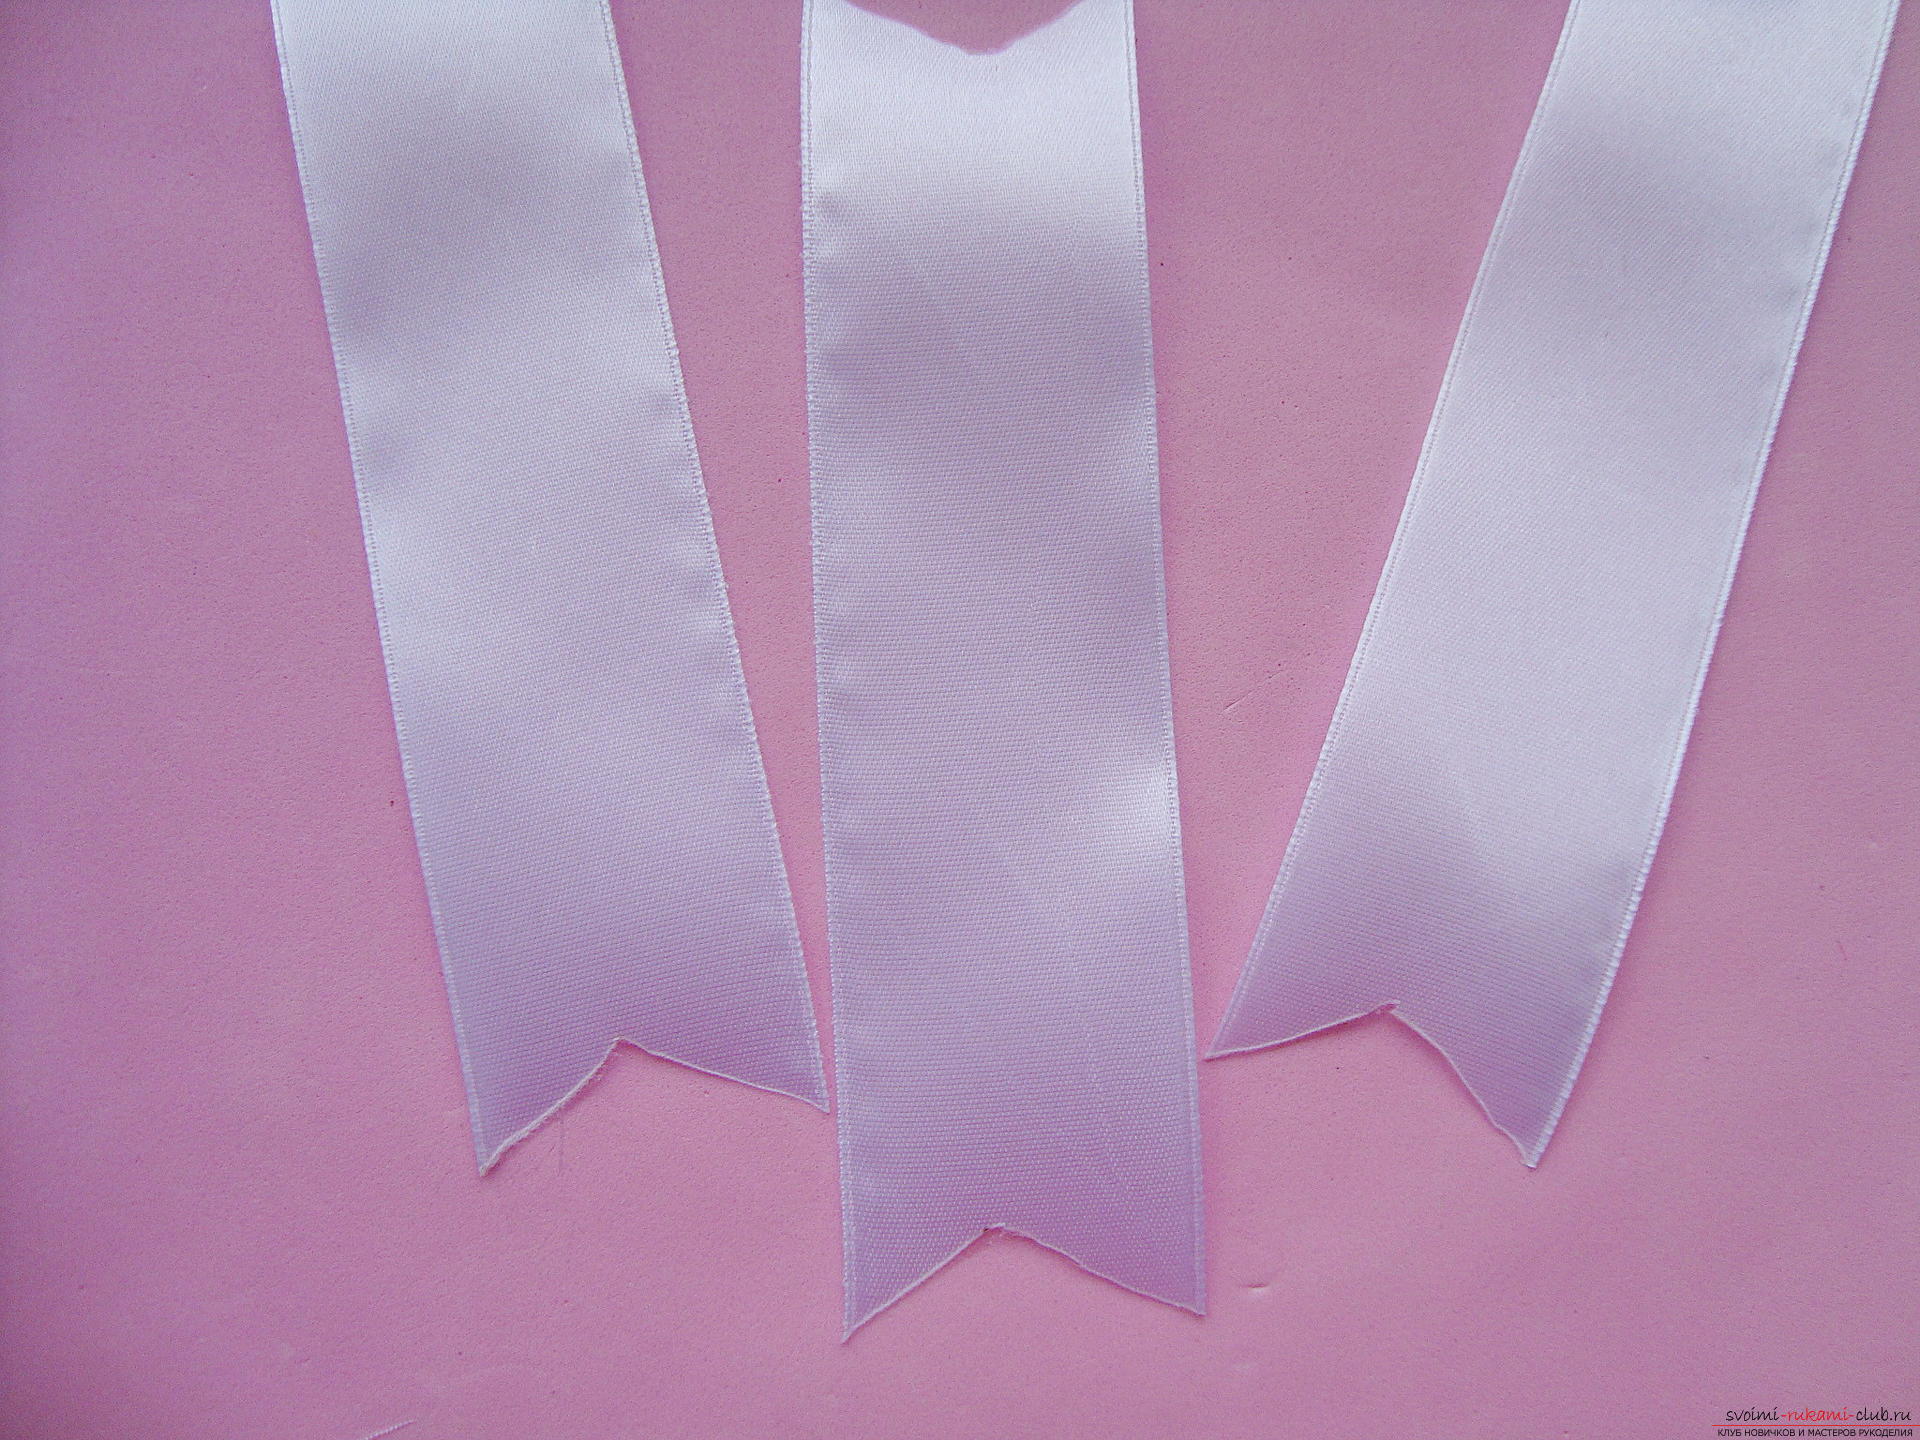 Two cuts are glued together and the third element is fixed horizontally. In the middle, press down all the tapes so that they stick together. So the base of the bow will look like this:
 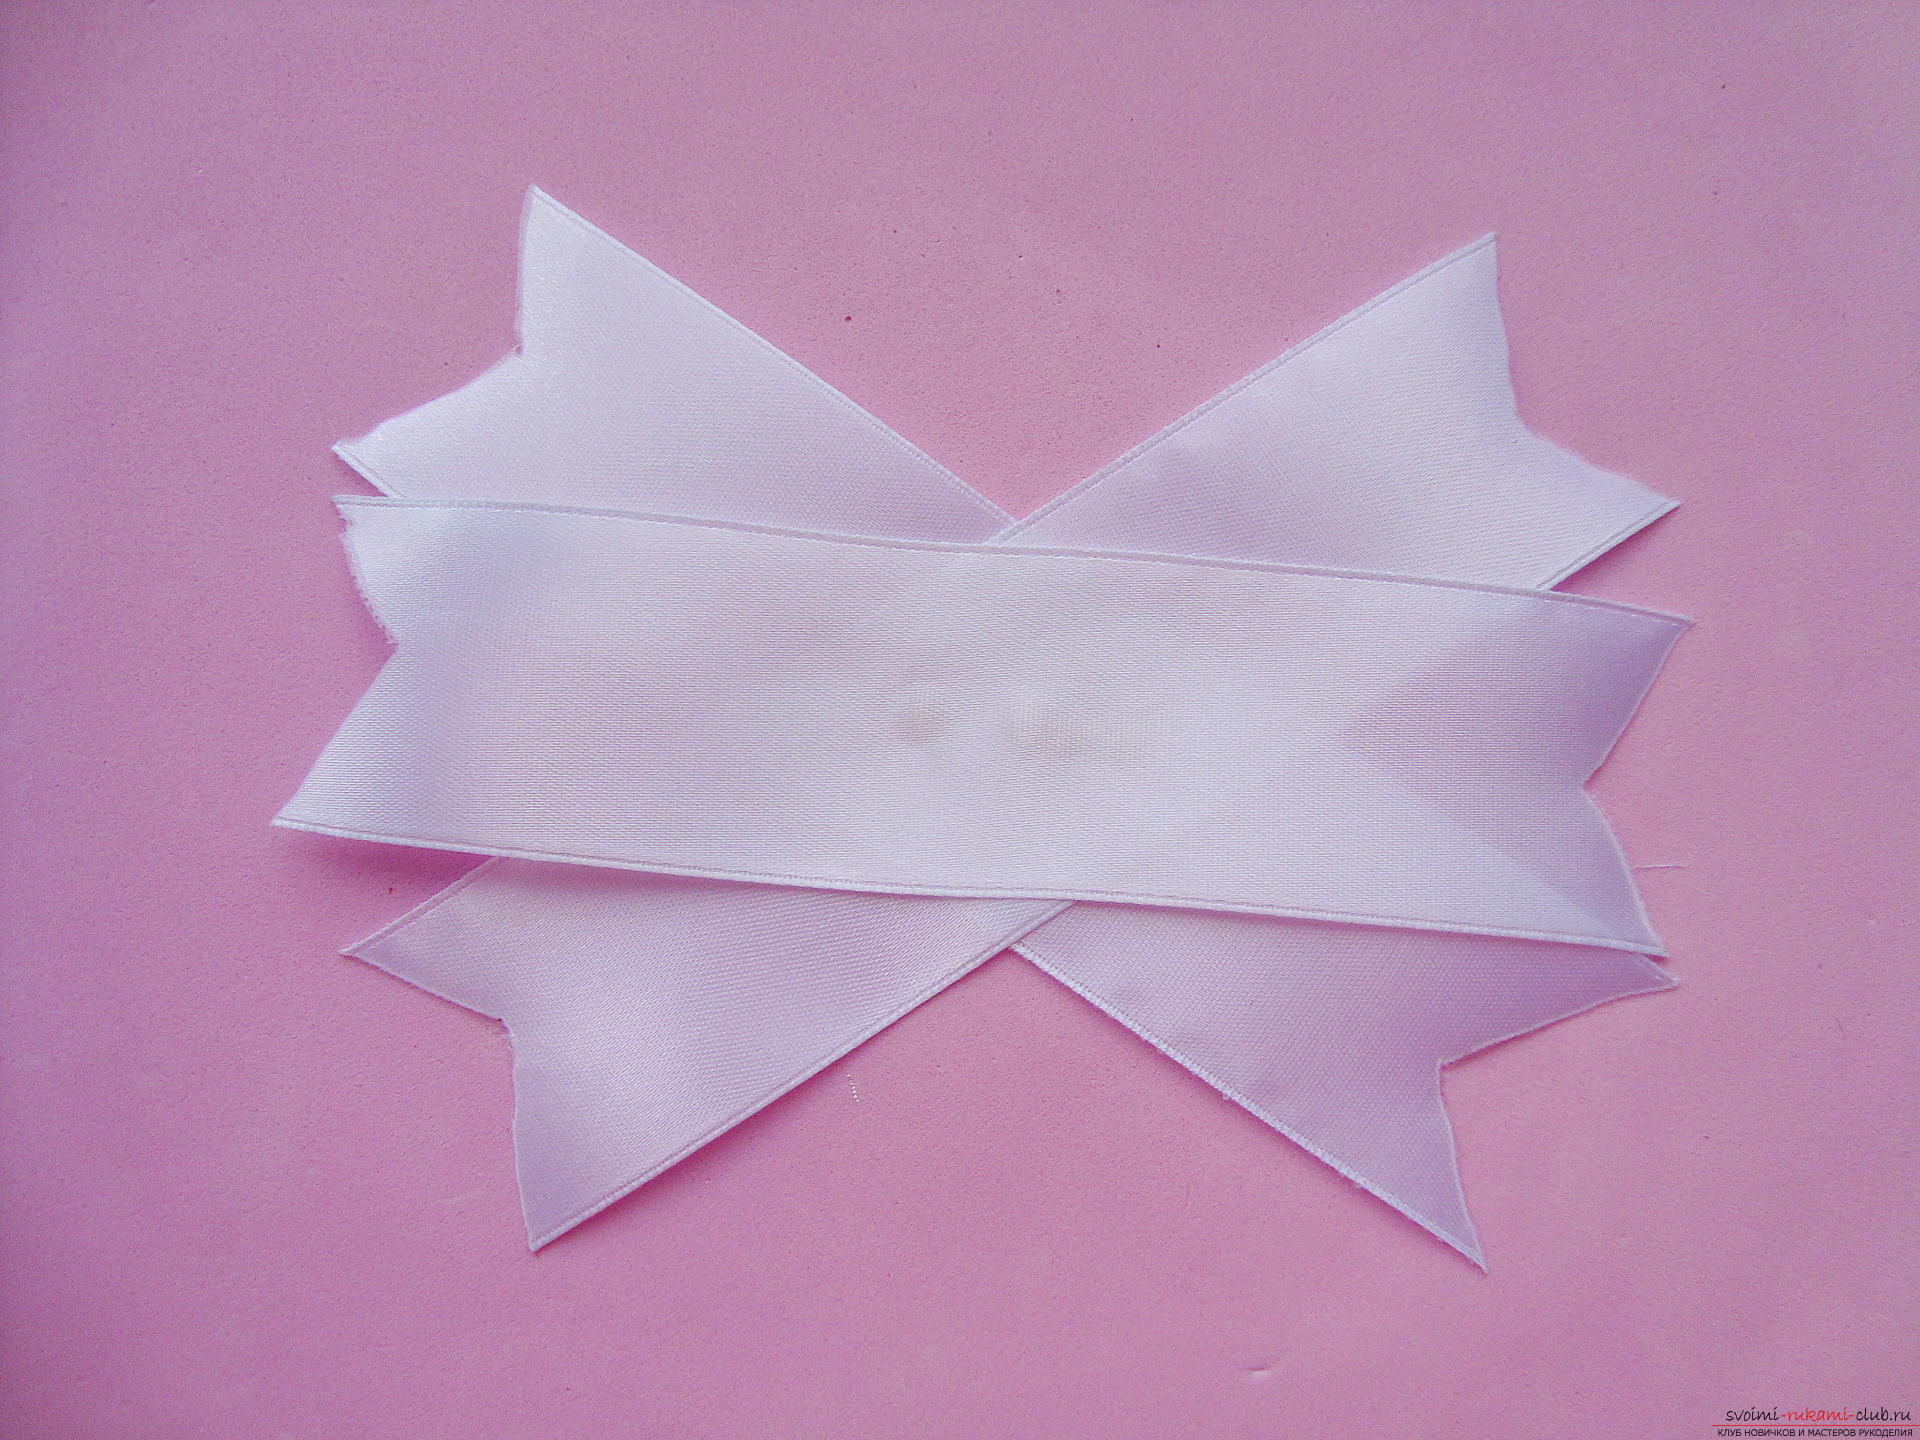 From the white dense ribbon with the cut out pattern, cut two cuts of 28 cm.
  Each element needs to be turned into a huge ring, but only the edge of not more than 1 mm is glued together. Position the ribbon so that the front side is out.
 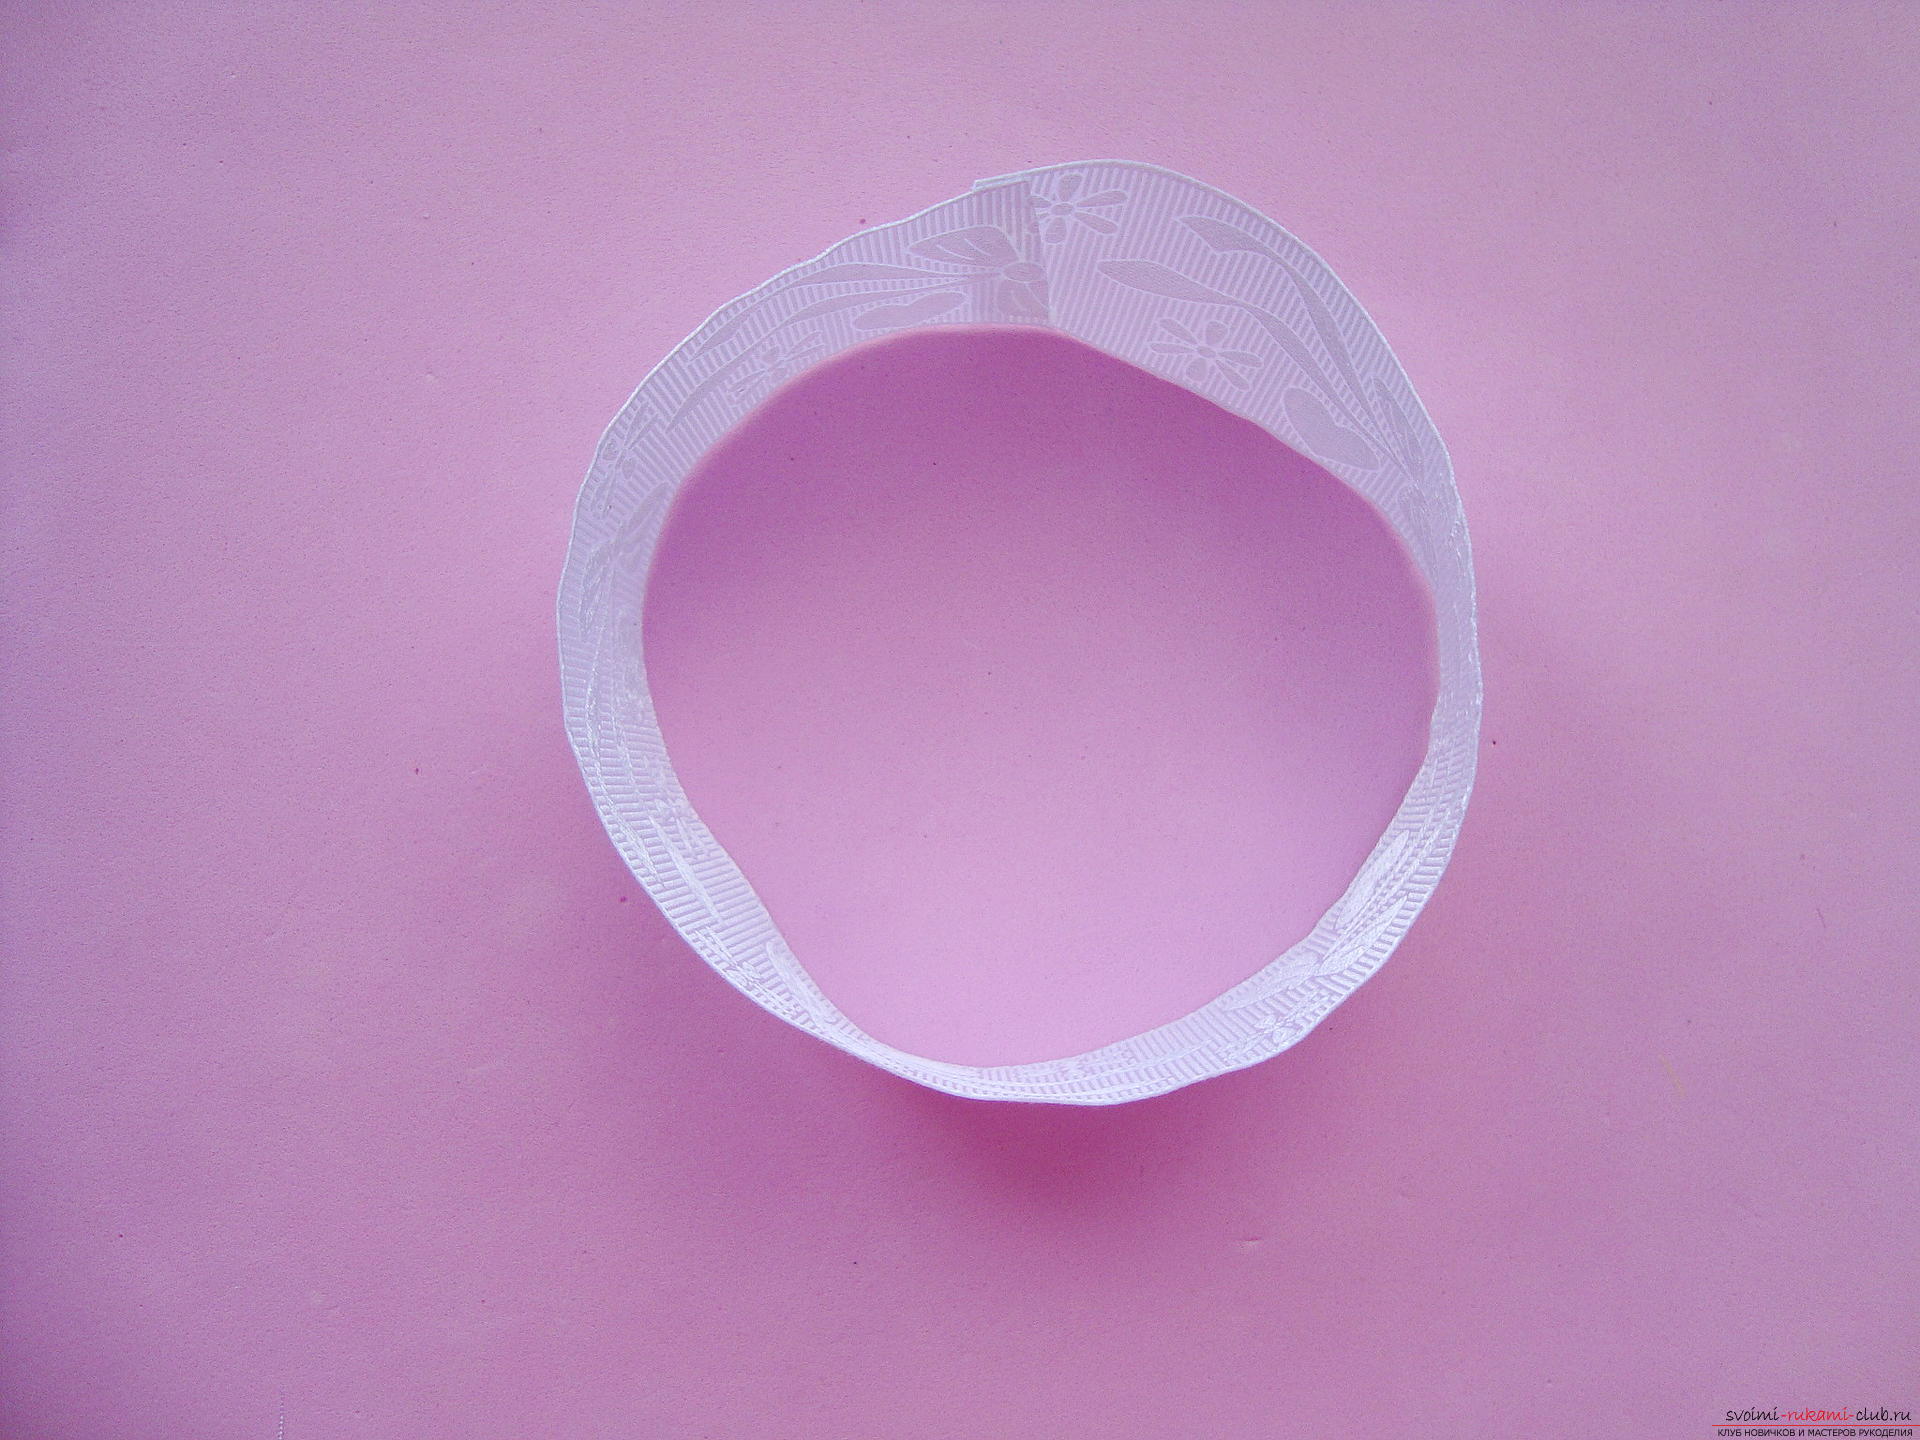 The rounded part turns into a form of eightwhen gluing the inner part of two symmetrically opposite sides. Of course, it's better to apply the glue to the seam area and connect it to another center. If you glue the other sides, bypassing the seam, the figure-eight will turn out to be uneven, since a transition will be noticeable at the place of the first tape binding.
 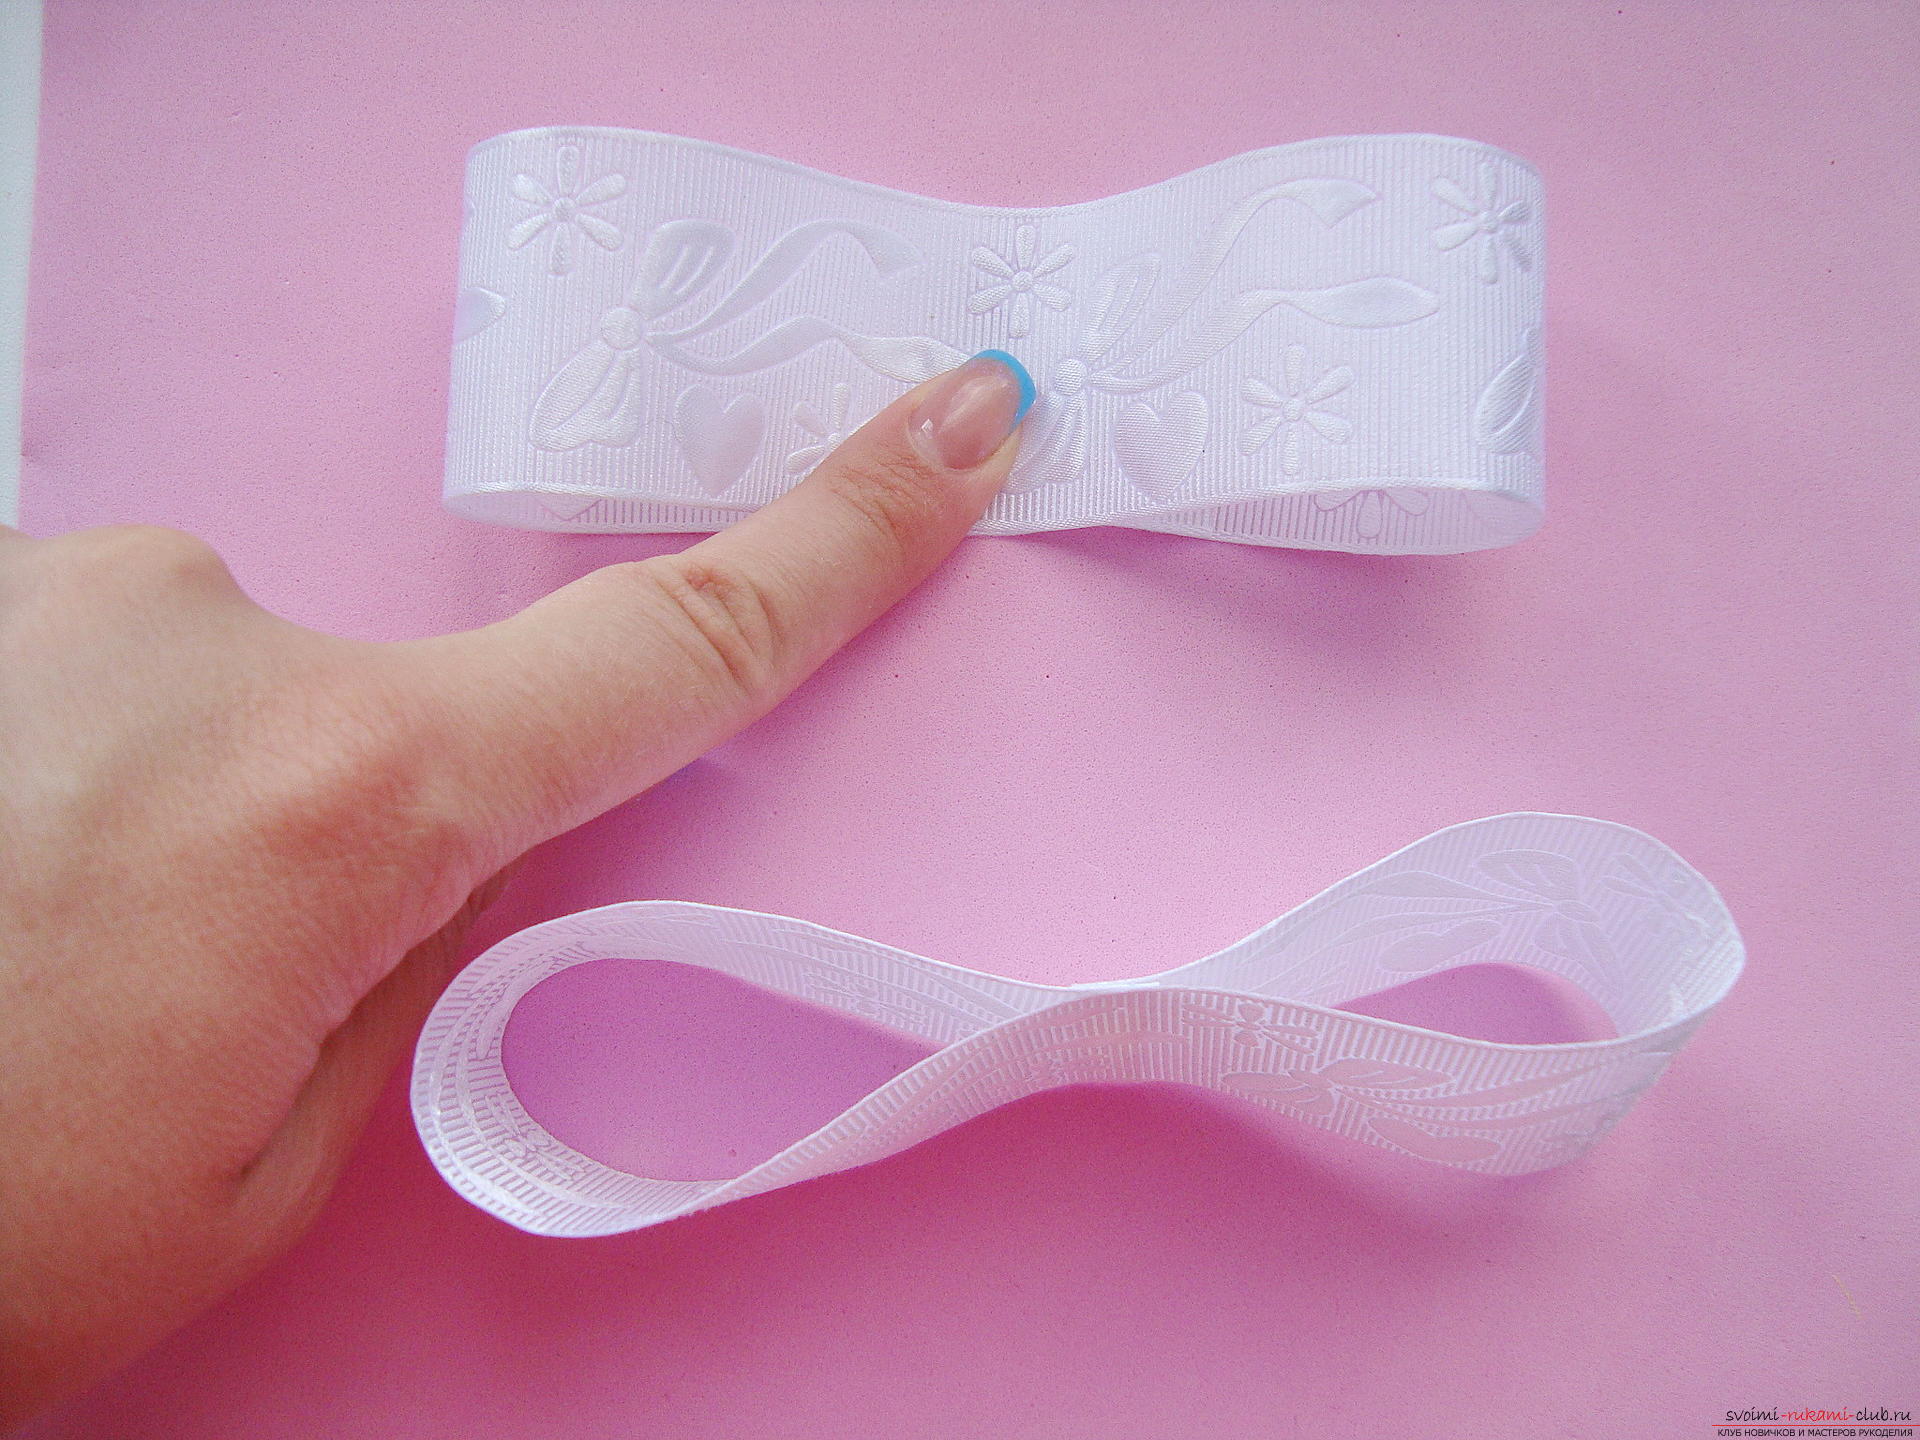 Two identical elements in the form of simple bows are glued together in a four-pointed bow. It is not necessary to connect the parts at right angles, forming a cross, create a bow.
  The size of the bow should be slightly less than the parametersthe basis of a flat ribbon. This principle is observed when assembling the whole product, because only in this case will be visible beautiful ribbons of all layers of the bow. If you create the top layer more than the bottom one, you will get a voluminous high bow of incomprehensible shape, and not a decoration by September 1. The new part is glued to the center of the base so that the edges of the base coincide with the direction of the bends.
 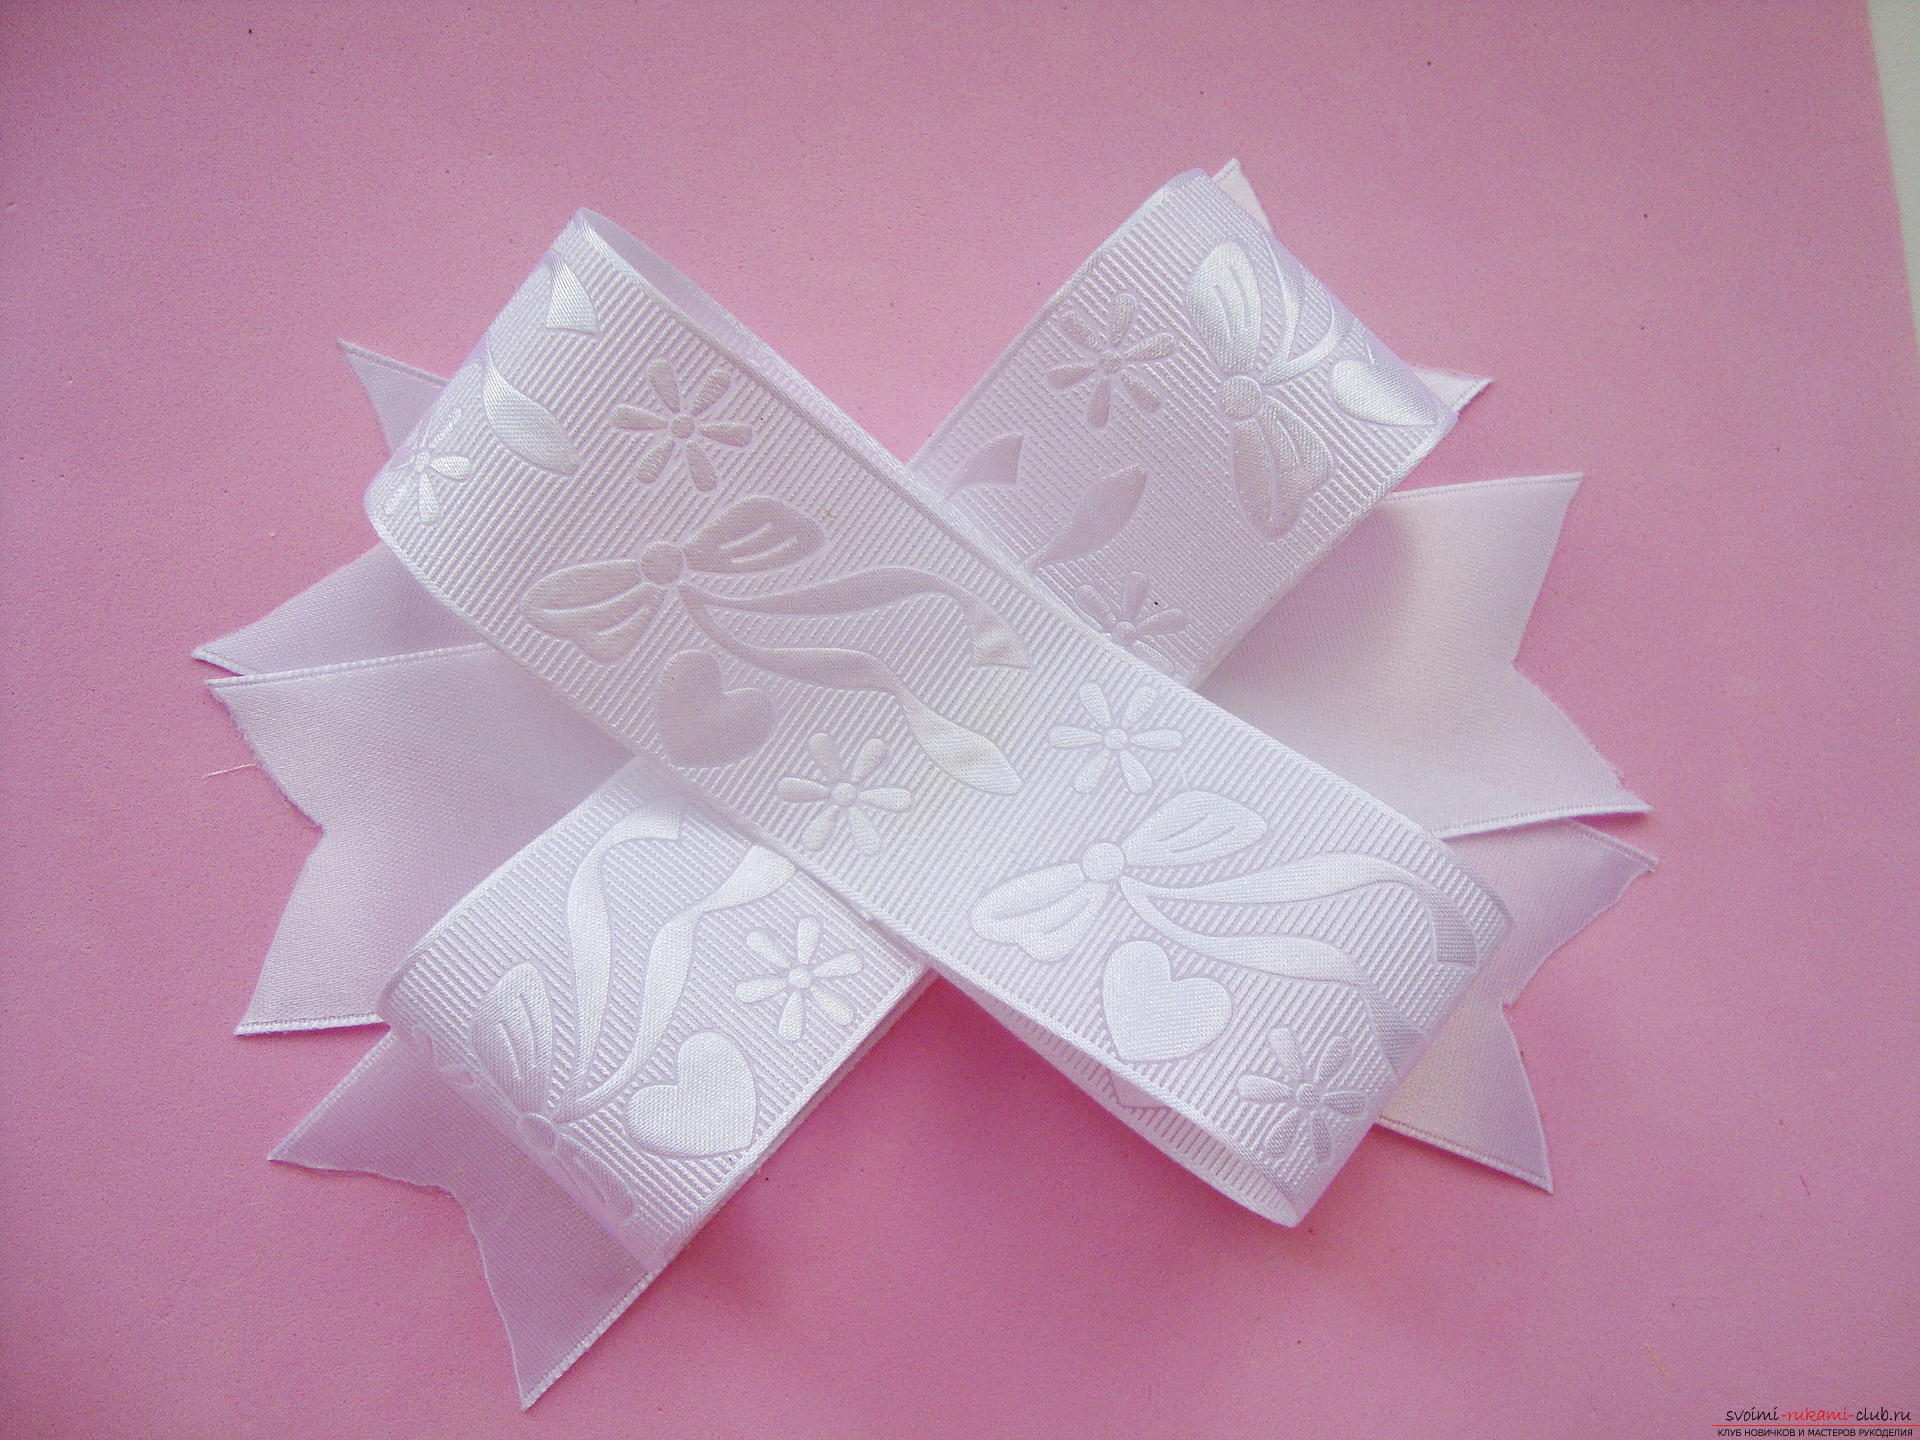 Next formed a bow of mixed texture on the tape. She is very gentle and beautiful, so she will lie down in the center of the product. Cut three pieces of 22 cm long.
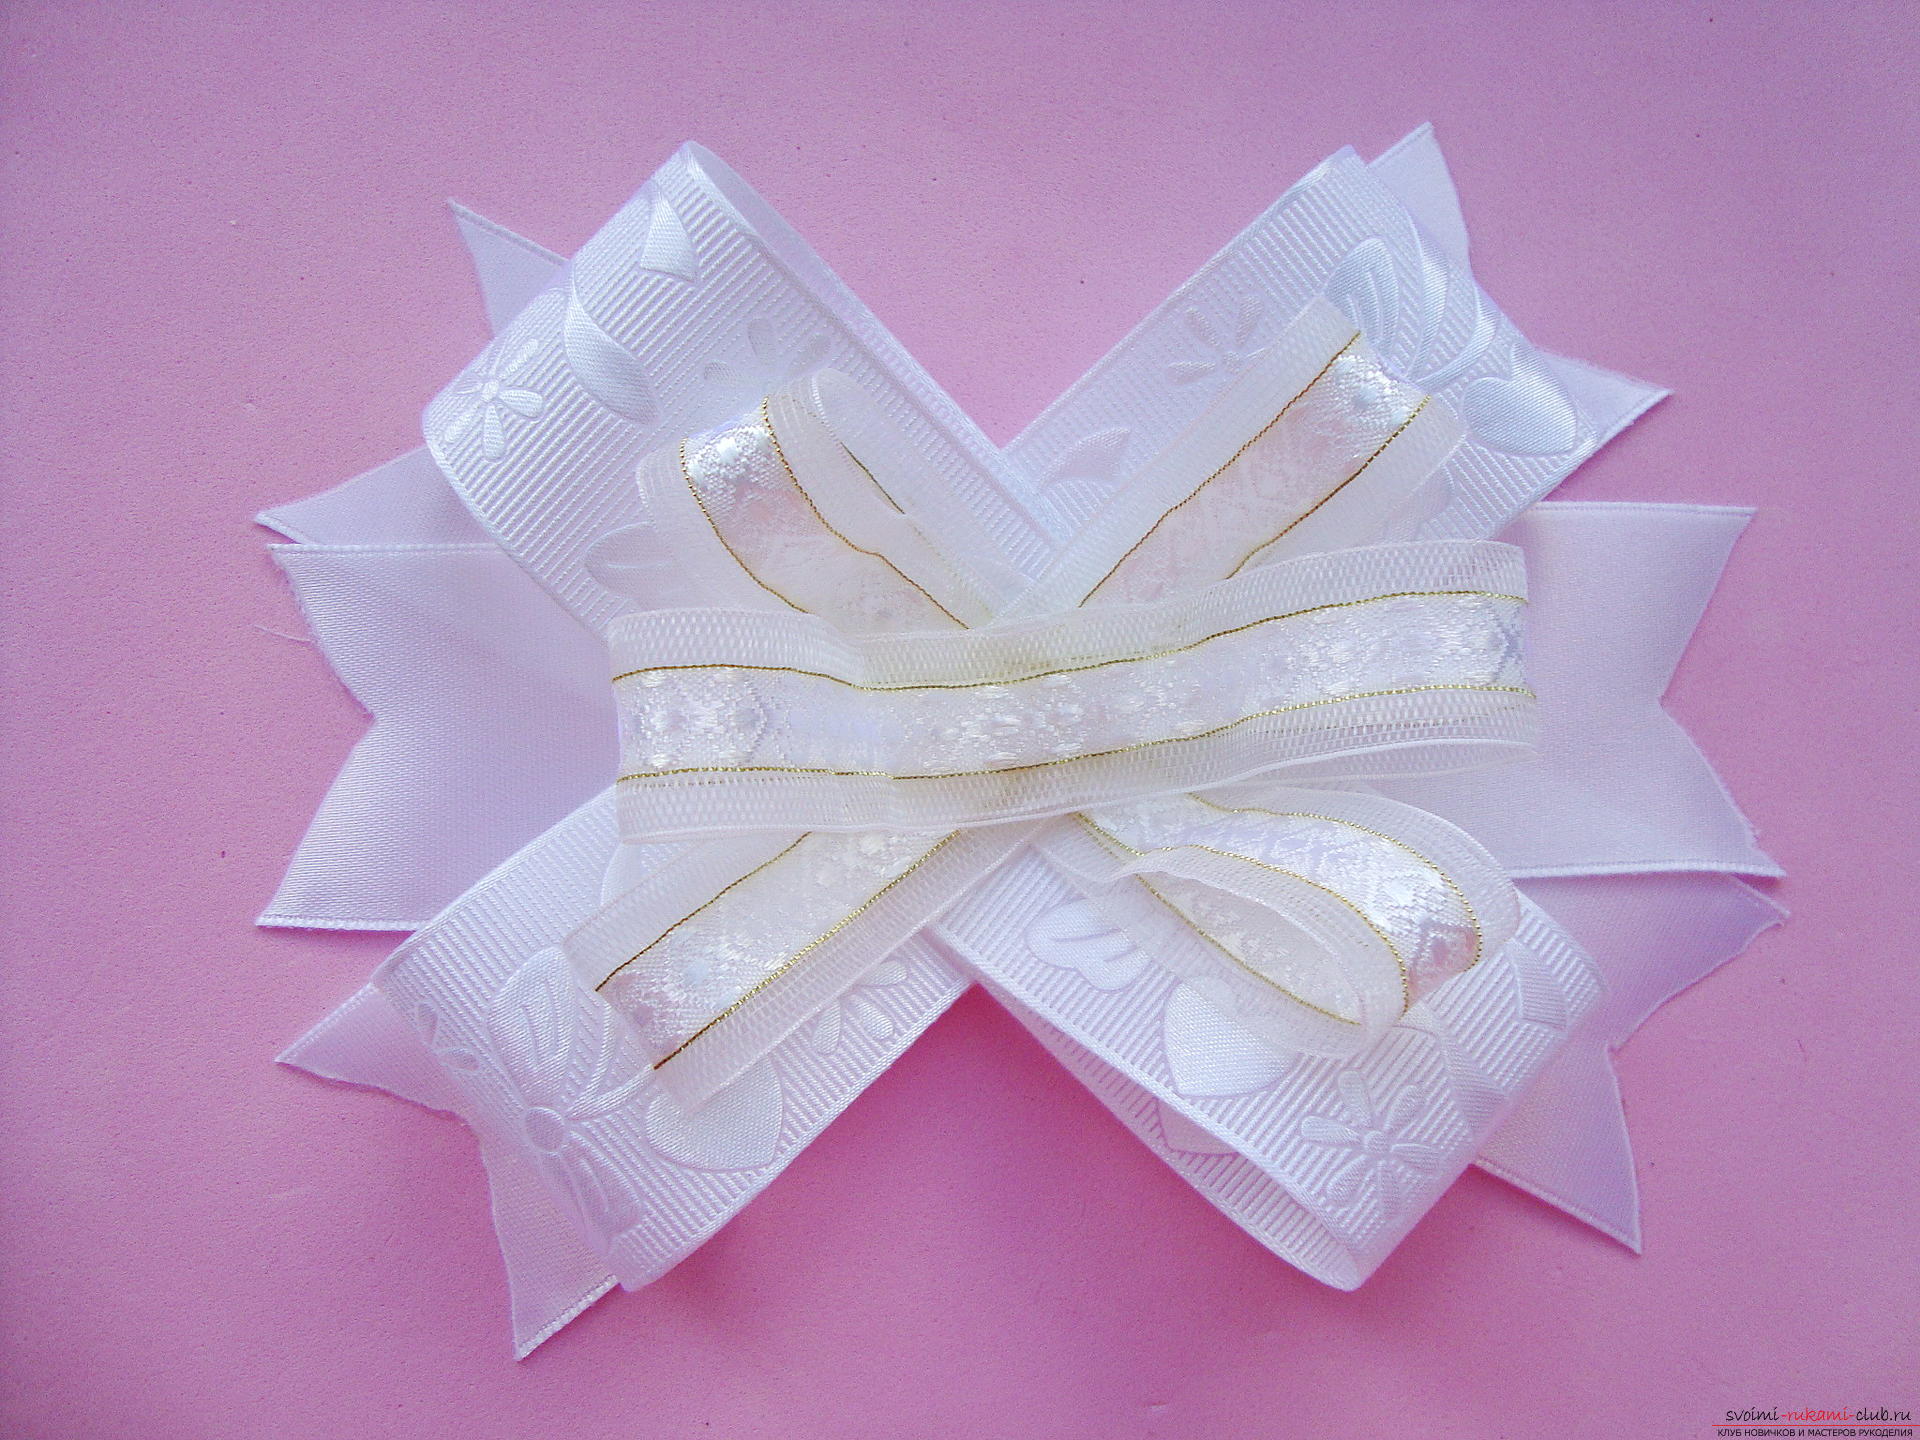
 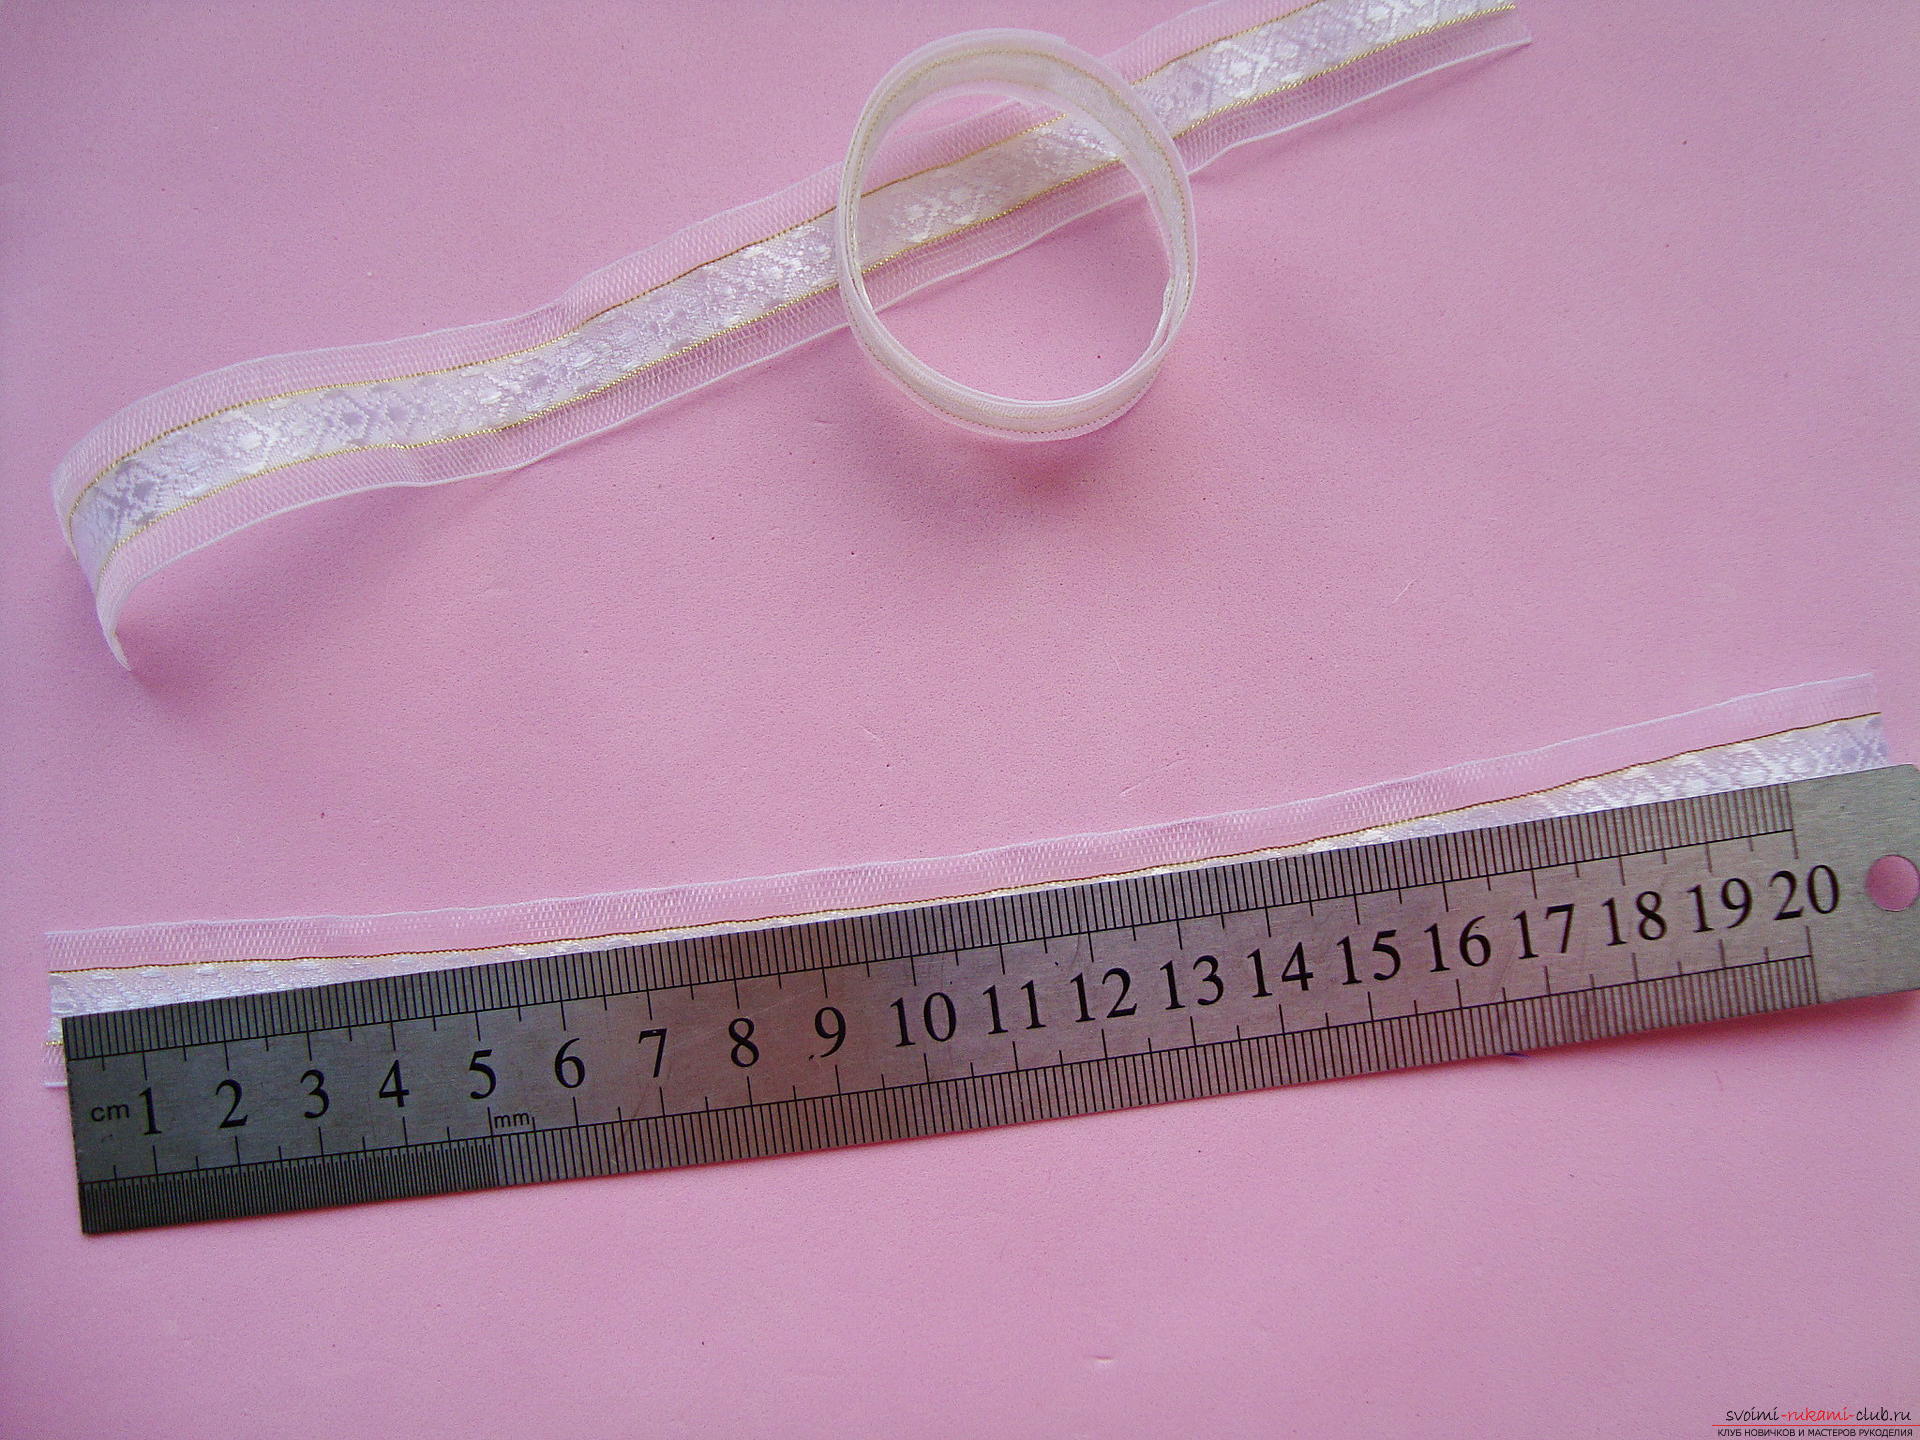 Each element is turned into a small bow withusing the same folds as described above for other parts. Three equal in size bow are glued together in a single piece, the elements have a direction like the bottom of the base, which is also of three parts, that is, two are crossed into a bow, and the third part is laid across.
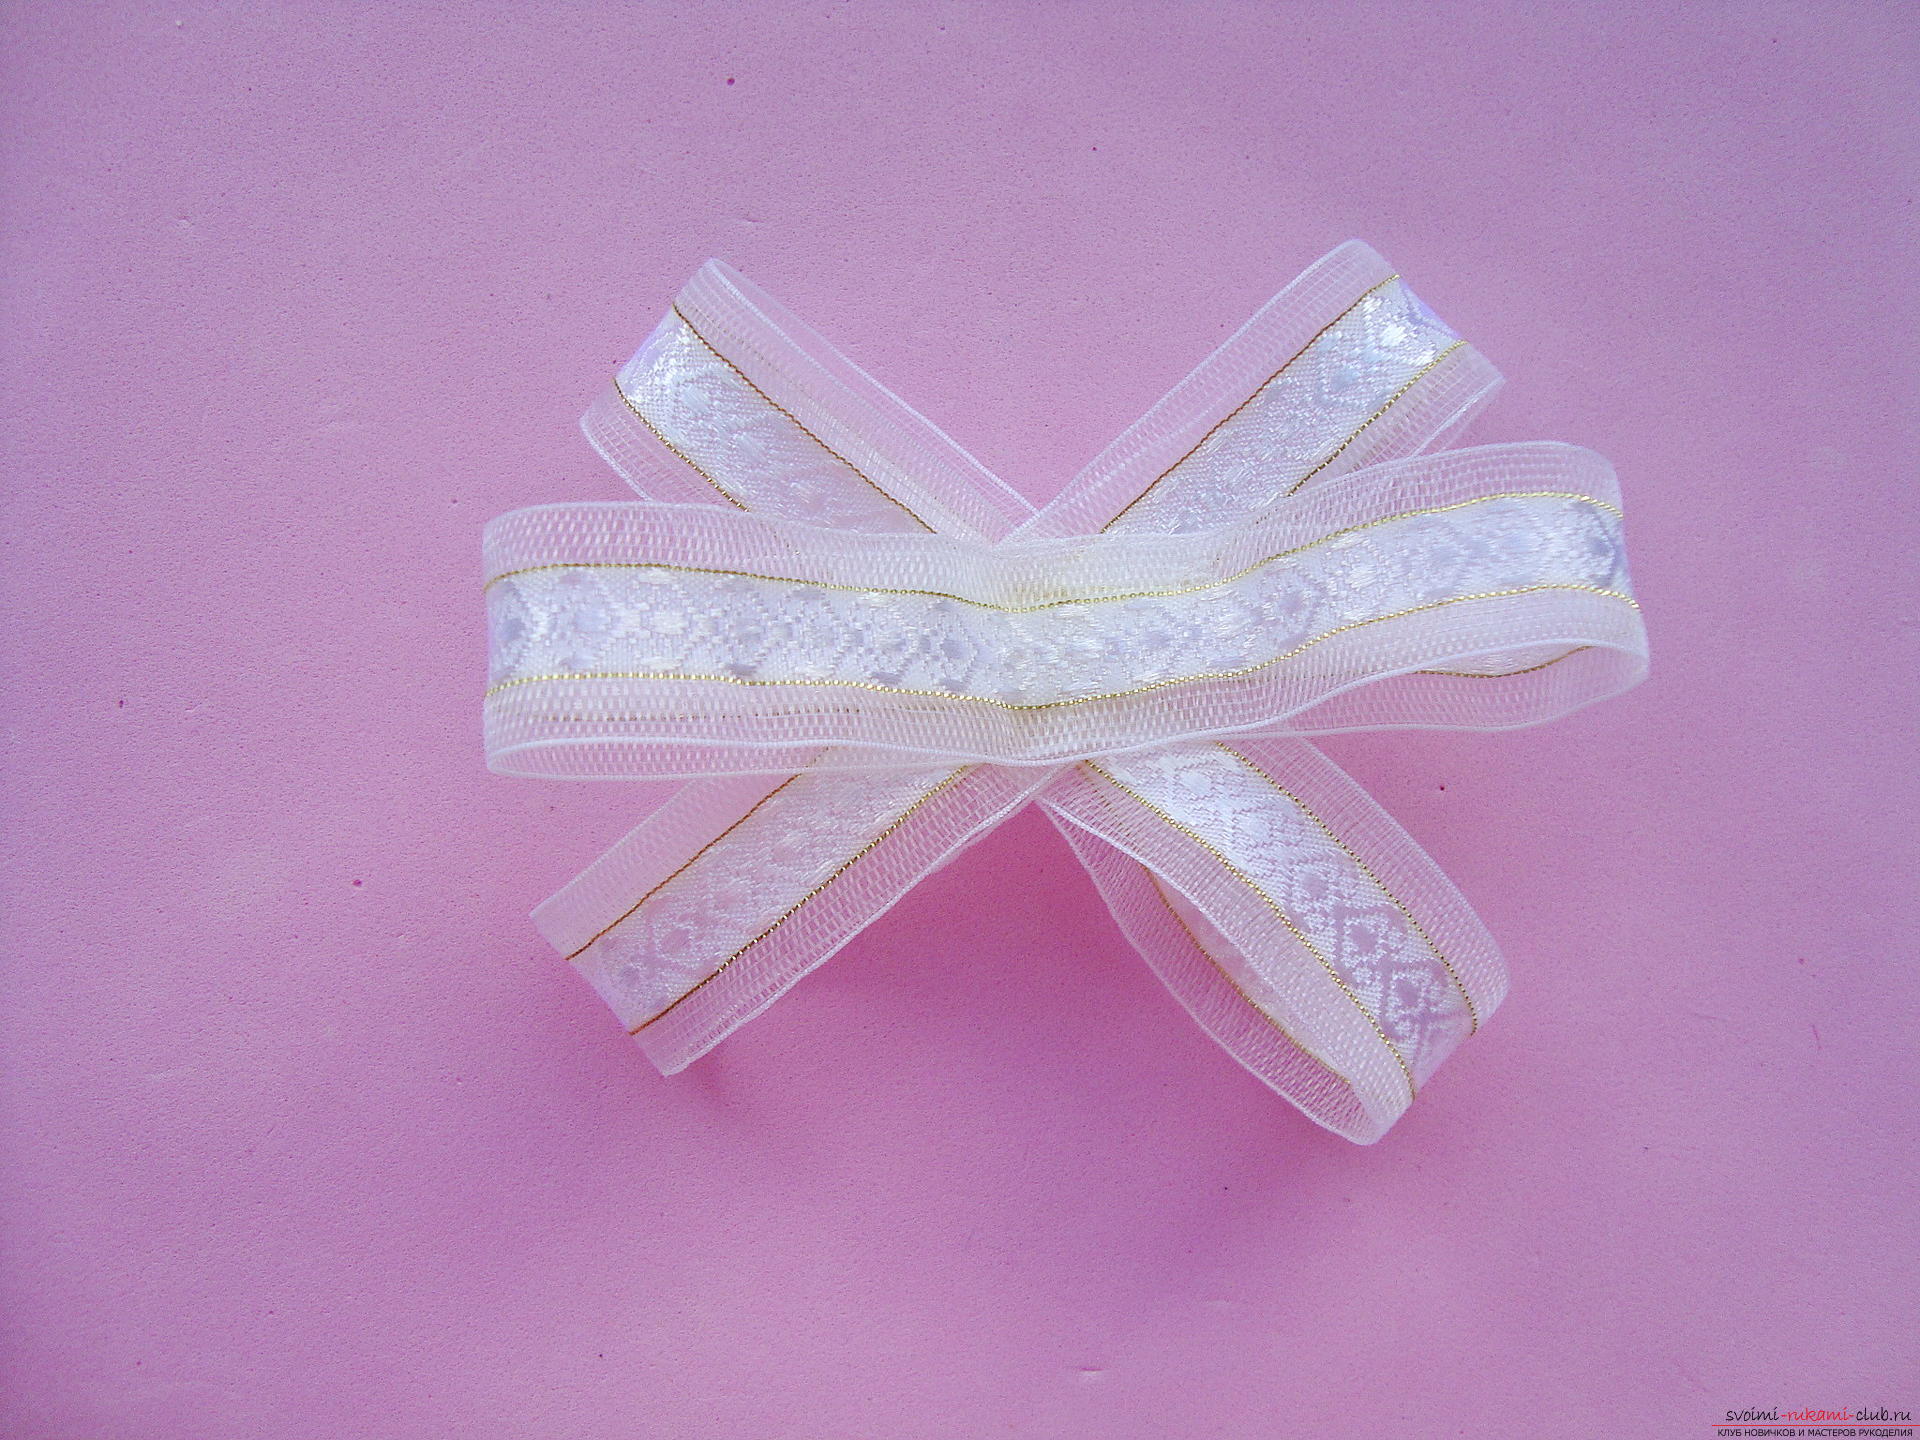
 In the center you still need to form the most delicate flower from a thin organza. For him, cut a transparent tape of 8 cm.
 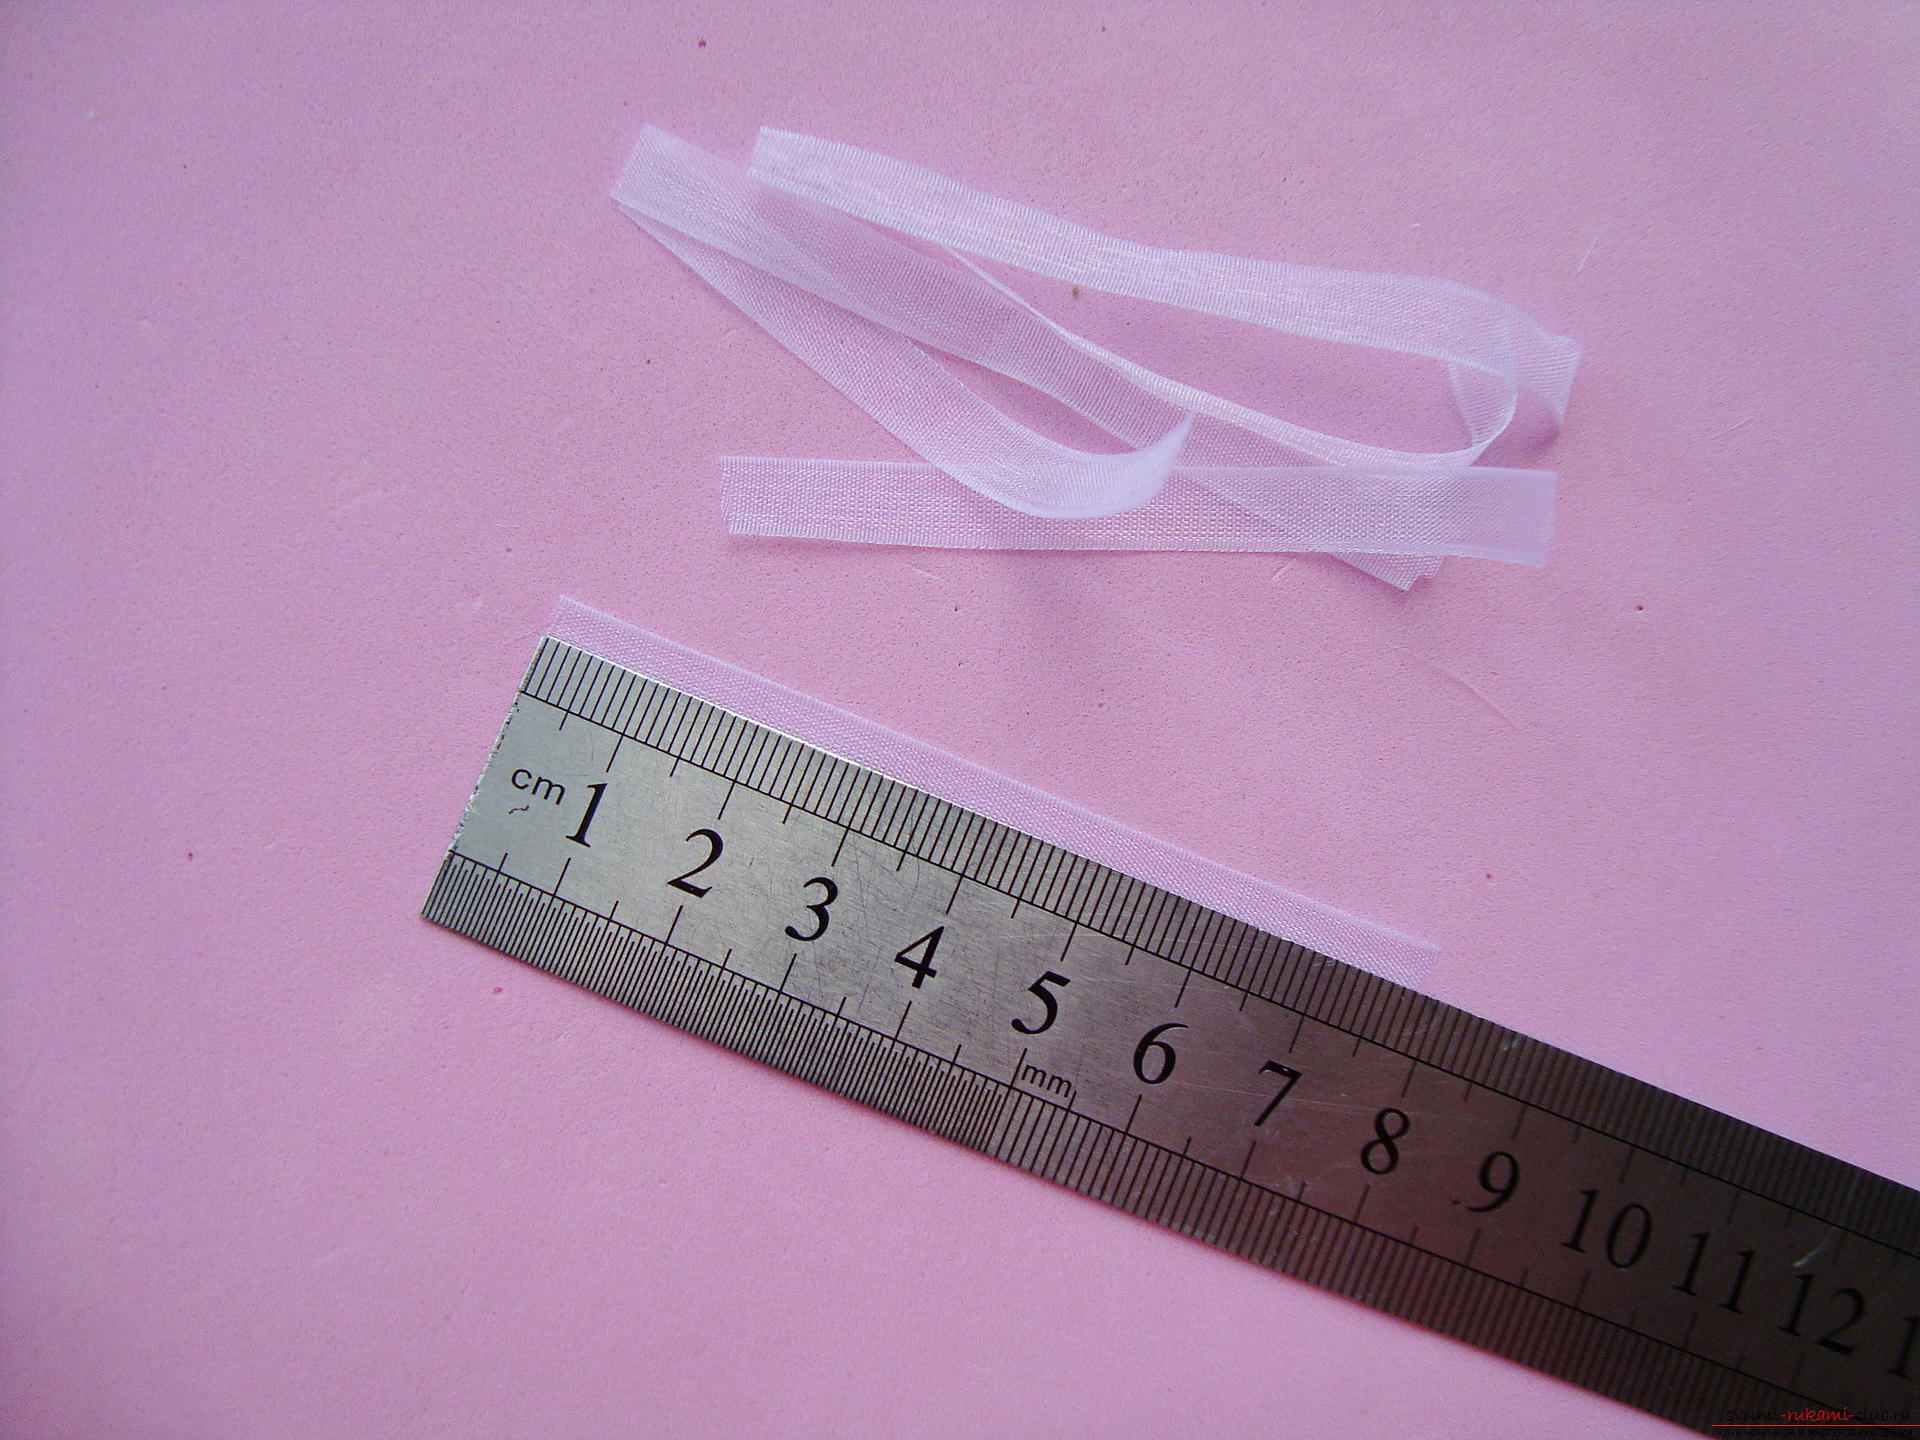 Each cut is glued together as a rounding. To do this, simply one edge is fixed with glue on the other at an acute angle, forming a bend.
  All the created elements are glued in the middlethe school bow, placing them symmetrically in a circle. Because the tape is transparent. Glue on the bottom of the part is better applied with an auxiliary tool, for example, a banal toothpick. This will keep the product neat.
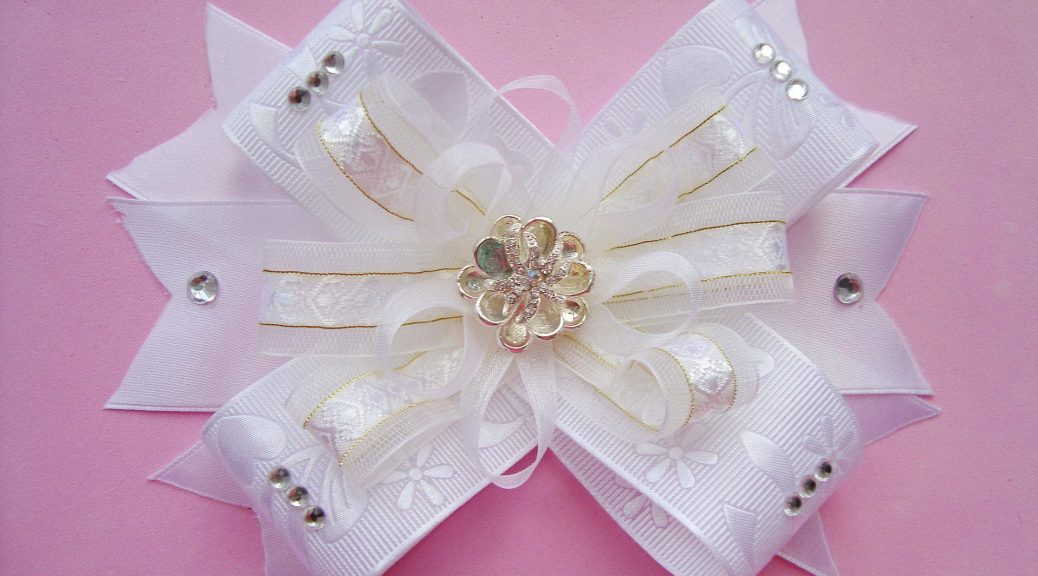
  The central part is decorated with a large flower,which was removed from the festive hairpin. You can search for another item in the box with old jewelry, for sure there is a large bead or sealed snap. Bends of a bow are pasted with rhinestones. If the iridescent elements are small, group them on the edges of the bow for 2-3 pieces. The ends of the lower base are ennobled in the center with large rhinestones.
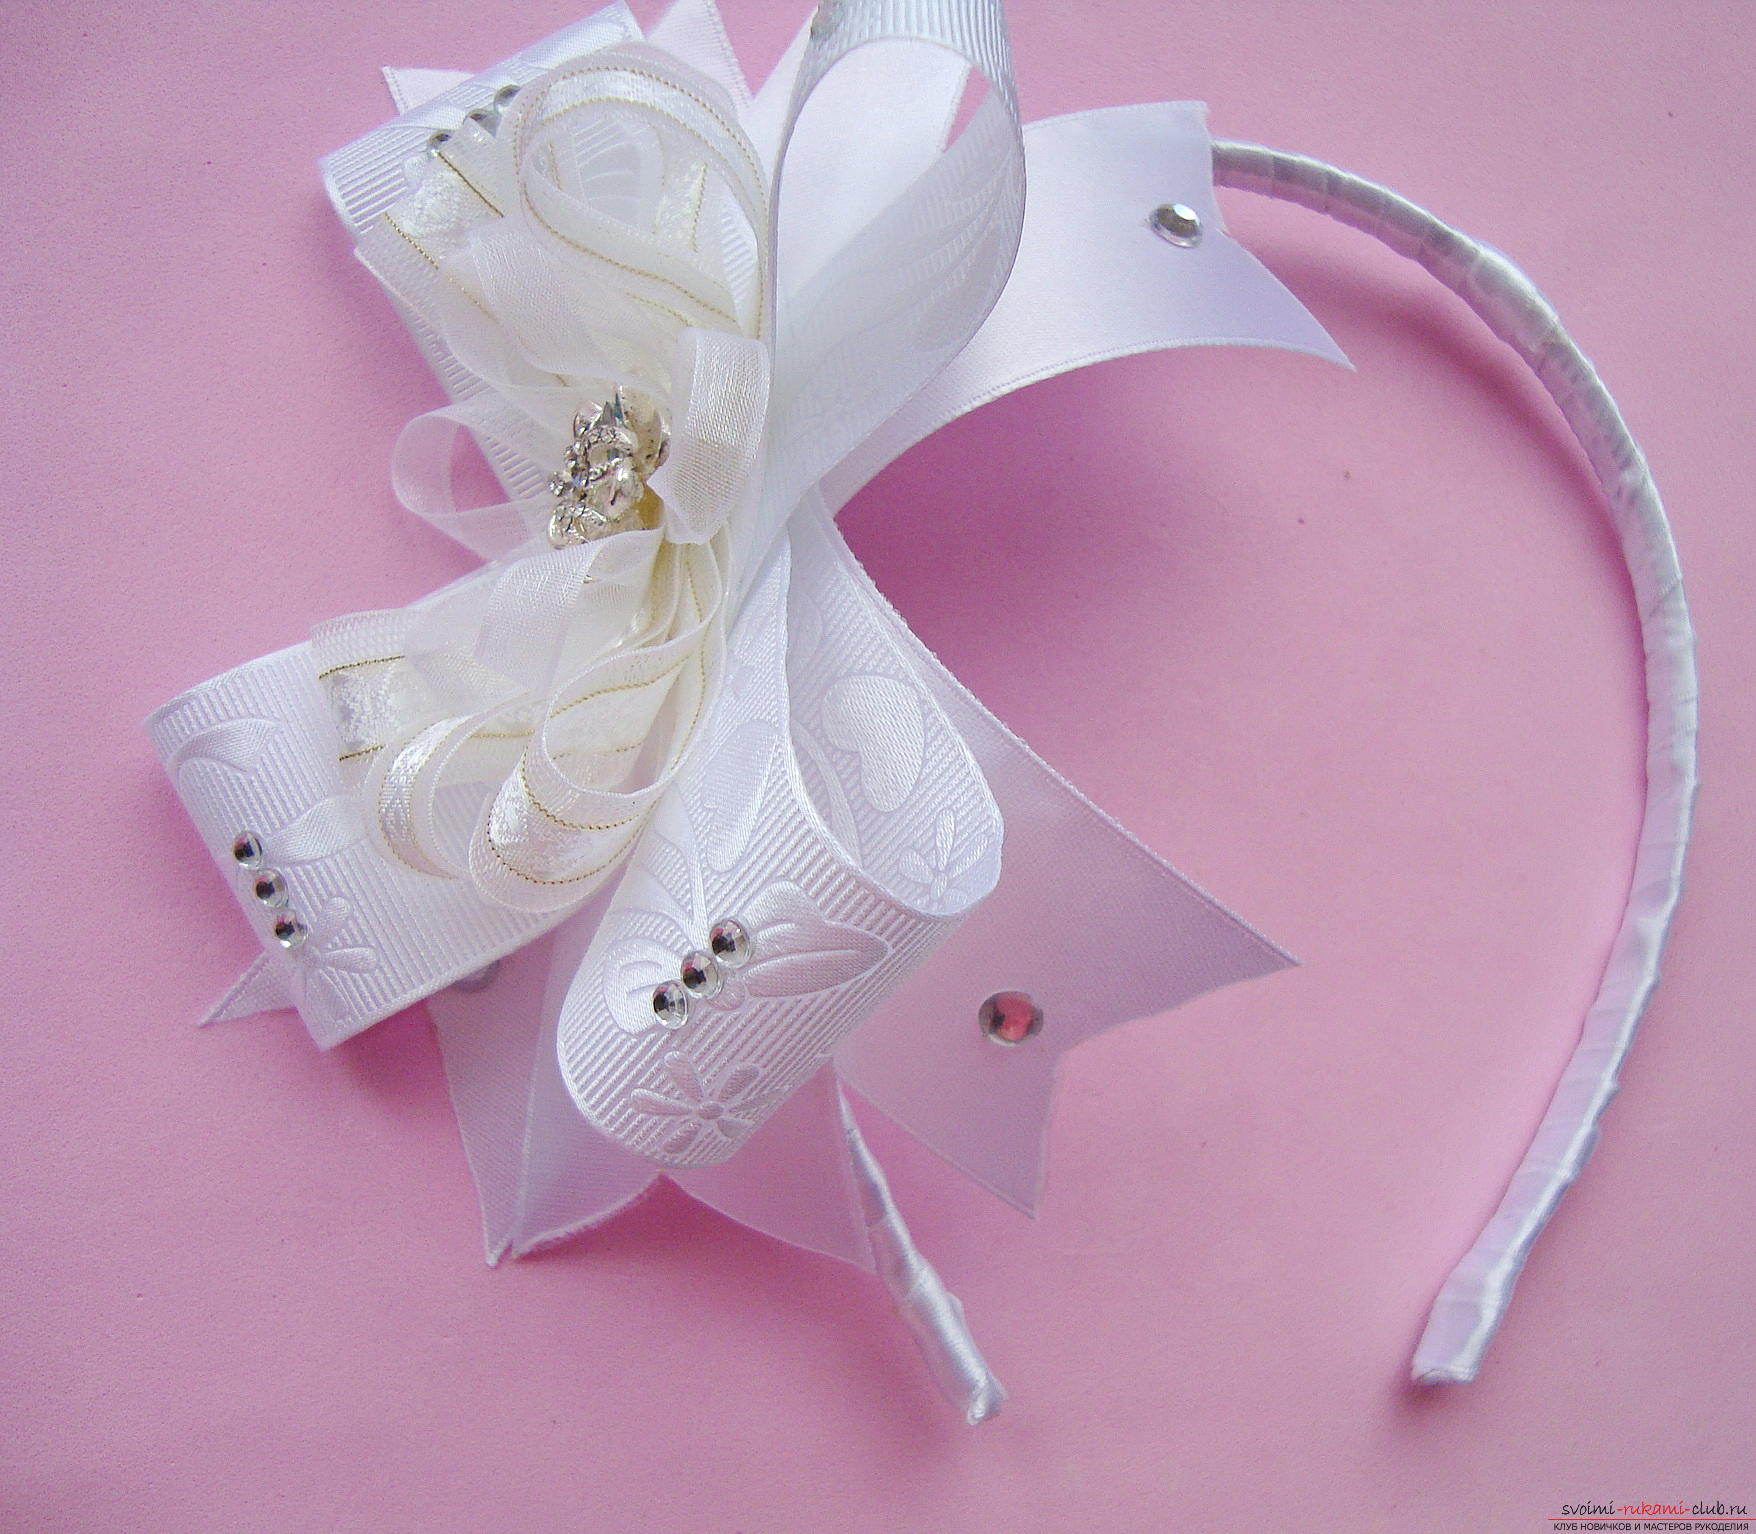
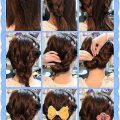
 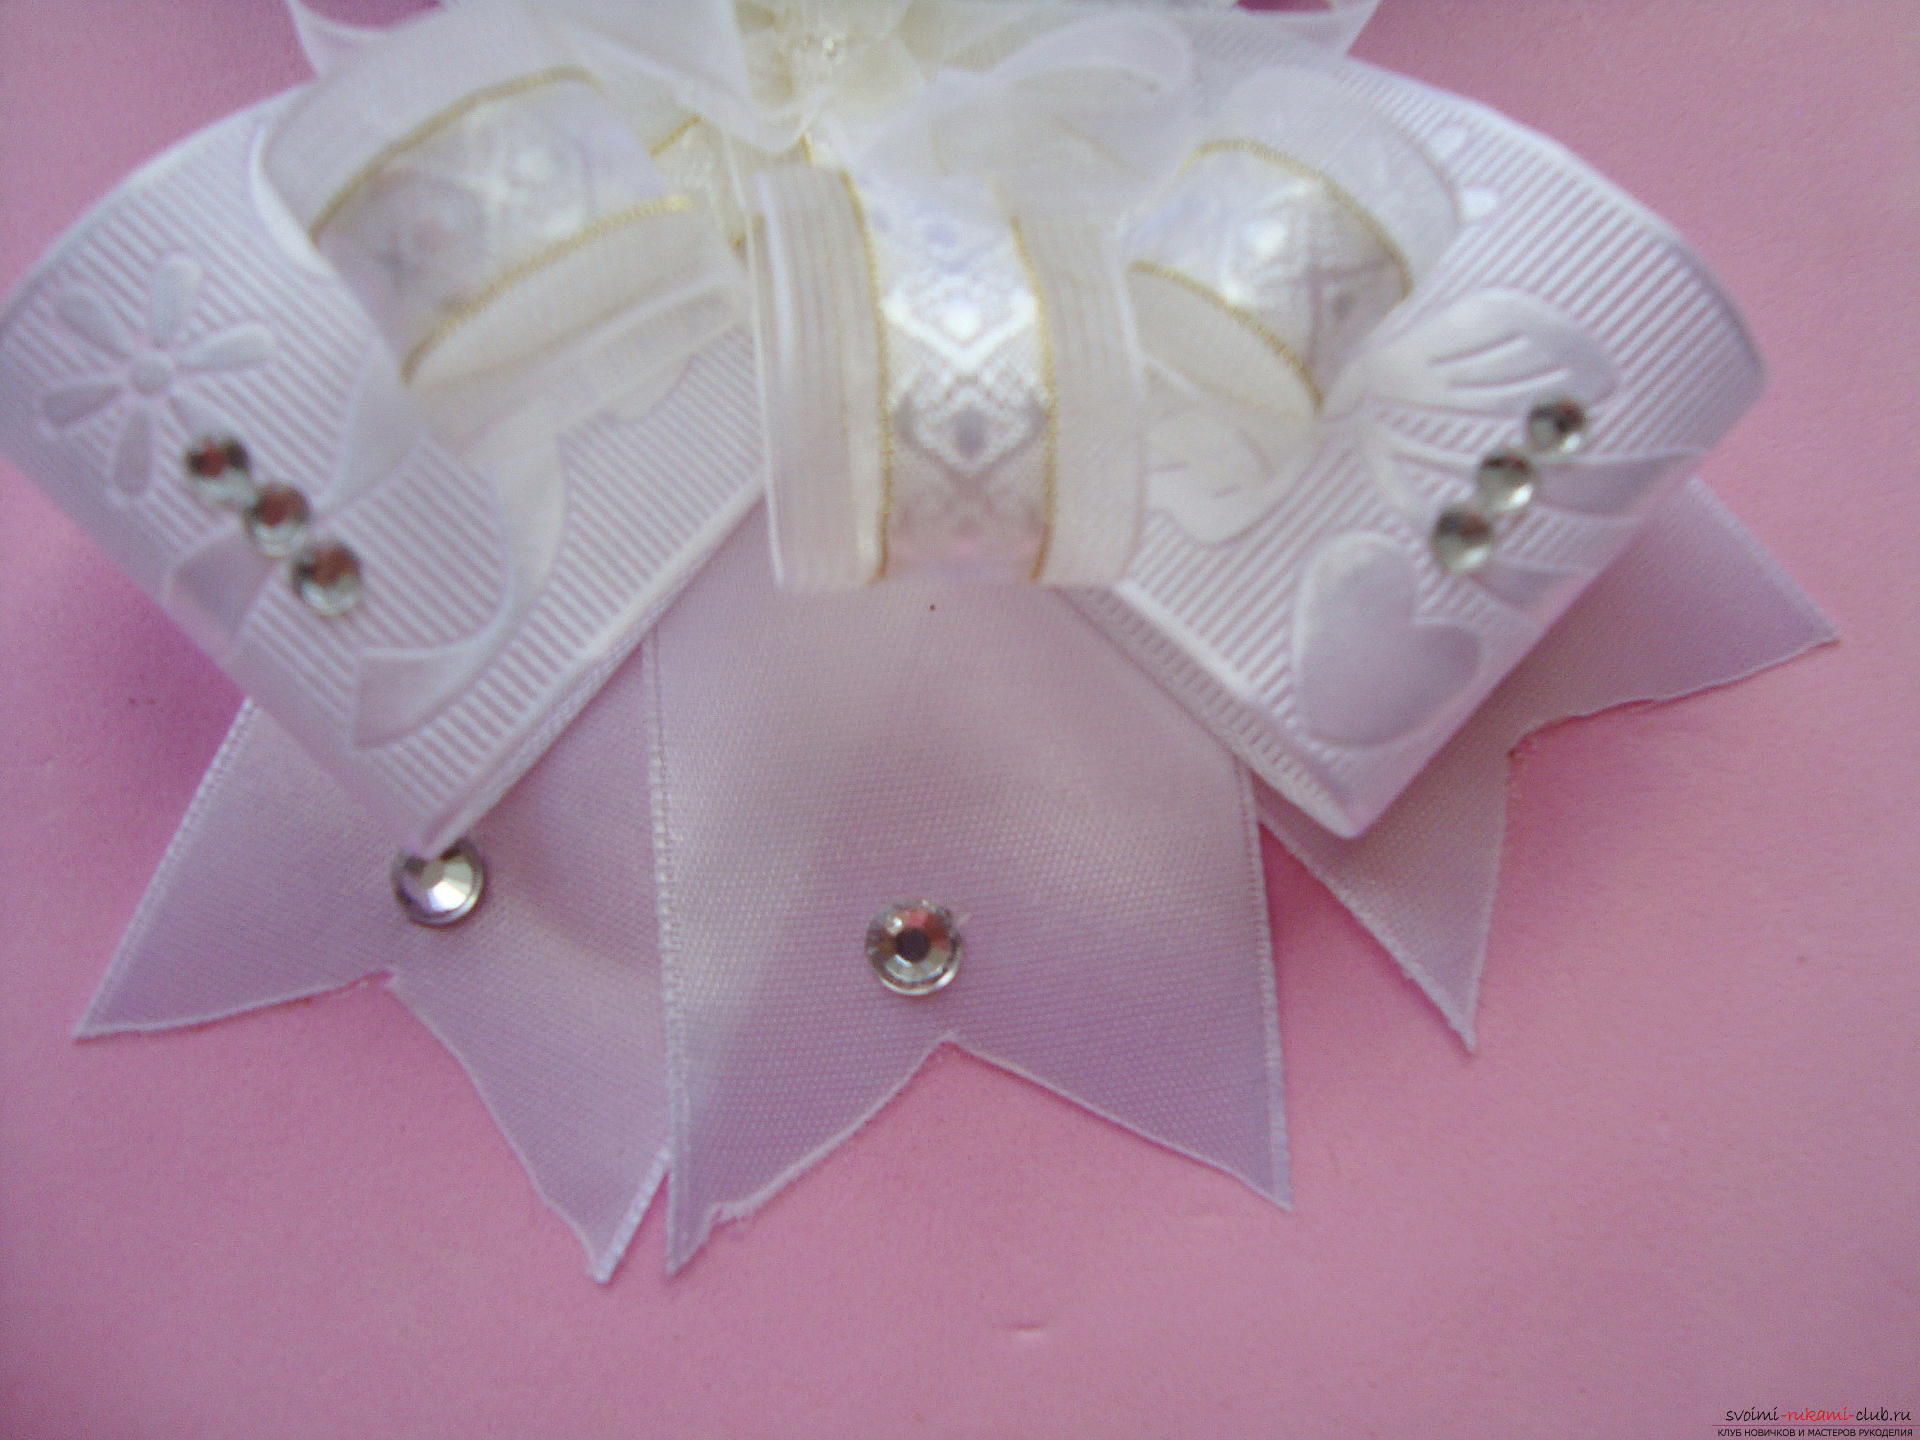 To fix the bow to the rim, firstyou need to measure without glue. Before the mirror, attach the ribbon a little higher, then lower and orientate where it looks best, note this place with a pencil or marker.
 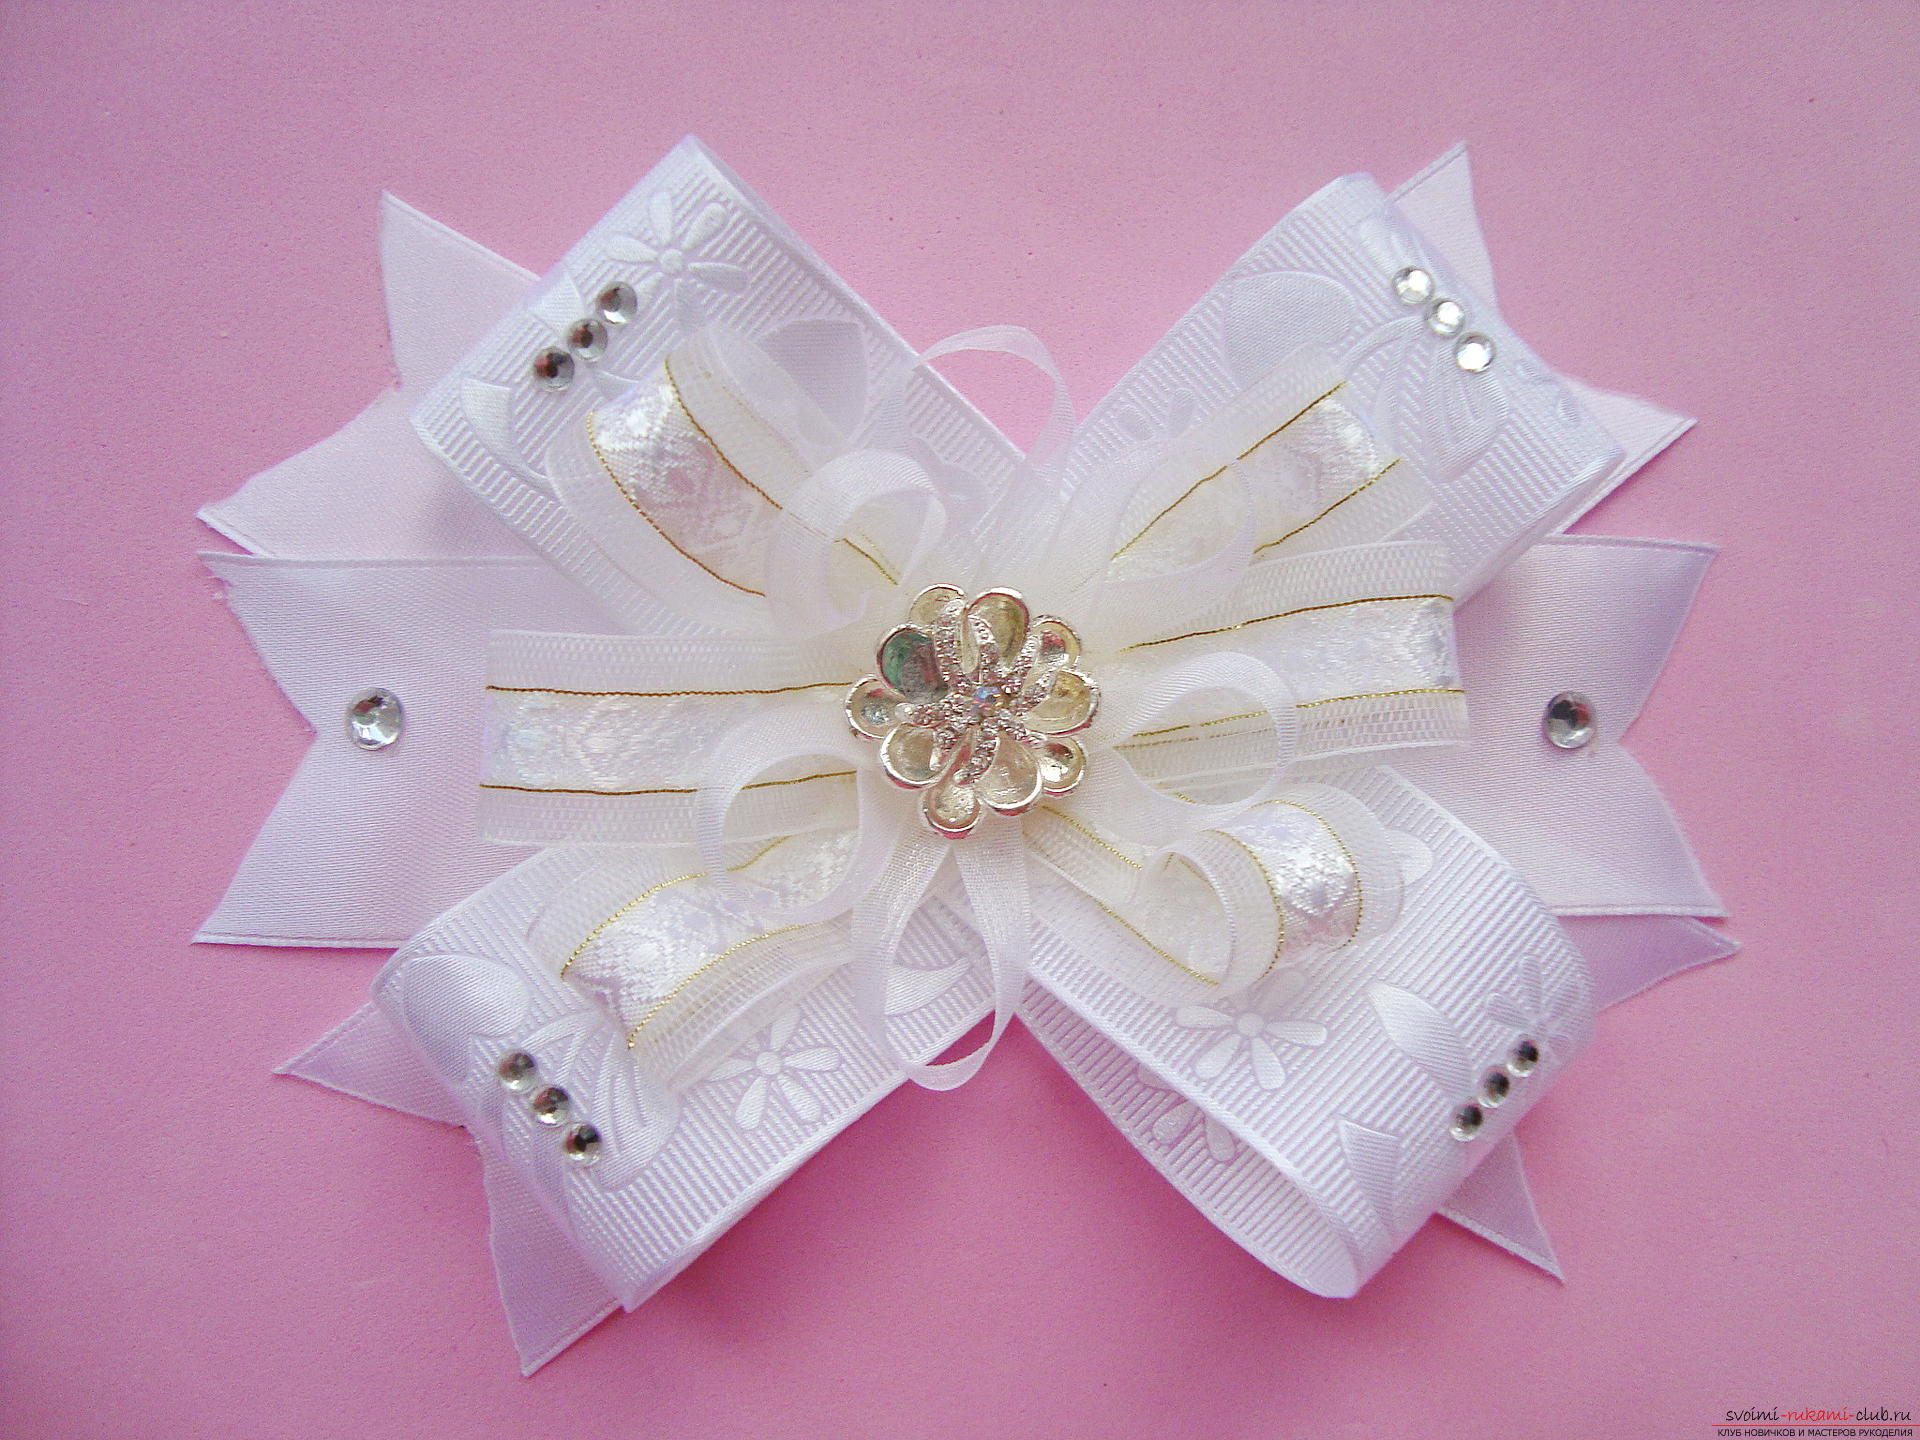 The glue is squeezed out in the center of the back portionproducts on a horizontal line and placed on a flat surface. The rim you place to the bow and fix the center of the product to the marked point on the rim. Then, the edges of the bow are raised and smoothed one by one on the rim, pressing in the places where the glue is applied. After 10 minutes all the glue will freeze well and the bezel is ready to decorate the schoolgirl's hair. A student with such an accessory will look fashionable, but not strikingly. The gentle white color of the bow looks great on brown-haired, blondes, brunettes and light-brown hair, so it is suitable for everyone.
Comments
Related posts:
 We learn to knit baby booties-slippers in the form of bunnies for children with step-by-step instruction, with photos and diagrams for free
 Interesting author's master class on felting hedgehog with photo and step by step instruction
 Crochet dresses: master classes with step-by-step instruction, photos and charts
 Making a bouquet of paper poppies with their own hands with step-by-step instruction and photo
 The most interesting hairstyles are their own hands on medium hair with step-by-step instructions and photos.