Bouquets of satin ribbons with their own hands and other products
Content
- Making a ball-artichoke
- Video: New Year's ball-artichoke with own hands
- Wedding bouquet of ribbons
- Video: Learn how to make a wedding bouquet of ribbons
- Topiary
- Video: Master-class on creating topiary from tapes
In our today's lesson, we'll look atA few interesting master classes (MK), on the basis of which you will be able to fabricate their own elegant items from tapes, using the technique of Kanzash. The result of this lesson will be the original artichoke ball, decorative topiary tree and a chic wedding bouquet of ribbons made up of roses.


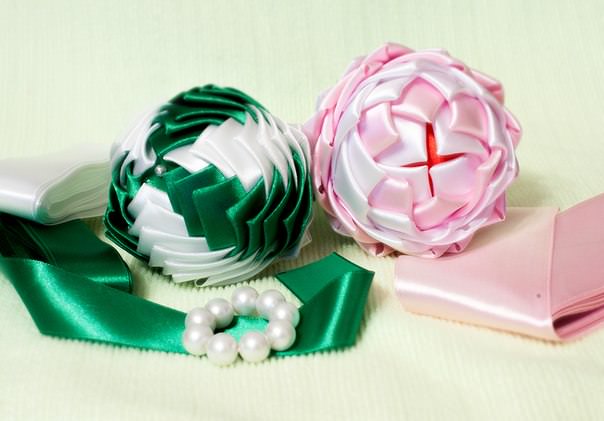
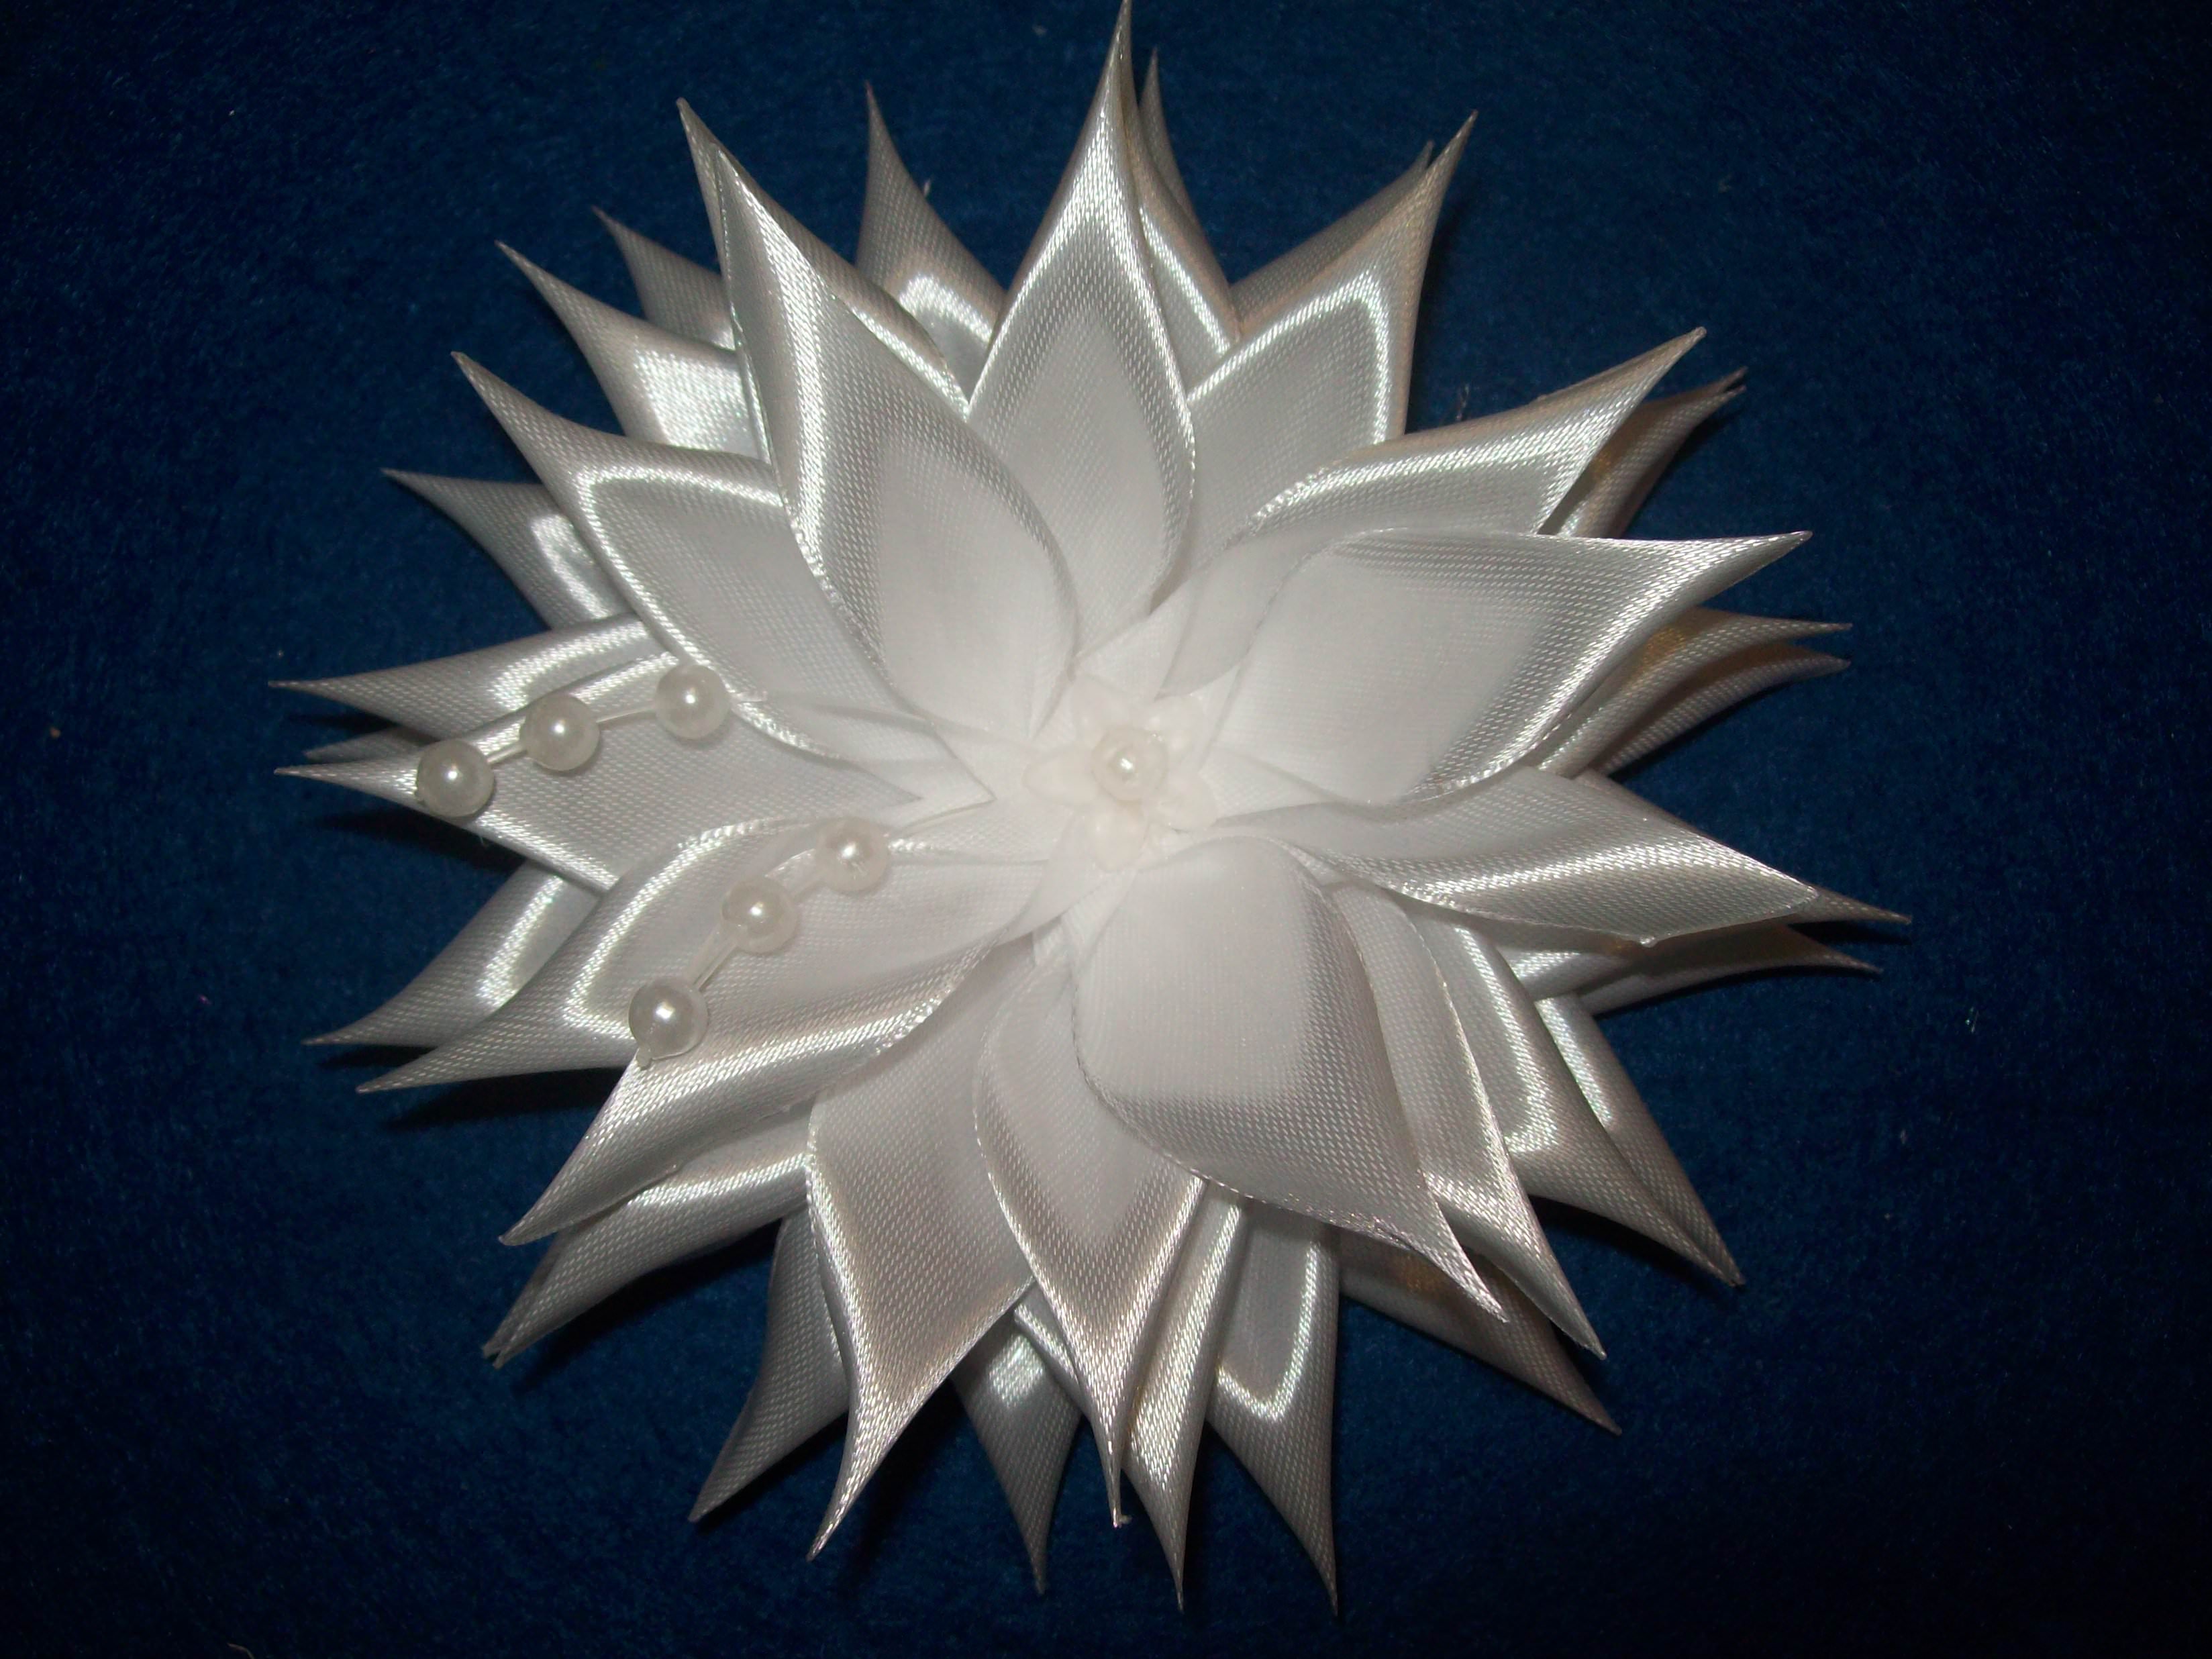
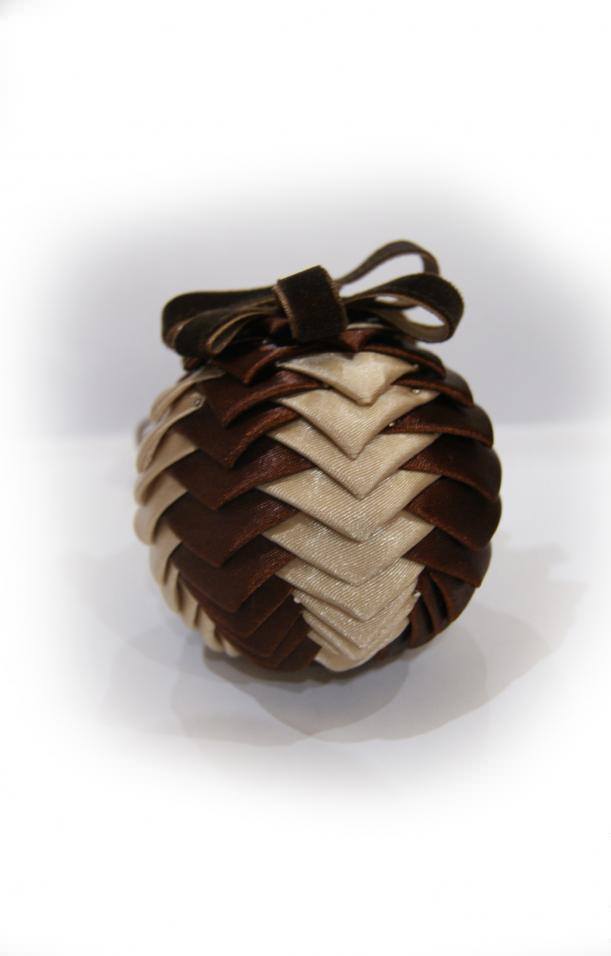
Making a ball-artichoke
This master class is devoted to an unusual craftKanzashi, which is based on an interesting technique artichoke. A similar ball can later be used as a topiary, but as a beautiful Christmas tree decoration. Prepare ribbons of various colors, and your New Year's beauty will play bright colors.
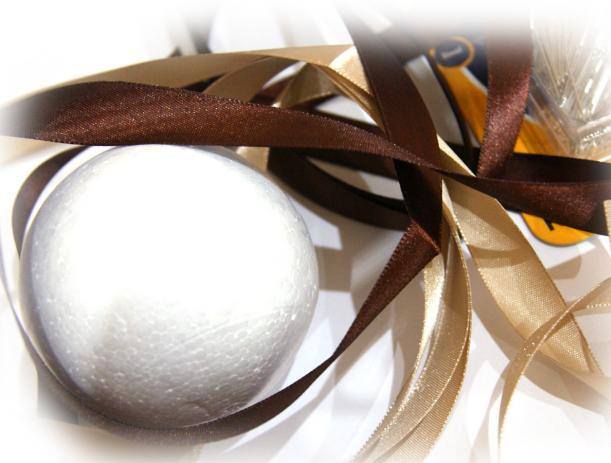
Before, to start a master class, you need to stock up a certain set of materials and tools, namely:
- Beads of foam plastic;
- Multi-colored satin ribbons;
- Tailors needles in sufficient quantity.
To make one ball of artichoke in one's own handsKanzashi technique, this master class uses a stock of seven centimeters in diameter, as well as beige and brown satin ribbons. In total for one such ball of artichoke, you will need about six meters of tape, the width of which is about sixteen millimeters.
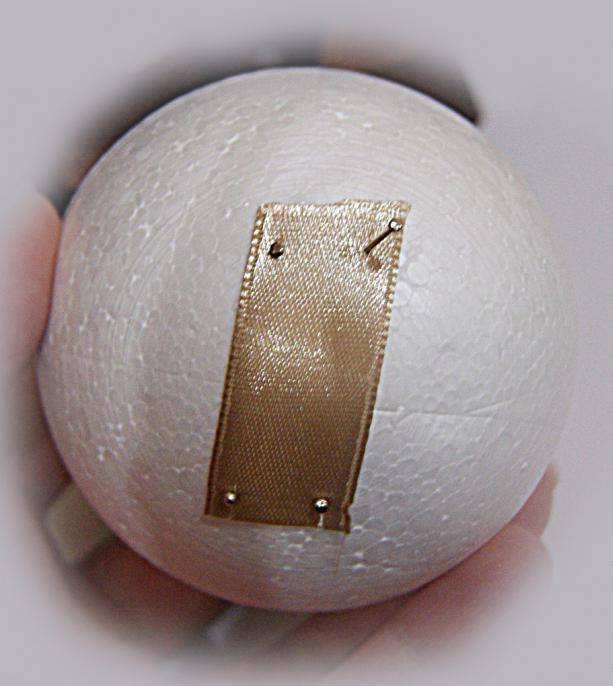
So, take the tape and begin to make from it stretches of three to four centimeters in length. Further, it is necessary to add all the segments and separately and fix on the ball.
Determine where the center is on the workpiece and use the needles to fix the segment, as follows, as in the photo:
The next step, you need to add moreOne segment in a triangle and, taking two needles, attach to the workpiece. In this case, the vertex of the triangular part should be on the center of the ball. See how the photo looks like this action.
Total for the first row, we need to make four details of a triangular shape. The fixation of the triangles in the second row is already in chess order.

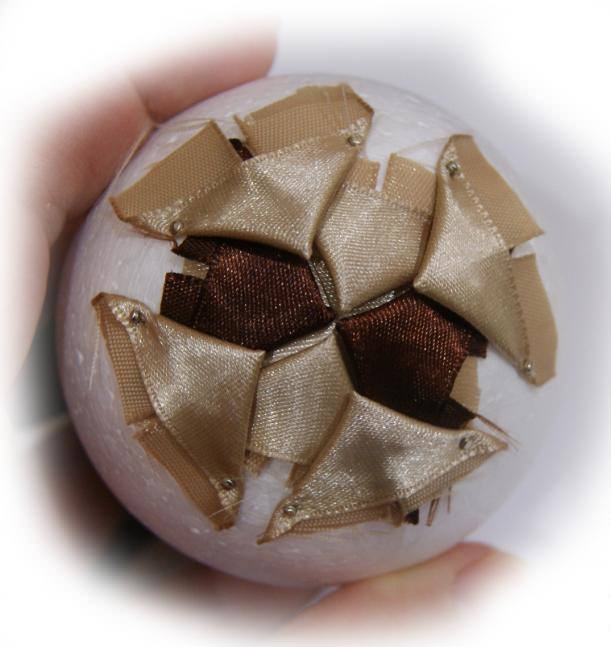
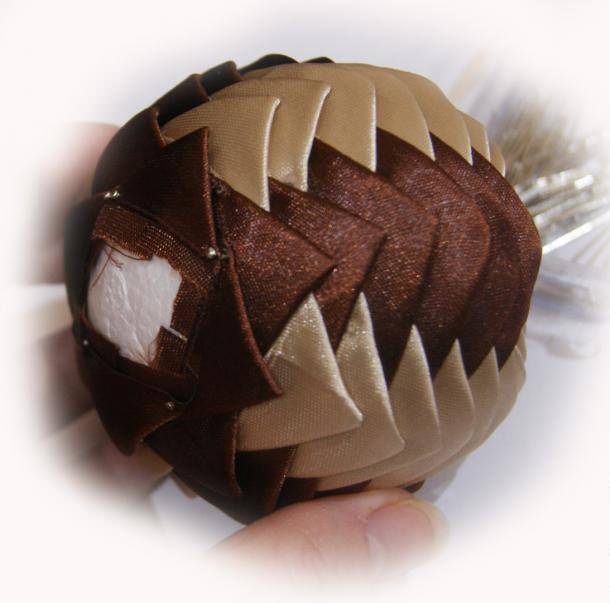
In the photo, you can see how the following series look:
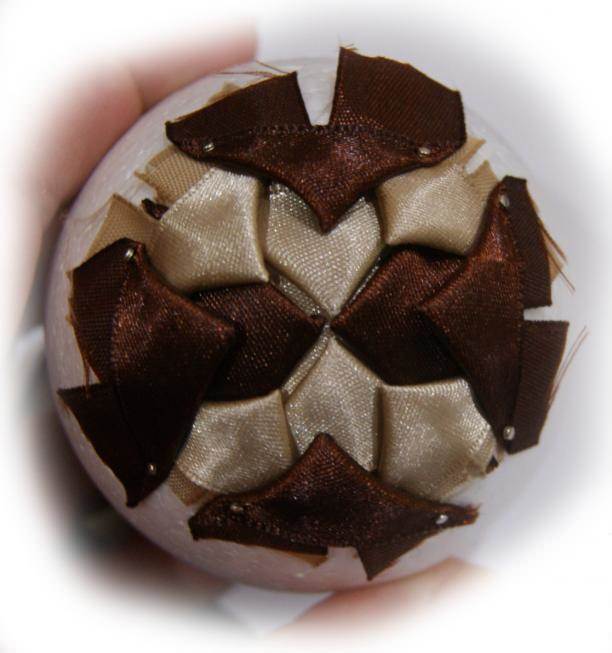
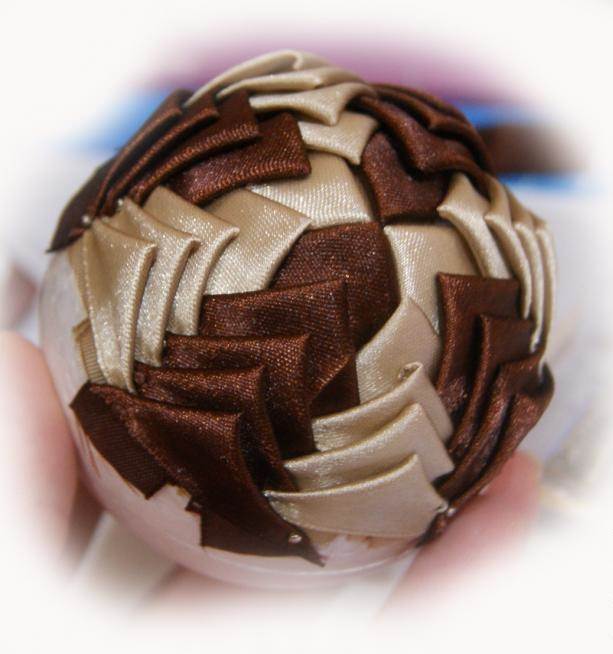
Thus, we fix all triangular elements until you cover the entire ball of artichoke.
In the process of work, carefully fold piecesTapes into triangles and sequentially evenly fix them on the workpiece of the ball. Each of the triangles must overlap the previous one in such a way that the needle hats are not visible.

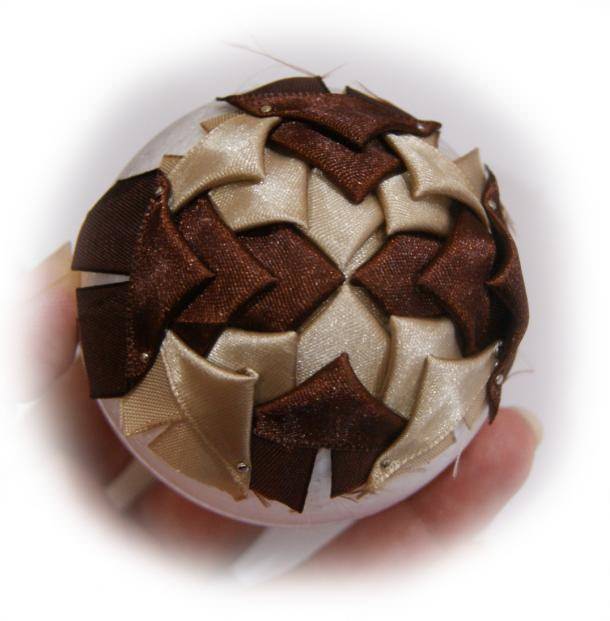
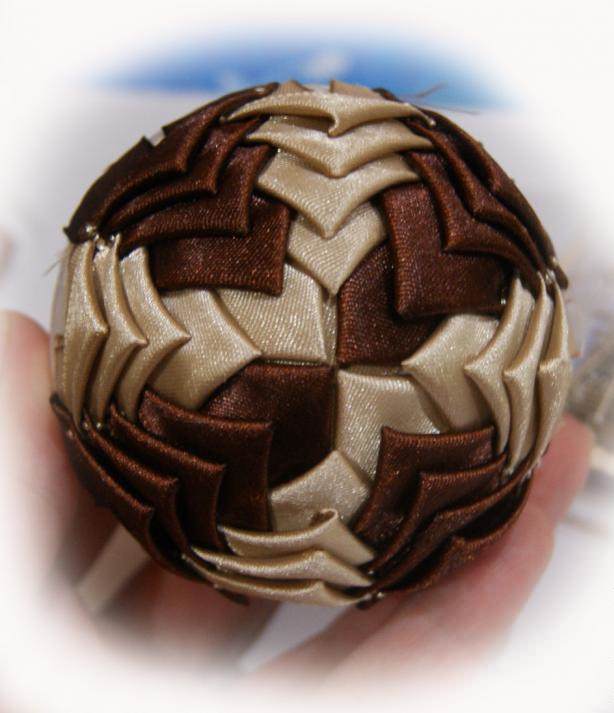
We continue step by step to cover the whole ball andCarefully close it in the final row. At the end of the work, you can decorate the ball-artichoke with a thin velvet braid, as the photo shows. The made loop will allow to hang such product on a fur-tree. Fastening of a braid also occurs with the help of needles.

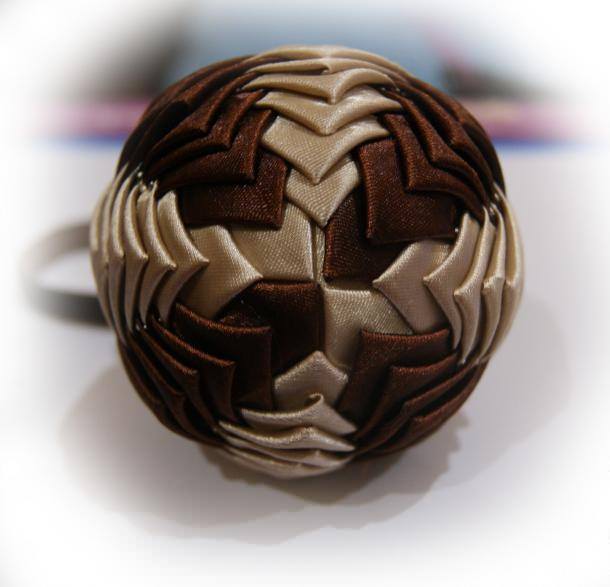
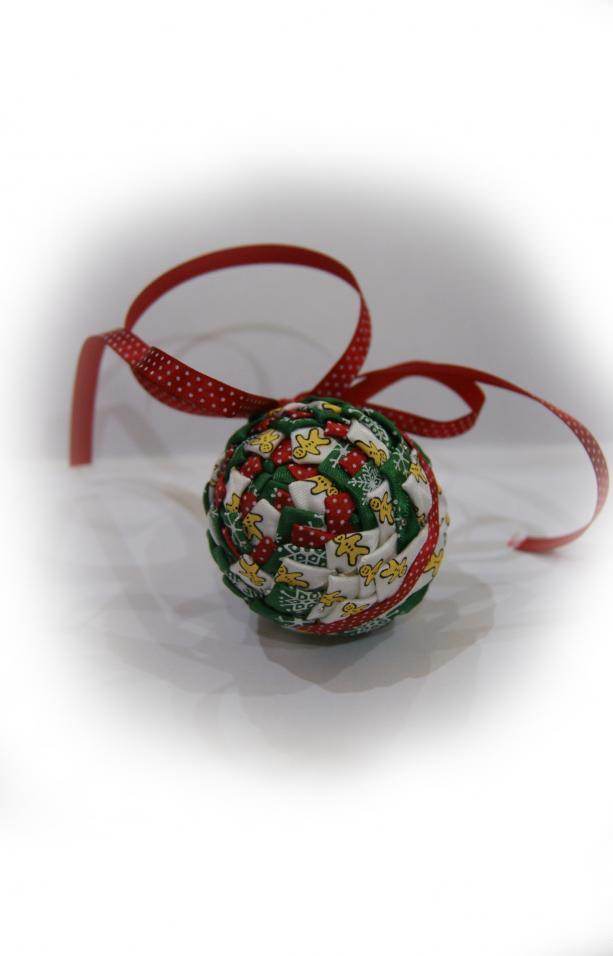
Technique artichoke allows you to create absolutely amazing balls. Show your imagination, use this master class, and come up with your own interesting color combinations
You will have your own unique product,Similar to an artichoke. In addition, you can use not only satin ribbons, but also velvet, as well as ribbons or fabric with a variety of thematic patterns. So you will get elegant balls, in artichoke technique or kanzash, which can be timed to completely different festive events.
Video: New Year's ball-artichoke with own hands
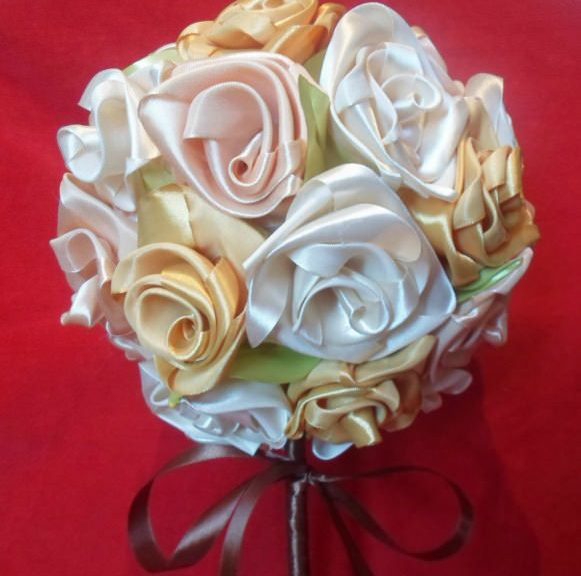
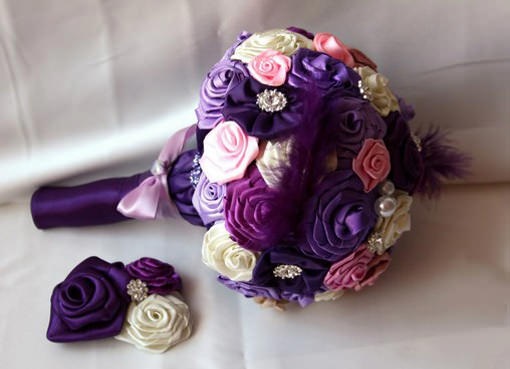
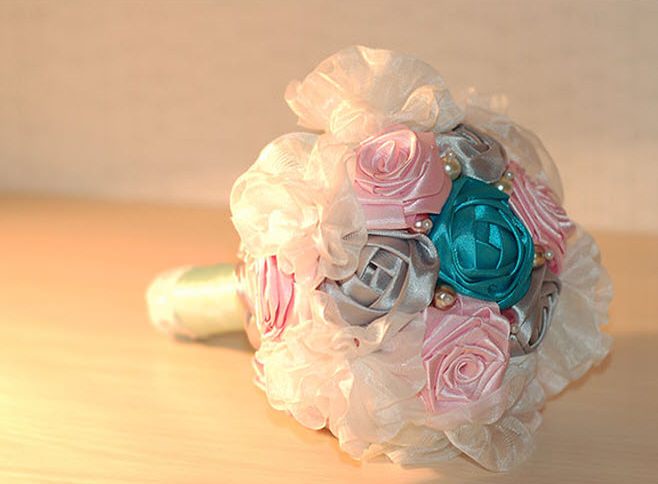
Wedding bouquet of ribbons
The next product is one of the most importantAttributes for any bride. Often, wedding bouquets consist of natural flowers. But, recently, in view of the growing popularity of works made by themselves, the brides are trying to find an original approach to this or that wedding attribute. A bouquet of ribbons is just one of such original methods that will not go unnoticed at your wedding.
In order to make a bouquet of satin ribbons in Kansas technique, you need to prepare such a set of materials and tools:
Satin ribbons of various shades, the width of which is in the range of two to six centimeters;- Organza of white color (about ten centimeters wide);
- For decor choose beads in the tone of the ribbons;
- Pins, on the ends of which are already beads;
- glue;
- Newspaper;
- Lashing;
- A stick made of wood (diameter two cm, length - about 20 cm);
- Dense material;
- a thread;
- Needle;
- scissors;
- pencil;
- Ruler.
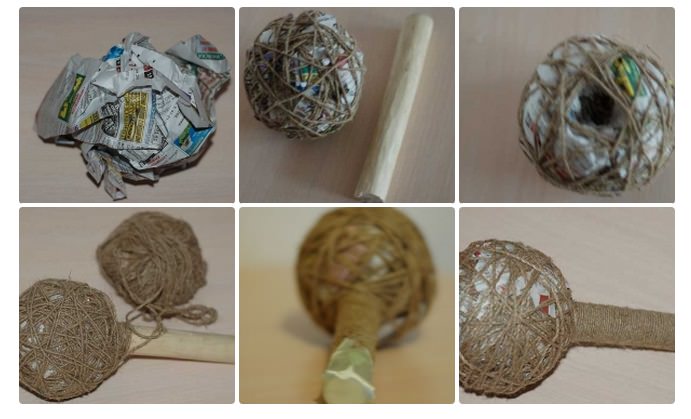
We start the master class with the preparation of the base, on which will be attached a wedding bouquet consisting of roses and other flowers.
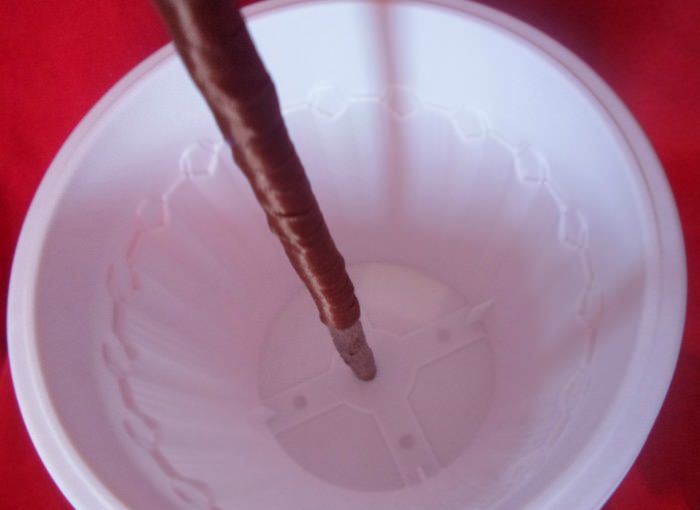
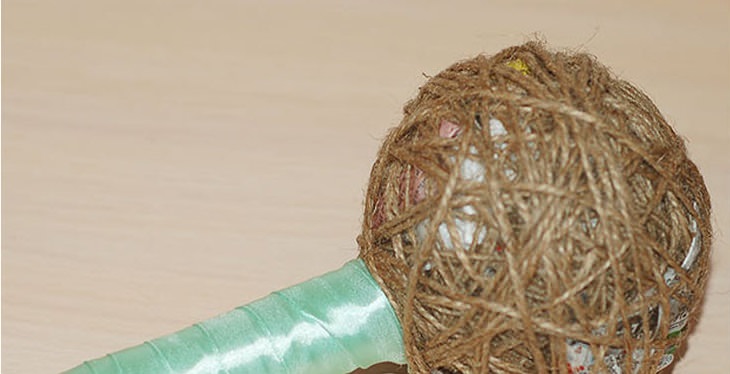
To create a rounded base, use thisTechnique: prepare a newspaper and form with your own hands a ball about 10 cm in diameter. After that, it must be wrapped using a string for this purpose. Do this carefully so that the ball does not lose its appearance. In the resulting ball, make a hollow where with glue fix the stick from the tree. In this way, we have made an element through which brides can hold a wedding bouquet. After installing the handle, be sure to wait until the glue dries. The wood rod itself is also wound with a string, above which a satin ribbon of the chosen shade is already applied.
Making the basis for the wedding bouquet, the next step, the master class moves to creating roses. In addition to roses, the composition of the bouquet will also have two more varieties of flowers.
To create a satin rose Kansas, takeRibbon suitable shade. You can create a monochrome light bridal bouquet or choose a contrasting color material in order to make a bright product.
On a dense piece of the selected material,It is necessary to draw a circle whose diameter is three to four centimeters. Each such circle is divided into cells, as in the photo. Further, the circle is cut out, and the cells are cut on one side. After that, it must be sewn. Thus, we have a figure in the form of a cone.
Now, take a ribbon whose width isTwo centimeters, and bend its edge, and a square to sew in the center of the received cone, as shown in the photo MK. The next step, wrap the tape on the corner to the opposite corner and fix it with threads. The photo shows how to properly implement this process. Thus, it is necessary to repeat these actions successively, and the angle of rotation of the satin ribbon should increase. As a result, you will get the first kind of Kansas roses, from which the wedding bouquet will be formed.


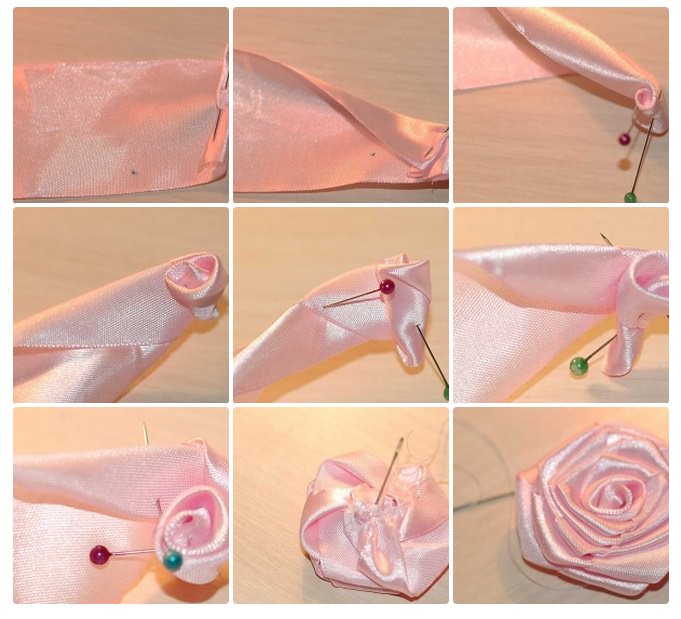
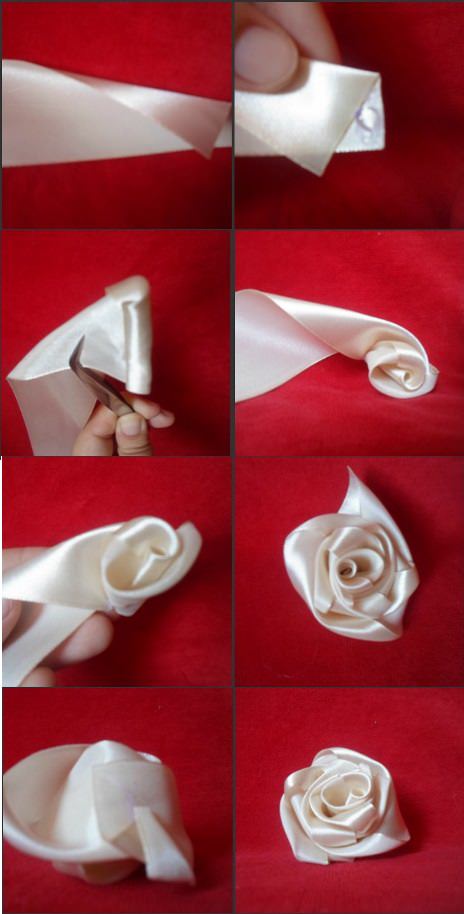
At the next stage, we make another roses. In the beginning, fold the border of the ribbon (four to five centimeters in width) several times, as in the photo by three or four millimeters. The folded segment is folded half-widthwise slightly at an angle. Tu, the part that is bent, will need to be wrapped at an angle of thirty degrees to the outside and wrap again around. According to this scheme of action, we continue to wrap the rest of the tape. At the end of these actions, you need to sew roses with your own hands. This will help all the rose petals to hold together as one.
Having mastered two kinds of Kanzash roses, we proceed to pre-assemble the bouquet. We take the base and begin to fix on it the made
With the help of decorative pins with beads. This will help and securely fix roses, and additionally decorate the wedding bouquet. Try to arrange roses in the same intervals, observing the relative symmetry. Pins fasten among the colors, thus filling the formed part of the space among the petals.

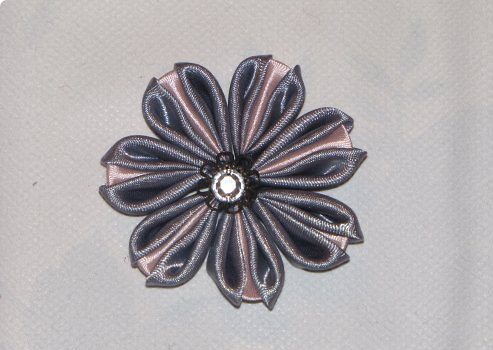
It remains to make another flowers that are somethingResemble chrysanthemums from ribbons. These light and air blanks are made from organza. Take a piece of this material, the width of which is seven centimeters, and the length is more than 300 cm. Fold it in relation to the length in half. On the bent side, lay a seam and pull the tape together. Here such an easy way will help you quickly make a magnificent flower. When completing the master class, attach it to the base in an empty space based on the bouquet.
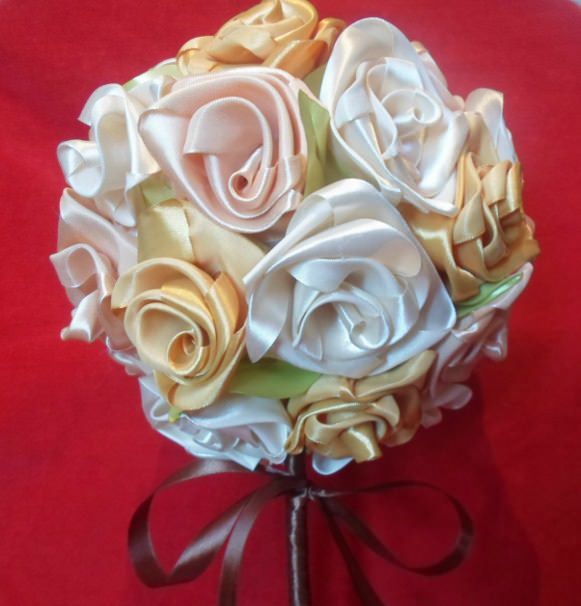
That's in such a simple way, with your own hands, you can make a beautiful wedding bouquet of satin ribbons for the bride, which is based on the technique of Kansas.
Video: Learn how to make a wedding bouquet of ribbons
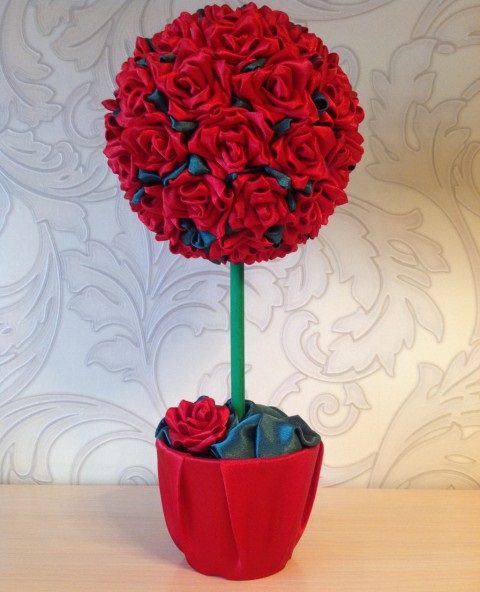
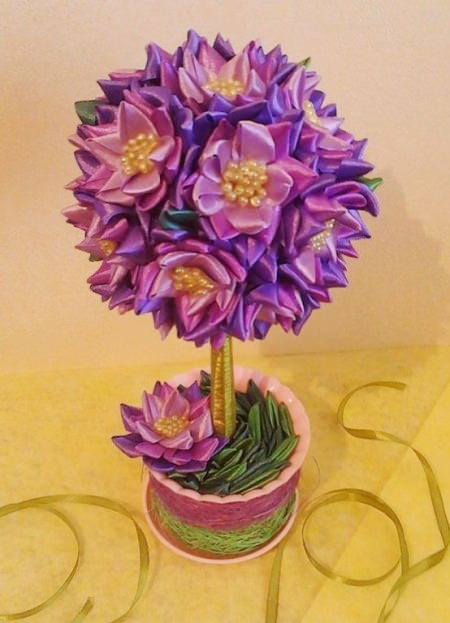
Topiary
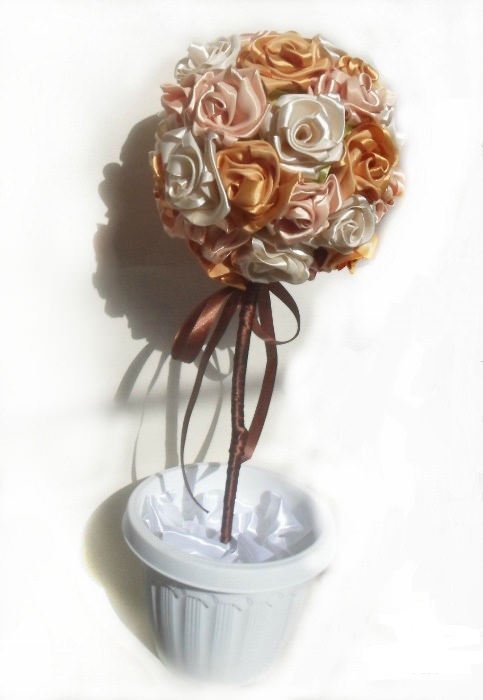
And in conclusion, I would like to offer youTry to make a decorative tree of topiary from tapes. They say that if you put the topiary in the house, it will bring you happiness. So it is and is not in any case is a beautiful piece of decor that will take a worthy place in the interior of your home.
To make a decorative tree of a topiary for your own hands, prepare:
Three satin ribbons of different colors, a length of seven meters and a width of five centimeters;- One green tape (1.5 m in length and five cm in width);
- One brown tape (2 m in the din and one cm in width);
- Meter openwork ribbon;
- The workpiece on which the topiary will be made, namely a ball of foam;
- A branch that serves as a trunk;
- Plastic flowerpots;
- Hot glue, as well as special glue sticks;
- scissors;
- A lighter;
- Candle.
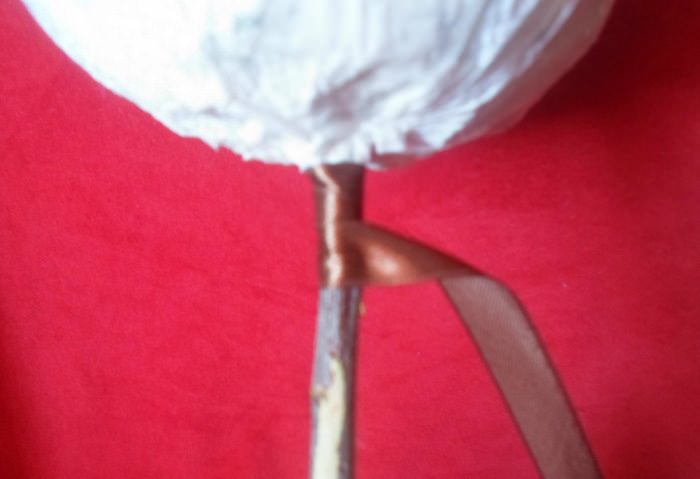
A ball of foam can be replaced by an analogue ofpapier mache. The technique of its creation is as follows: take six sheets of newspaper sheets, napkins, light threads, glue. From one of the newspaper sheets, form a ball with your hands, then wrap it in a subsequent sheet and so on until you collect a ball of all six newspaper pieces. Now, wrap the balloon with a thread. Next, we do with a scissors hole, grease with glue we fix the branch. Thus we get the barrel. The ball itself, it is necessary to cover with light napkins and leave to dry.

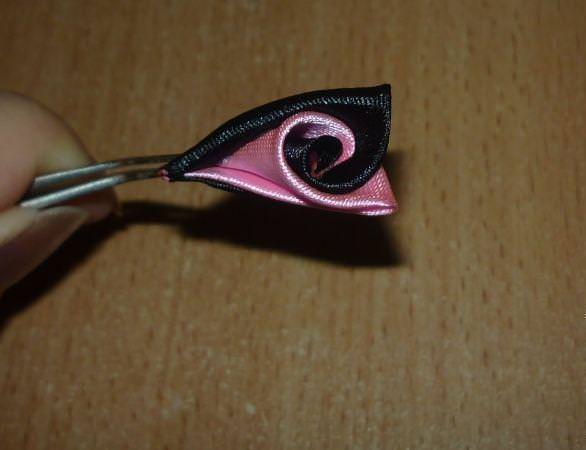
Further, the master class moves to making roses,Which will cover the whole tree of topiary. We take the tape, and we make lengths of fifty centimeters. The ends of the tape must be burned with fire, so that it does not crumble. Now, the ribbon needs to be placed face down and bend its upper corner to itself, as in the photo. The glue is applied at the edge of the tape and folded into a tube in the bend area. This place is also fixed with glue. Further, the ribbon bends away from itself (the angle at the same time should equal ninety degrees) and wraps the core. So, you get the initial petal. According to this scheme of actions, we form petals along the entire length of the tape. The end of the ribbon is bent and fixed at the bottom of the flower. In total, it is necessary to form about forty similar roses, of which the topiary will form.
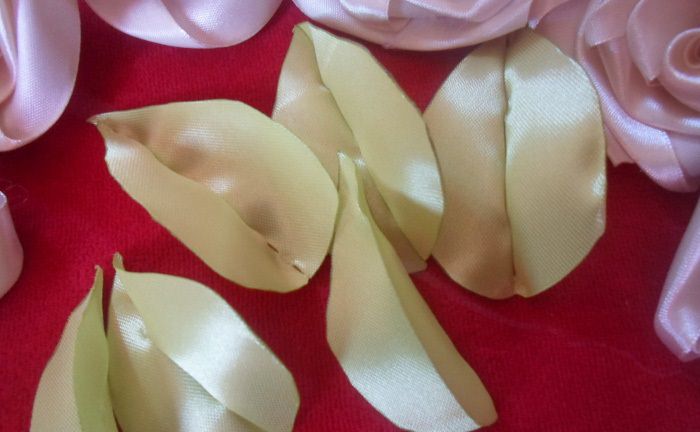
At the next stage, the tree should acquireFoliage. Use a green ribbon for this purpose and cut out the foliage from it. To create streaks, fold the sheet in half and carefully draw the edge of the sheet above the candle.
Having done all the preparations, we begin to formDirectly the topiary itself. Each of the roses must be fixed with glue on the ball. Try to alternate the colors of roses with each other. The sheet is glued on its own in random order among the flowers.

We take a pot in which we set our tree. We pour the whole base with plaster solution and leave to dry. It remains only to decorate the gypsum base with any available decorative materials available to you. This can be lace, beads, rests of ribbons, etc. That's all, the topiary with satin ribbons is ready. Such an original tree will delight you with its beauty all year round.