A bow from a tape in Kansas technique with his own hands (photo and video)
Content
- Fascinating festive bow
- Multilayer bow of canvas made of ribbons
- Video: We make a ribbon from ribbons
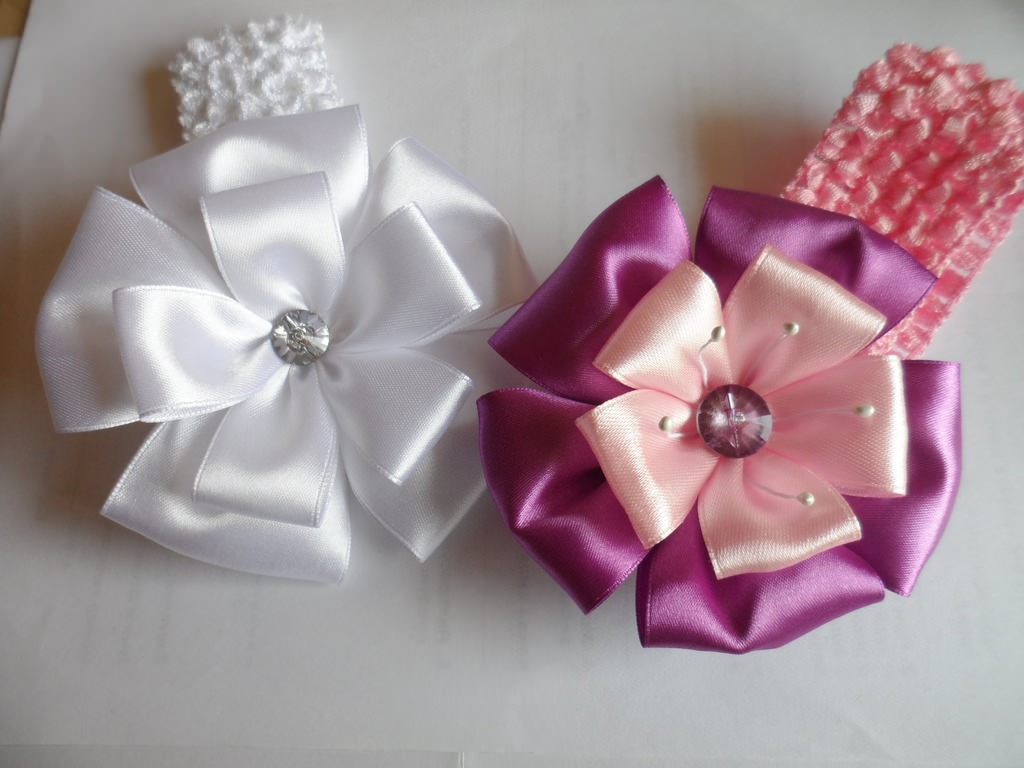
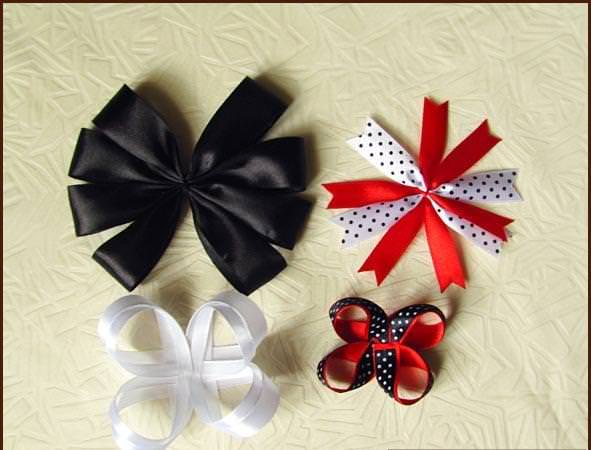
Before the onset of any holidays,Especially children's, mothers, are looking for their daughters, beautiful hair bows. It is not necessary to buy them in the store, you can make an original gift bow from satin, reps or nylon ribbons, with your own hands and tie it. Knowing that such a bow of satin ribbon, no one will repeat.
Another bow of satin ribbon, decorate a giftA souvenir or a gift that you can tie in and decorate yourself. Ideas, where to apply a bow of ribbon, a large number. Make it yourself, it will not be difficult and will not take much time. All you need is at hand.


Fascinating festive bow
This ribbon from the ribbon, will complement itself, and alsoDecorate the hair of each girl, if you tie it. Such a magnificent and elegant accessory, it seems large and complex in repetition, but this is not at all the case. If you watch a video and a photo with a picture of such a thing, you can be sure that it is very easy to do by yourself.
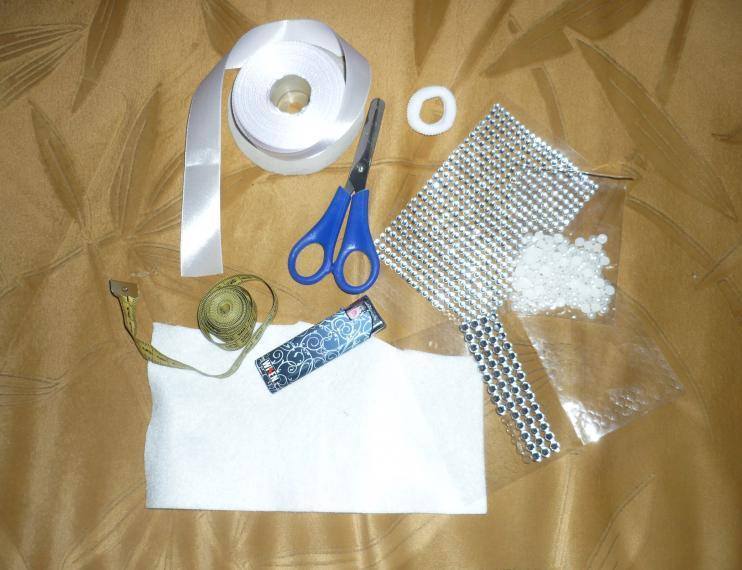
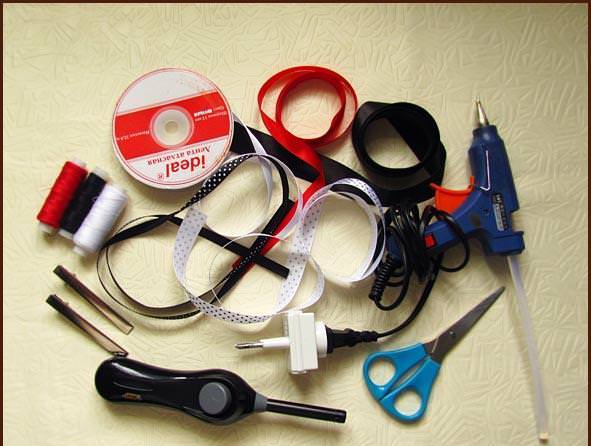
In order to make a ribbon from a ribbon that you can tie on your hair, even in school, you need to purchase several types of accessories, such as:
- Fabric of satin or reps ribbons;
- Decorative material that will serve as a decoration;
- Small cut of felt;
- A candle or a lighter;
- Ordinary elastic band;
- Scissors and centimeter.
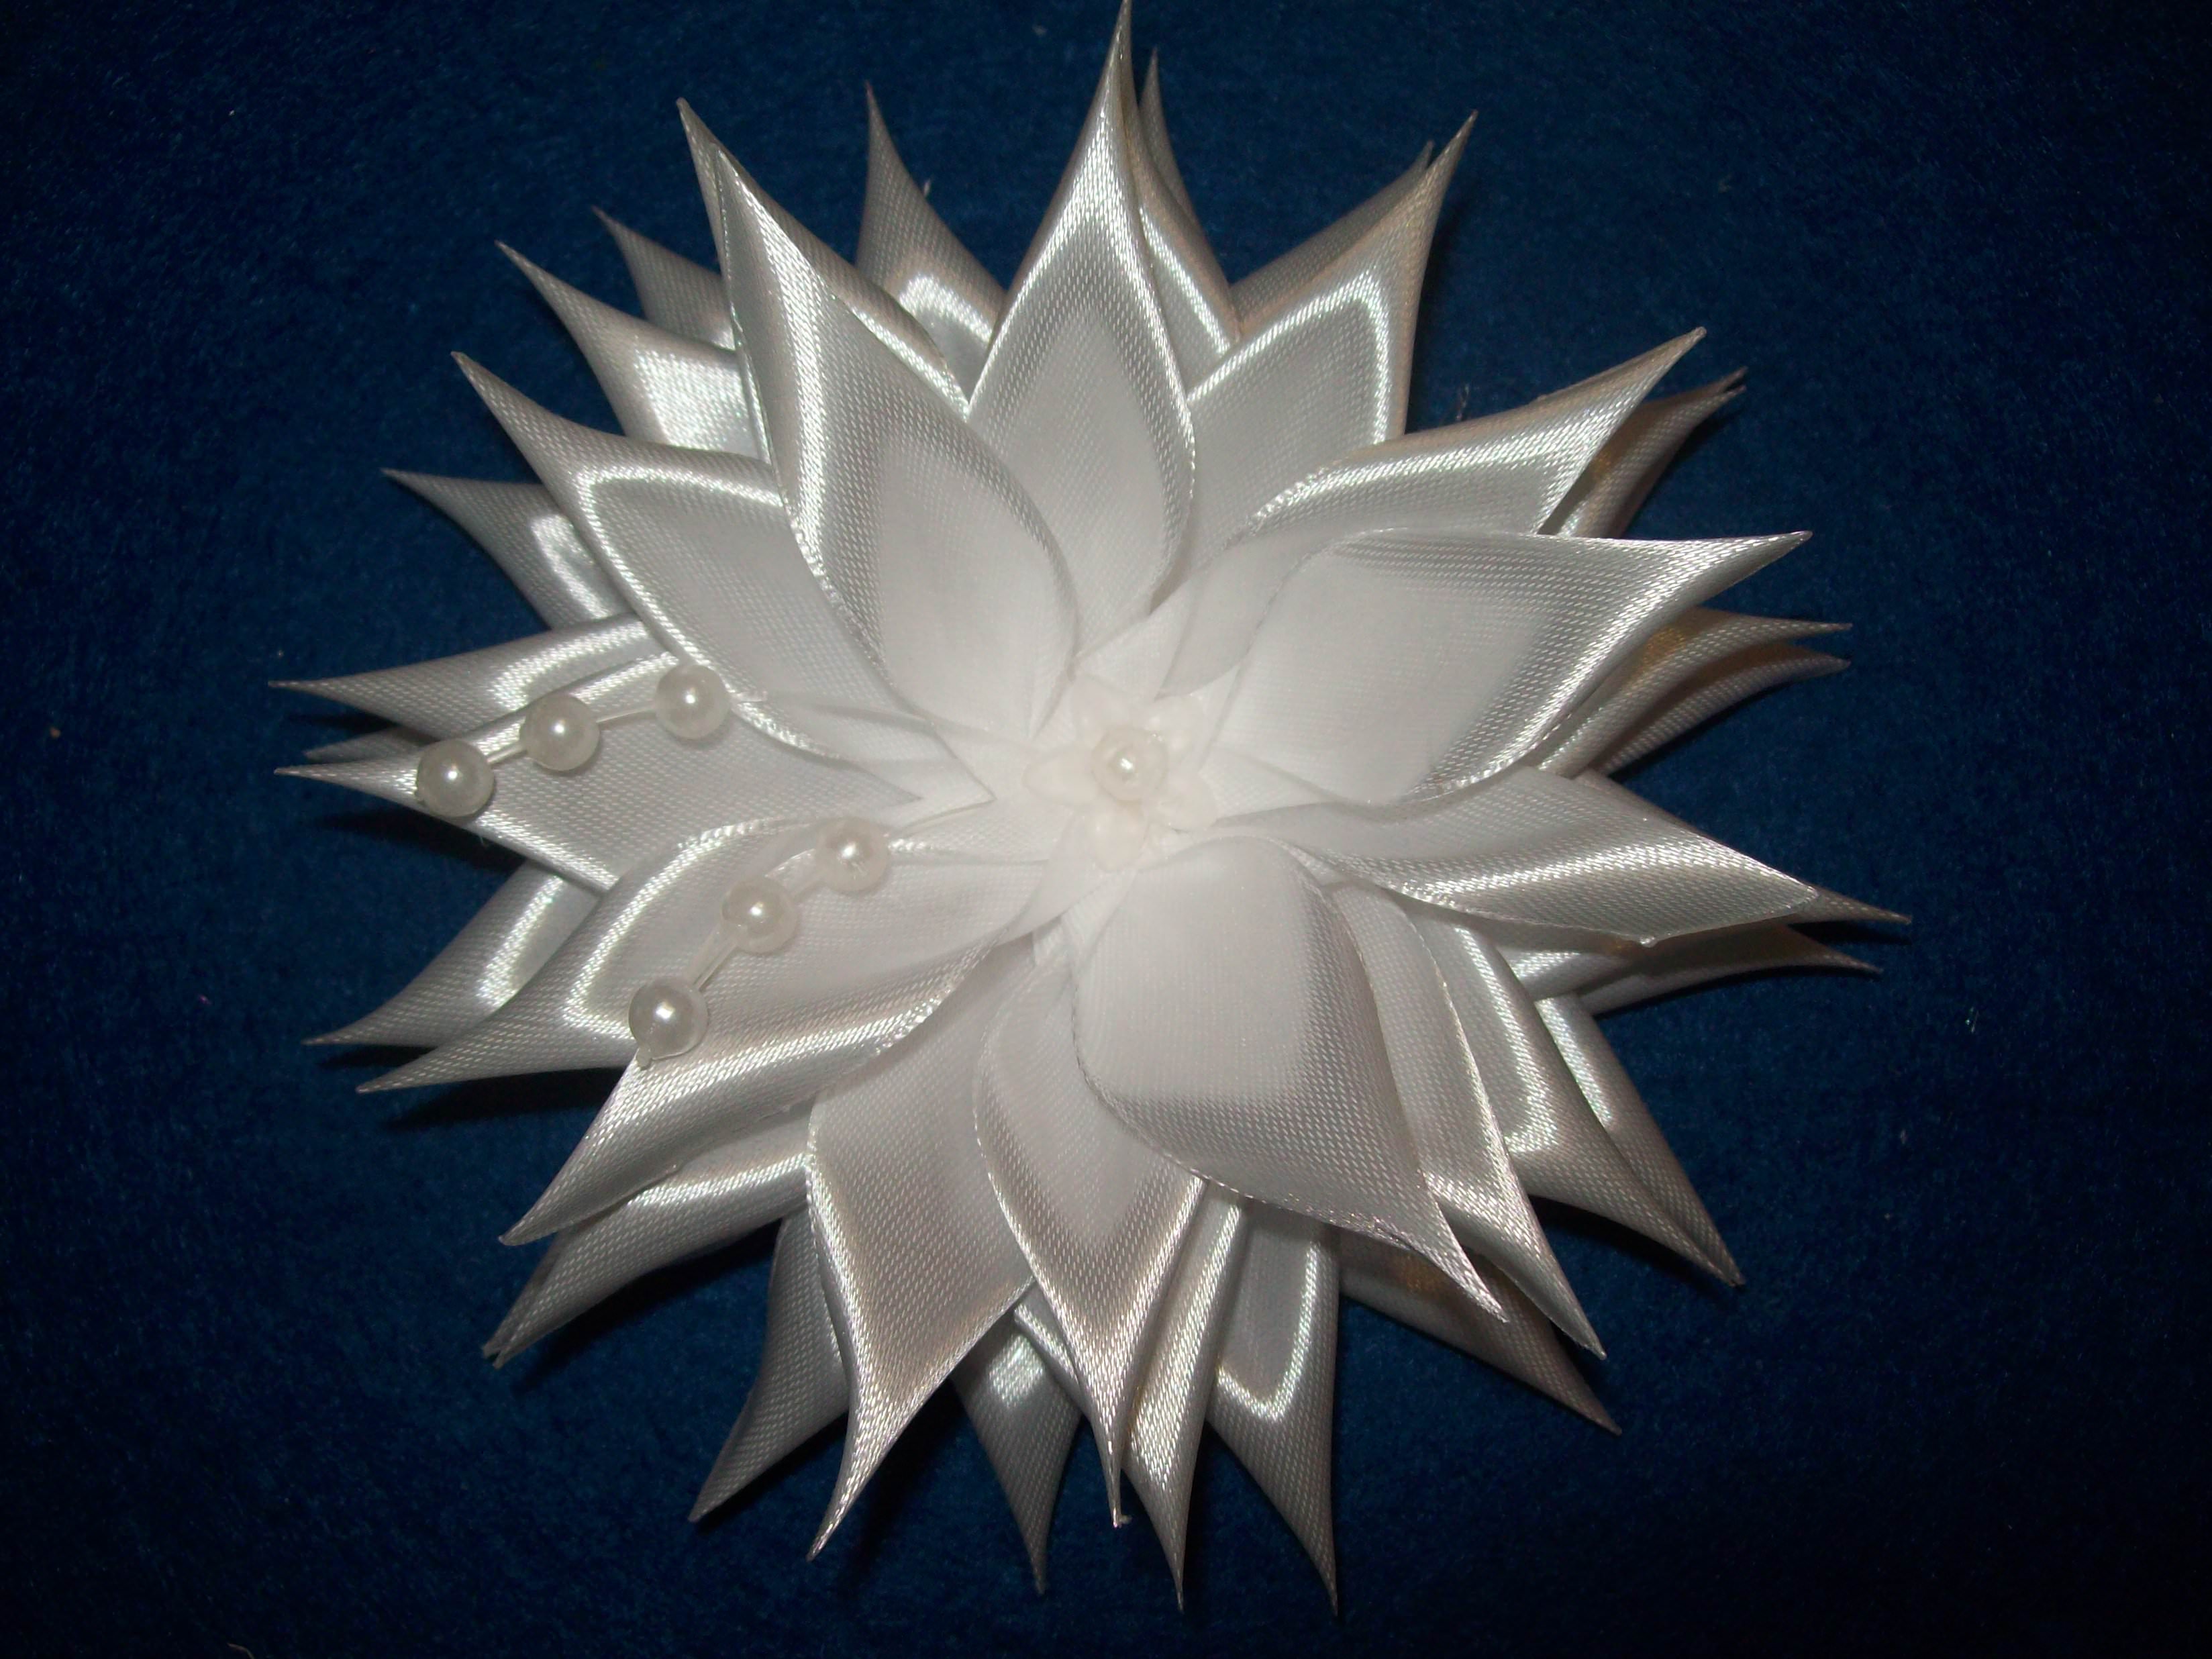
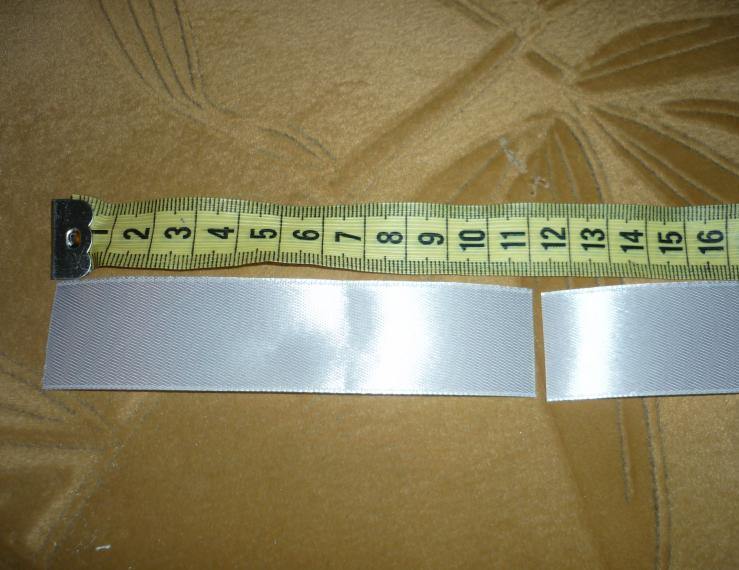
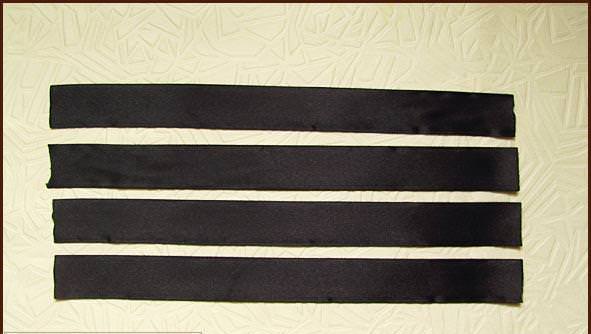
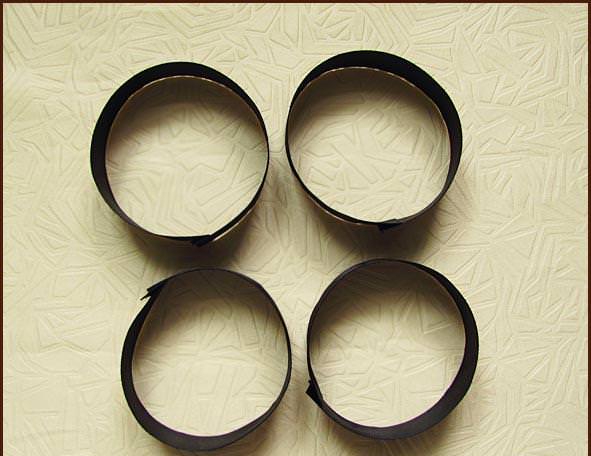
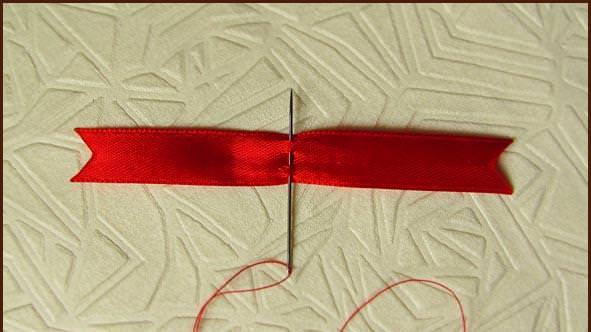
The first thing we need to do is to cut the ribbon into strips, each of which will be 11 cm. To make a ribbon out of a ribbon, it's necessary to make 50 pieces of such blanks.
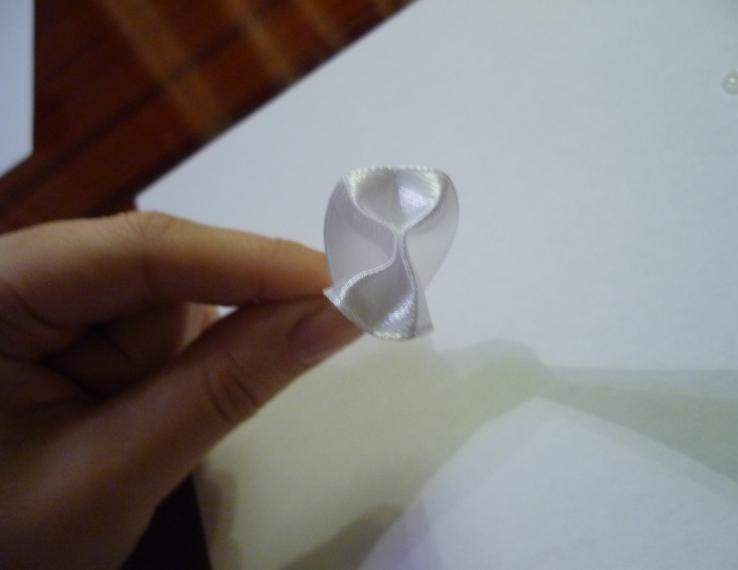
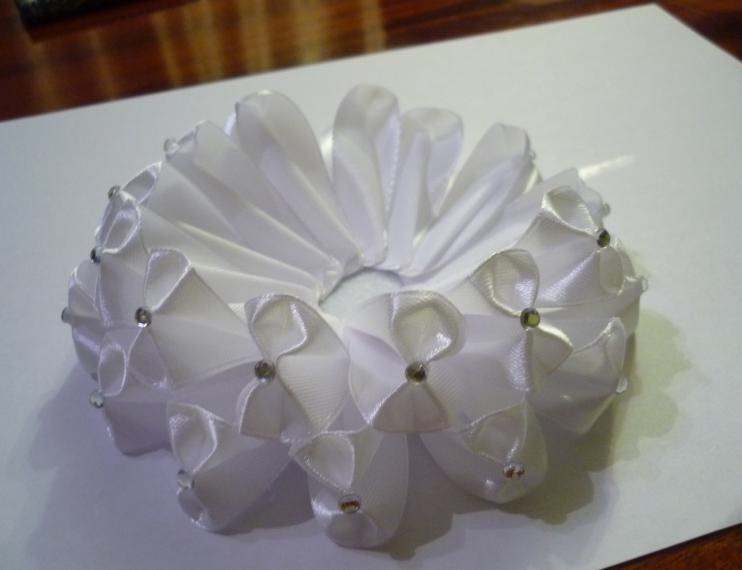
Fold the cut tape in half. The smooth side should be on the inside. Look at the photo, you should get the same element.


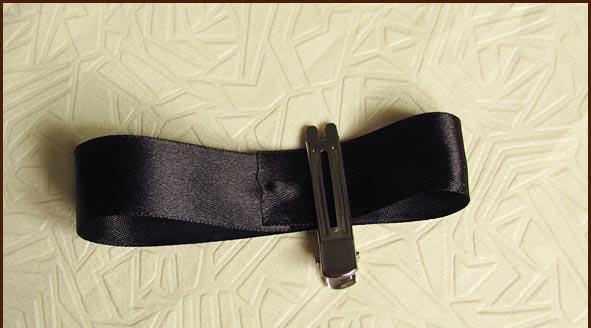
On the smooth side, drip glue, slightly receding the place from the bent part. Fold and press it with your hand. Then, unscrew it and fold it again. In the end, the smooth side will be at the top.
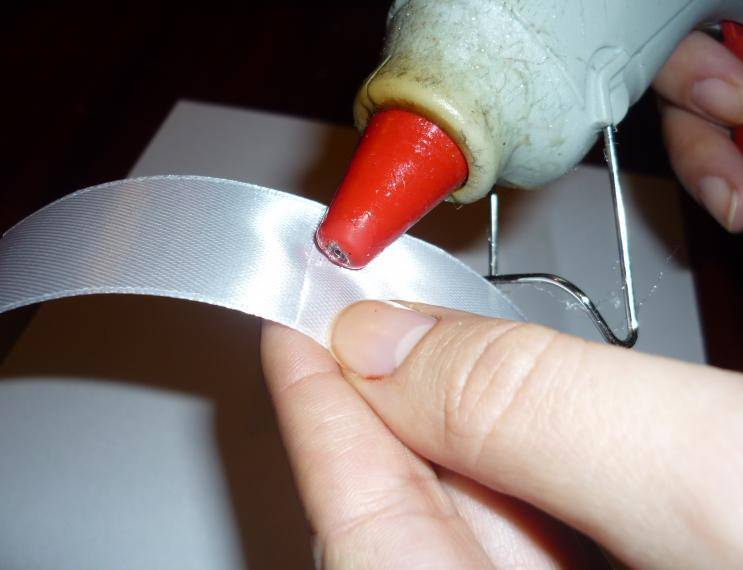


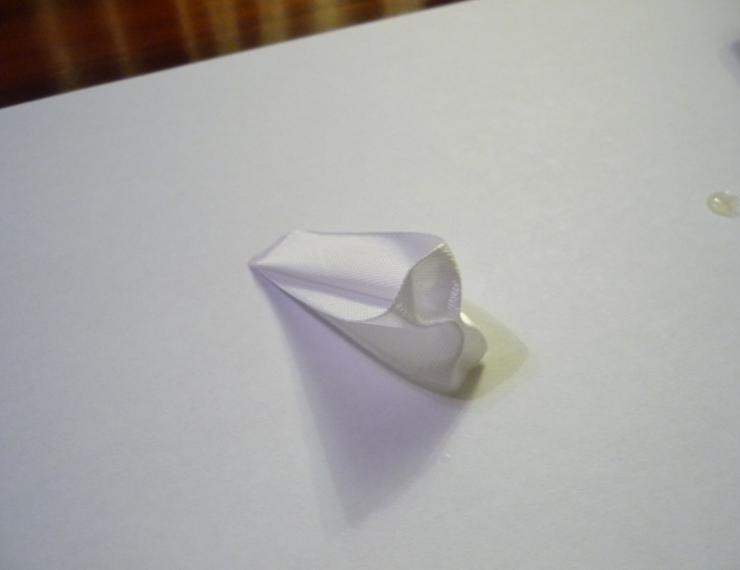
It turns out such a blank, as in the photo.

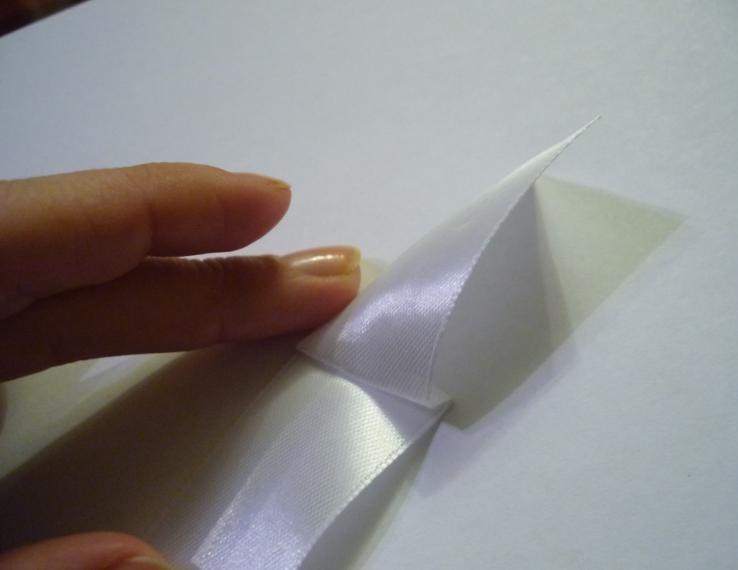
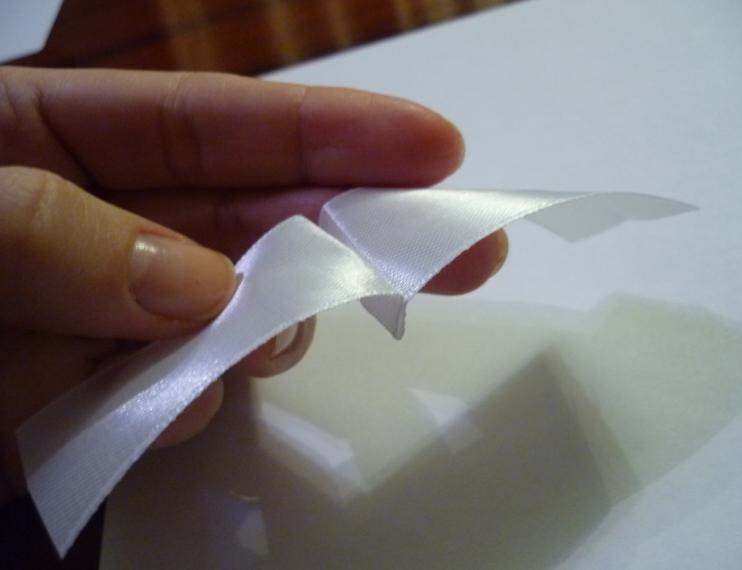
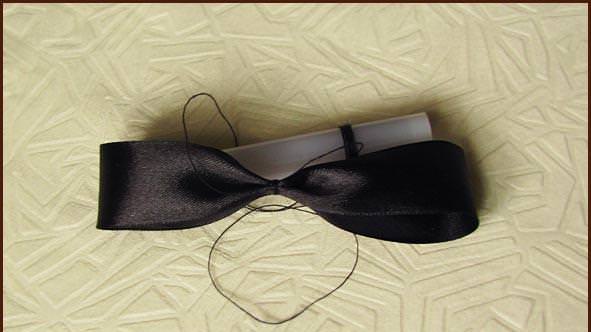
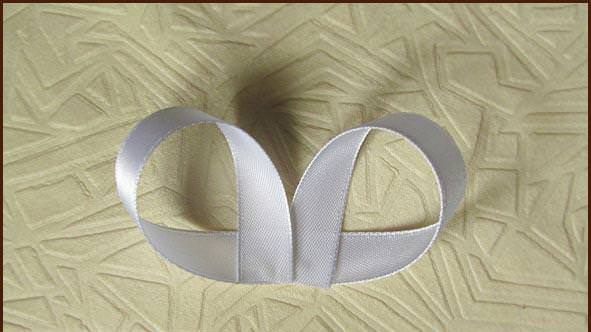
The edges of the segment, fold into a small bow. You will get the ends of the tape, placed on different sides. Treat the sides with the help of a lighters lighter.


Look at the photo, such an element, you must do.
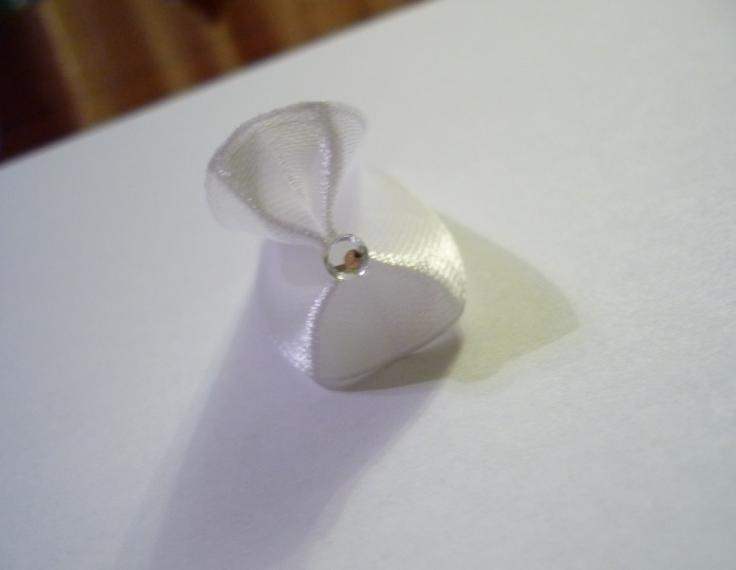
Middle of such a piece, adorn it with a white rhinestone, spreading it onto a drop of glue. This master class, applies rhinestones, you can replace them with beads.
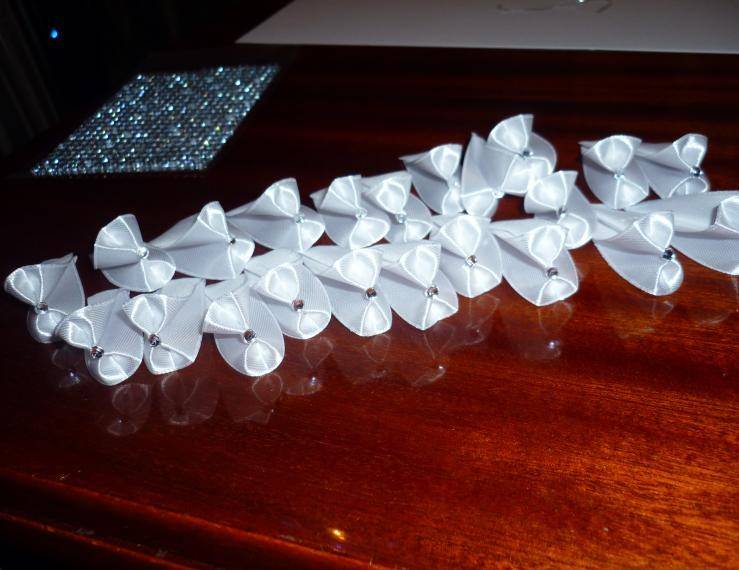
Adhering to this scheme, prepare the rest of the elements, which will beautifully form the basis of the Kantashi bow.
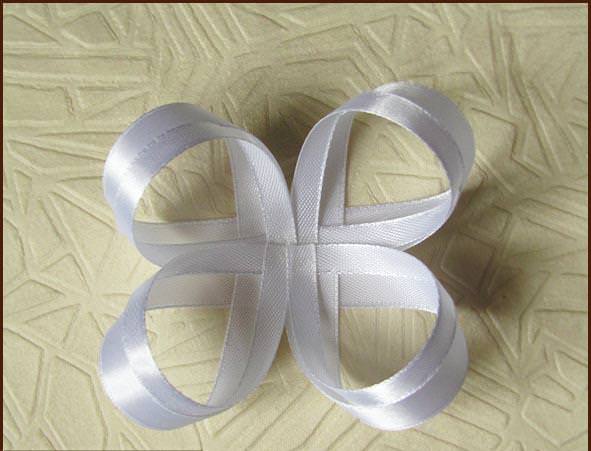
From the piece of felt, cut out the shape of the circle, about 5 cm in size. Then, glue the first petal on it.

Further, our master class impliesGluing all the elements to a felt circle. The first tier will consist of 11 or 14 pieces. In the same way, we attach the petals, the next tier and then, we need to do, according to the same scheme. In the end, a magnificent bow, you are provided.


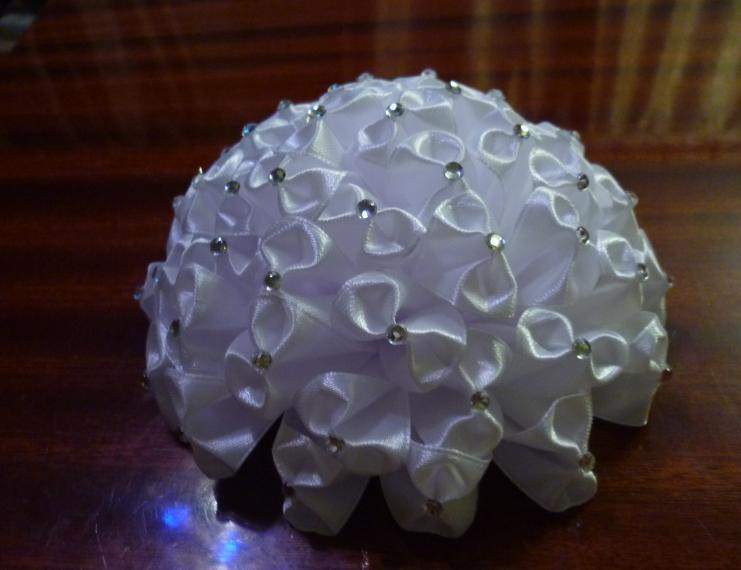
Our master class, coming to an end, remainsOnly, attach a bow of Kanzash to a simple rubber band, with the help of textile glue. You can attach ribbons, in order to tie this accessory. To learn more detailed material, you can see the video lesson.
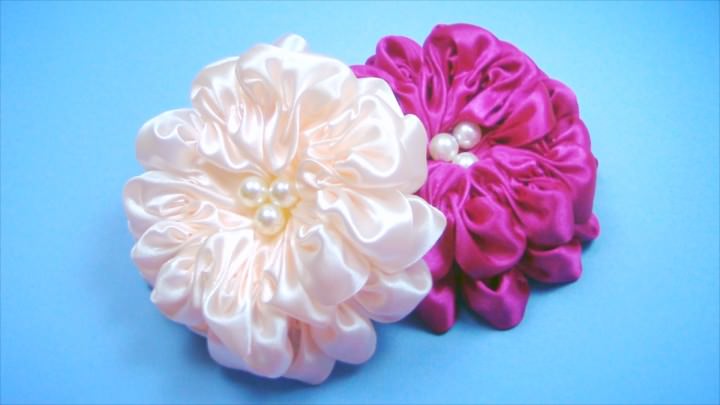
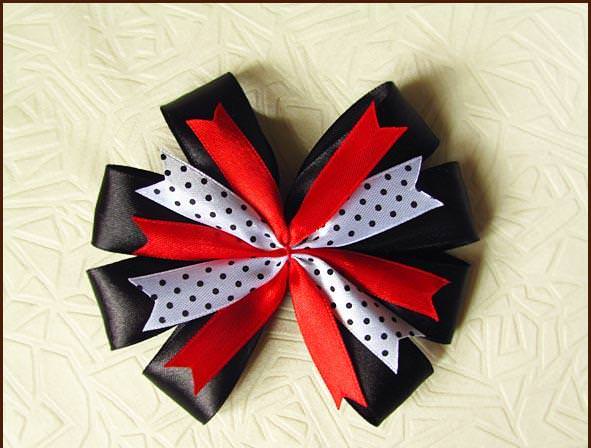
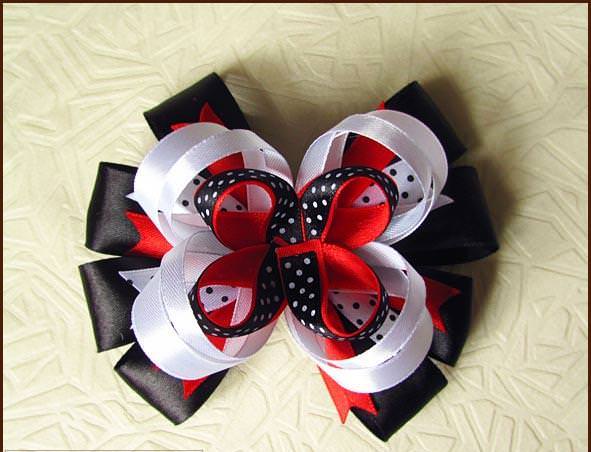
Multilayer bow of canvas made of ribbons
If you want to make beautiful bows of satinTapes, then this master class, just for you. We will do it ourselves or with children. Such a thing will perfectly decorate the gift set or a little surprise. Also, bows made of satin ribbons, will complement any hairstyle of a little girl, if you tie them in your hair.
In order to make kantosi bows and tie them, we need a simple fittings, namely:
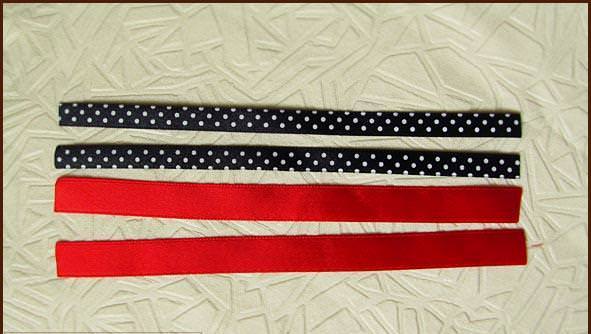
- Black and scarlet satin ribbon;
- Tape of white color in black peas and the same, only with the reverse pattern and color scale;
- Simple white ribbon;
- Decorative material;
- Simple gum, crab or barrette;
- a thread;
- scissors;
- Fire candles or lighters;
- textile glue.
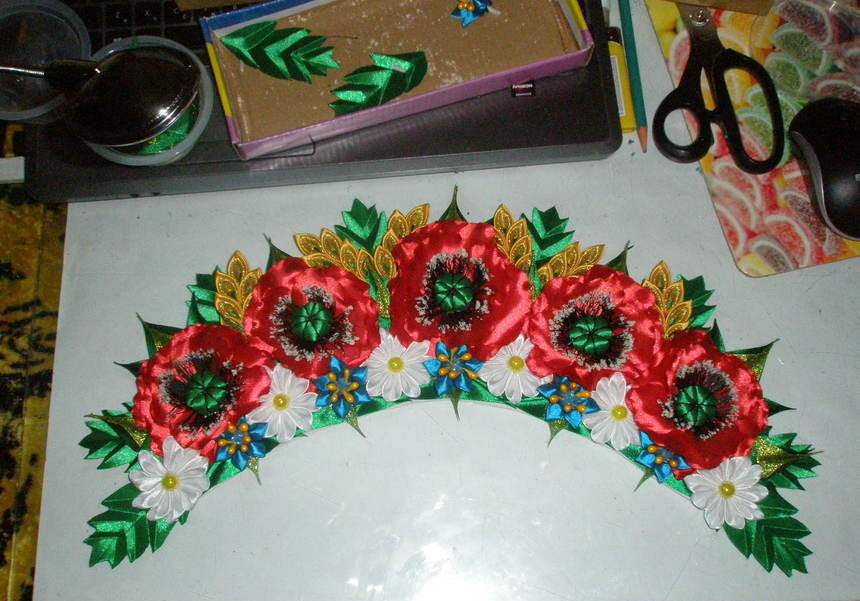
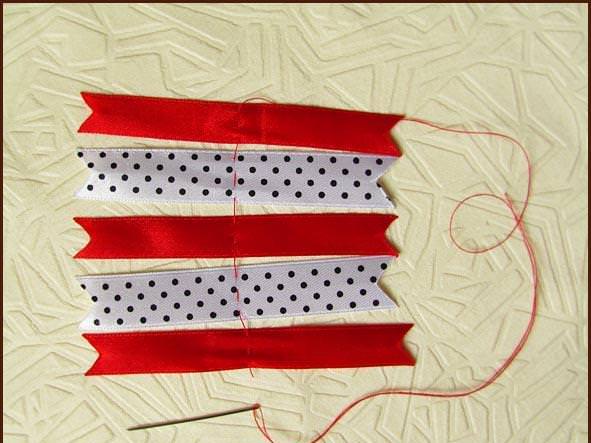
For the first layer, cut four black ribbons and scorch their edges with fire.
Sew a needle or glue with glue each strip, forming here such circles, as in the photo.
Fold the first piece in half, so that the seam is in the middle.
After making a crease, create a bow. Seretkin, fasten with a black thread.

So, collect and bind all the other elements.

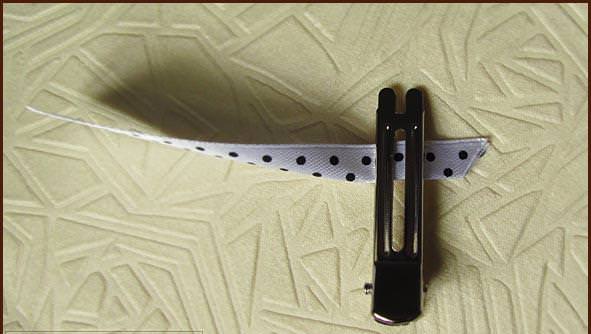
We proceed to create a second layer. Take scarlet ribbons and white in peas.

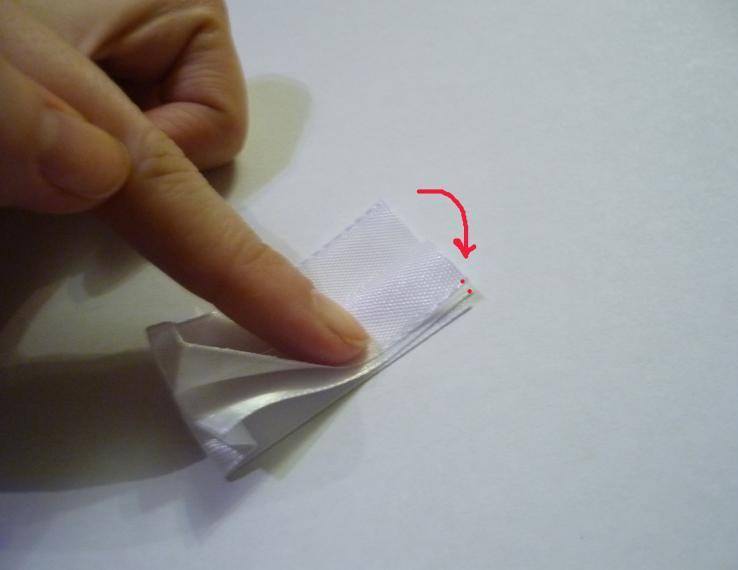
Take one strip and double it. Cut off the corner and scorch it with fire. It is necessary to do so from both sides. You have to leave, 5 such blanks with the cut off ends.

We will not fold them in half, as it was done by our own hands, higher in the text, because the tapes are rather narrow. And we'll resort to needles with a thread. Make two seams in the middle of the segment.
Combine one string all the strips in the sequence shown in the photo.
It is necessary to tighten everything neatly, making two turns, fixing, in the end, a knot.
Having finished the second layer, go to the next step of our lesson. We cut white ribbons of suitable width and work the edges of the flame with lighters.
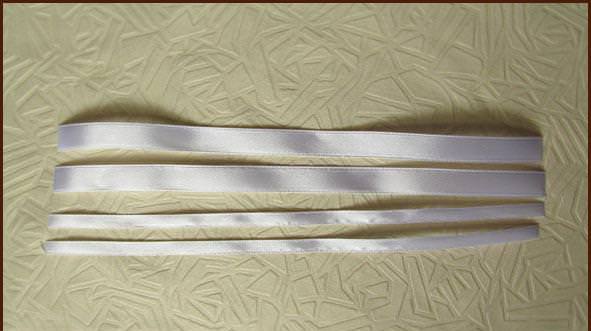
Bend it in half in the middle place, smoothing this part. From the other cut, make a loop from one edge, which must be sewn or glued. The second edge is done in exactly the same way.


The same manipulations, we do with other strips. Next, you need to sew or glue them together to make an element that resembles a pretzel.

The second butterfly will be made, already from a narrow ribbon. A thin piece, put on top of a wide pretzel, gluing them together. So, we are safe, we made the third tier with our own hands.

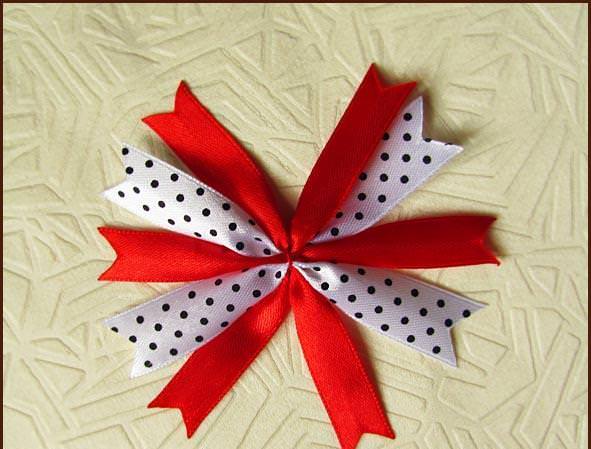
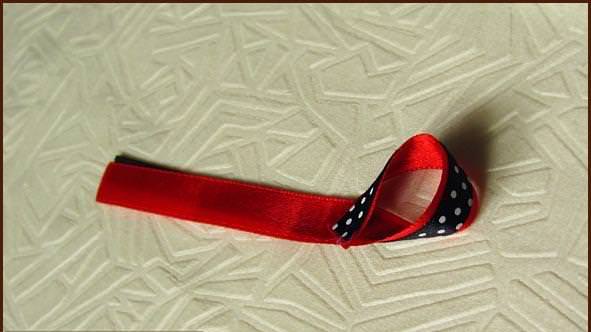
We cut ribbons of such colors as black in white peas and completely red. Also, do not forget to process all the ends.
Join together, two pairs of ribbons, differentColor, reverse side to each other and glue in the central part. Now, make the same butterfly, which was higher in the text, white. As you could see, the fourth tier is not difficult to do.


Now, we need to put everything together by our own hands. We have four bows that need to be connected together.
During this process, we will only use one glue. If you doubt his fortress, you can sew everything together.
Kansasi bows black, red and white in peasColor, you need to glue together or tie. And then attach to the elastic band or hair clip. To do this, cut a small strip of black shade, which, further, attach our ribbons from ribbons. We glue the cut to the iron base in the center.
Turn our artwork over and glue the tapes to the center of the bow.

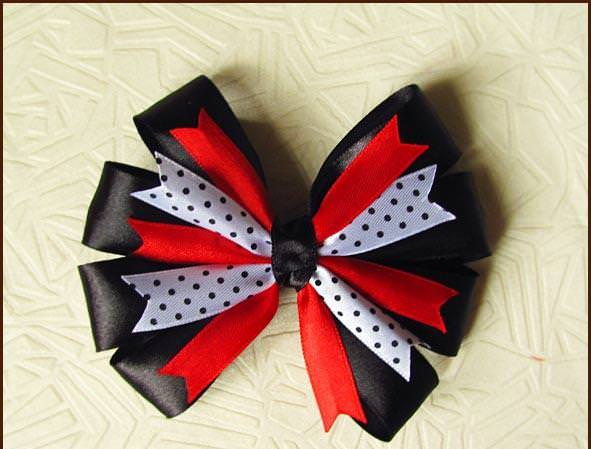
In the same way, we attach the rest of the blanks made with our own hands.
In the middle of the bowl of Kansas, you need to plant decorative material, in the form of a bead or a bright button.
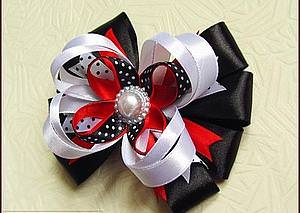
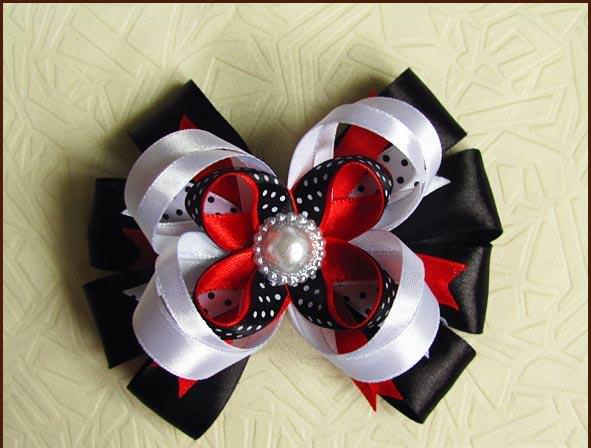
Gift beautiful bow or decoration onHairpin, completely ready. It's very easy to do it yourself, without spending a lot of time. If any points are not clear to you, take a look at the video master class on our website.