Bant on the extract from the hospital of the newborn boy with his own hands with a detailed description of the steps and photos
The birth of a son is an important event for both parents,and for close relatives. On the day of the mother's discharge from the baby from the maternity hospital, it is customary to arrange a holiday: the pope gives flowers, decorates the hall with balls, the mother dresses in the best dress, all the guests also in festive backgammon. But what to decorate the "clothes" of the baby, if it is wrapped in an envelope or blanket. The sweatshirt can be safely counted as a baby's clothes, so on the day of discharge this first accessory should be beautiful, gentle and most unusual.  You can create a unique bow on your statement onlyown hands. To do this, you will need a satin ribbon, burner and a little time. Always remember that things created by hand, save energy and protect your baby from a bad eye. You will need the following material and tools:
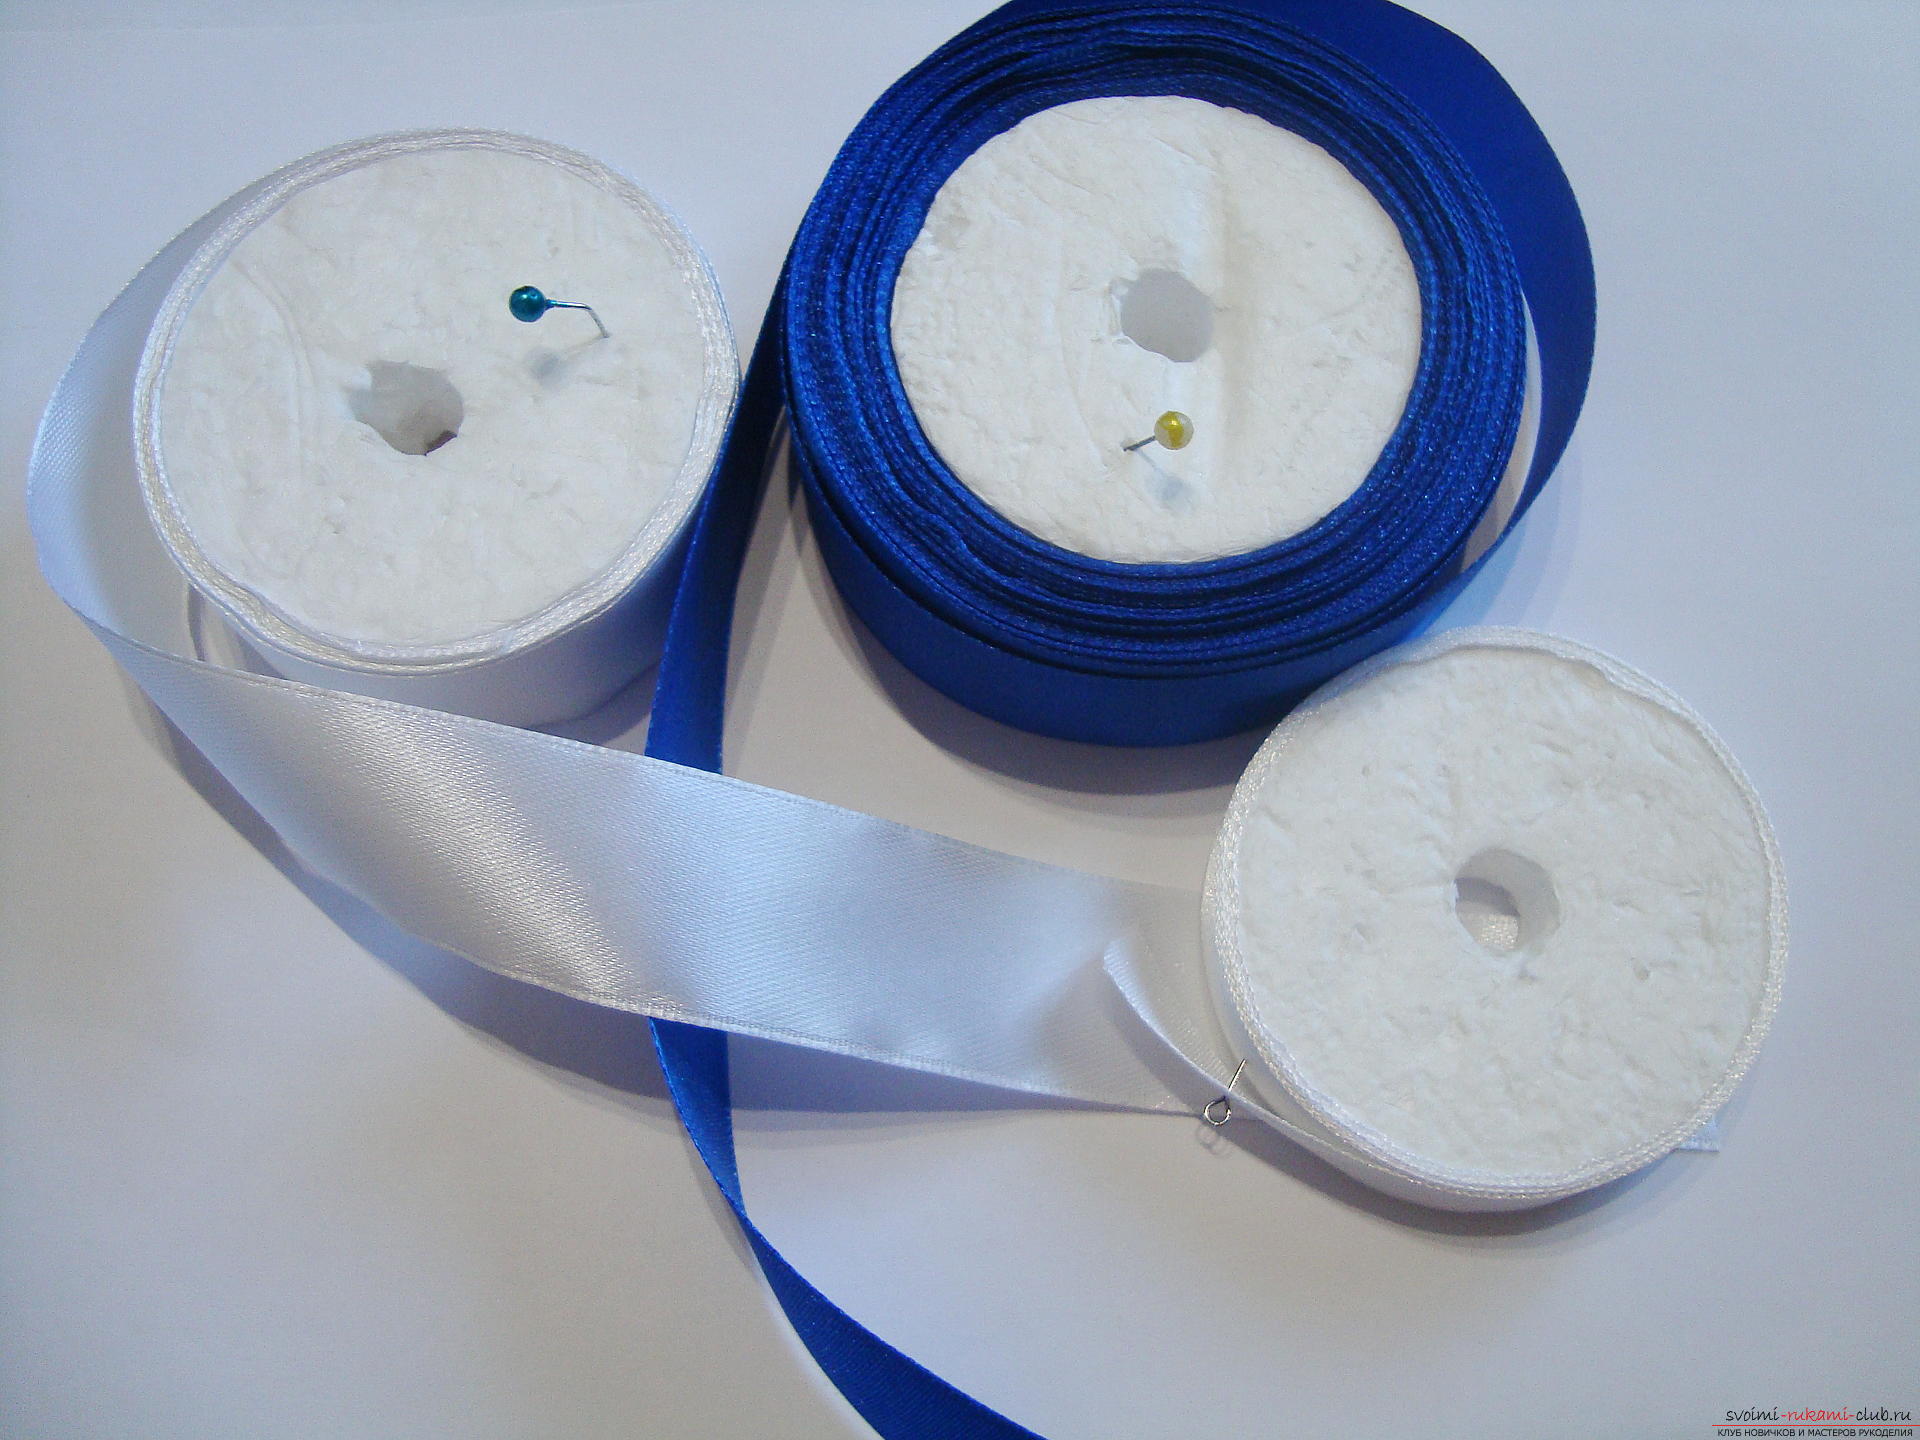
 At the first stage we start to create the mainbow, it is made in the form of a multi-layered flower with large petals. To create this product you need cuts of white and blue in size of 8 cm. You can cut the tape with scissors and burn the edges near the fire, or under the ruler, draw lines with the burner, keeping the satin on the glass surface.
 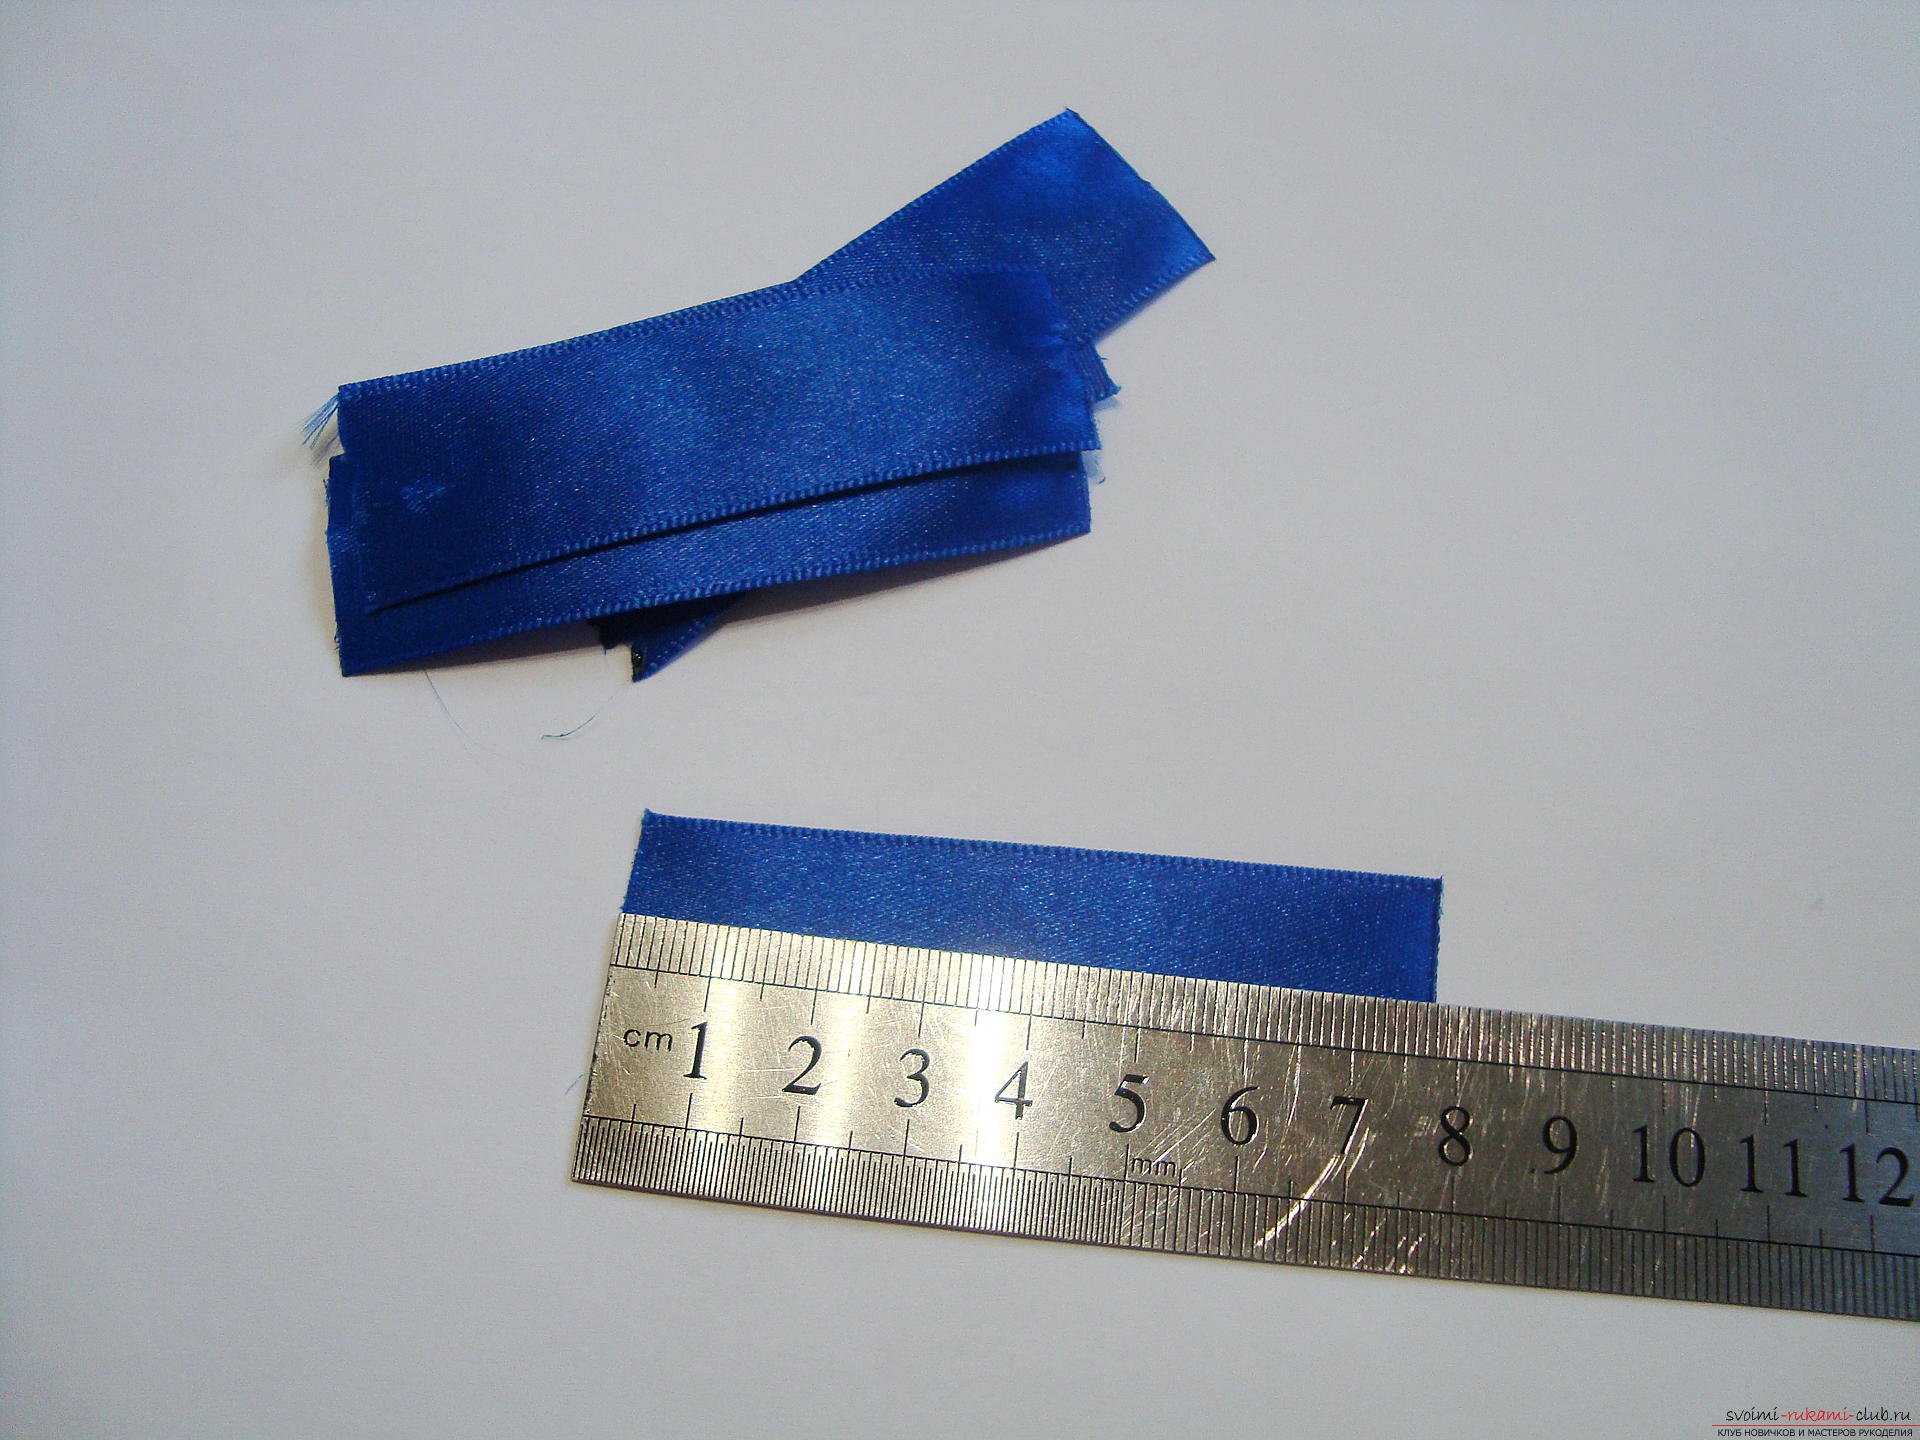 Each cut is bent in the middle. The fold should be at an angle, so that the ends of the bands become perpendicular to each other, one edge will be the front side and the other one the wrong side.
 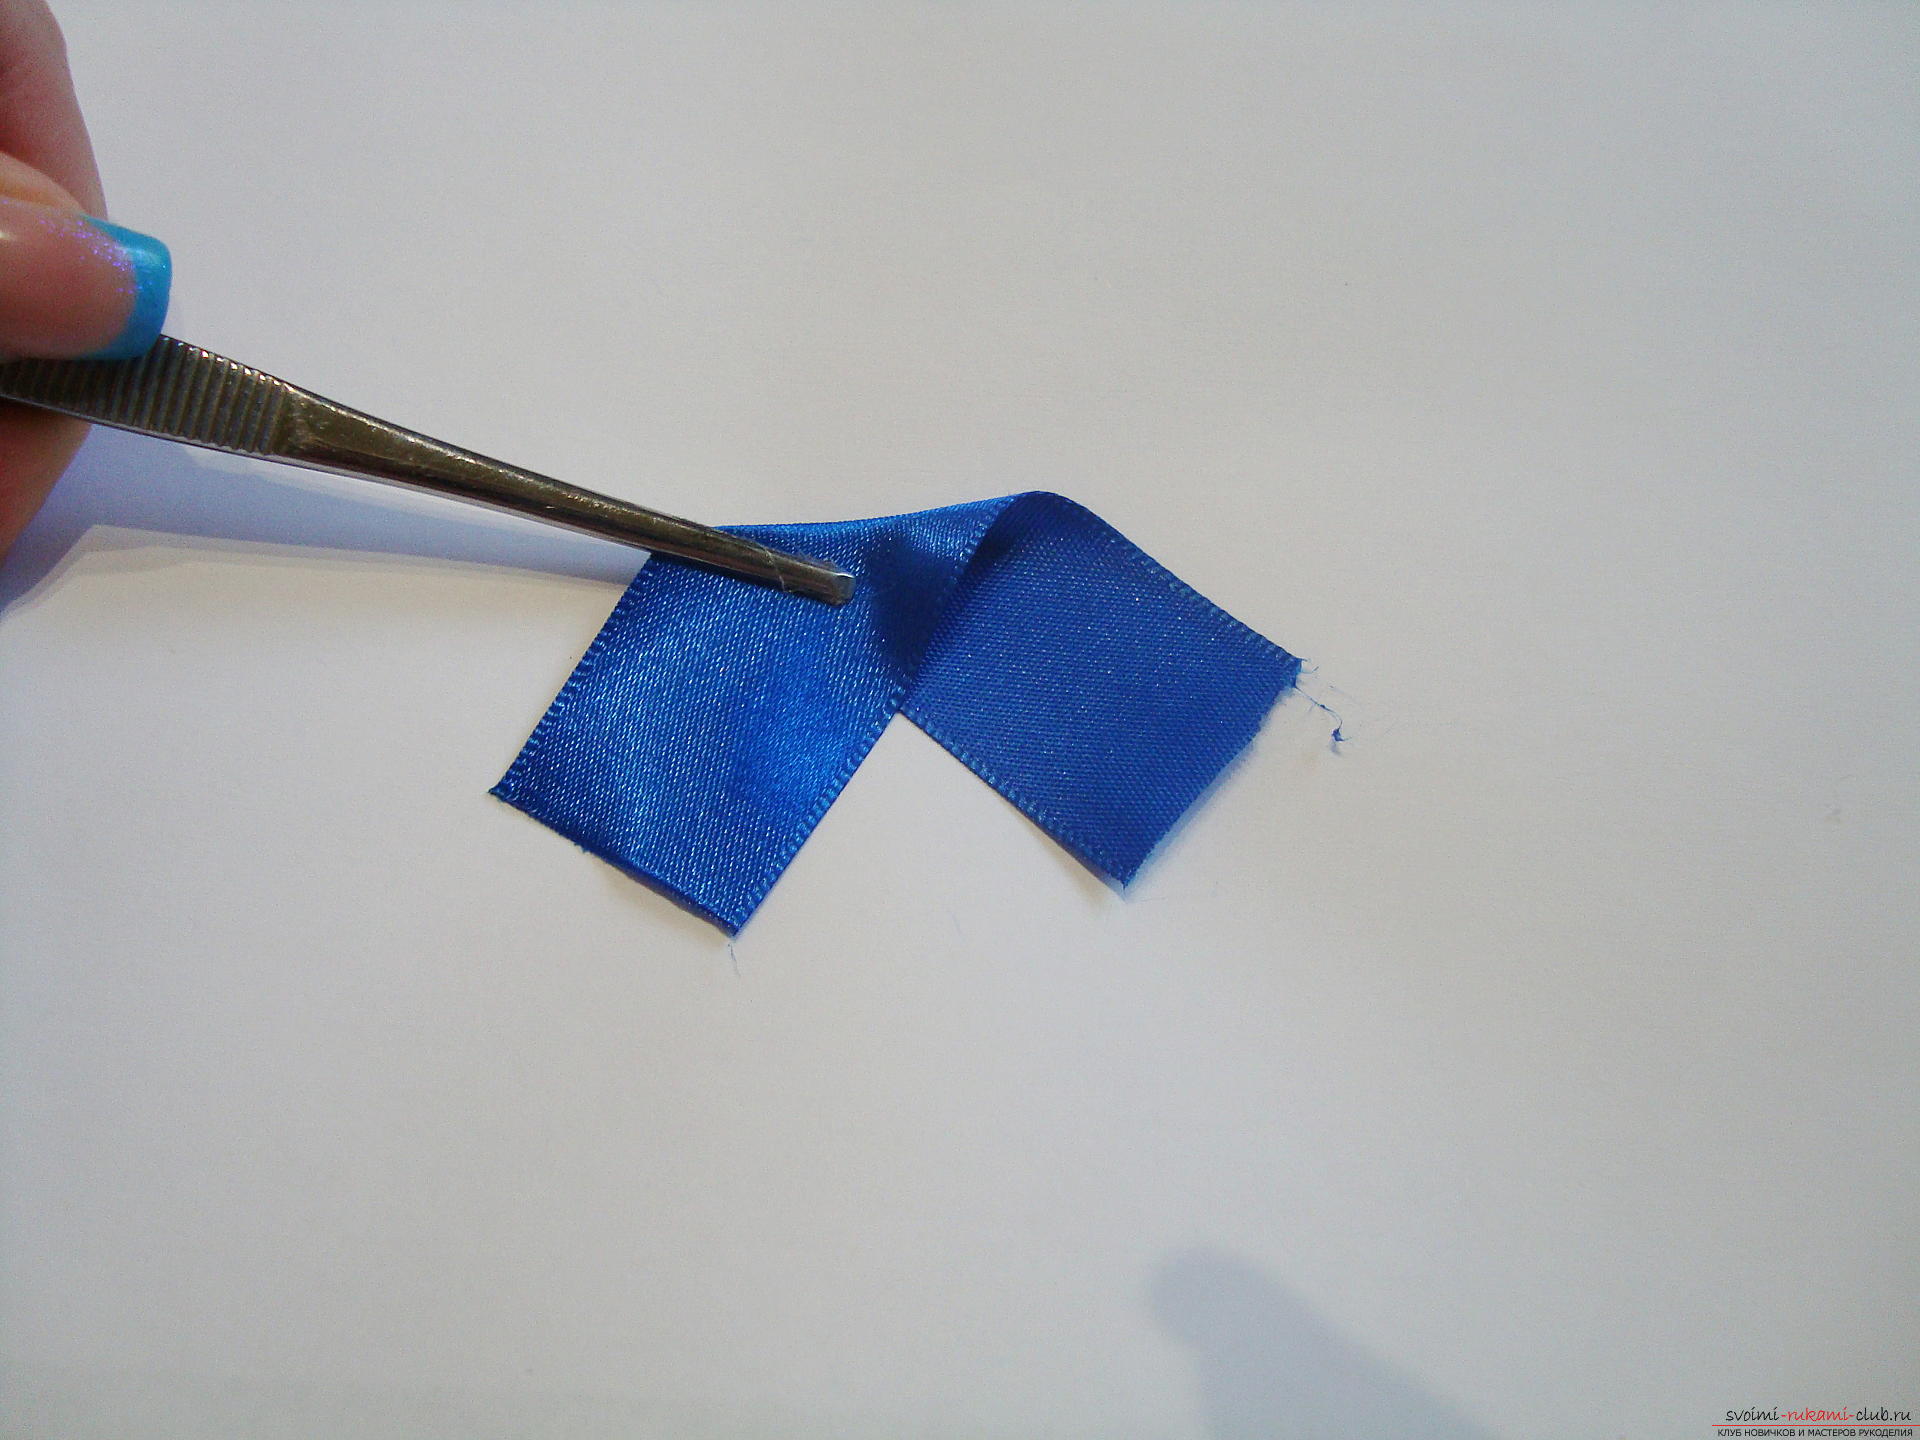 Now hold the middle of the fold line with your finger andwith the other hand, wind one edge of the tape, which is bent sideways, towards the end lying downwards. With this movement, you turn the edge of the tape so that at the base the ends converge as much as possible and lie down on the wrong side to the face, then it turns out that the face faces of the atlas are facing upwards. When the bend is made at the top, a protruding angle is formed, and it determines the shape of each petal. If you twist the bends to create uneven, then the petal will be sloppy, and then the entire flower will turn out to be a curve.
 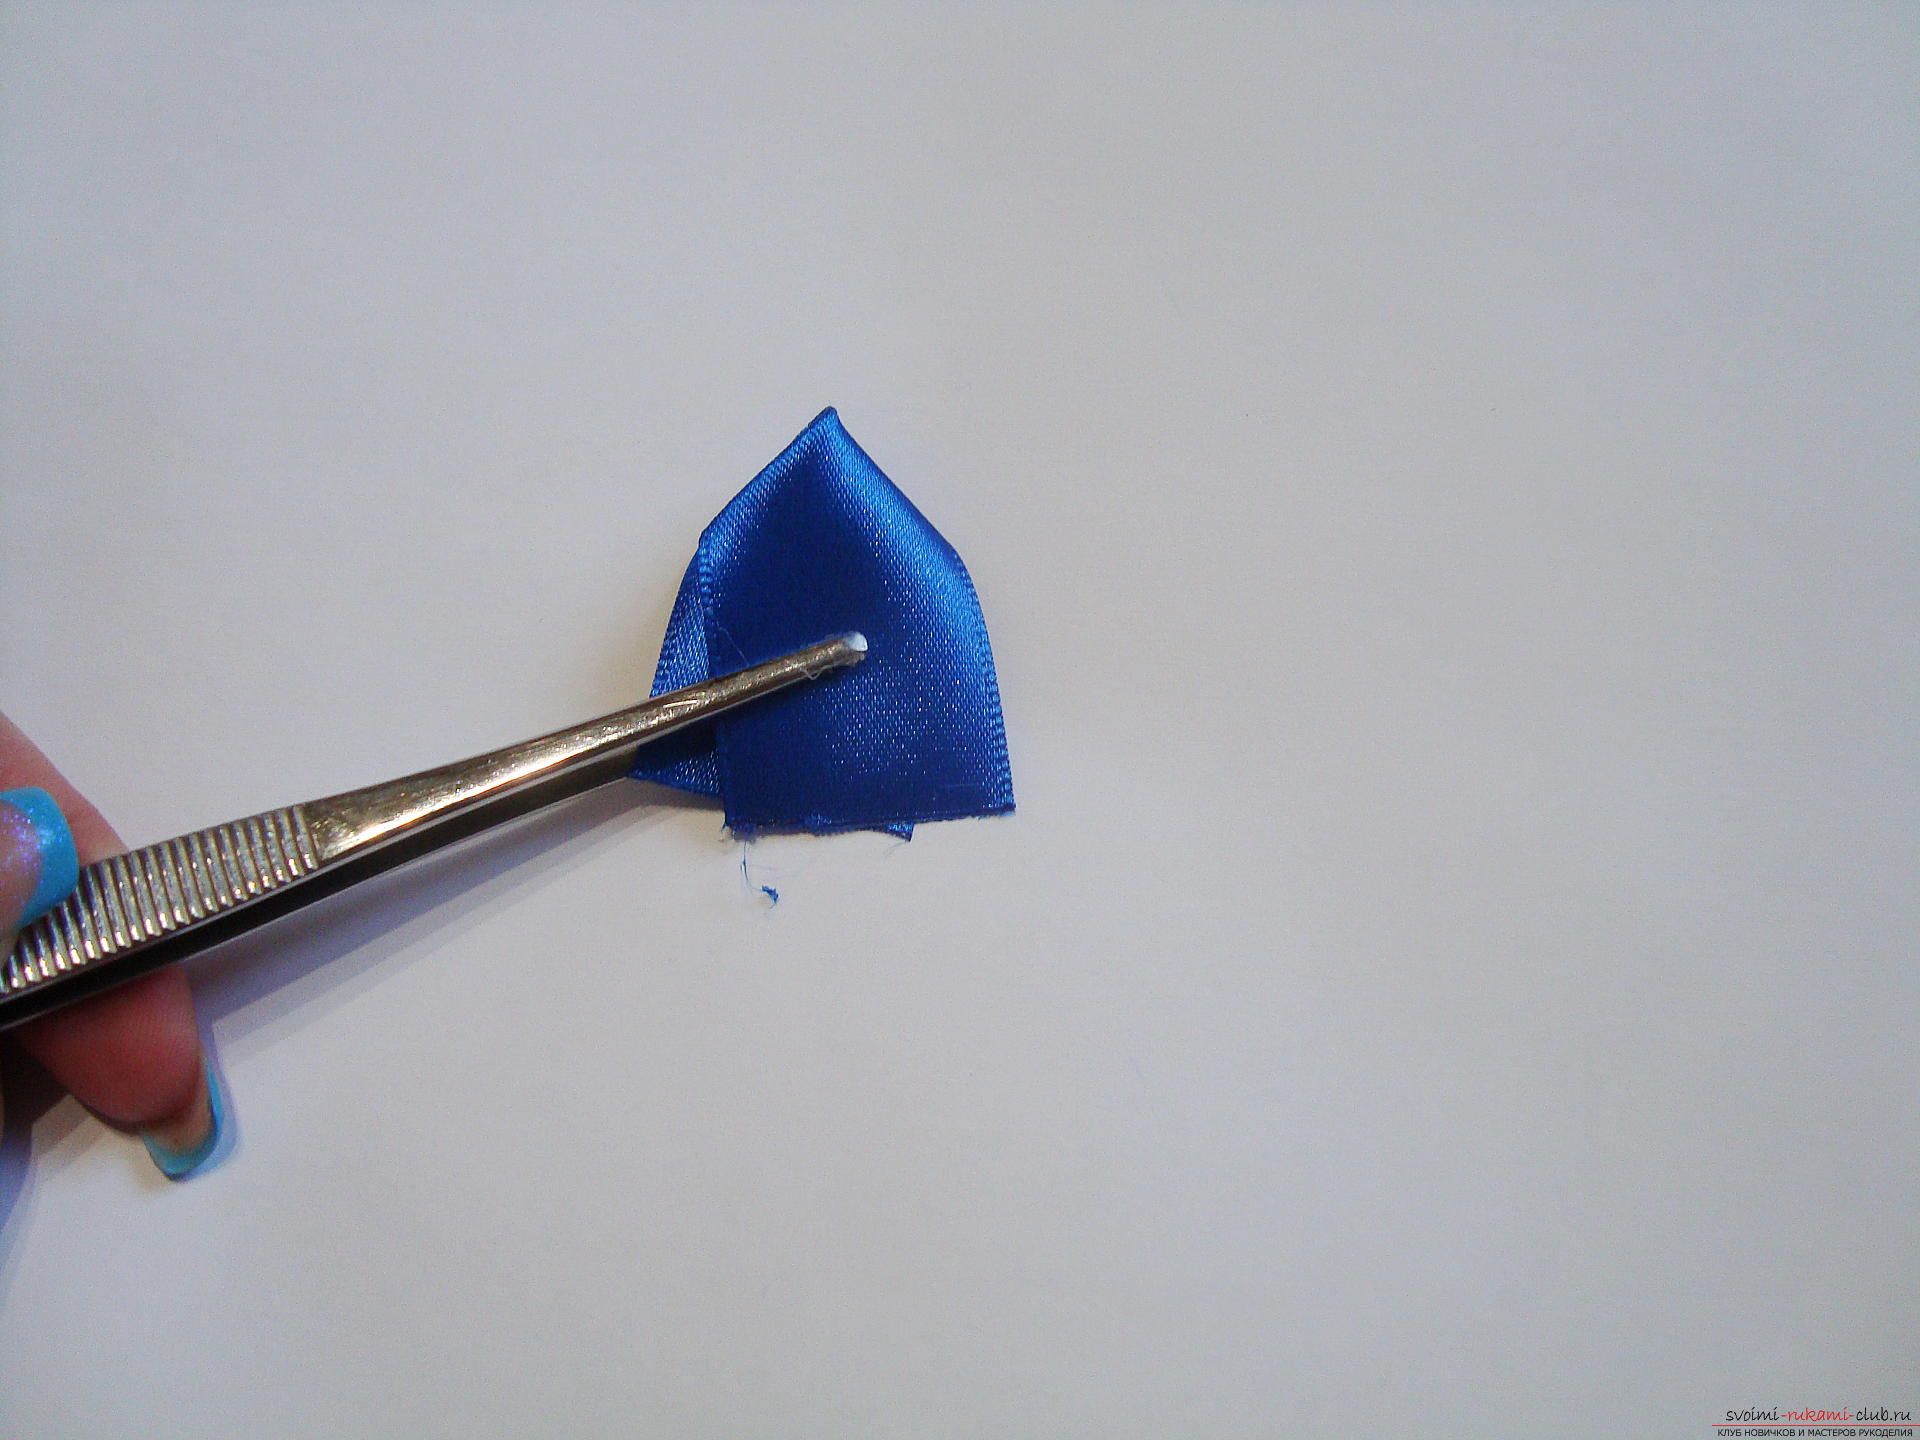 Now you need to form the bottom partthe petal. At the heart of the details, bends are created, with their help, veins appear on the petal and the shape changes. The bend is made double, one on the right side and captures half the base.
 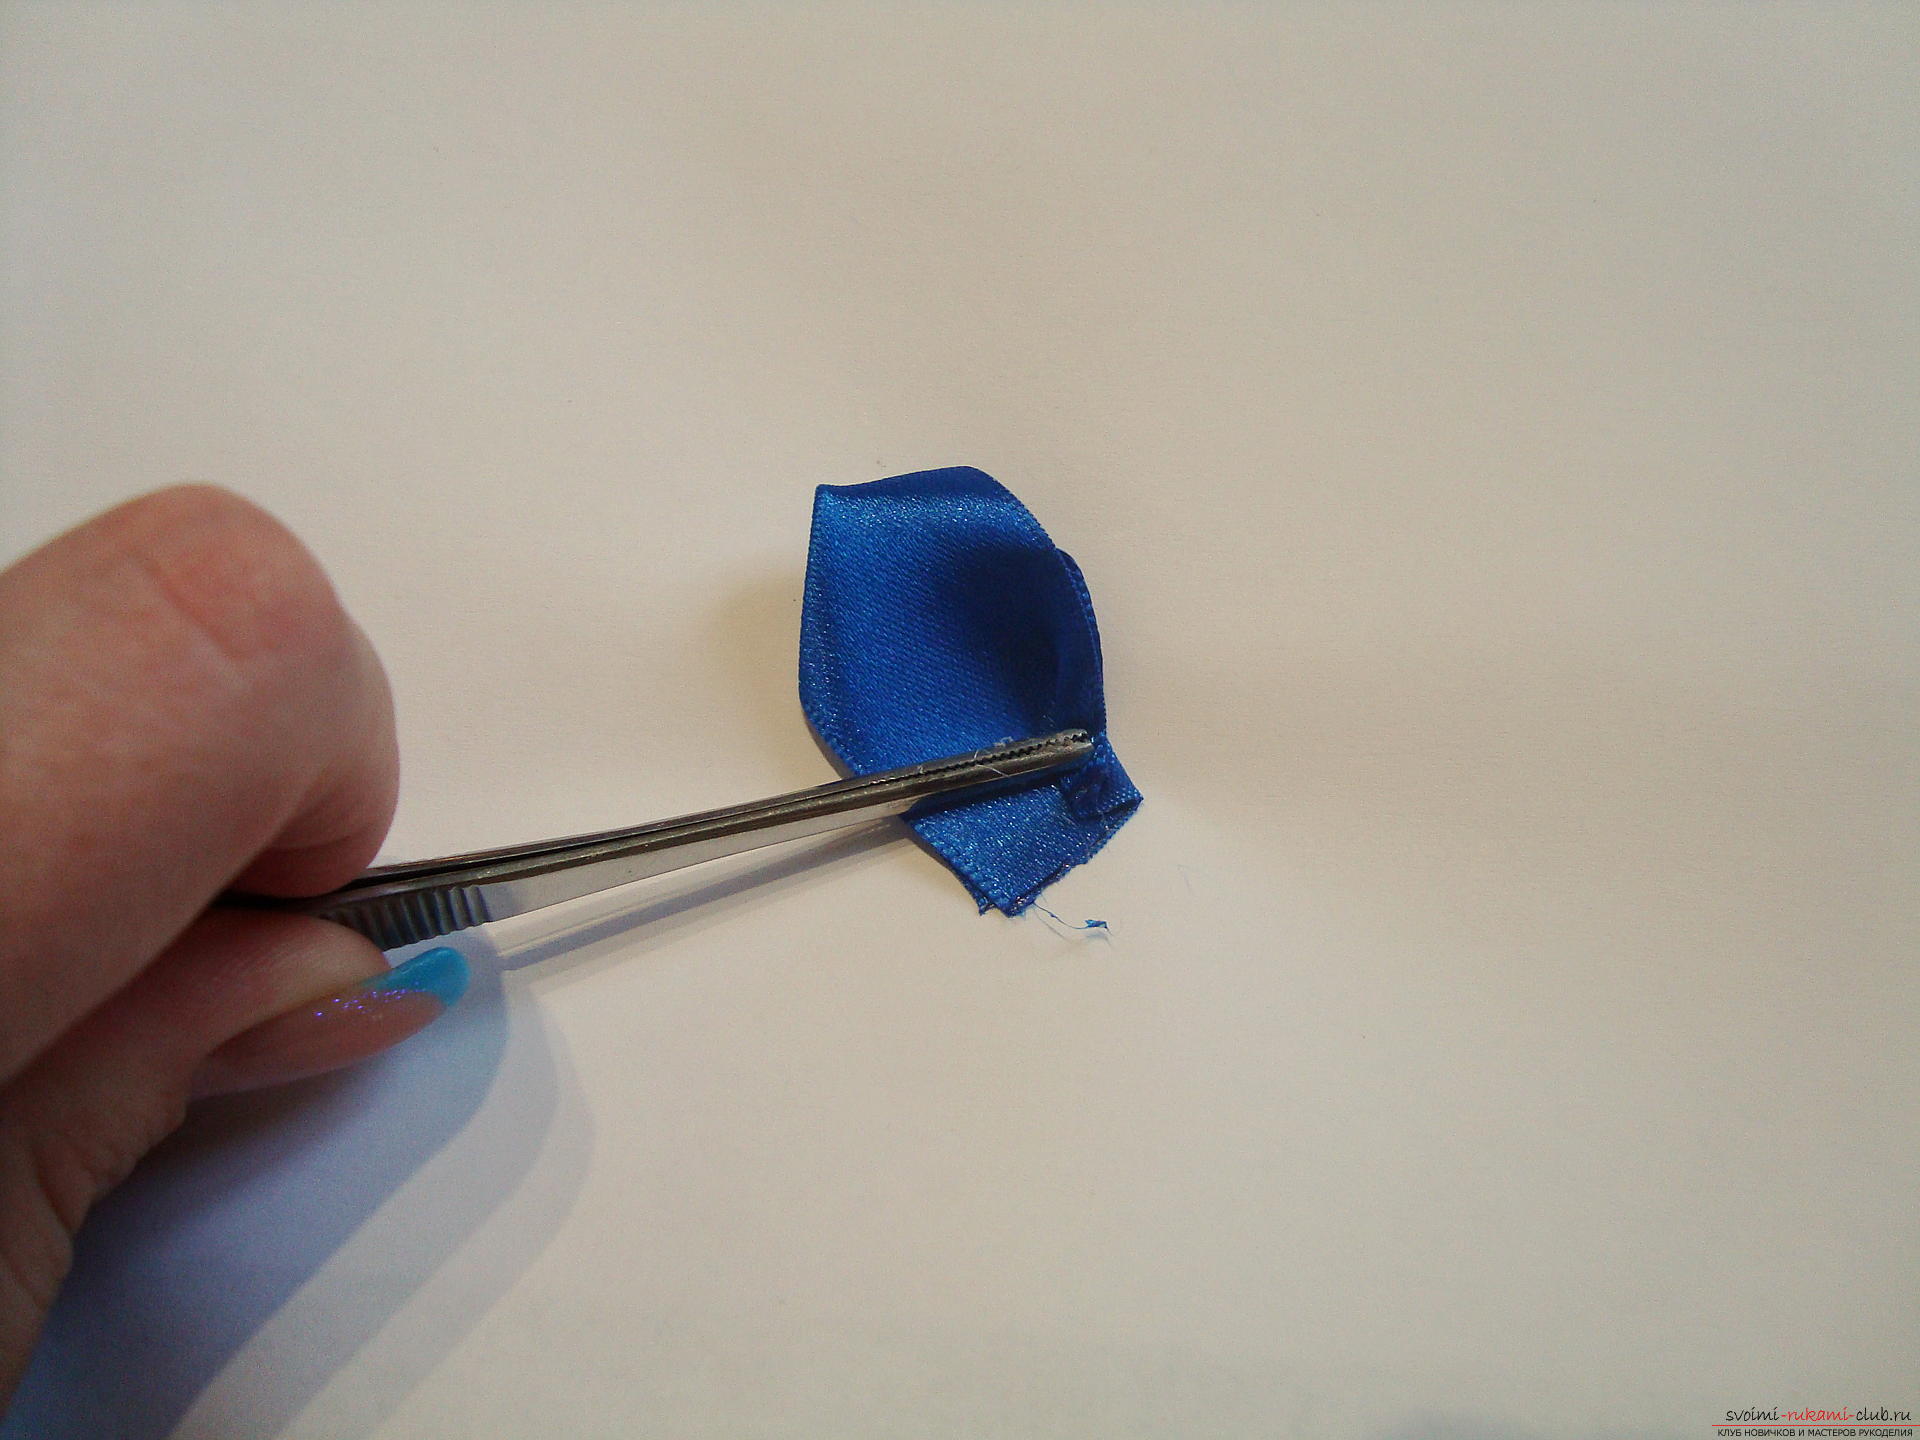 Other bends are created on the left and thus twowaves change the shape of the entire workpiece. To fix the bends, place the metal ruler on the piece 2 millimeters above the cutting line of the tape, then slowly draw the line downwards from the heated burner. Create a lot of petals in blue and white, all of them should be the same shape and size.
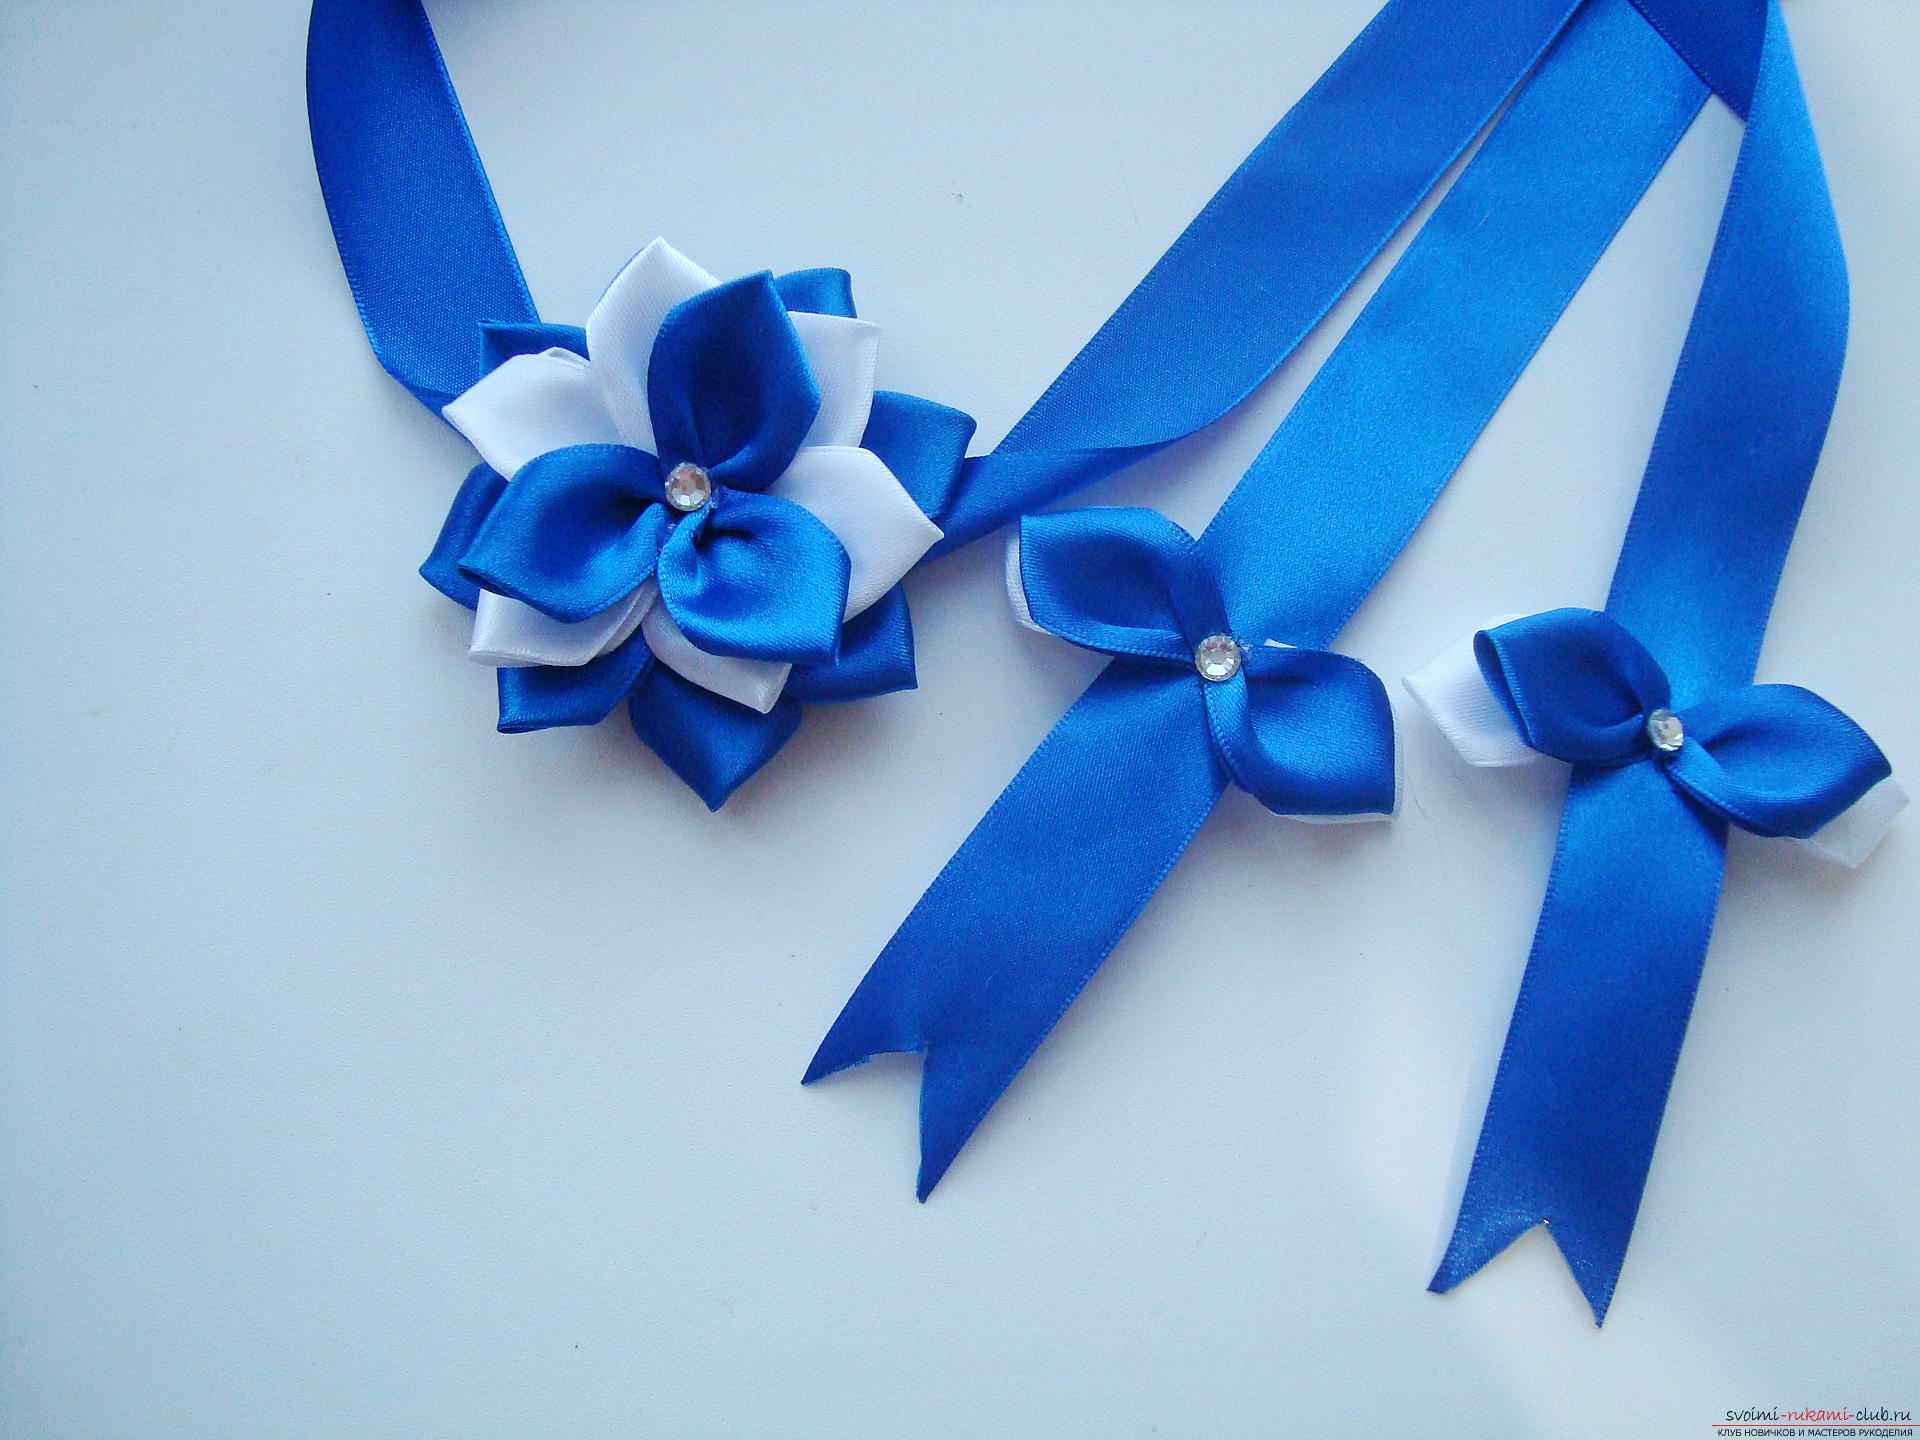
  Let's start assembling the bow. For a base, use a rounded satin with a diameter of 5 cm, it is simply cut from a wide band and be sure to scorch the edges. The first tier of petals is glued to the very edge of the circle and consists of blue elements. The first lobe is fixed from either side, the second element must be located close to the first, and the wide part of each part will be slightly overlapped over the previous element.
 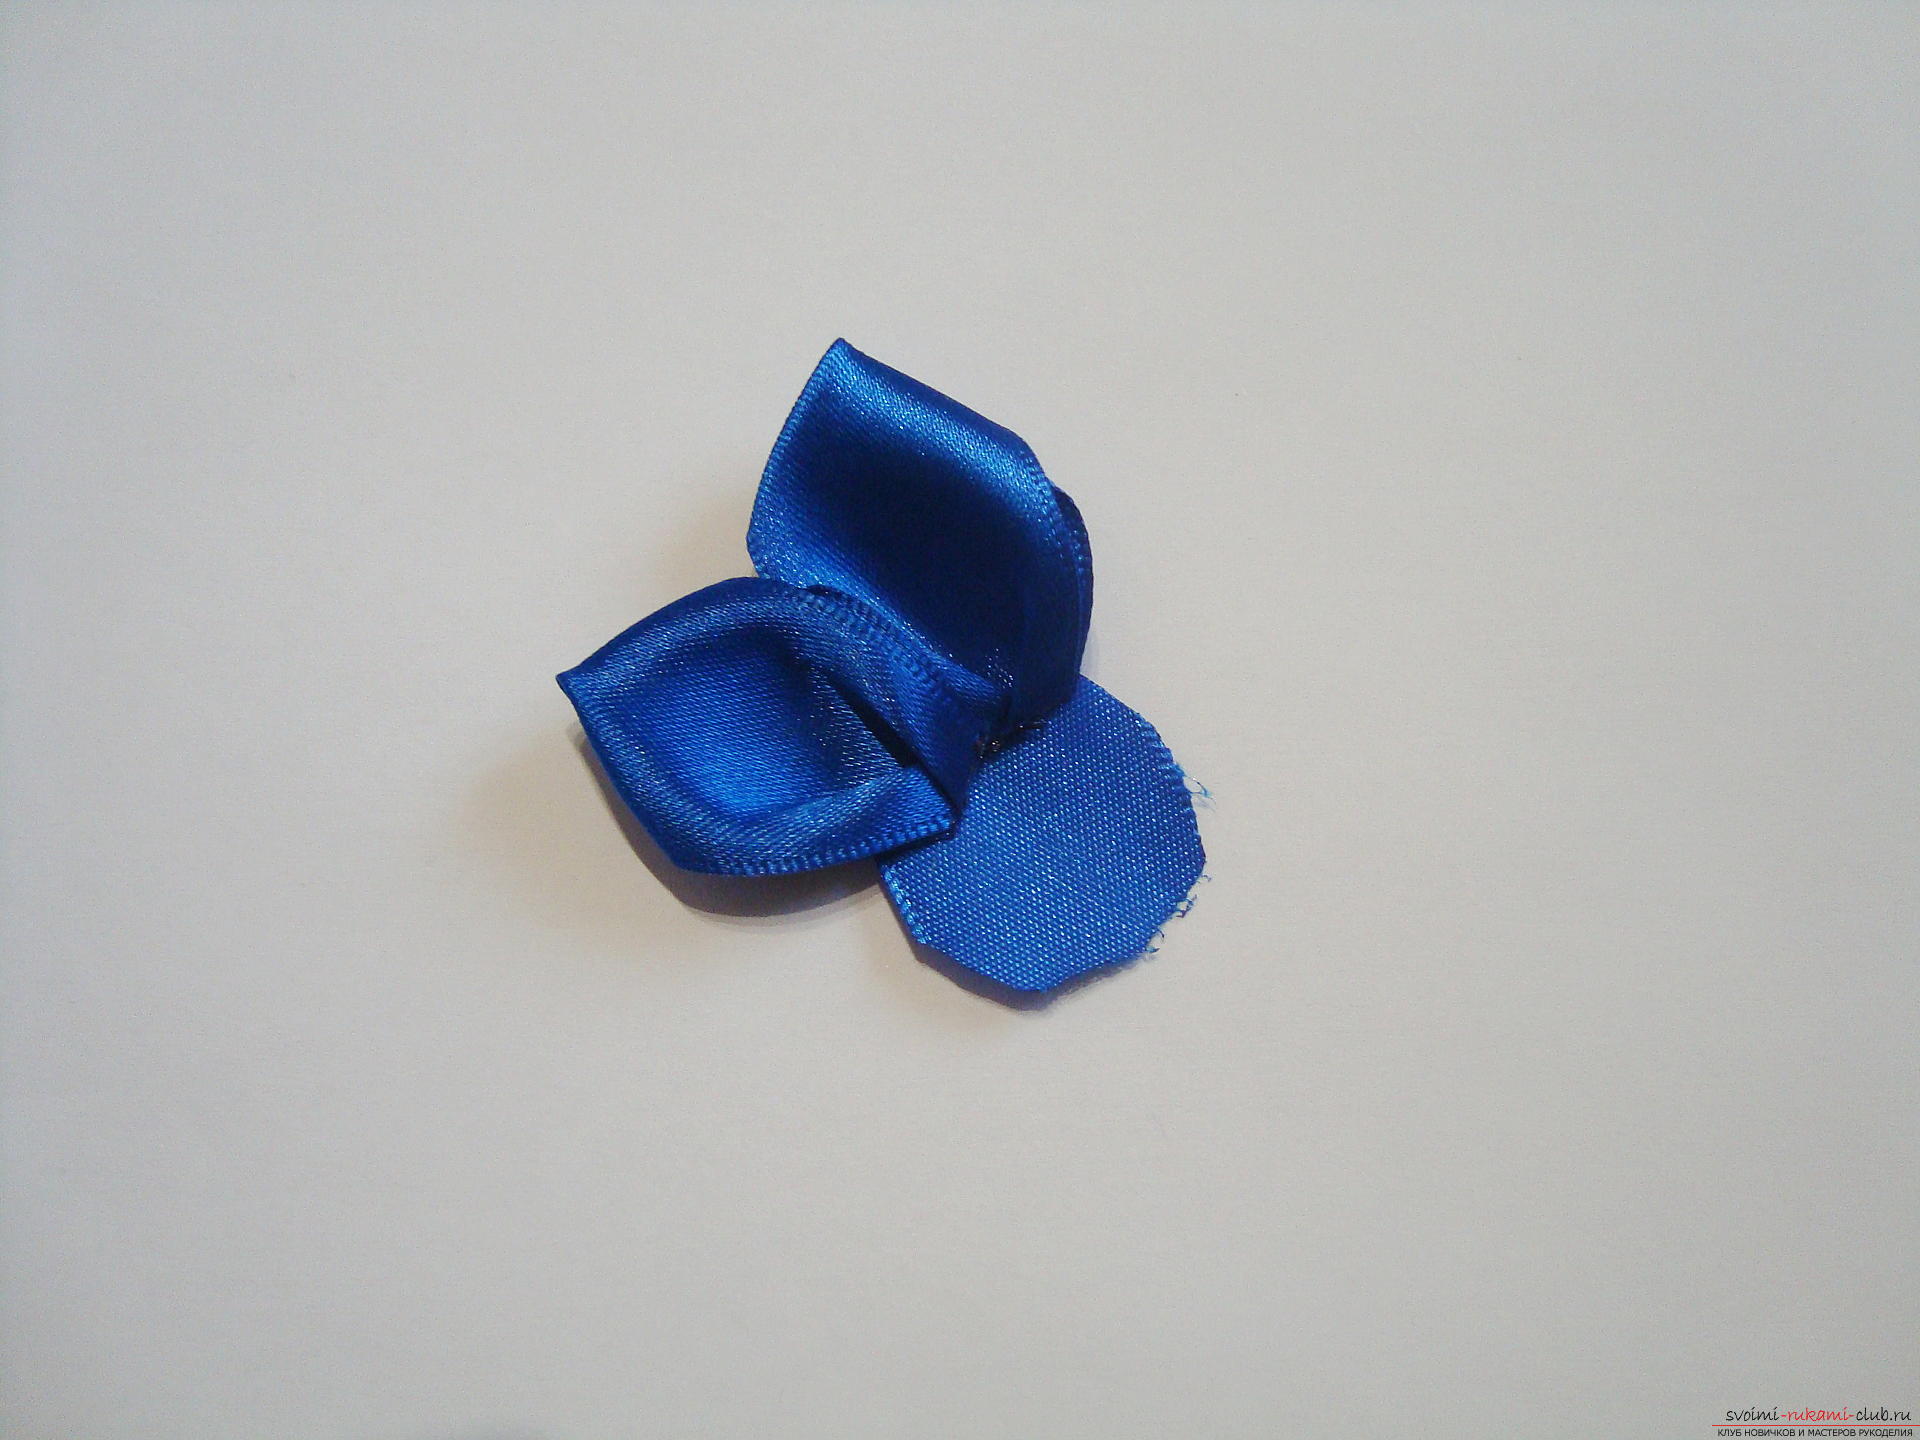 The second tier of the bow forms white elements, theystick a little to the inside of the round base. Each part is also densely glued to the previous one. Due to the fact that the petals are the same size, the lower tier will protrude and become visually perceptible. White petals try to place above the gaps of the lower row.
  The last third tier is formed from petalsof blue color. This contrast allows you to make the bow bright and at the same time sweet. These details are pasted as tightly as possible in the middle, so that the central part is flat and almost decorated.
  On the middle of the flower is attached a decorative detail that will hide all traces of glue and the junction of the blue petals.
 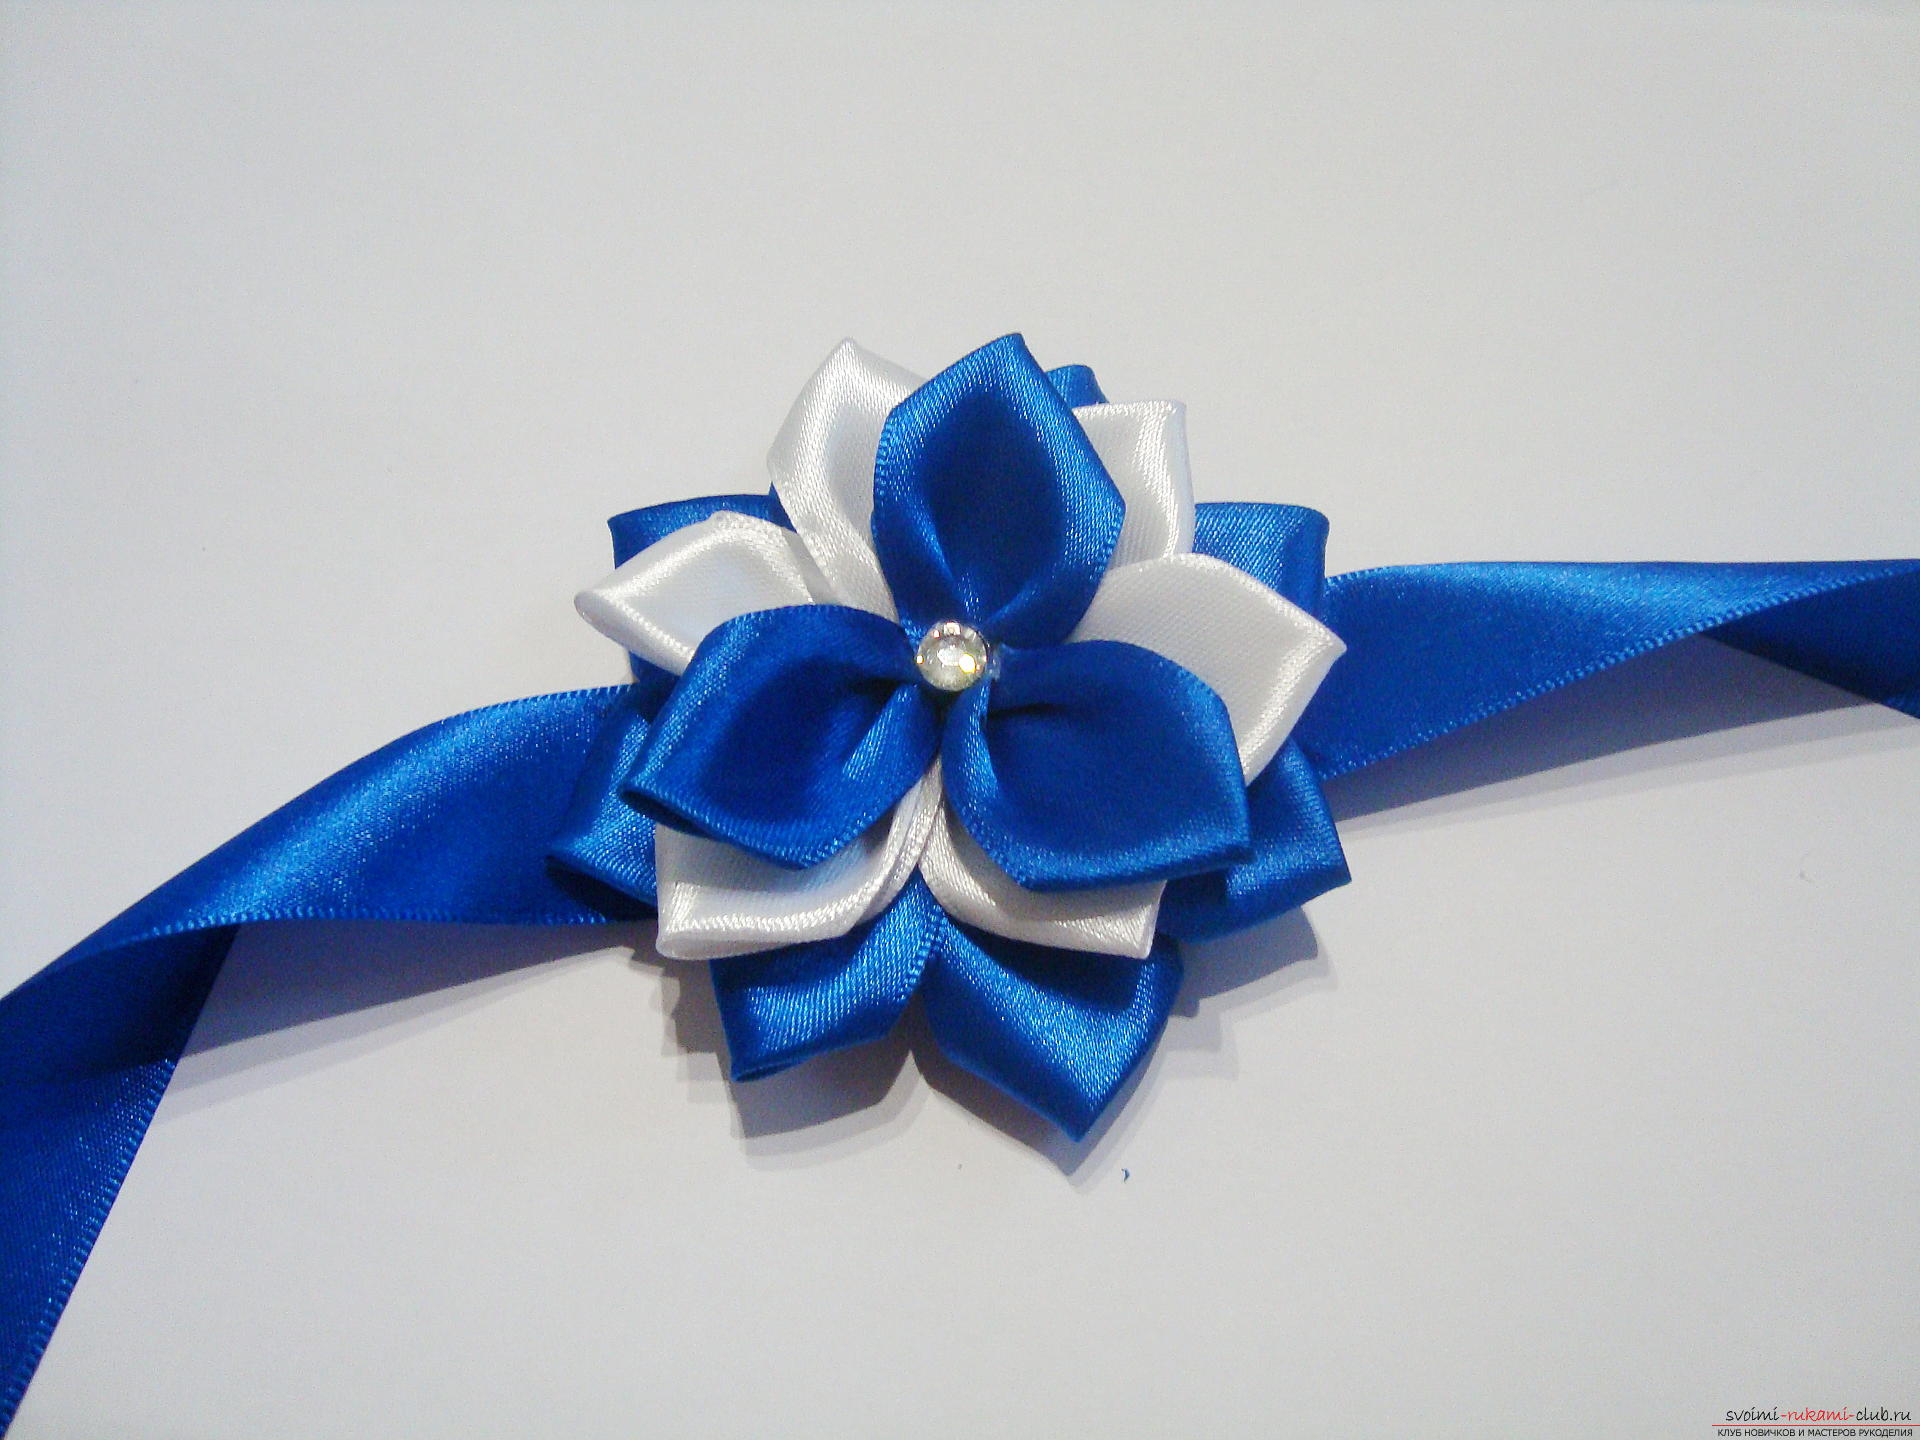 Turn the bow over and attach a piece of tape about 4 cm in length to the rounded base so that it becomes the holder for the long ribbon that adorns the blanket or envelope.
  Through the created fastening tape is passedof blue color. Its length is usually about 1.5 meters, but it can change at your discretion. The ends are cut with a swaddling band in the form of a triangular flag. Slices can be made immediately by an incinerator, it is much more convenient than singing a sharp inner part of the cut end. Small bows should decorate the ends of the ribbon. They will need 4 more petals per edge, two elements must be white, and two blue. Leave the edge of the tape about 12-15 cm and glue two white elements, placing them horizontally at a distance of about 1 cm. Both petals should be located opposite each other, so that they form the lower level of the bow.
 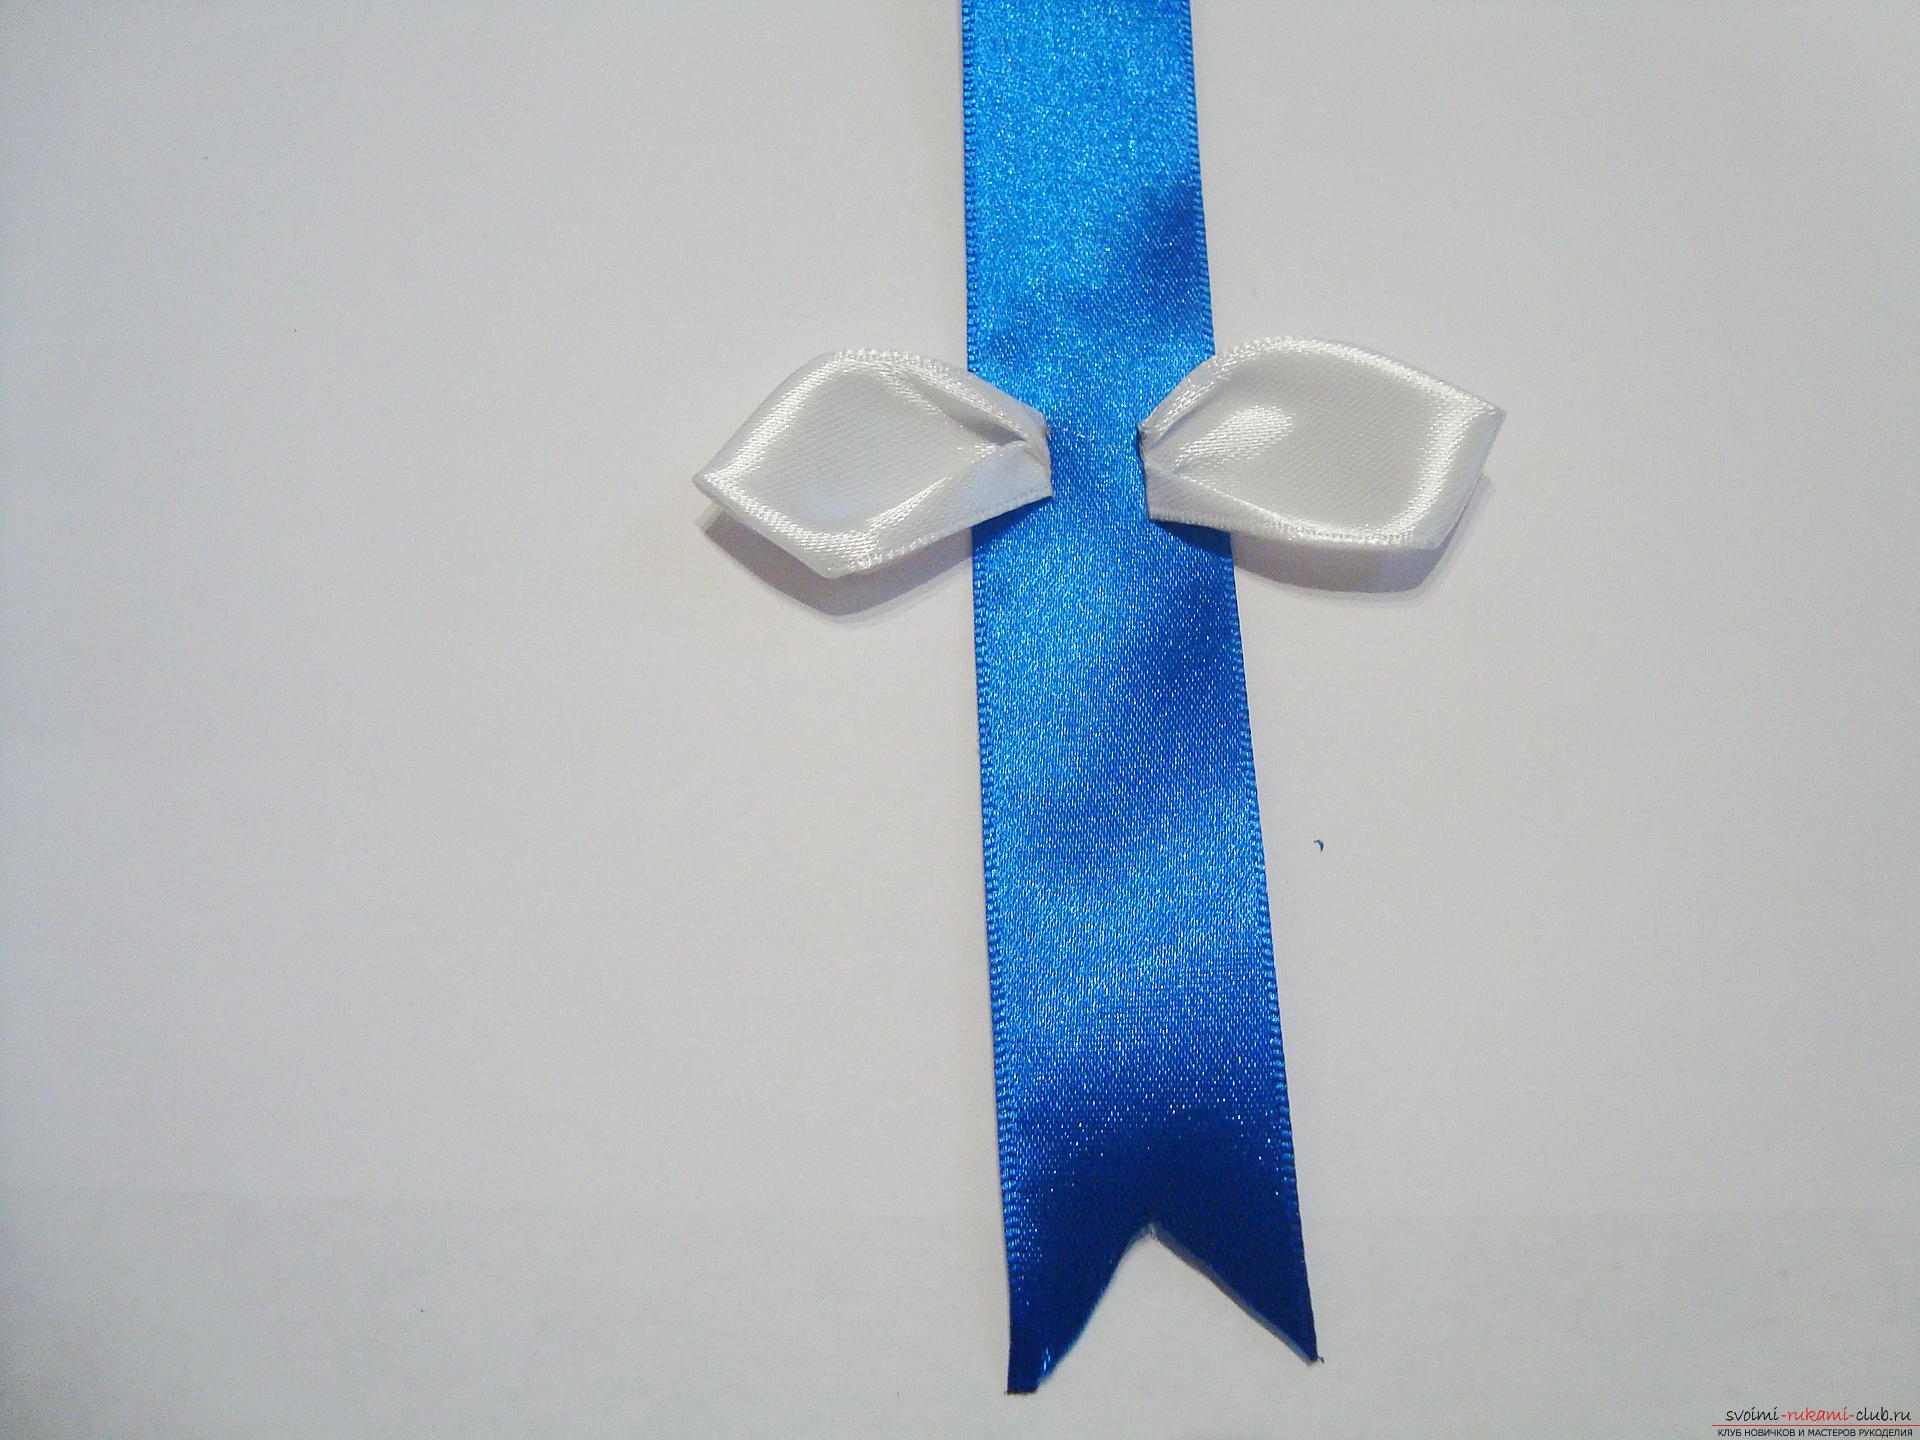 The second tier is the petals of bluecolor, they are glued directly on the central part of the tape, tightly in contact with each other. The joint of the last elements should be as noticeable as possible, then the work will also look neat and aesthetic. The middle of the bow is sealed with a small rhinestone. Remember that this product is for a boy, so do not overdo it with shiny items.
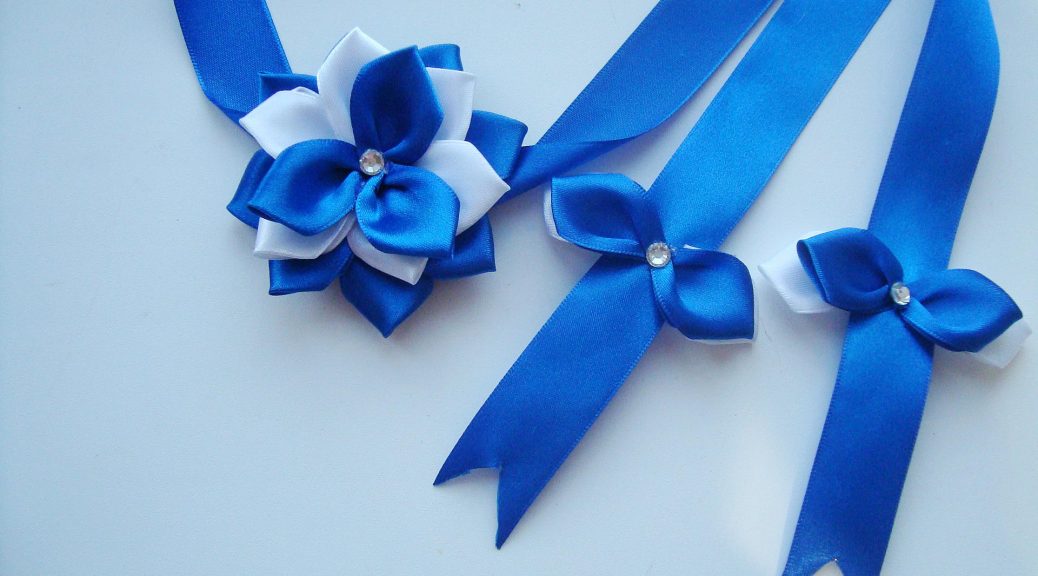
 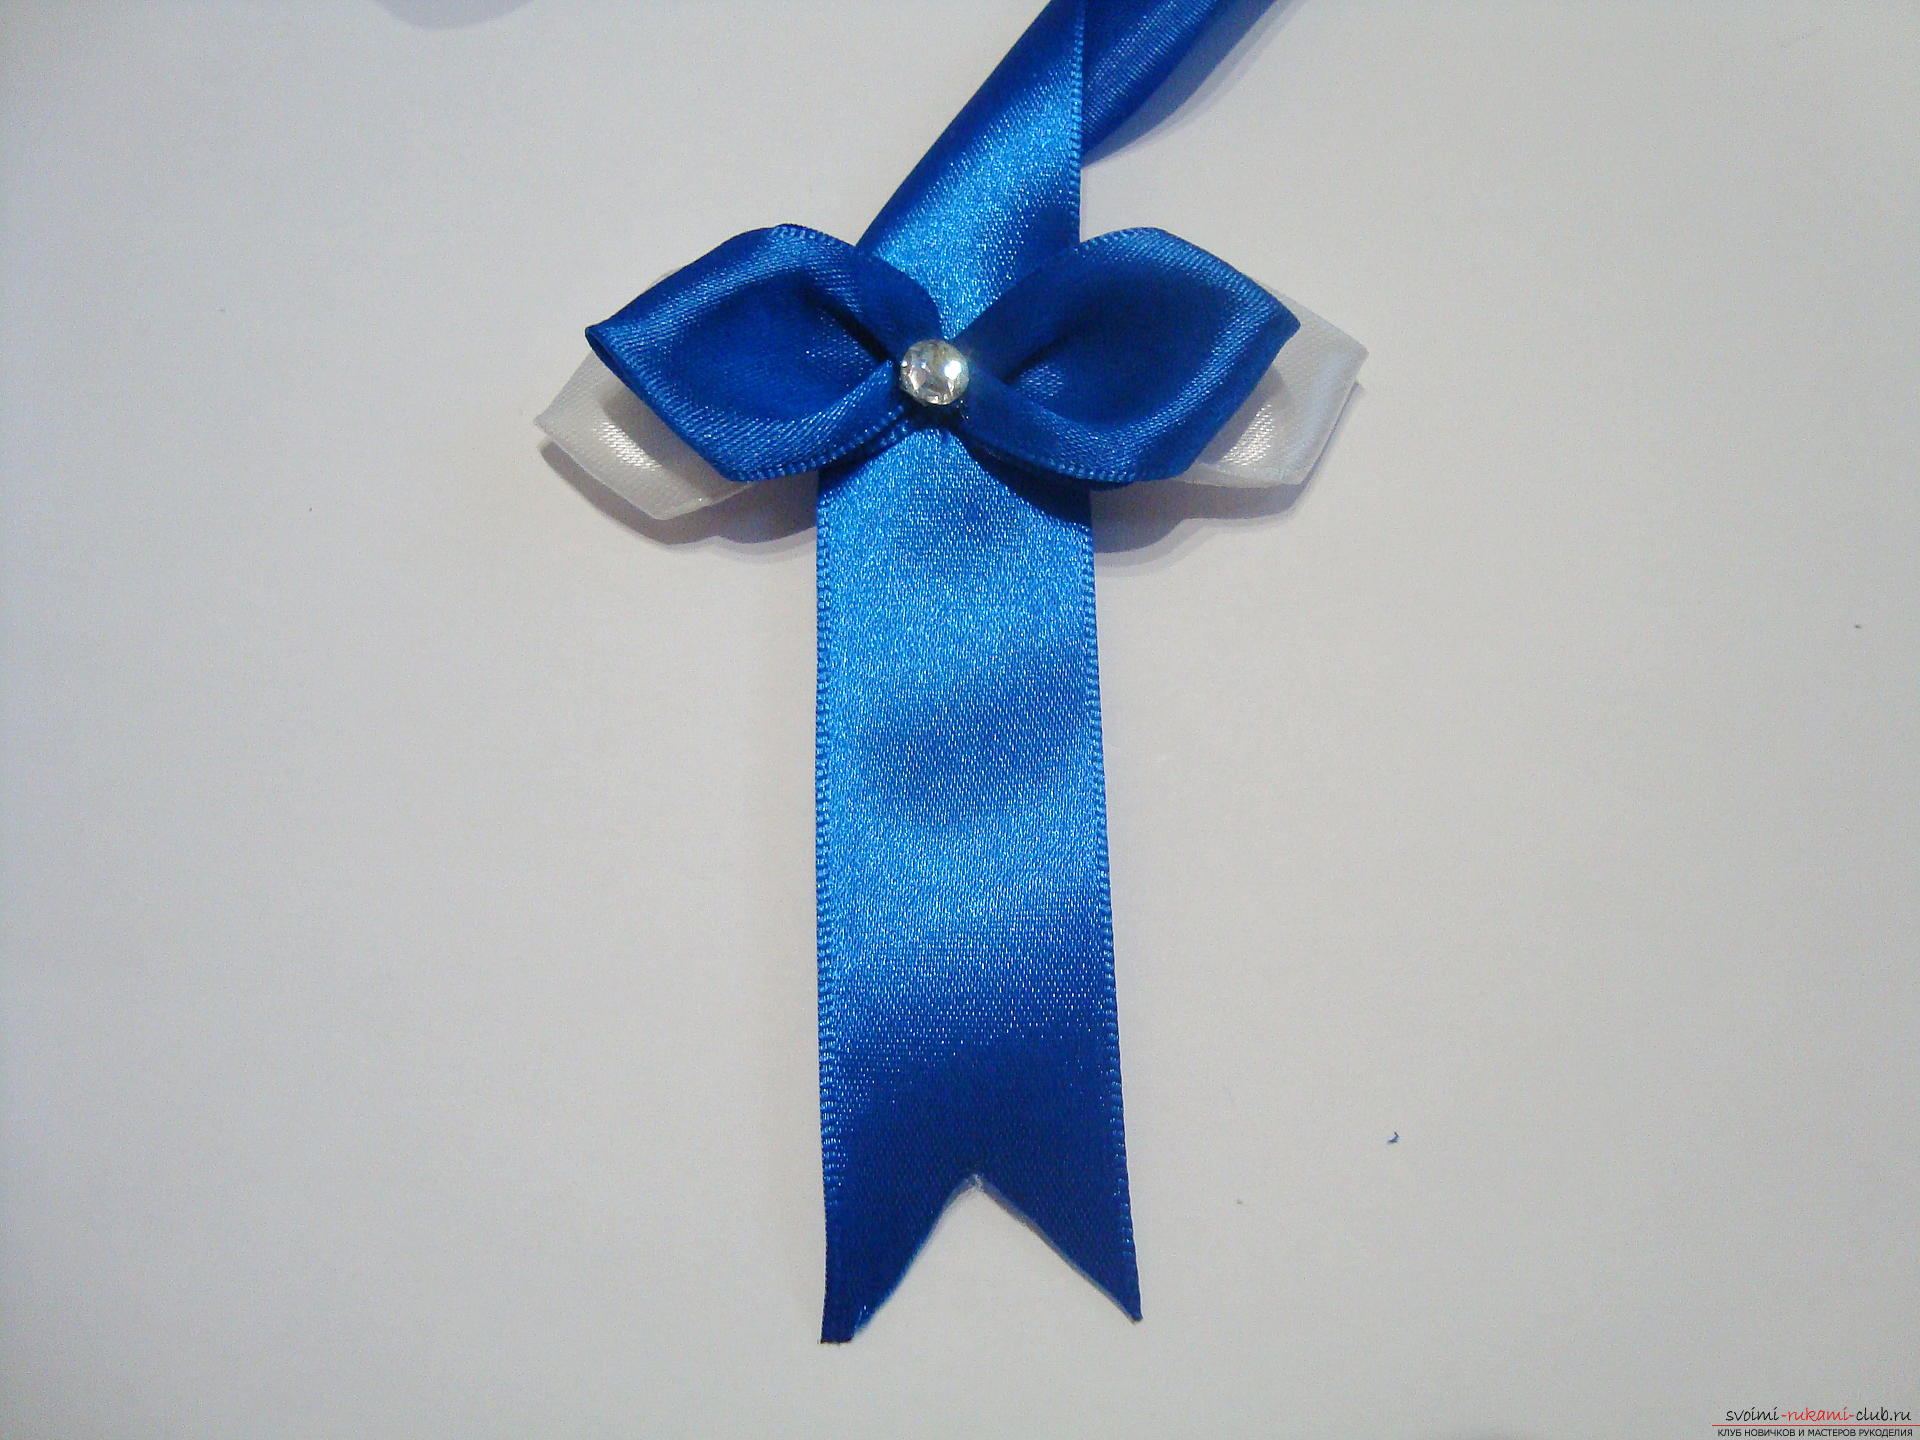 As a result, a gentle bow to the extract was created, which was created by own hands. This product will certainly please everyone and will symbolize that in the precious envelope there is a male child.
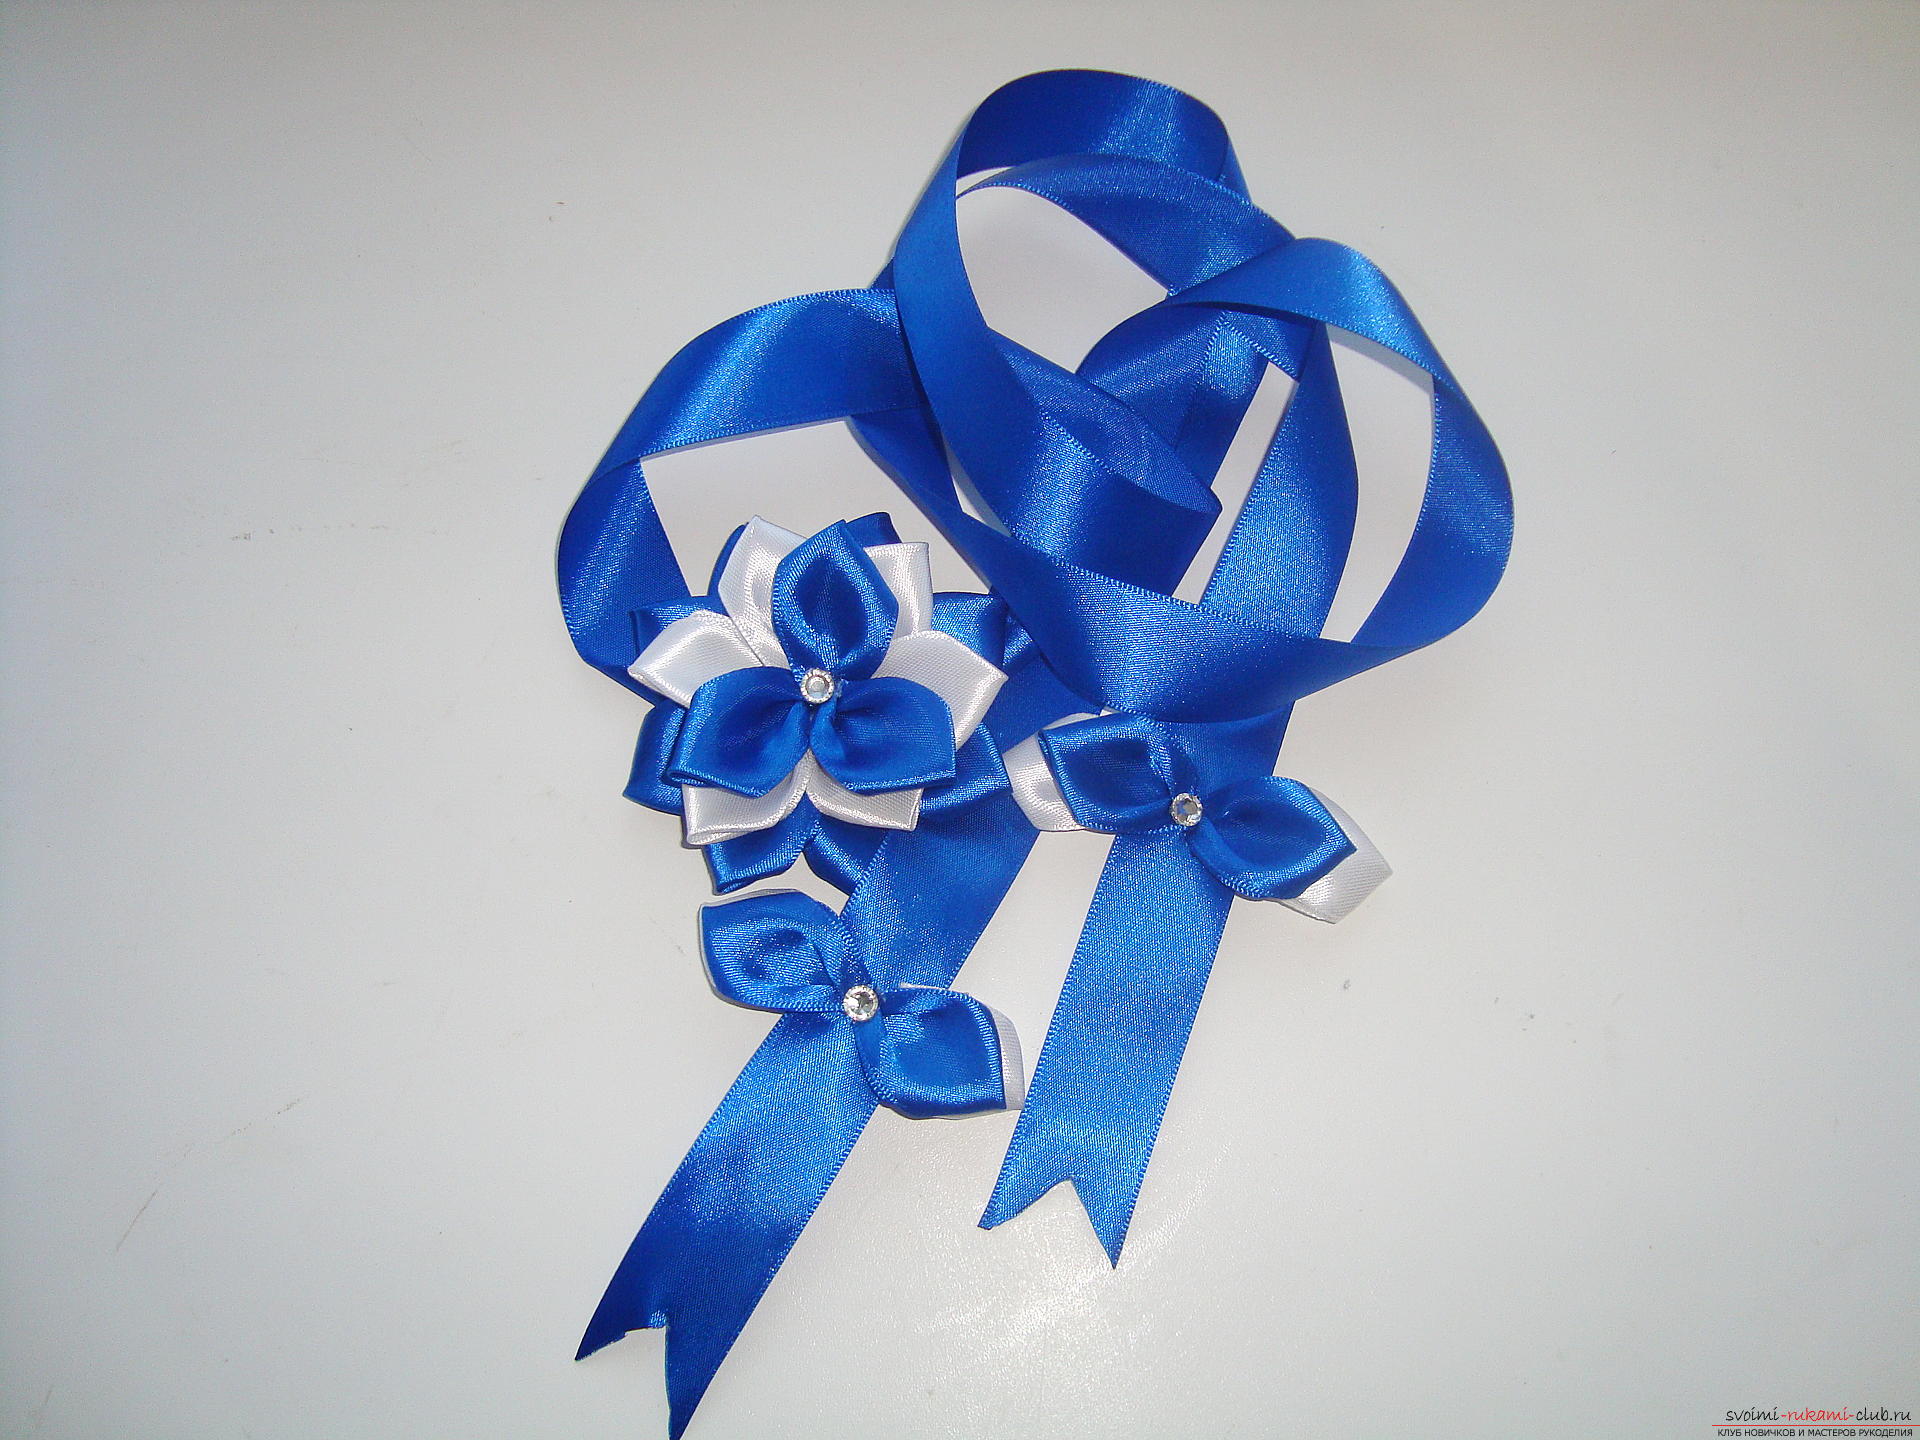
Comments
Related posts:
 Step-by-step recipe for salad from vegetables "Summer" with a photo and a detailed description of the steps
 We are building a school suit for a boy with a detailed description and photos.
 How to knit with cute mittens "Winter Tale"? A lesson on knitting winter mittens from acrylic on knitting needles, with a detailed description of steps and photos
 A gift from diapers for a newborn. How to make a cake from pampers with your hands on an extract
 Loom Bands products with their own hands with detailed descriptions and photos.