
Bracelet made of gum on the machine: a lesson with a photo
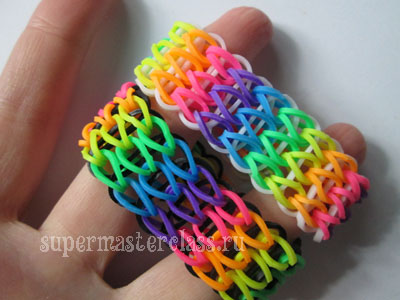 The machine is an endless opportunity to createbeautiful and varied bracelets! We suggest that you familiarize yourself with the master class, how to weave a bracelet from rubber bands on a machine: the lesson contains detailed explanations and step-by-step photos. This type of weaving looks interesting when the base is contrasted with elastic bands on the front side. And to make it even more fun, we invite you to color the bracelet in the colors of the rainbow! The machine does not allow to weave a bracelet that completely covers even a child’s wrist. It is usually advised to weave the fragment on the machine, and do the rest in a simple way - for example, as it is woven. But in this lesson we will show you another way - how to extend machine weaving in such a way as to get the bracelet with the necessary (and not the specified number of pins) length.
To weave a bracelet of gum on the machine for our lesson will need:
straight machine; hook; rubber bands for weaving - black or white for constrictions and colored rubber bands according to the number of colors of the rainbow or any others you want; one fastener-eight. 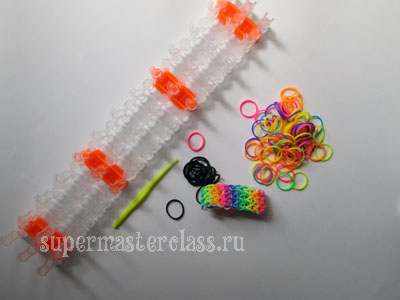
Weaving a bracelet of rubber bands on the machine: a lesson with step by step photos
First of all, assemble the machine in such a wayso that the central line is shifted relative to the two extreme ones. Thus, the pins will be staggered. Place the machine so that the open part of the pins is facing away from you. 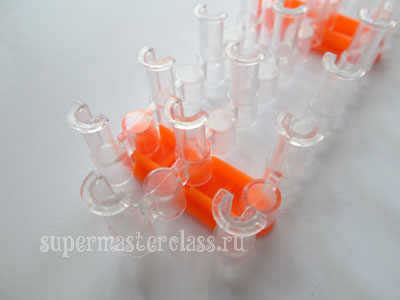 On the extreme pin of each line of the machine, put on one purple elastic band.
 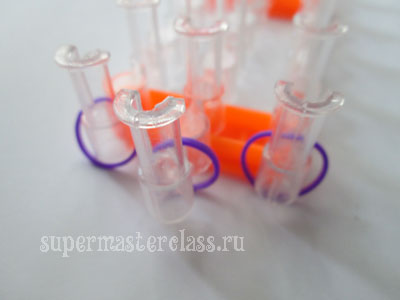 Then pull the pink rubber bands, as shown in the photo below.
 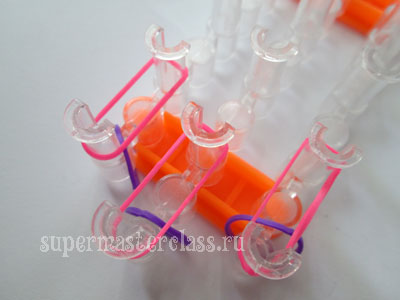 Next - orange.
 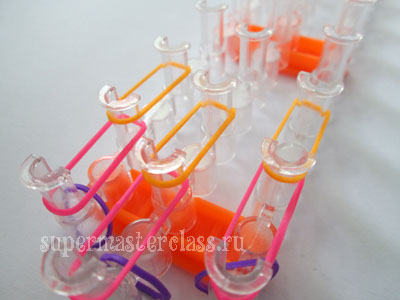 Then yellow, green, blue and againpurple - and so on until the end of the machine. If you follow the color scheme proposed here, then the last stretched rubber bands will be purple. Throw on the last pins one more pink rubber band, without stretch.
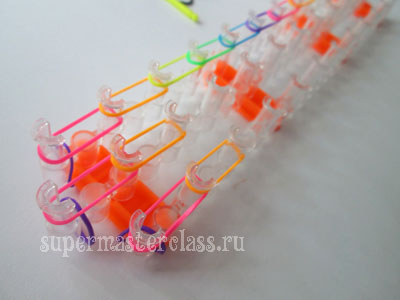
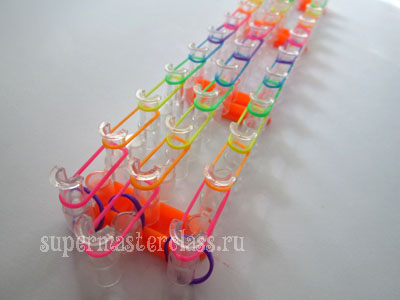 Stretch the gum base - black or white. Arrange them, clinging to three pins, a triangle:
 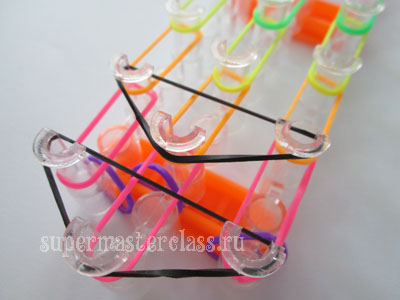 We reach the end of the machine:
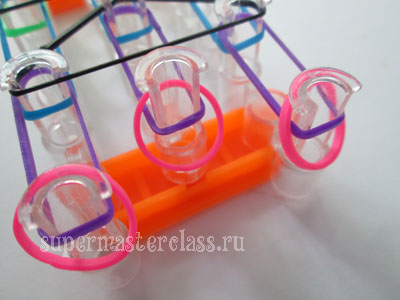
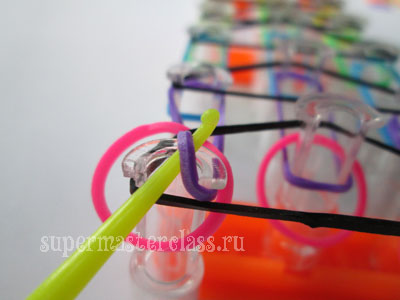
 We begin weaving a bracelet of rubber bands on the machine. Take the hook and enter it into the cavity of the pin. Grab a purple gum and release it, pulling it between the black gum and the pin itself (see photo below).
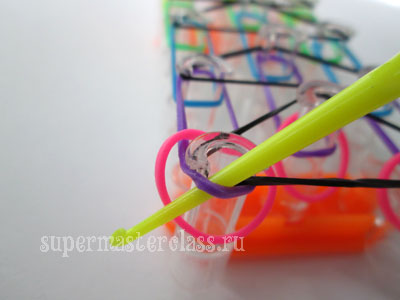
 The loop thus removed is thrown onto the next pin of the same machine line.
 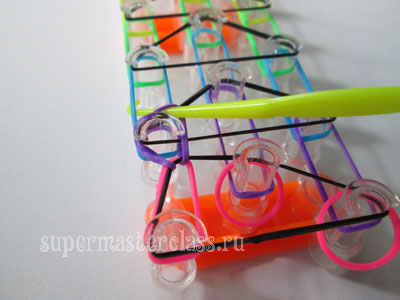 Do the same with the second purple rubber band.
 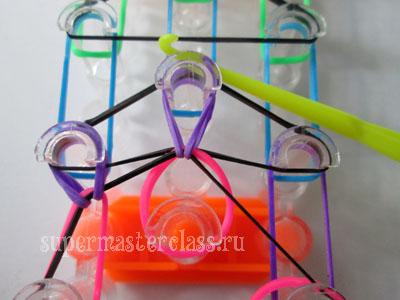 And the third.
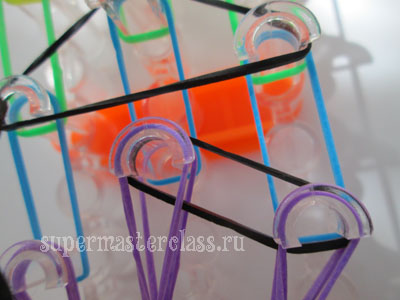
 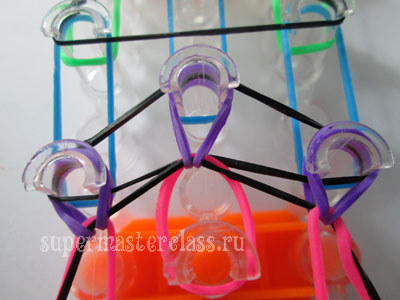 Take the blue rubber bands. Enter the hook into the cavity of the pin, pick up the blue gum and carefully, so as not to throw off the remaining elastics, draw the loop and throw it on the next pin.
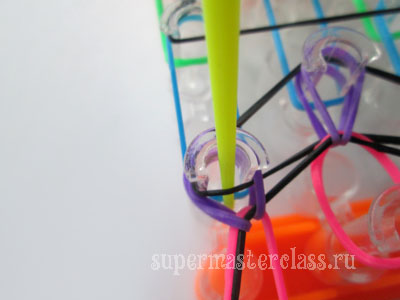
 Do the same with the other blue rubber bands.
 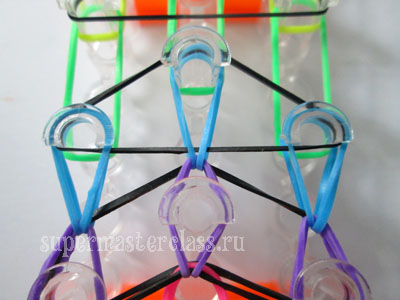 You understand the principle: in the same way, we release the following loops until we reach the end of the machine.
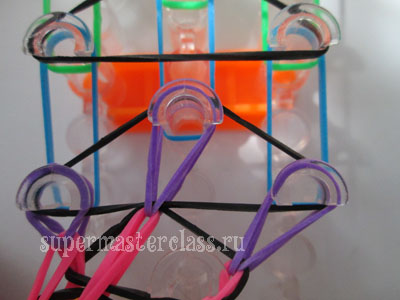
 Now we need to carefully remove from the machinewoven ribbon for the bracelet and transfer it to the top of the machine to continue weaving. To do this, do so. In the cavity of the pin pull one side of the purple, hitherto dangling idle gum, and on the other hand grab its second side on the hook.
 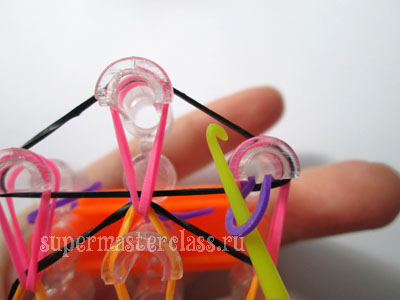 Doing so with all three purple rubber bands.
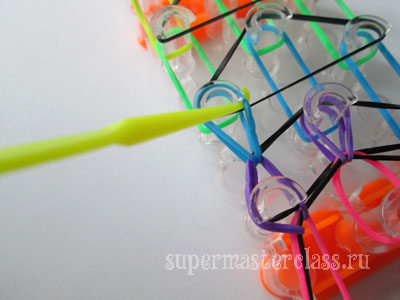
 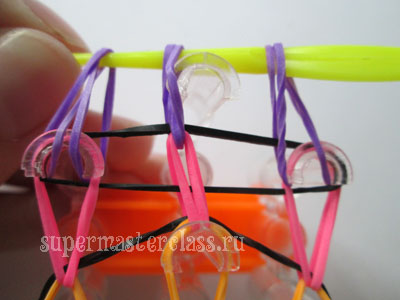 We put a black rubber band on our finger, we hook it with a hook, on which loops of violet rubber bands are already hanging.
 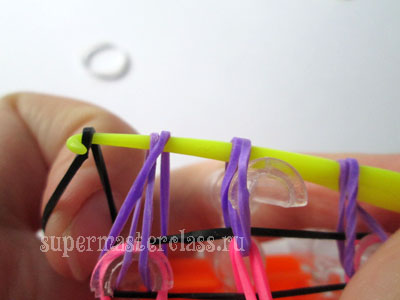 We stretch the black gum across the entire row of purple, holding the second edge of it with a finger so as not to slip out; then we hook the second loop of the black eraser with a hook. Like this:
 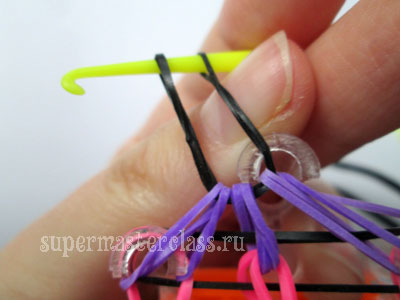 We will fasten both loops of a black elastic band with a figure-eight clasp, and our bracelet on this side will be protected from opening.
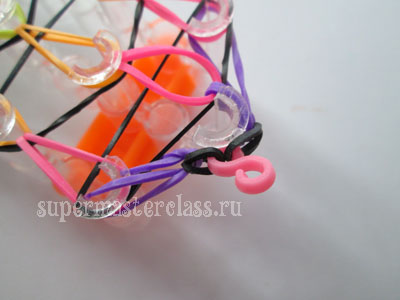
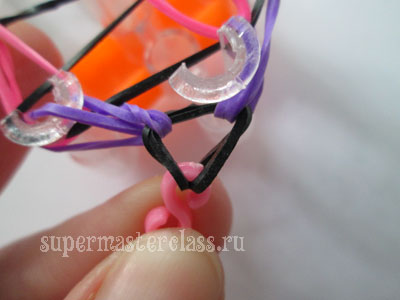 Gently pull the clasp, removing the rezinochki from the machine. Be careful: it is important to stop in time so that the last, yet unfixed hinges do not fall off the machine!
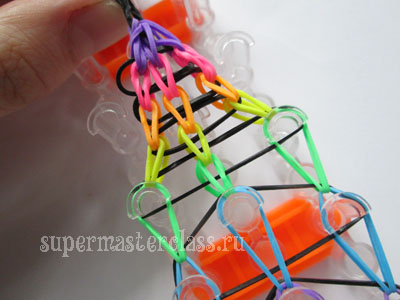
 We pass the hook through the extreme pink gum, at the same time capturing the extreme black.
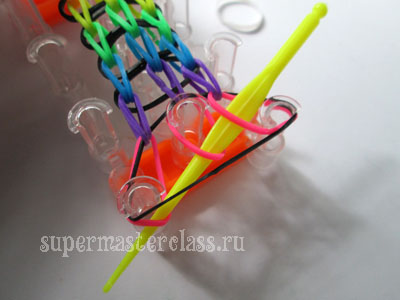
 We attach a braided bracelet of rubber bands to the ruler to determine the density of weaving and calculate how much we still need to weave to get the bracelet of the desired length.
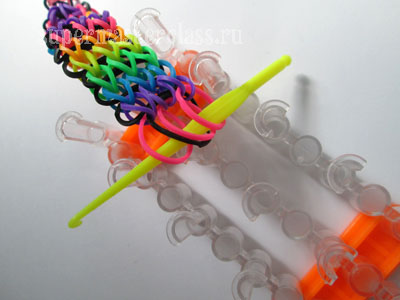
 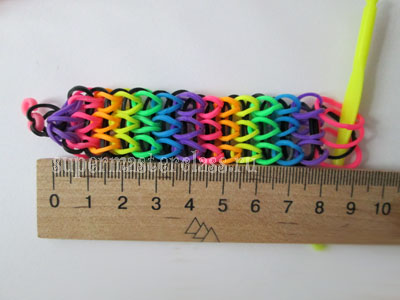 Pink rubber bands left on the hook are placed on the machine like this. Do not forget about the black gum bases: we also have it on the machine.
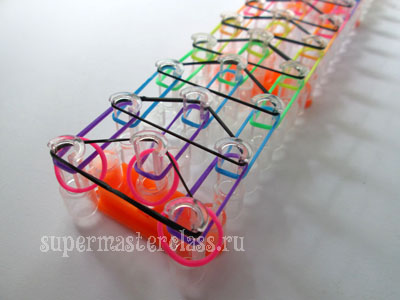
 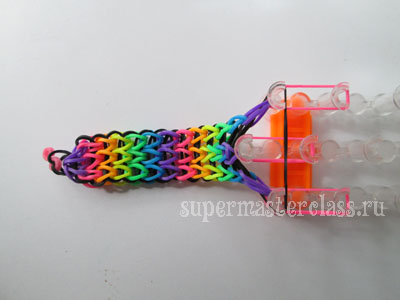 Next, stretch the gum - color, as we did at the very beginning of weaving.
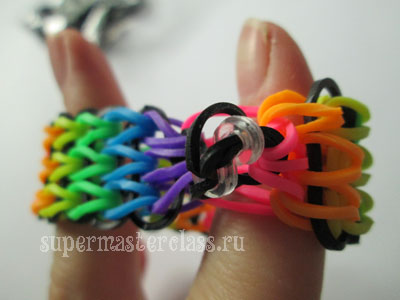
 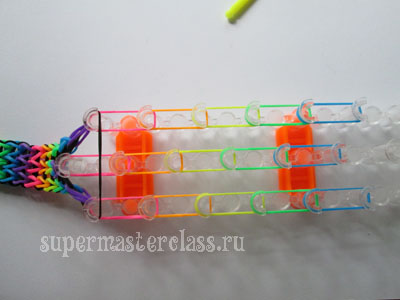 We complement the location on the machine with blackgum bases. Now I decided to twist the bracelet so that it becomes continuous. Still, I had to use the fastener, and you do not need to do such a twist - you just need to braid the bracelet to the required length, and then pull off both ends with one fastener. But for lovers of difficulties in this lesson, I will describe a method that allows you to get an almost circular bracelet. To prevent loops from the edge of the machine, I used an ordinary plug as a stopper. An ice cream stick, a spoon or a pencil would cope with this task as well.
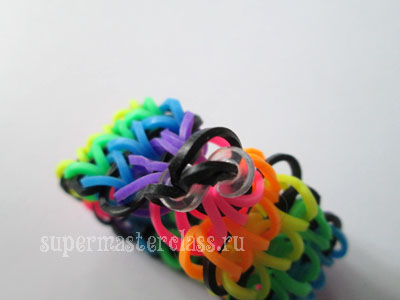
 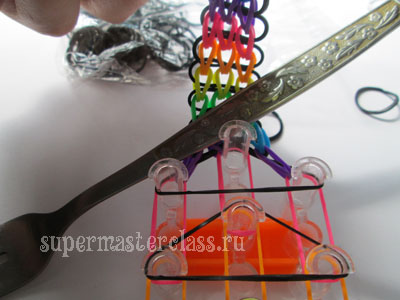 We start a woven ribbon bracelet of gum on top of the machine, a good tension on it ...
 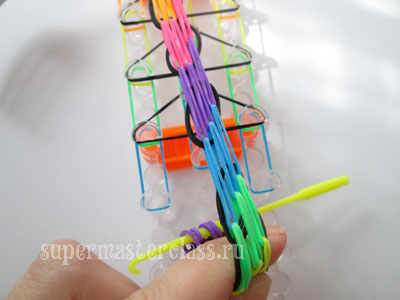 ... and we catch the extreme loops of purple rubber bands as if the bracelet was not interrupted.
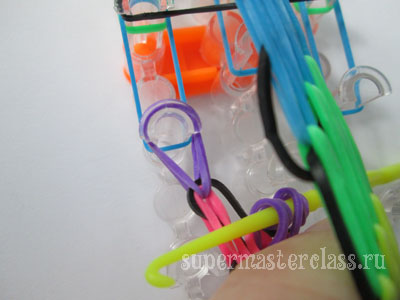
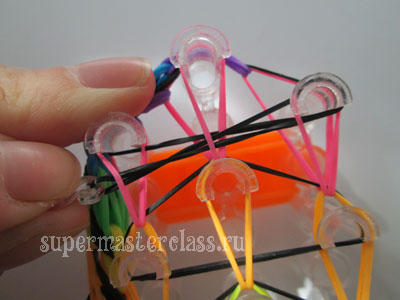
 Do not forget about the gum basics. We throw it on the machine, removing the top of the purple loops and then returning them to the place.
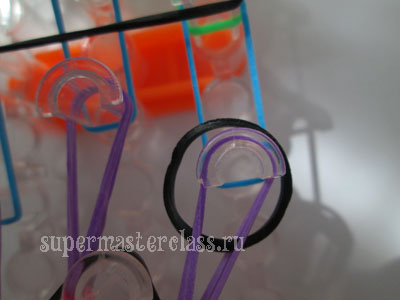
 It is inconvenient to keep him in this state, so I shifted him to the side. We throw off the already blue loops, etc.
 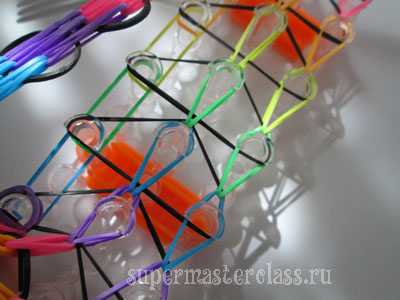 Until we reach the end of weaving.
 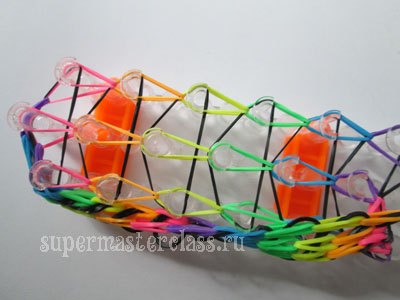 Starting with a black rubber band last (pink) loops. To do this, grab the topmost loops, as shown in the photo below.
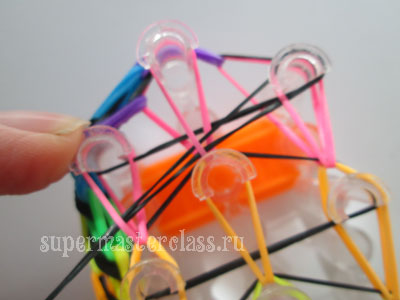
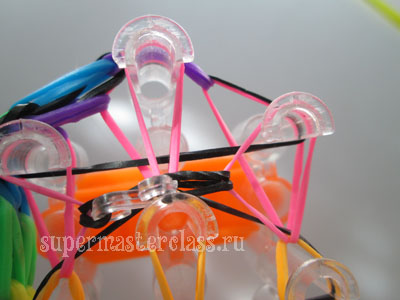 The loop of the gum is fastened with a figure-eight clasp. We have left untapped part of the black base.
 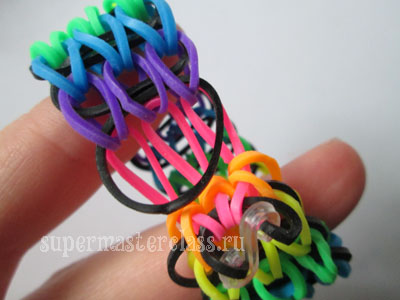 We will wrap it with a figure eight and also embed it in a fastener.
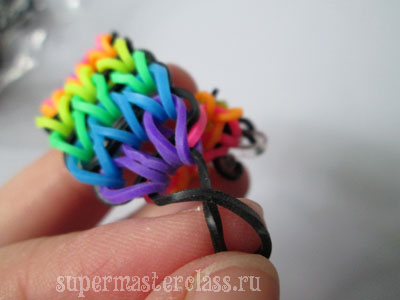
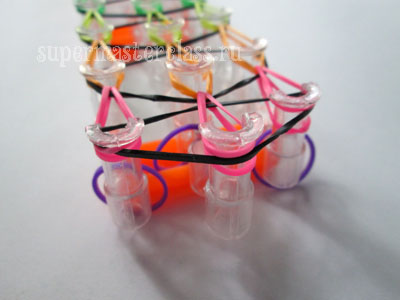
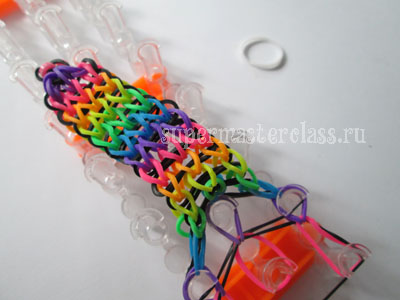
 This is a wrong side - turn out the bracelet woven on the machine on the front side and even out so that the elastic bands rests elasticly into place.
 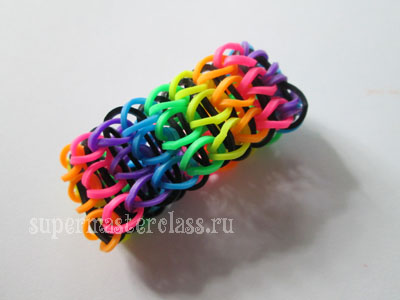 We also advise weaving. Eva Casio specifically for the site Previous article: Next article:
Comments
Related posts:
 Bracelet made of rubber: summer - bracelets made of rubber bands and beads braiding
 How to weave a snake out of rubber bands, on a machine and without, video / Toys with own hands, patterns, video, MK
 How to weave the spider out gums on slingshot and machine photo MK
 Detailed photo and video lesson of weaving dogs from rubber bands