Bracelets made of rubber bands with their own hands, how to weave a bracelet made of rubber bands, weaving bracelets on the fingers, using a slingshot when making bracelets with your own hands.
Weaving from rubber bands is quite newkind of creativity. His homeland is America, and only now this kind of art has reached our country. "What exactly did this technique conquer the world?" - you ask. Here everything is very simple, the materials are available to people with different levels of prosperity, the technique of execution is quite simple, and the result captivates with its brightness, unusualness and variety. This hobby is typical of many girls and girls, it's not surprising, because doing your favorite thing and making a lot of bright accessories, you can get a lot of fun. Moreover, it is so nice to realize that at your disposal there is a large selection of original ornaments that can always be selected for a certain outfit. Being engaged in such creativity and developing your skill of weaving from elastic bands, you can become the owner of many beautiful and unique necklaces, earrings, rings, phone cases and many other interesting things. To date, there are several techniques for weaving ornaments and accessories from rubber bands:
- weaving on the fingers;
- weaving on a special machine;
- weaving on forks.
To engage in such creativity in additionSuch tools can be useful: a hook, a special machine for weaving, as well as an ordinary dining fork. The list of tools can be slightly modified, everything will depend on the technique of weaving chosen by you. So, in order to master the skill of making ornaments made of rubber bands, you need to start with the simplest weaving that will serve as the basis in subsequent works. Moreover, when you are engaged in simple simple weaving, you will gain experience in this matter and do not beat yourself to the development to go in this direction. An additional emphasis should be placed on the fact that most manufacturers recommend to engage in such creativity from the age of 8.
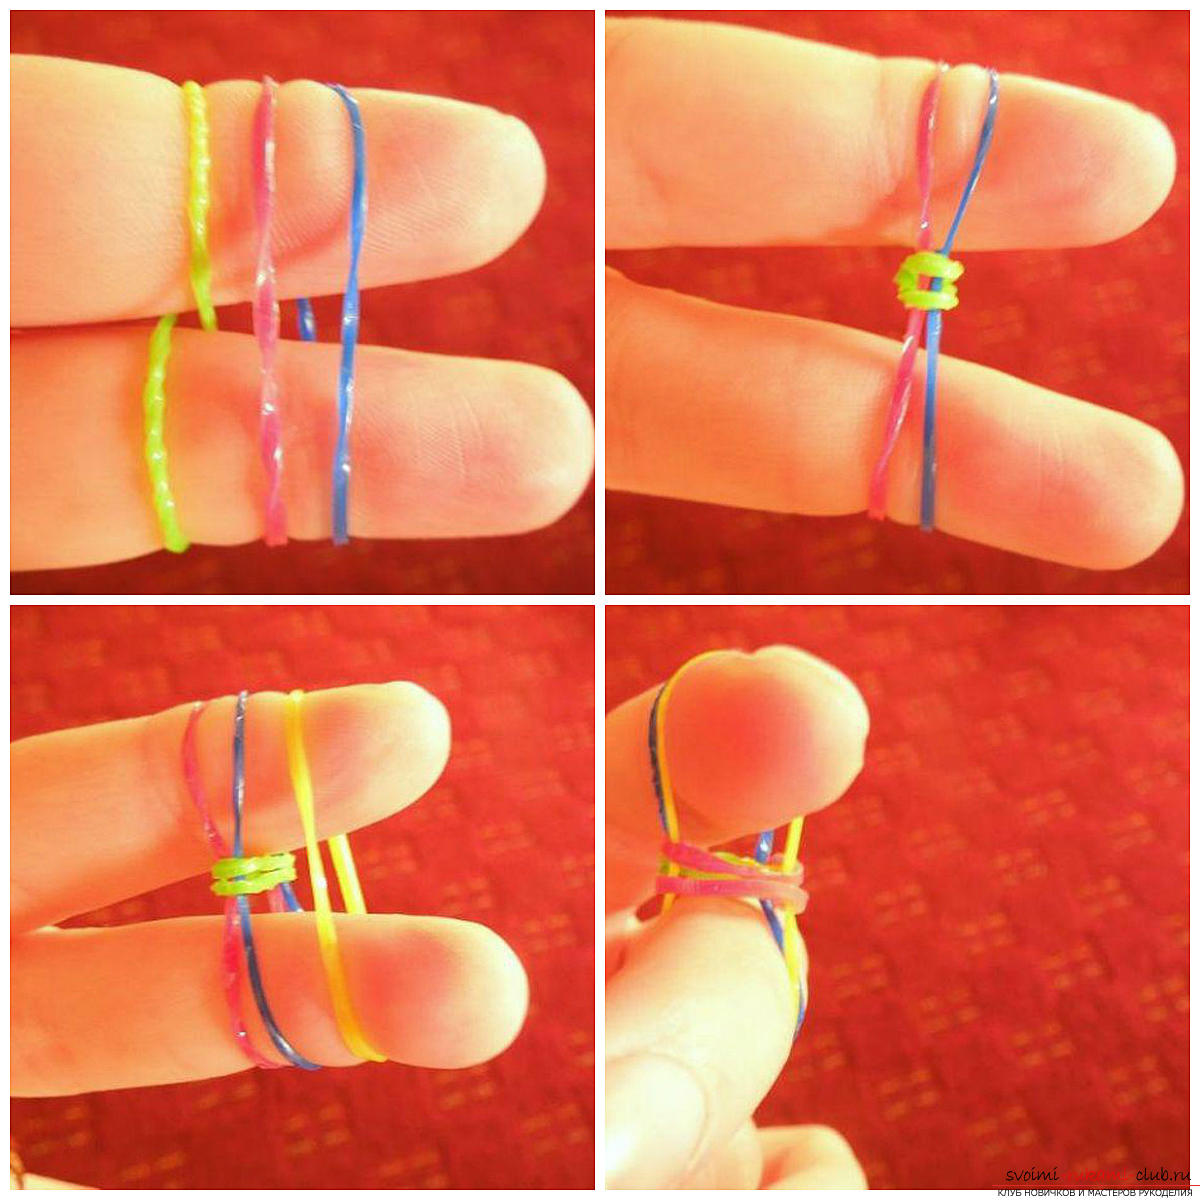
Weaving on the fingers
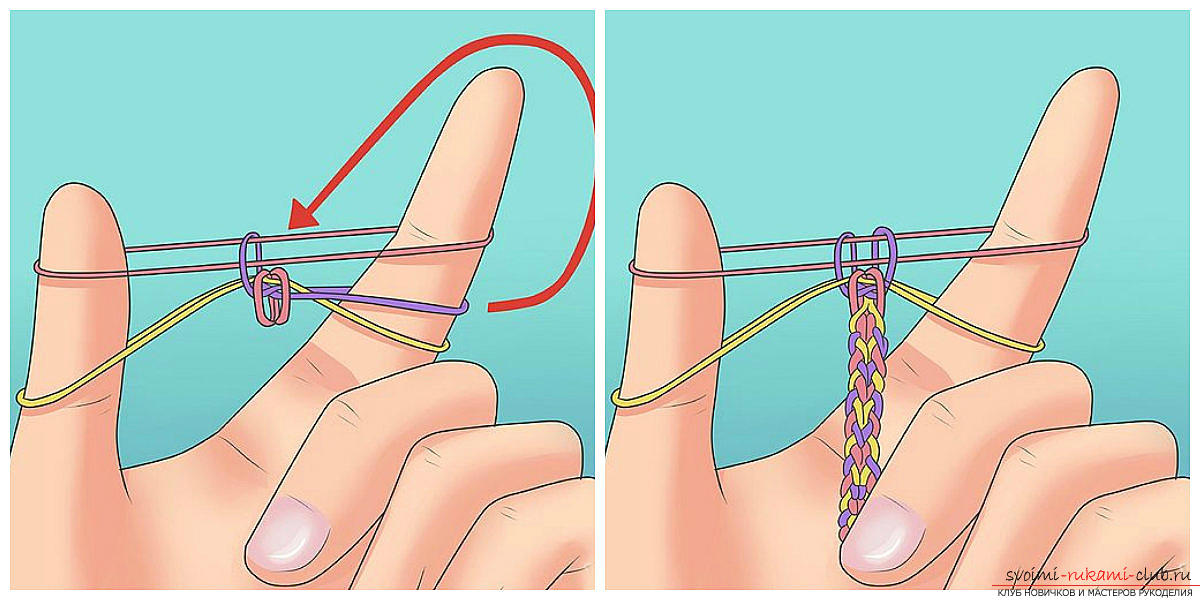
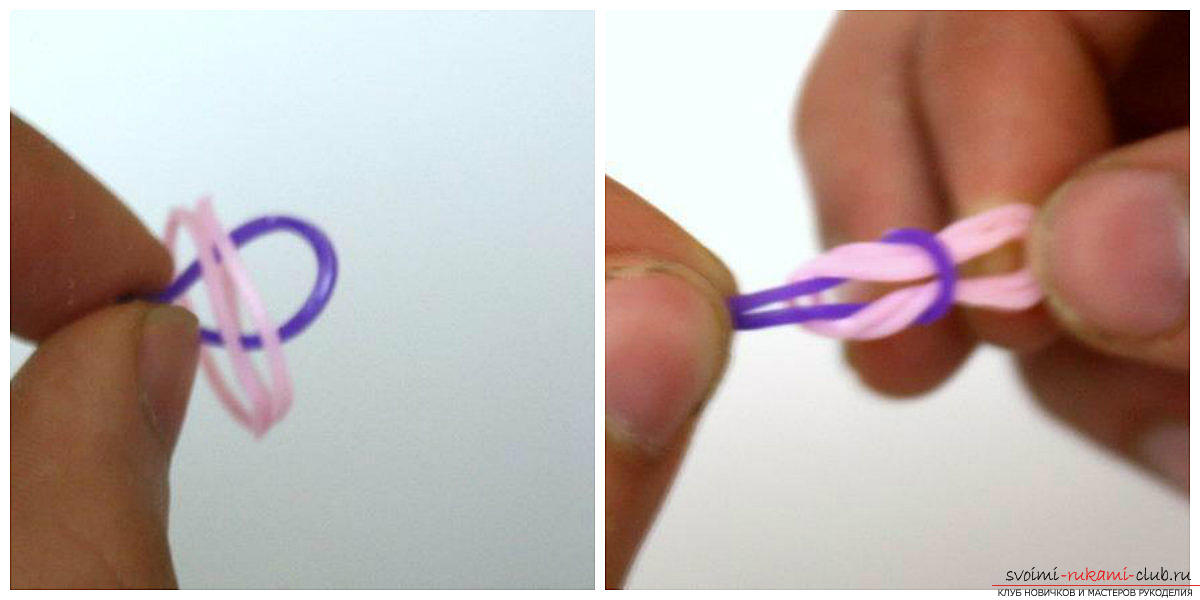
If you have in your hands a set of rubber bands forweaving the various ornaments, then first you need to master the simplest schemes that do not require the use of a slingshot, hook or machine. Thanks to this you will get a quick result and will be able to move on to the next, more complex stage. There is a huge set of techniques for making jewelry from rubber bands on the fingers. Beginning masters and amateurs initially master the lighter in the execution of techniques, like the ordinary chain. Having stuffed your hand, you can try to make something more complicated. This can be a weaving "fish tail", "sidewalk" and much more. And below we will try to disassemble some of the basic techniques on examples. Base pattern To master the technique of weaving items from rubber bands, it is better to master the basic patterns first, the production of which does not require any special tools. One such weave is considered to be a "chain". The process of making a pattern "chain" of rubber bands 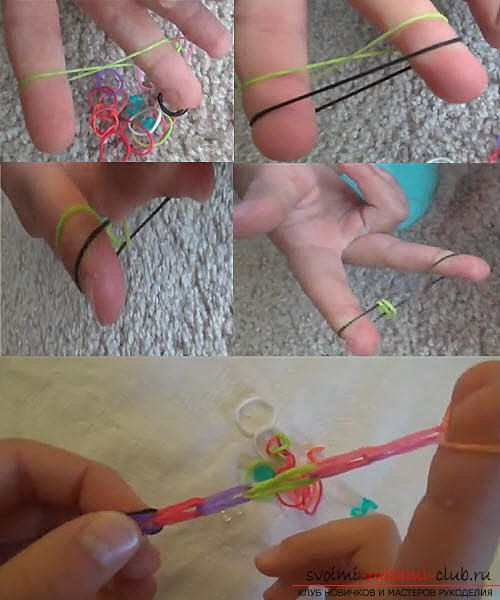
Continue to do similar actions untilpores, until you are satisfied with the length of the product. At the end of the work, attach the S-shaped fastener to the decoration, it will serve as a clasp. "Fish tail" on the fingers

These actions need to be repeated until the moment the bracelet reaches your desired length. Complete the work by fixing the ends of the product with a special fastener. Fish tail turned on the wrong side
Now your task is to duplicate all the actions until the bracelet will not get the length you need.
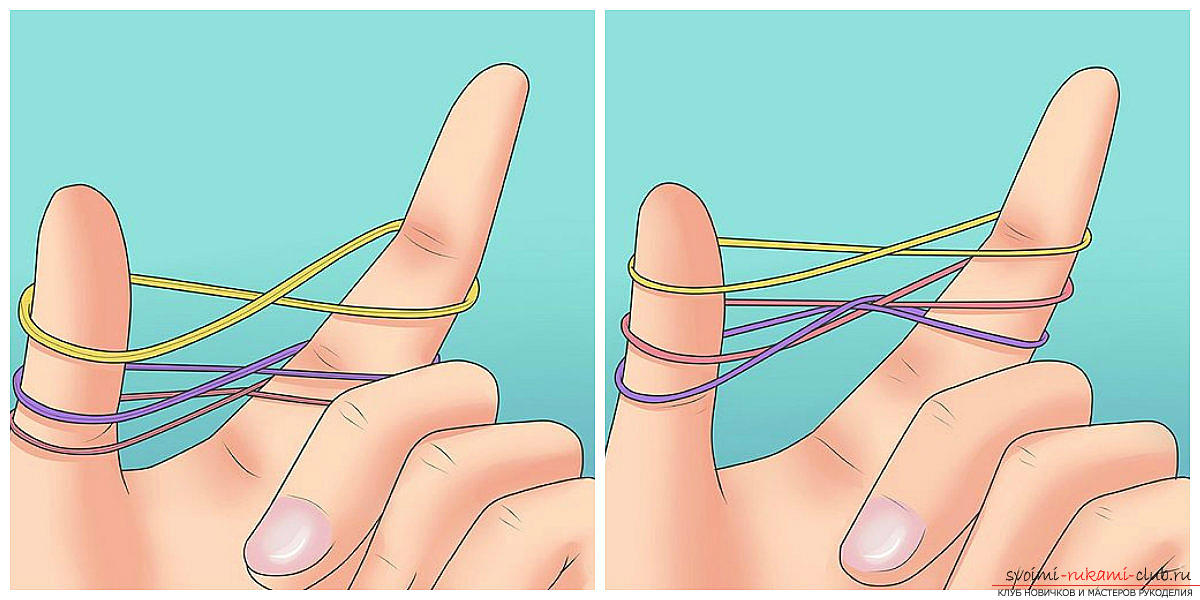
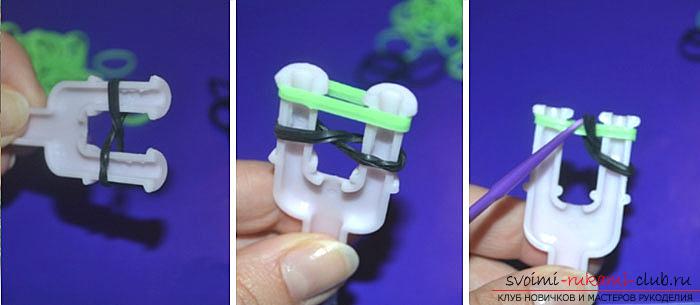
Weaving on the slingshot
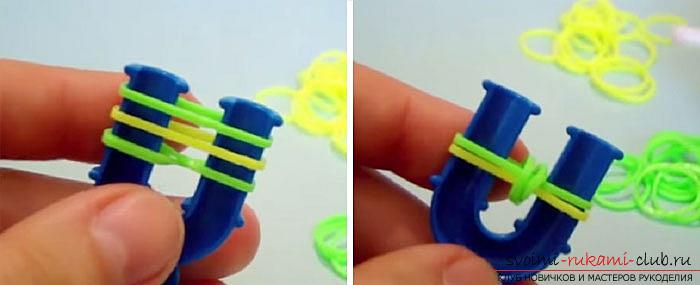
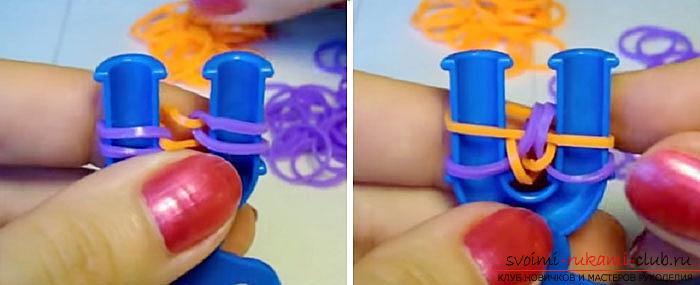
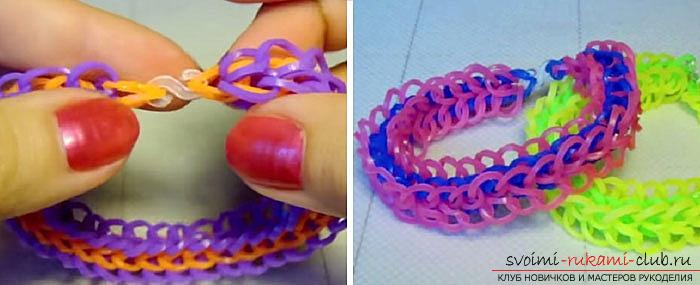
If you are planning to learn the ways of weavingitems made of rubber on the slingshot, then, of course, you need to start with lighter options. Those products that are plaited on the slingshot, you can make and on the fingers, but still the use of the tool - it's more convenient. You do not squash your skin. Moreover, by braiding the product on the slingshot, you can easily distract from this lesson, putting the slingshot aside. By braiding a bracelet on your fingers, you must finish the decoration in any case, otherwise you'll have to weave from the very beginning. If the fingers are most convenient to weave products of the same color, so that there is no confusion, then using a slingshot, you can use several colors in the manufacture of accessories. Most often the slingshot is a plastic product, on one side of which there are two bars, they can weave lighter items. On the other side of the tool, there are four bars on which broader ornaments are woven. Basically, in the finished sets are sold more simple slingshot with two posts, which we will need. "Sidewalk" on the slingshot Weaving "Sidewalk", made on a slingshot, is considered quite simple in execution. It can easily be recreated by any newcomer in this art. For this kind of weaving, it is best to use gums of two contrasting colors, and they should be worn in pairs.
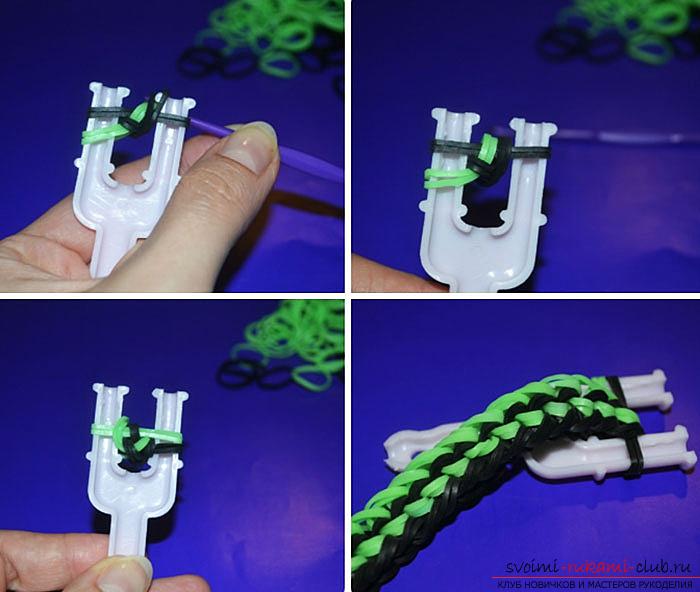
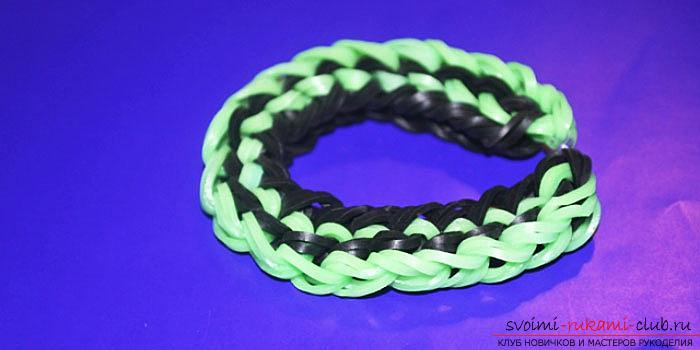 Continue to work until you getbracelet of the desired length. "French scythe", executed on a slingshot Now we will dwell in more detail on one more popular weaving on a slingshot, it will be a "French scythe". This name is absolutely not accidental, tk. in its appearance weaving is similar to the popular among all fashionistas hairdo. So, take the slingshot to the left hand with your teeth up, the groove should look straight at you. Also, as in the previous version, we will spin products alternating with rubber bands of contrasting colors.
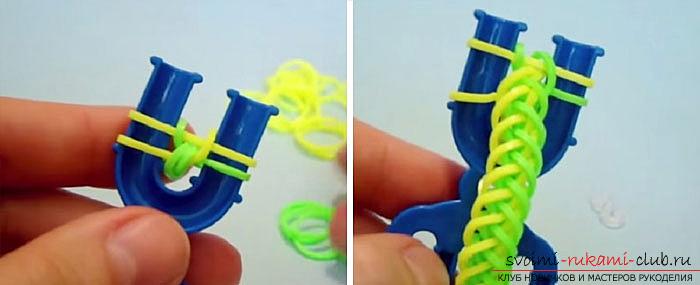
That's how we make the weaving"The French braid". Continuing the braiding in this way, make a bracelet and fasten the tips using the S-shaped buckle. "Heart of an angel" The master class, given below, will help you to master such technique of weaving, as "heart of an angel". This name was given to the bracelet due to its appearance. In the center of the weaving is a pigtail, which is surrounded by hearts on both sides. On the arm this product will look very bright. And for work you need to prepare gum of two colors, a slingshot and a hook. Instructions

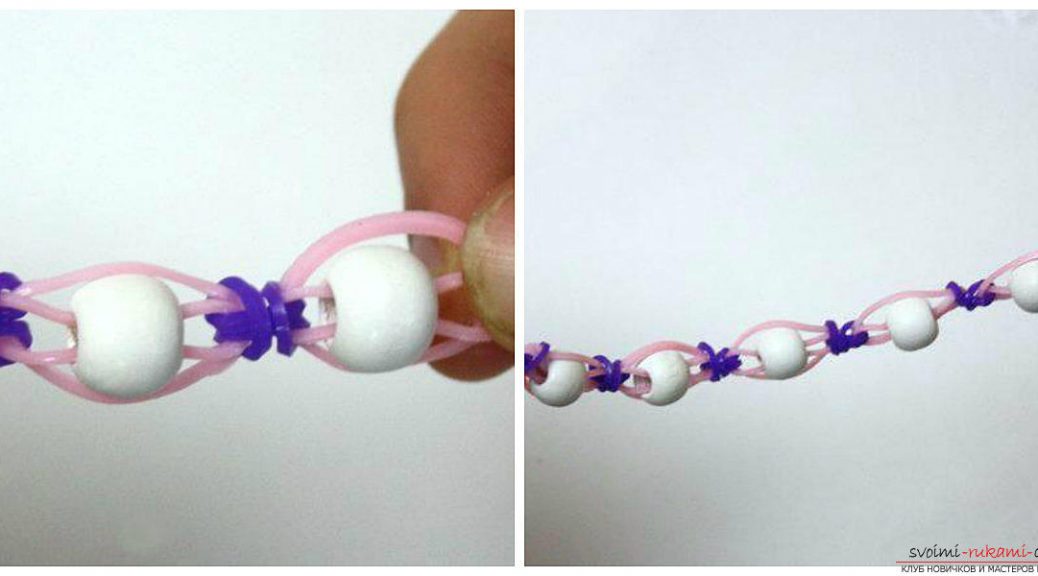
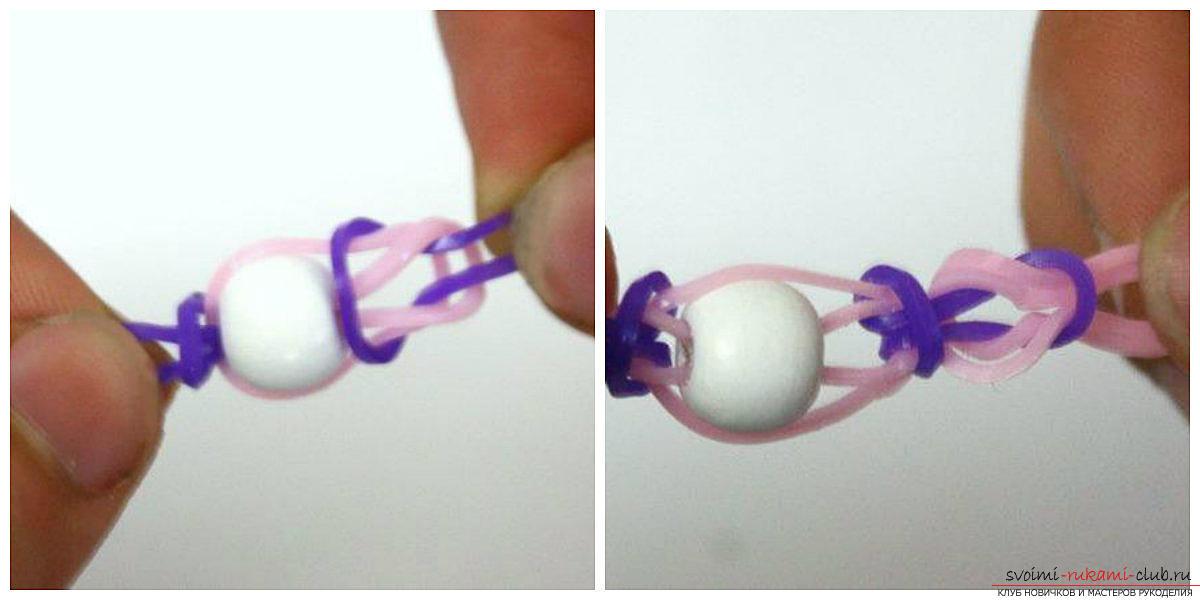
Braiding the bracelet from rubber bands usingbeads A pretty cute model of decorating using beads will appeal to any girl. The master class, presented below, will help with the ease of making such an ornament yourself. For this decoration, we need about 20 rubber bands, 6 beads and a plastic clasp. All work is done manually, without requiring the use of additional tools. To make the execution process more convenient, select beads with wider holes.


If you want to do this kind of art,then all the photo instructions and descriptions listed above will help you master the new technique of making unusual and bright decorations. Perform actions on the given algorithms, alternate dressing of rings and dropping of loops to form new and beautiful patterns. Try to experiment in making jewelry. In addition to bracelets, you can get rings, intricate figures of animals that will become the original suspension for a mobile phone or keychain. Also you can use such decorations as souvenirs for people close to you and acquaintances.
Comments
Related posts:
 Bracelet made of rubber bands: rainbow - bracelets made of rubber bands and beads braiding
 Bracelet made of rubber: summer - bracelets made of rubber bands and beads braiding
 Master class braiding bracelets with their own hands will teach how to weave bracelets of rubber bands on the machine.
 Master-classes on braiding on the fingers of bracelets made of rubber bands
A detailed master-class toys made of rubber bands are weaving from the owl's rubber bands with our own hands.
Master-classes on braiding on the fingers of bracelets made of rubber bands
A detailed master-class toys made of rubber bands are weaving from the owl's rubber bands with our own hands.