You can build a frame house with your own hands, there is nothing super complicated in this. The main thing is to do everything neatly and according to the standards, but our recommendations with photos and diagrams will help you in this.
We frame a frame house with our own hands Popularityframe houses is growing every day, which is due to the ease of its erection and short installation time. In general, such houses are built in cottages for seasonal living, although it is possible to equip a frame house and for year-round living in it. Taking up the independent construction of a frame house, it is important to take into account the main criterion - the period of residence. Stage number 1. Laying the foundation. Due to its low weight, frame houses do not require too strong and massive foundation. As such, piles (screw) are usually used, small concrete poles and not too deep concrete foundation. Before choosing a foundation, you should find out what type of soil prevails in your area and determines the number of floors. The column foundation will easily stand the load of a single-storey house, even on loose ground. The laying of the columnar foundation begins with the purchase of 120-150 small pillars. Then you need to dig or drill under them holes about a meter in depth and about 20 centimeters in diameter. Between the recesses it is necessary to observe a distance of about 75-80 centimeters. After that, asbestos-cement pipes are installed in the holes. The remaining space is best to forget with sand and rubble, and compact. Then concrete or cement mortar is carefully poured into the hole of the pillars. To proceed to the next stage, it is not necessary to wait for the hardening of the concrete. 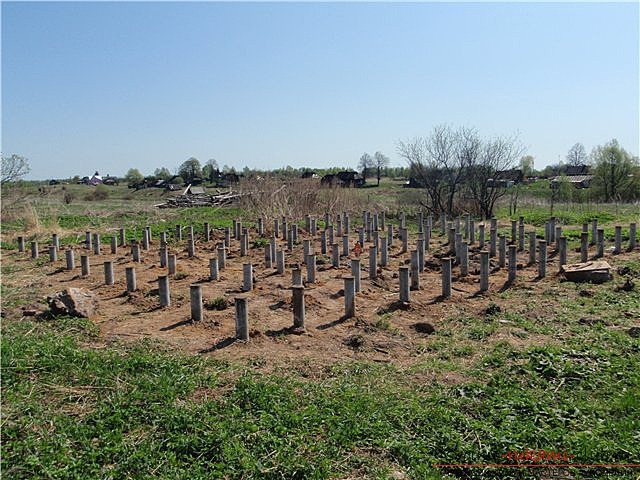 Laying pile foundation can be madeindependently, without attracting additional workers. For this type of work, manual labor is required, because the piles must be screwed in only in level, completely eliminating deviations. Do not also ignore the main rule - unscrewing and then re-screwing the piles is strictly prohibited. If any pile was incorrectly screwed, it is preferable to leave it as it is, so as not to destroy the compacted soil. Stage number 2. Mounting frame house. Those who are going to build a frame house themselves already know that the two technologies of their construction are the most popular: Canadian and Finnish, based on almost identical principles. It does not matter which technology you choose for yourself, since the main stages of the construction of frame houses are the same for both cases. 1. First select the material for the future skeleton. This can be either metal (particularly steel) or wood. Now one of the most popular, due to its ecological compatibility, economy and ease of installation are wooden frames. When using steel materials, the frame is made easier and cheaper, and additional funds can be saved on foundation work. For such a frame, metal fasteners are allowed, nagels for wooden frames.
  2. After determining the material, go to the laying of the floor. Firstly, a roofing felt or roofing felt is placed on the base. After that, along the entire length of the perimeter of your house, a bar is installed, which serves as the base for the rough layer of the floor. For him unedged board is suitable. Before this, it is necessary to cut the logs and lay some heat insulation material between them, which will serve as protection against moisture and cold. It is recommended that before processing the boards be treated with appropriate materials, which protect against mold and rot.
  3. Now go to the walls. First of all, they are mounted on a flat surface, and then installed. Do not forget for all sides of the walls to make the jigs necessary to support the racks. 4. Installation of walls should be done with the calculation of the planned height of the ceiling. It is quite sufficient to have a ceiling of about 2.5 meters. In this case, even after finishing, it will not be lower than 2.3 meters in height.
 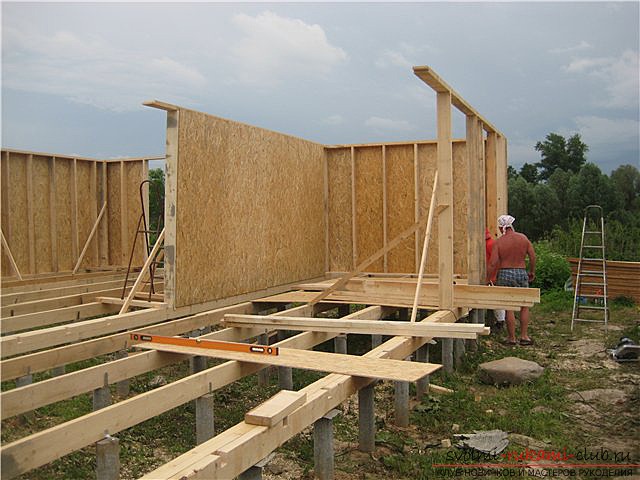 5. The established frame begin to be sheathed by the board. The construction of frame-panel houses takes place according to a similar principle. 6. Determine the number and size of windows. It is desirable that their area does not exceed 20% of the wall area. The choice of double-glazed windows is yours, but if you are building an all-season house, then it is preferable to stop at three-chamber double-glazed windows.
 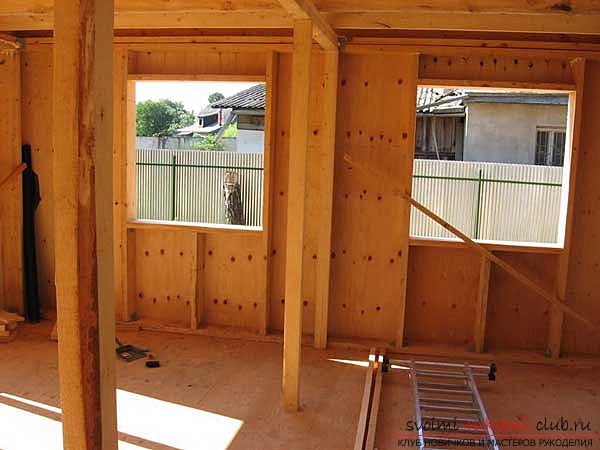 7. After finishing with the walls, you need to make a roof. The main requirement is that it does not let flow. Between the beams it is not superfluous to lay the heat and waterproofing materials. Outside it is better to cover with metal. For decorative decoration of the house, siding, lining, sandwich panels are perfect.
 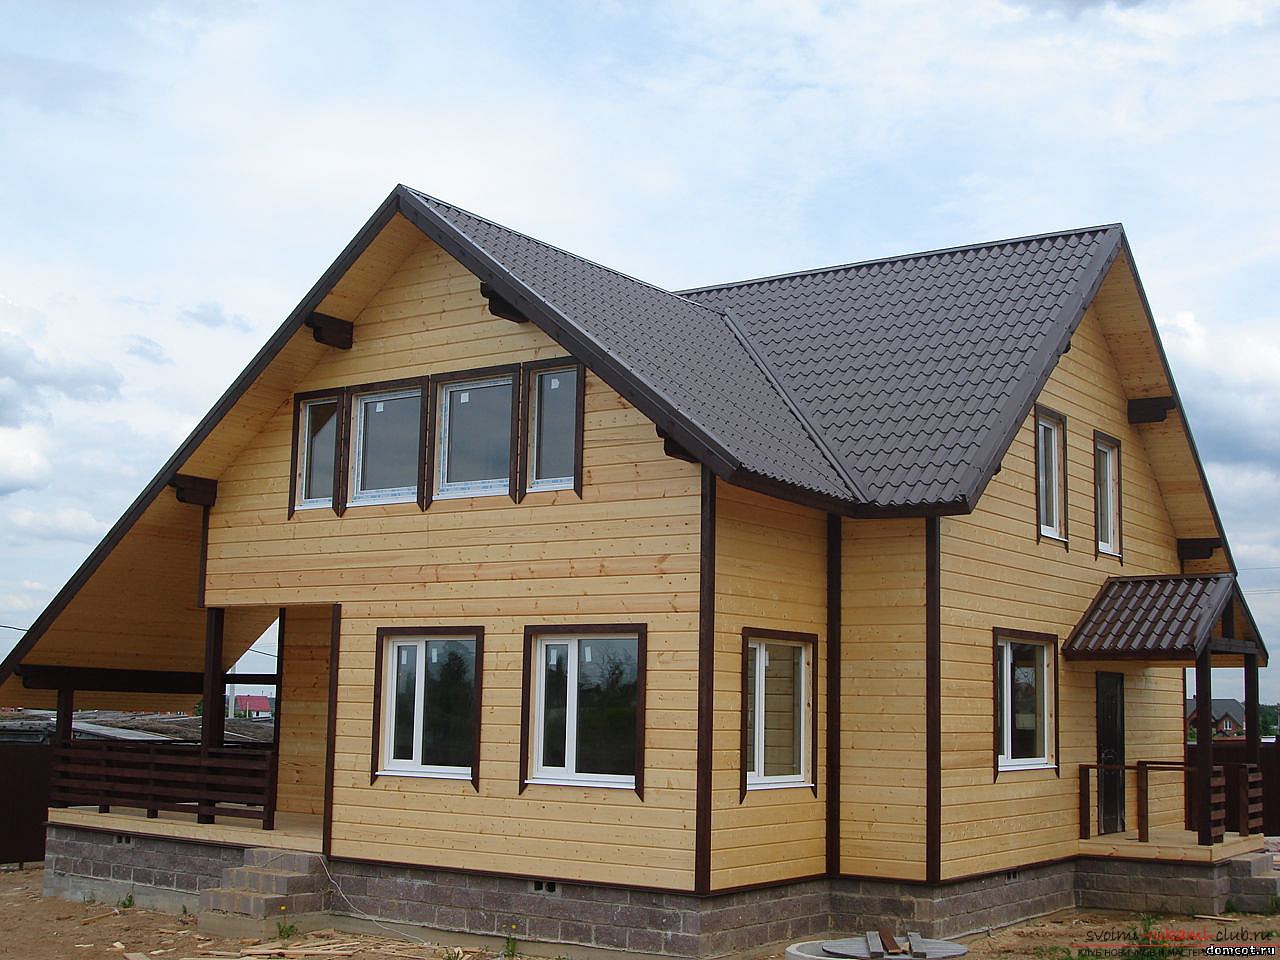 8. The house should be additionally insulated. It is desirable to do this outside and inside the house. For the inner phase of insulation, gypsum boards (especially vinyl) and mineral wool are ideal. Naturally, from the outside the insulation is made before the siding of the house with siding or plastic lining.
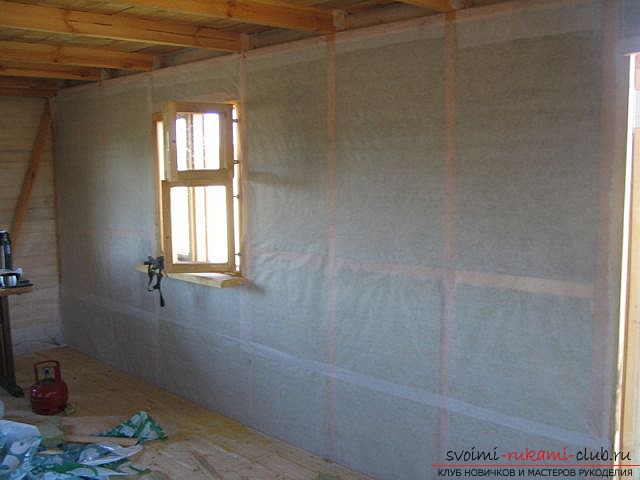
 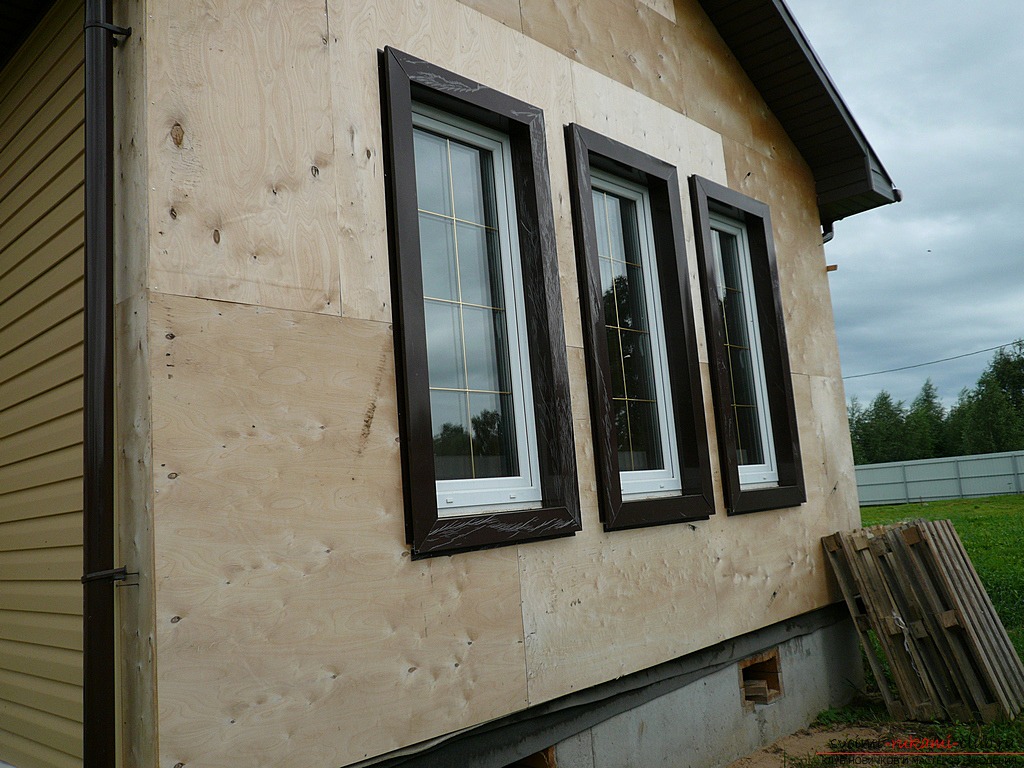 For external insulation, a sheath is formed, inThe space between the slats of which is placed with mineral wool, and polystyrene is laid on it. The space between the sheets of expanded polystyrene and the struts is blown with a mounting foam. There are options for external insulation and without the use of a lath. Approximately the same algorithm is internal insulation. Between the posts are laid mineral wool, which is covered with expanded polystyrene. Stage number 3. The device is a vapor barrier at home. In residential buildings, the presence of vapor barrier is due to the presence of places with high humidity - this is primarily a bathroom and kitchen. Experts say that they are above the open air in terms of humidity. In order to avoid errors when installing the vapor barrier, the following important points should be considered:
- in any case you can not use homemadematerials or polyethylene instead of the factory vapor barrier. Despite its external similarity with polyethylene, the vapor barrier film has a multilayer structure;
- when installing vapor-insulating materials it is necessary to watch that it does not tear during installation and is securely glued to the walls;
- do not install the vapor barrier from the outsideat home, there is wind protection for this. The device of the vapor barrier must be carried out exclusively inside the house. In doing so, make sure that the membrane is mounted with the correct side;
- remember that the vapor barrier layeris installed on the heat insulator, and in no case is the reverse. The condensate, formed from moisture, is harmful, first of all, to the heat-insulating layer. With a poor vapor barrier, condensate will get inside the insulation and after a couple of seasons you will wonder: why did the insulation cease to function? The fact is that moisture causes the formation of cracks in the heat-insulating layer, and then can reach up to the boards. Considering the fact that the main thickness of the walls is set by a heater, when it is destroyed, your frame house will quickly become unsuitable;
- when mounting the vapor barrier layer, it is important not to forget that there must be a natural movement of air in the house, or, as they say, it must "breathe";
- If you take a risk instead of the factory vapor barrierinstall polyethylene, be prepared for the fact that very soon the rooms will begin to form fungus, mold and dampness, and the presence of forced ventilation will not improve the situation. Absolutely sealing the house, polyethylene, together with the same airtight elements as double-glazed windows and double doors, will create a not too healthy atmosphere.
Comments
Related posts:
 Crochet crocheted shoes will help our detailed descriptions with photos and diagrams
 Postcard to your beloved girl, which you can do by yourself. Photo postcards.
 How to build a pattern of a long dress for a woman with your own hands, using step by step instructions with a photo and description.
 Horse-own, a toy horse, a horse of socks with his own hands, a horse of thread with his own hands, how to make a horse from improvised materials, advice, recommendations and phased photos.
 Knitting with an elongated waistcoat with a zipper. Our scheme and recommendations will help you to master the knitting of a waistcoat with a pattern of a honeycomb with knitting needles