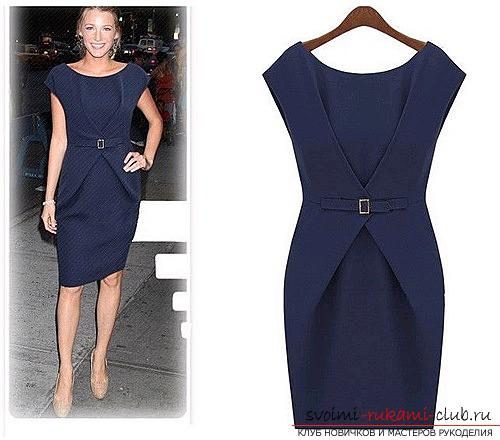
Construction of a bodice pattern with a one-piece short sleeve for a woman with step-by-step instruction, description and photo.
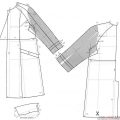
The drawing below will not be useful to you.only from the point of view of constructing the pattern of the bodice, but also for mastering the modeling of various styles and models of all possible elements of the wardrobe. Copy onto the paper the back part and the bodice of the bodice, which form the basis of the dresses. 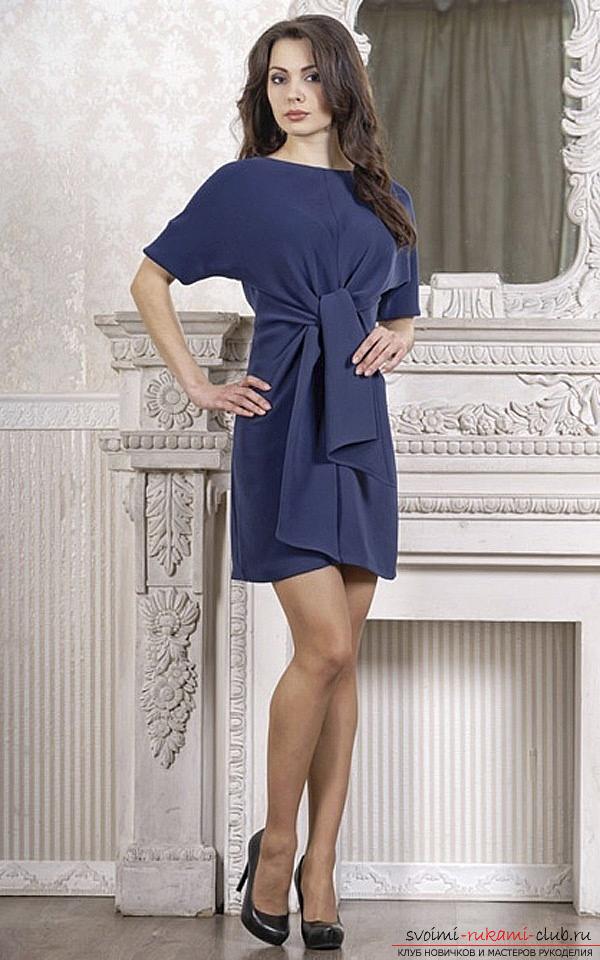 The lateral line of the bodice is transferred to the ear of the armhole. To this end, from point D4 down we line up to contact with the level of the waist. In the example given by us, point G4 is located along the arm width saddle. In the case of using a base constructed according to a different technique, it is necessary to divide the width of the armhole in two and draw a vertical from the separation point, which will be the new lateral line of the bodice. Simultaneously with the lateral line, a side dart is carried. Shoulder sutures are transferred one centimeter closer to the front. Thus, on the back of the shoulder rises by one centimeter, and on the shelf decreases by as much.
 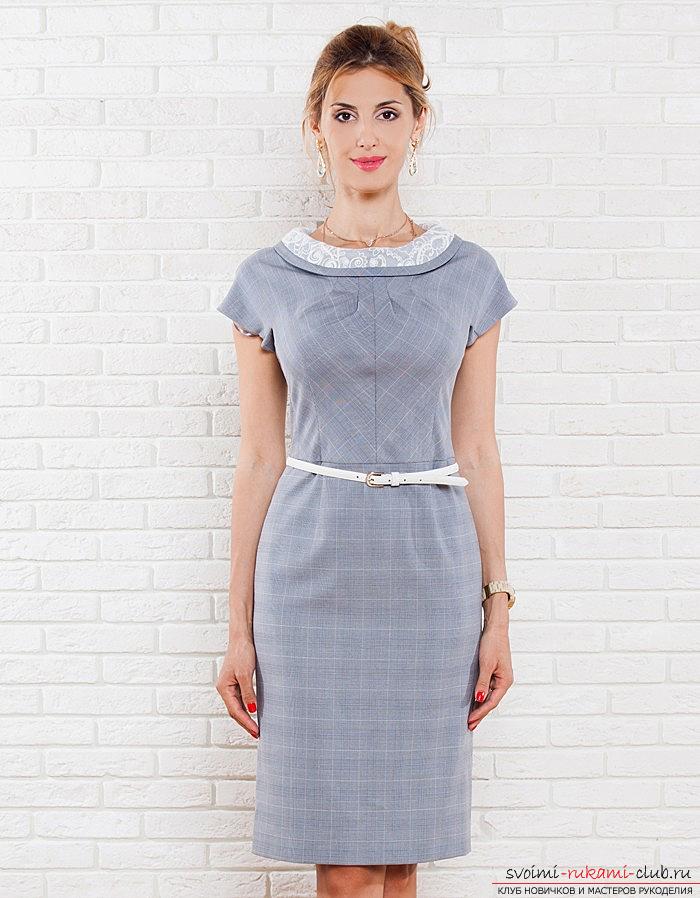 We pass to the back. The line of the shoulders at the back of the neck and at the dart rises by one centimeter, and the margin of the shoulders rises by half an inch from the armhole. To this end, from A4 it is necessary to postpone one centimeter in the direction of upward and put the point A41. From points O and O3 too it is necessary to postpone on centimeter upwards and to put points O11 and O31. from point P1, continuing the line of armhole in the direction upwards, it is necessary to postpone one and a half centimeters and designate point P11. After that, points A41, О11, О31, П11 should be connected. Get a new line of shoulders at the back. There is another, more simple variant: from A4 point one centimeter is laid up in direction, and from point P1 - one and a half centimeter, the dart is closed and a new line of shoulders is held.
  Also keep in mind that, if necessary, tuck onthe lines of the shoulders of the rear part can be reduced or completely eliminated. We calculate the length of the sleeves. From point П11 to the right side, continuing the shoulder line, postpone the necessary length (one and a half to four centimeters) and put the mark P12. the segment П11-П12 is equal to the length of the one-piece sleeve. From the mark P2 on the right side, postpone two to three centimeters and put the mark P21. We connect by means of a curve of marks П12, П21 and Г4, which will be a new line of armhole of the back part.
 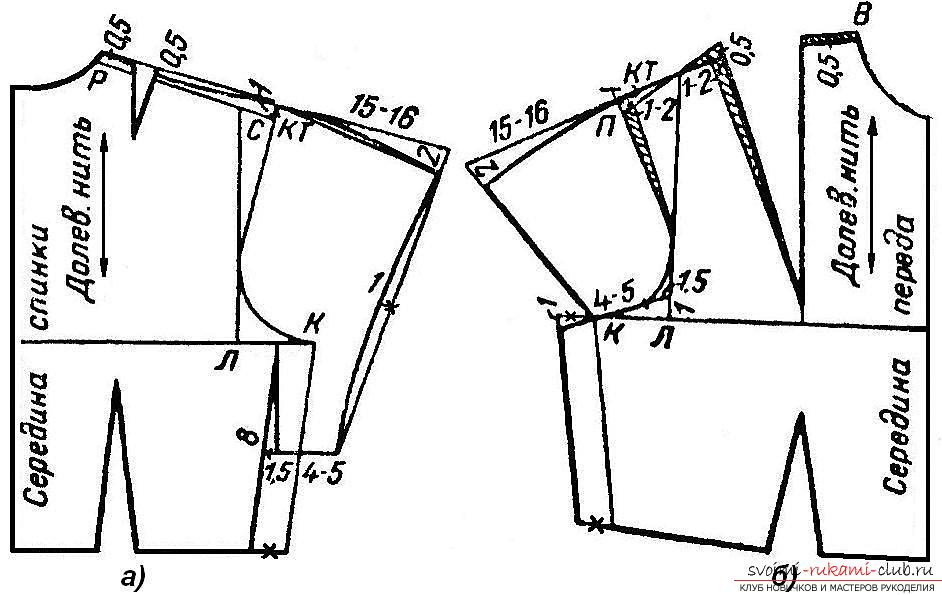 We pass to the shelf. For two centimeters it is necessary to reduce the solution at the breast tuck. To build a drawing further you will need a compass. From the mark Г7, which is a kind of center, through the mark В9 it is necessary to draw an arc to the right side. After that, the leg of the compass is placed in the mark B9 and a radius of two centimeters is scored on this arc, the point of contact is denoted as B91. By connecting the marks G7, B91, you get a new tuck line. Next, the shoulder line decreases by two centimeters. To this end, from the mark P5 in the direction to the right side of the shoulder level, two centimeters are laid and the letter P51 is put. Now the labels П51 and В91 are connected, after them smoothly connect the labels П51 and П6.
  Next, close the breast tuck, so she does notprevented. From the mark B3 down one centimeter is laid down and the mark B31 is put. From mark П51 in the upward direction, the armhole line continues and is laid off one and a half centimeter, the mark П52 is put. The labels B31, P52 are connected by a straight line. From mark P52 to the left side, continuing the line of shoulders, put aside one and a half to four centimeters of the length of the sleeve (as well as on the back) and put the mark P53. To ensure that the sleeves are closest to each other, from the mark P53 at an angle of 90 degrees, lay down the size of the bevel 5 - 10 millimeters and put the point P54. This size varies depending on several factors: the model, the volume of the arm or shoulders, the degree of fit and others. You will know the size of the bevel only when fitting. The segment P52-P52, which determines the lengtha one-piece sleeve, you need to draw a curve. From the mark P2 in the direction to the left side across, postpone two to three centimeters and put the mark P61. Using the curve, connect the labels P54, P61 and G4 - you will get a new armhole line. At this stage, the drawing can be considered constructed. Or you can use it as the base of the bodice in the process of further modeling. Using various modeling options and this drawing, you can invent all kinds of dressing gowns, blouses, dresses and much more. For example, using a variety of options for shifting a breast tuck. Once again, we emphasize that in the given master-class dimensions are given as an example. You can take any that suits you.
Comments
Related posts:
 Bezel by September 1 for girls with step by step instructions, detailed description and photos
 We knit a beautiful light purple dress with knitting needles for women according to the schemes and with the description, as well as with step-by-step instruction and photo
 The most interesting hairstyles are their own hands on medium hair with step-by-step instructions and photos.
 How to tie a beautiful crocheted dress: master-class with step-by-step instruction, photos and diagrams
 How to carve and sew a coat with a one-piece sleeve is useful to know all the craftsmen